


Likes
Comments
Share


@PinkFloydLover
Follow
Flushing the bigger girl since day 140. Harvested the smaller girl on day 141, but will show you the results after I harvest the other one. I had a little of it, but I had cut some branches to smoke some weed previously!

Likes
1
Share

@Walachiangrowdiary
Follow
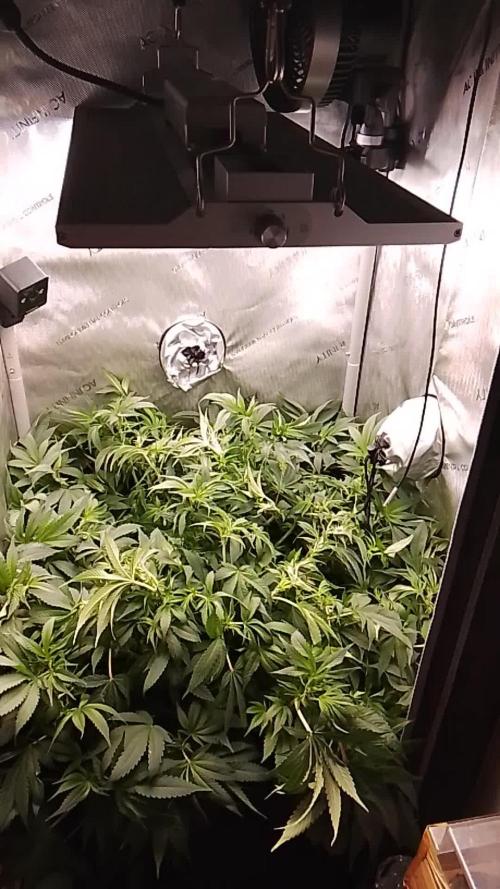
Im doing at the start of 1st week bigger defoliation for better light penetration and air movement.Top dressing with GHF bio Bloom 3g/l top dress mixed With wormhumus and watered with Homemade compost Tea And superthrive

Likes
12
Share


@Plumbcat19
Follow
They are happy and healthy!! I cannot wait to get my timelapse camera going because I would have been able to catch these bolting this week! It is super cool how fast they doubled in size!

Likes
4
Share


@BudsZA
Follow
This strain was super easy to grow. At first she didn't grow too big in veg. But once she flowered she really got big fast. Massive, heavy colas on this plant. By far the best harvest I've gotten off an auto and some of the dankest buds of grown personally. Amazing strain!

Likes
12
Share


@stutch
Follow
Heute ging der Grow zu Ende. Ich hätte wahrscheinlich noch eine Woche warten können, hatte aber keinen Bock mehr und will mein neues Autopot System zeitnah installieren. Die Pflanze sieht super aus, die meisten Sonnensegel sind schon im Laufe der letzten Wochen abgefallen. Hab Sie heute 2-3 Stunden nach "Sonnenaufgang" abgeschnitten, umgedreht und aufgehangen. Ziemlich stressfrei, wie der gesamte Grow. Bin gespannt wie viel ich ernten werde und in ca. 10 Tagen sollte es soweit sein. Die Luftfeuchtigkeit wird für die ersten 2-3 Tage auf 55% eingestellt, anschließend werde ich es schön langsam auf ~60% RLF lassen und hoffentlich in ziemlich genau 8 bzw. 9 Tagen beschneiden und einlagern können. Dann gibt es auch ein Update mit dem Gewicht.
________________________________________________________________________________________________
The grow ended today. I could probably have waited another week, but I didn't feel like it and wanted to install my new Autopot system as soon as possible. The plant looks great, most of the fan leaves have already fallen off over the last few weeks. I cut them off today 2-3 hours after “sunrise”, turned them over and hung them up. Pretty stress-free, like the whole grow. I'm curious to see how much I'll harvest and it should be ready in about 9 days. Humidity will be set to 55% for the first 2-3 days, then I'll let it go nice and slow to ~60% RH and hopefully be able to trim and store in pretty much 8 or 9 days. Then there will also be an update with the weight.

Likes
44
Share


@rudiak
Follow
Hey everyone!
It’s been another fabulous week of the girls fattening up getting ready for the ever looming harvest time! The colas are huge and glistening like a glitter ball!
The back right girl has been on flush since day 51, 2 more went on flush on day 53, and the final girl front right went on flush today, day 56!
Over the week I gave 3 girls a really heavy defoliation taking the majority of fan leaves off to allow good airflow and try fattening up those lower buds. It’s still impossible to tell if I prefer defoliation or not but we are getting close to harvest so should have a definitive answer to that soon! The back right girl has had absolutely no defoliation or trimming through her life cycle.
I still regularly think back to when we broke one of the girls and transplanted, the cannabis gods were on our side warning us 4 girls will be huge, we were very lucky or would be seriously short of space as of now.
As the girls are going to be harvested at slightly different times to ensure each are at their optimum, I have had to construct a dry box.
How I built my smell free DIY dry box:
Take a large cardboard box, cut an extraction hole in the top at one end and mount some ducting and seal the gap around the edge. Cut a flap in the opposite end at the bottom which will be the passive intake and promoting a draft through the hanging buds. Poke some holes in each end of the box using a screwdriver and thread some thin rope or string through the box tying the ends together once finished to give you sturdy locations to hang some pegs from. Finally I attached an extra bit of card on one of the flaps at the top; this overlaps the slight gap in the top between the flaps that could allow light to enter. Once completed I put the ducting into one of the lower intakes of the tent; the negative pressure in the tent then uses the air in the dry box as a passive intake creating a smell free area to dry your cannabis outside of your grow tent. This also keeps a slight breeze flowing through the box to ensure even drying.
Happy toking guys and hope you enjoy the pics and vids, thought it was getting hard to tell how big these girls were in pics anymore so the vids help a lot, and I was lazy this week! :P

Likes
Comments
Share


Likes
74
Share


@Ferenc
Follow
Day 59, 17th of November 2021:
Well, not much to mention but the most important: Pistils are coming so the flowers are on the way!!!!!
Set up is the same nothing has changed:
ViparSpectra XS2000 is on full power which is 240W so 100% capacity.
Ventilation: 12 hours period when the lamp is on it switches 1 hour on and after one hour off mostly to keep the temperature and of course because of fresh air flow. When the lamp is off it switches on in every 2 hours for 15 min at the same time with the extraction fan.
The extraction fan is on 12 hours when the lamp is, and then it switches on in every 2 hours for 30 min.
That's all a bit more water for them from today also. Humidity quite the same approx 50%, temperature as well approx 26-27 Celsius.
Fertilization remains the same since last week, the BioBizz family raised up to be 2ml/L each so it is like 2ml/L of BioGrow, 2ml/L of BioBloom, 2ml/L of TopMax... see the ratio above.
The schedule of the fertilization has not changed happnes 2x a week except epsom salt just 1x a week.


Likes
143
Share


@SwissKush
Follow
Day 50 - is a jungle in here
a. she is enormous, and still growing, branches are too long becoming too close to lighting... adjusting the lights to only 67% (201w) intensity to control the growth
b. changed the DWC out to a fresh pool, raised the Cal mag to 1.5ml/L, 1000ppm she loves it
Day 51
a. she is loving the higher PPM solution!
b. the buds are expanding, and are very sticky
c. the resin is now growing with new growth
Day 52
a. gave her a 5L Cal-Mag only boost with stream water, ppms 850 and dropping
b. this plant is so hungry
Day 53 - monster plant
a. she is growing still, so much veg!
b. the buds are bigger and bigger everyday
c. video upload
Day 54
a. expanding everywhere still
b. the smell is very nice!!
c. she is still drinking 5-6 litres a day
d. still using 201watts lighting, intensity only 67%.
e. topped off with a fresh 5L spring water, PH 6.0 with PH down.
f. ppms at 650 after the fresh water, will go back upward with next feed.
g. major defoliation, 50+ fan leafs from the bottom of the plant and around the canopy. The stems are very solid, thanks Armor Si in veg. opens up many new sites for 201 watts of light.
Day 55
a. growing well
b. her buds are expanding every second
Day 56
a. the flowers are smelling go good
b. growing very well, keeping ppms under 1000 here
Likes
13
Share


@J_diaz420
Follow
Genética muy estable, floración rápida, hermoso color y bastante generosa 💚❤️

Likes
10
Share


@PolezGardn
Follow
week two flower everything looks healthy :D
today i defoliated them
i watered them with 1.5l every 48h
the light i use was set to 80% and it hangs 80cm away from the tops
Likes
92
Share


@DogDoctorOfficial
Follow
Week 5 Veg Report: SCROG Netting, Massive Leafs & Precise Data Mastery!
🌱 Girls Growing Stronger Than Ever! 🌱
This week has been truly epic in the grow room—so much so that it’s time to bring in the SCROG net! With the canopy expanding and the younger ones still working to catch up, the SCROG net will help me achieve that perfect, even canopy. A well-placed SCROG not only ensures better light penetration but also gives the smaller plants a chance to spread out and thrive alongside their bigger sisters.
Now, let’s dive deep into the SCROG method.
The Screen of Green (SCROG) technique is a grower’s secret weapon for maximizing space, light efficiency, and yields. The concept is simple but powerful—train the plants to grow horizontally along the net, forcing them to expose multiple budding sites instead of just a single cola. This way, the canopy spreads evenly, improving light distribution and air circulation throughout the tent. As the plants grow, I’ll gently weave their branches through the screen, ensuring they fill every square inch of space. The end goal? A sea of buds all basking in equal light!
💪 Huge Leafs Everywhere! 🌿
One thing that’s really catching my eye this week is the size of the leaves—they’re HUGE! Honestly, they’re so big I couldn’t resist a little fun, so I made myself some fashion accessories: leaf earrings and a cap from the Super Sativa Seed Club Green Papaya! 😂 And, of course, I captured the moment. But seriously, large leaves at this stage are a great sign of healthy, robust plants. These “solar panels” are hard at work soaking up all the light, driving photosynthesis, and fueling growth.
So, what does it mean when your plants are showing off big, luscious leaves? It’s a clear indication that they’re happy, healthy, and thriving in their environment—big leaves mean lots of energy being produced and stored for future bud growth. Exactly what we want!
💧 Precision Feeding with Aptus Nutrients 💧
This week, I took a deep dive into my Aptus nutrient lineup and shared a video explaining how each product affects the water’s pH and TDS. Using the AMP-3 Precision Meter, I’m getting real-time water readings and keeping everything dialed in perfectly. Let’s break it down:
• pH: 5.83
• TDS in solution: 445 ppm
• Water temperature: 25.2°C
The Aptus products are incredible for balancing nutrients without throwing off the pH or TDS too much. I’m fine-tuning my feedings based on these readings to make sure the girls are getting exactly what they need. The precision I’m able to achieve with the AMP-3 is mind-blowing—I get immediate feedback on pH, temperature, and EC, allowing me to make real-time adjustments and ensure the perfect environment for nutrient uptake.
📊 Environmental Mastery Thanks to TrolMaster 📊
Speaking of control—let’s talk about the TrolMaster system! Between the DSH-2U Humidity Station and all the other sensors, I’ve created the perfect environment for my plants. Here’s where we’re at this week:
• Temperature: 26.2°C
• RH: 70.6%
• CO2 levels: 775 ppm
• VPD: 1.0 kPa
• PPFD: 423
Thanks to TrolMaster, I can monitor and adjust these metrics in real time, and the best part? I can do it all through the TM+ Pro app, even while I’m lounging in my green papaya leaf hat! 😆 Whether I’m checking the CO2 levels, adjusting the lights, or fine-tuning the humidity, it’s all in my hands with just a tap of my phone. Talk about convenience!
🌱 P.S. – Inline Sensors: Heavy-Duty Precision 🌱
Now, let’s talk about the heavy-duty players in this game—the (PCT-2) Heavy Duty Inline EC/Temp Sensor and the (PPH-2) Heavy Duty Inline pH Sensor. These bad boys are connected directly to the AMP-3 Precision Meter, and they’ve been absolutely crucial in giving me the most accurate readings on my water and nutrient solution.
The PCT-2 keeps me informed about the electrical conductivity and temperature of my solution, which is key for monitoring how well my plants are absorbing nutrients. Too high or too low, and we’re asking for trouble, but this sensor ensures I’m always in that perfect range.
The PPH-2, on the other hand, is all about maintaining the perfect pH balance. A fluctuating pH can mean nutrient lockout or deficiencies, but thanks to this sensor, I get a constant read on my pH levels, so the plants are always in their sweet spot for optimal nutrient absorption.
Together, these inline sensors allow me to run a super-tight ship—every drop of water and nutrient is dialed in to perfection, keeping the plants happy and healthy!
Shout Outs!
As always, huge thanks to TrolMaster and ThinkGrow LED for the amazing gear, to Aptus Holland for their top-notch nutrients and Pro-Mix for the best soil i have used so far. Big love to the seed banks, the amazing Grow Diaries community, and all my followers—you guys make this journey so much more exciting. Don’t forget to catch up on my social media, Instagram, and YouTube for real-time updates and exclusive content!
Stay tuned for more—next week is going to be epic!
DogDoctorOfficial Discount Codes so you can save big on your next check out 💚💚💚
Kannabia - DOGDOCTOR 30% off
SeedsmanSeeds - DOGDOCTOR 10% off
CannaKan- DOGDOCTOR 15% off
terpyz.eu - DOCTOR 15% off
The Neutralizer - PORKIT5-DOG 15% off
Growers Love to you all 💚💚💚


Likes
5
Share

@GoodTimesOrganics
Follow
Welcome Back!💚
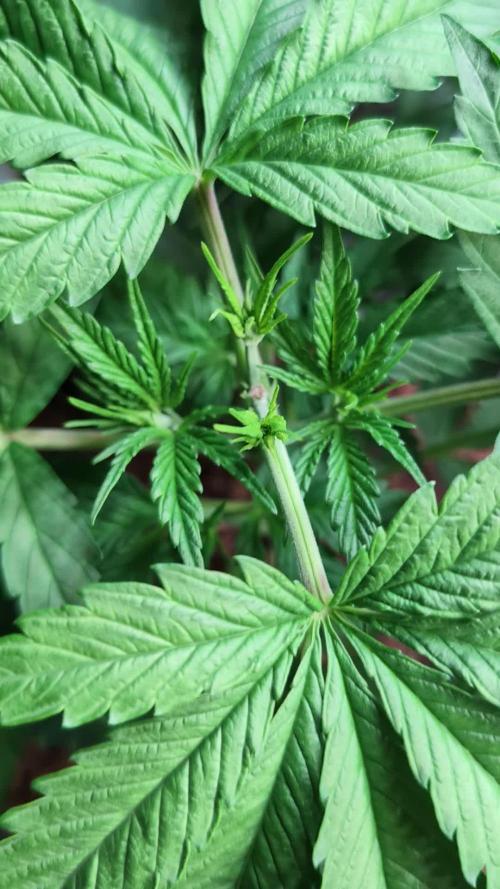
Nach der dritten Woche entwickelt sich die THC-Victory rapide und nach dem topping zeichnet sich es ab, dass die Pflanze sich nun sehr schnell in die Breite ausdehnt.
Ab dieser Woche werde ich noch damit beginnen die Seitentriebe etwas zu biegen um sie im weiteren Verlauf dann etwas runter zu binden
Die Umgebungsgegebenheiten sind weiterhin optimal:
—————
🌞 Temp: 24°C bis 26°C
🌚 Temp: 18°C bis 19°C
💨 RH: 68%
VPD: 0,7 kPa👍
—————
Grüne Grüße 🥦

Likes
12
Share


@Tazard
Follow
These are clones that I managed to take from my summer garden that became a disaster due to a heat wave that we had breaking 100 year records. I expect everything to be 48” in height at maturity.

Likes
54
Share


@RastaGrow
Follow
Привет привет друзья как дела как настрой ??? Ну вот и долгожданный репортаж от Раста ;) неделя прошла без изменений, как обычно всю неделю поправлял ветки от 707 показывал им как надо и в какую сторону им надо развиваться, в переди ещё 3-4 недели и я уже думаю чем мне закрепить ветки так как на этом этапе шишки уже очень тяжело. А ещё они только набирают вес и силы 😍😁

Likes
3
Share

@carlitoshaze44
Follow
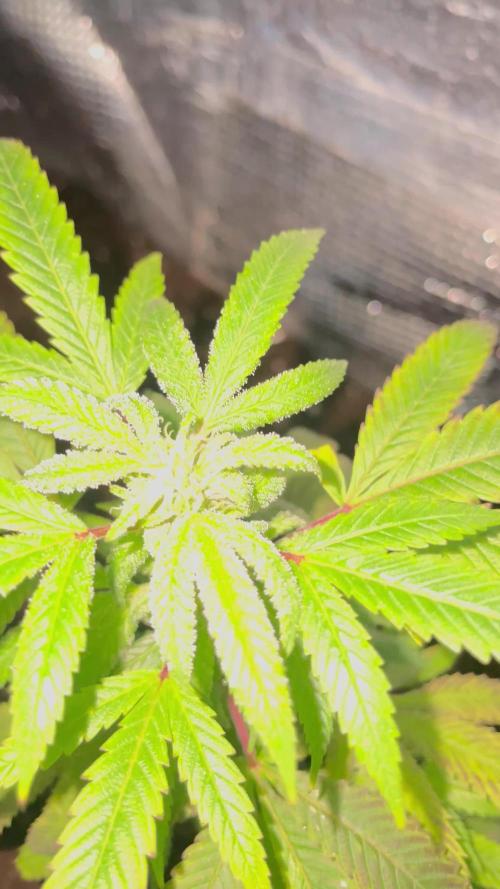
Hahahaha esto es una review de lo que será cuando se cambie a el sustrato.
Escarcha!

Likes
27
Share


@Lady_NugWitch
Follow
Girls are transplanted, topped and responding well. I'm going back to my old roots, so to speak, using what my girls used to have. Changed mediums to fox farms, and I mixed with coco loco soilless.


Processing
Likes
28
Share


@Hawkbo
Follow
Most of them made it only 1 six shooter definitely didnt make it and a cream cookies is a lil stuck. I threw a mexican airlines in the old six shooter cup but just letting it germinate in the soil I havnt done that in a while. They are going to get another feed tmm. The medium is a 50/50 coco/soil mix since I'm using the green buzz and its organic I figured a little soil might be beneficial. Day 7 from germination they should be ready to go into their final pots in the next few days.
Likes
4
Share


@KushClicks
Follow
Week 4 updated
Hey guys, so 2 out of the 3 shocked plants caught back themselves, they are doing great. I added 2 more plants so we're st 5 in total.
I topped the big plant and started mainlining her. She's growing nicely and I hope to shape her really good. I'd start mainlining the other 2 probably later on this week and maybe by the end of this week I can top the 2 new added plants providing growth.
I'm feed ing everyone Athena Grow and Core. No signs of deficiencies so we're off to a good start.
See you guys next week!
Don't for get to use my code STLVDXW for an extra 15% off your next order at fast buds
#fastbuds
Likes
12
Share


@GREENPHOENIX6262
Follow
*Week 4 Flower 09/24*
Both Mimosa girls appear to be running fine with Mimosa (1) running a little behind but is catching up accordingly. Small oversight in early growth resulted in a minor stunt but she is improving dramatically.
Water Feed has increased by half a gallon ( 1gallon clean - .5 gallon nute feed)
*Week 4 Flower 09/28 - Mid week update*
Both plants are flowering accordingly - Mimosa (1) is a bit taller then Mimosa (2)
Buds are becoming dense and covered in trichomes.
No deficiencies - No areas of concern - Potassium and Phosphate feeds continue
*Week 5 Flower end of week recap - 09/30*
Both Mimosa's are flowering nicely - Budsites covered in frosty trichomes.
Mimosa (2) looks shorter but that is because her COLA was tied down to expose bottom budsites.