
Likes
Comments
Share


@Pungolian
Follow
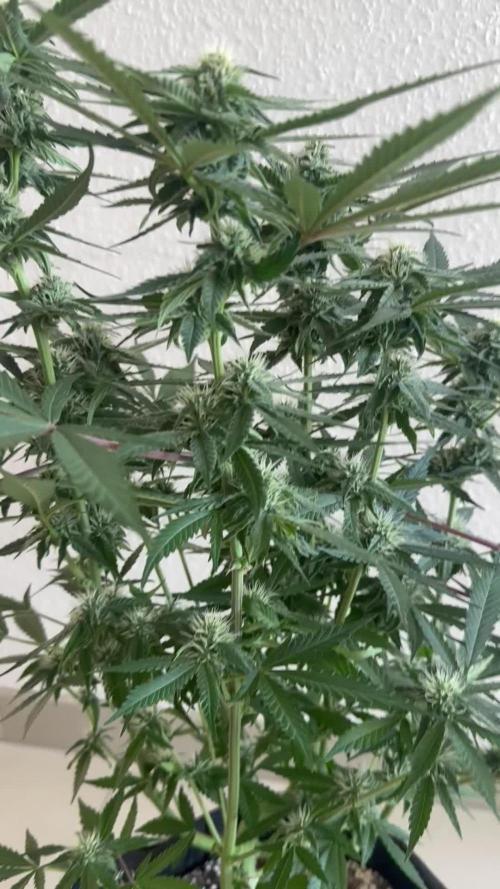
Stretching like hell and finally throwing a few white pistols! Did well in several t storms this week, now to get thru ‘cane season


Likes
29
Share

@DE_BW
Follow
Mendo Frost is looking very promising now and is definitely living up to her name. Bud stacking has accelerated noticeably, with multiple sites already showing excellent frost production and strong flower development. I performed a moderate defoliation this week to improve light penetration and airflow through the canopy. At this point the structure is set, the plant is healthy, and the focus shifts to letting the buds bulk up over the coming weeks.

Likes
25
Share


@Hawkbo
Follow
Lookin good, no more herms so far as I’ve tightened things up hopefully that’s the last of them for good. I installed a 4Inch AC infinity fan and filter as an intake so I have been able to close all of the vents. At this point the leaf strip has proven to be a solid method, I have nothing to compare bud size at this point but just the extra space it opened up is a plus. I’m sure the lowers will be a little more firm and the plants obviously haven’t had to be fed as often as usual so its saving time, water and nutrients. The added microbes have also allowed me to keep my ppm around 1000 instead of 1080ish without any sign of deficiencies. The Mandarin cookies x Dionysus has a little cal-mag issue but that was a trait from the mother which out of 10+ grows all had a cal-mag deficency. I gave everything a little flush last watering and took measurements then a good feed today
REMEMBER , IF YOUR SHOPPING FOR GEAR YOU CAN USE THE CODE “BANGDANG” FOR 10% OFF YOUR ENTIRE PURCHASE FROM ANY OF THE FOLLOWING COMPANIES.
@greenbuzzliquids
@rainscience_growbags
@gorilla_grow_tent
@growlightscience.led
*****Gorilla grow tent discounts extend to all companies affiliated with grow strong industries which include..*****
@super.closet
Lotus Nutrients
Kind LED grow lights
Likes
4
Share

@GTools
Follow
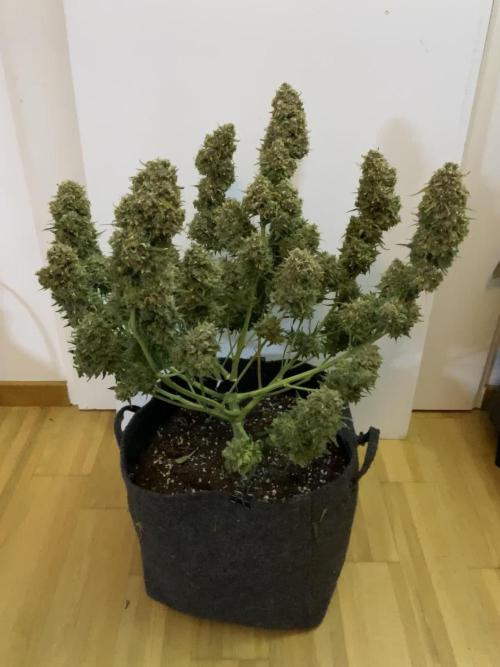
Finally it was time to cur them down. There is a nice layer of glassy trichomes and the plants have dense buds.
I am expecting a decent harvest outcom.
Updates will follow drying and curing proceeds


Likes
388
Share


@yan402
Follow
🌸🍏✨🍭🌸🍏✨🍭🌸🍏✨🍭🌸
Hi and welcome to another Kannabia grow!
This time I’m running their Apple Fritter (feminized photoperiod). She’s going to veg under 24hr light and be manifolded.
Still cleaning the rest of my Candy Cream GF (11.04.25) — going to sow the seed tomorrow (12.04.25)
*been lazy, sowed on 14.04.25
🌸🍏✨🍭🌸🍏✨🍭🌸🍏✨🍭🌸
---
💭❗💭❗💭❗💭❗💭❗💭❗💭
❗Events & thoughts worth noting❗
💭❗💭❗💭❗💭❗💭❗💭❗💭
12.04.25 (GW1) – Cleaning + flushing the old coco coir. Might need to add another brick. *No new brick needed ✅
This is how I recycle my coco coir — fast, cheap, no BS.
🌿 Harvest plant
✂️ Chop roots small — they stay in for structure (organic perlite)
💦 Hot water rinse — remove salts & dust
🍶 Pre-soak with light feed:
Micro 10ml
Bloom 0ml
GreenBuzz 10ml
Cal-Mag 60ml
FFJ/FPJ 10ml (new disgusting batch)
pH down (citric acid)
♻️ Media stays — Roots stay — Back in service.
14.04.25 (GW1) – Planted seed in final pot ✅
16.04.25 (GW1) – Did last tent clean up + setup ✅📸
17.04.25 (GW1) – Seed germinated 🎉📸 — roughly 48hrs in final pot. Solid start👌♥️
23.04.25 (VW1) – Minimal burnt tips 📸 — not progressing, not a concern.
26.04.25 (VW1) – Started using the new batch of FPJ/FFJ
https://growdiaries.com/diaries/266849-grow-journal-by-yan402
30.04.25 (VW2) – Increased TriPartMicro & GreenBuzzBloom 10ml → 15ml
03.05.25 (VW2) – Increased TriPartMicro again 15ml → 20ml, topped the plant, and added final layer of clay pebbles around the base, trimmed side branches and did LST in preparation for "manifold" 📸
08.05.25 VW3 finished manifold📸
13.05.25 VW4 Increased TriPartMicro to 30ml and GreenBuzzBloom to 20ml.
15.05.25 VW4 Done defoliation and LST 📸
18-19.05.25 VW5 pruned all the shoots bellow my "mains" and did a full defoliation📸
24.05.25 VW6 increased GreenBuzzBloom to 30ml
04.06.25 VW7 did a cleanup📸
11.06.25 VW8 increase TriPartMicro to 40ml
17.06.25 (VW9) – Final structure pass 💈🌿
Did a clean perimeter prune + removed weak shoots. Ended up with 12 tops, was aiming for less, but she made the call
Didn’t fight it, just shaped it the best I could
Airflow’s good, structure’s stable
🛑 No more cuts until post-stretch
Pics coming shortly 😘
Flip coming soon — we’ll see how she handles it.
20.06.25 VW9 Switched lighting to 12 hours, may the stretch begin 🤞
22.06.25 VW10 Did a good LST session,made some pics, and came to some conclusions and a small change of plans:
Originally planned for 8 mains — long, spaced colas and maybe a couple stronger “titans” if she wanted to go that way.
But she’s showing me something else, and I’m not here to fight her — just guide her.
Now after stretch, I’m keeping side shoots only if they: Fill real canopy gaps
Don’t crowd neighboring tops (minimum 15cm spacing)
Aren’t growing into walls or toward the next plant
Anything too close, too low, or heading into shade gets removed. No point forcing it.
Looks like I’ll finish with 14–16 solid tops, depending on how she settles.
I’m just trying to give each one enough light and space to stack properly.
No overcrowding, no larf — just letting her do her thing with a bit of structure.
Increased Tri Part Micro to 50ml as well.
28.06.25 VW11 one week since I flipped to 12/12 and she is stretching nicely, a bit shy in showing pistils compared to the Fantasy Feast regulars I have in the same tent.
29.06.25 VW11 increased GreenBuzzBloom 30→ 60ml
06.07.25 FW1 TriPart Micro: 50→ 30ml
TriPart Bloom: 0 → 20ml
Home-made FFJ/FPJ (Watermelon + Pumpkin): 10 → 30ml
12.07.25 FW1 GreenBuzzBloom 60 →40ml, TriPart Bloom: 20 → 60ml, fpj 30→60ml
🌱💦🌱💦🌱💦🌱💦🌱💦🌱
🌿 Day to day tasks & actions 🌿
🌱💦🌱💦🌱💦🌱💦🌱💦🌱
11.07.25 FW1 – Fed 5l of #1 → 2l runoff
12.07.25 FW2 – Fed 5l of #1 → 2l runoff
(*RUNOFF reused for tomato plants)
🍶💧🍶💧🍶💧🍶💧🍶
💧 Nutrients in 30L #1 – Week 11 Veg
🍶💧🍶💧🍶💧🍶💧🍶
💧 TriPart Micro: 10 → 15 → 20 → 30 → 40 → 50ml → 30ml (1.00ml/L)
🍶 TriPart Grow: 0ml (0.00ml/L)
💧 TriPart Bloom: 0 → 20 → 60ml (2.00ml/L)
🍶 GreenBuzz Bloom: 10 → 15 → 20 → 30 → 60→40ml (1.33ml/L)
💧 Cal-Mag: 60ml (2.00ml/L)
🍶 Home-made FFJ/FPJ (new batch): 10ml → 30→60ml (2.00ml/L)
💧 pH Down: Citric acid (buxXtrade)
📦 TOTAL: 250ml per 30L
🔬 8.33ml/L
🍶💧🍶💧🍶💧🍶💧🍶
⚙️✂️⚙️✂️⚙️✂️⚙️✂️⚙️
✂️ Tools & equipment ✂️
⚙️✂️⚙️✂️⚙️✂️⚙️✂️⚙️
✂️ 2× MarsHydro SP3000
⚙️ MarsHydro 150mm ACF Ventilator
✂️ Trotec dehumidifier (big unit)
⚙️ Mini no-name dehumidifier
✂️ Kebab skewers (LST – stainless)
⚙️ Wire + roast skewers (LST assist)
✂️ Scissors (HST)
⚙️ Vacuum (for spills & cleanup)
✂️⚙️✂️⚙️✂️⚙️⚙️✂️⚙️✂️⚙️✂️⚙️
---
🍏🍪🌬️🍬🍏🍪🌬️🍬🍏🍪🌬️🍬
Apple Fritter (Kannabia Seeds)
🍏🍪🌬️🍬🍏🍪🌬️🍬🍏🍪🌬️🍬
Species: 50% Indica / 50% Sativa
Genetics: Sour Apple × Animal Cookies
THC: Up to 25%
Effect: Euphoric, relaxing, creative
Flavor: Sweet, fruity, pastry notes
Flowering: 56–63 days
Resistance: High
Indoor yield: 450–500g/m²
Outdoor yield: 600g/plant
Structure: Strong, bushy, dense buds

Likes
161
Share


@FrontRowAG_BrianG
Follow
Entered diary of the month for the first time here on GD. It’s been a good run thanks to Ethos Genetics and Front Row AG Nutrients.
Grow diaries has been kinds shitty lately. I’ve tried my best to upload as many good photos as possible.
I know I grow a little differently than most here on grow diaries. Push the plants as hard as you can, lots of heat/humidity/co2 and high EC. My motto, if you’re gonna grow, harvest as much as you can with the space you have.
Overall this was one of my best runs in a while. Deep orange and cream/cake smells and vigorous growth made this a great strain.


Likes
9
Share


@CannabisCultivate
Follow
There will be pleasant dreamzzzz around here in the near future, these beauties are covered in crystal and the buds are incredibly dense. They are almost near harvest and they will have a wash when the time comes. These girls have been incredible from day one and I must say, we are WOWED by this strain and the genetics within!


Likes
Comments
Share

@SolitudeCorners
Follow
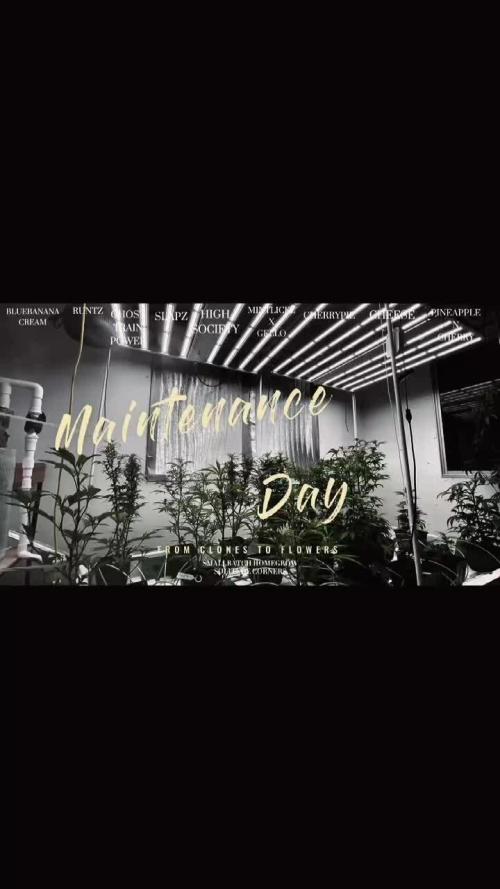
🌿Week 4: Defoliation & SCROG Setup
Week 4 was all about structure and airflow.
The canopy was getting bushy fast, with a ton of inner growth, so we went in for a solid defoliation session across the board. Lower fans, overlapping leaves, and shaded internodes were cleaned up to let light penetrate deeper into the canopy and reduce potential humidity traps.
Right after that, we finally dropped the SCROG net, stretched out gently across the canopy to guide the branches horizontally and prep for flower stacking. Some of these phenos are already reaching for the sky, so the timing felt just right.
Captured a full-time-lapse clip of the defoliation + netting process. It’s super satisfying watching the chaos turn into clean lines. Nature meets intention.
Feed Bloom since 20/6
22/6 Defoliation
🌱 Plant Response:
After defol, they bounced back fast. Tops are perky, leaves are praying, and stretch is continuing in a controlled way. The structure’s more open now — better airflow, better light distribution, better everything.
Likes
1
Share


@chapothegrower
Follow
had to cut her very early because of some mold problems, but had about 50-60 grams of amazing, organic weed from this plant!


Likes
5
Share


@Jayndre69
Follow
Well think I'm going to start flush tmr ive had several problems with this run but still really happy with the outcome tho there is alot of room for improvement! I believe I will try soil next I had nothing but problems with ph in coco coir I will put up the outcome of the 3 plants it does look promising:)
Likes
31
Share


@THCpapa
Follow
Week 14 marks not only the completion of the first week of flowering but also a remarkable stretch in the growth of my green companions. It's like they've hit a growth spurt of epic proportions, reaching for the stars with leafy determination. They're like botanical skyscrapers, standing tall and proud in their green kingdom.
Each week, these plants become more beautiful, like nature's own masterpiece unfolding before my eyes. The best part? There's no more discoloration on the leaves, and they're gobbling up nutrients without any negative side effects. It's like they've discovered the fountain of leafy youth, and they're thriving like never before.
But amidst the leafy triumphs, there's a slight hiccup in the form of temperature. Throughout the day, the temperatures can reach a toasty 83 degrees. I have a Vivosun controller that's supposed to kick in the exhaust at 79 degrees, but it seems to be struggling to keep up. Looks like it's time to bring in the big guns and get an AC unit for my green haven.
As I reflect on the journey so far, I can't help but feel a sense of awe and gratitude for these amazing plants. They've taught me patience, perseverance, and the true beauty of nature's artistry. Here's to Week 14 – a week of stretching, flowering, and the promise of a bountiful harvest. Cheers to my green companions – may they continue to grow and thrive in their leafy paradise! 🌿


Likes
17
Share


@VACADELUNA
Follow
Week 18 of life and day 40 of flower. Tricomes look nice, buds are swelling and still lots of white. We are probably 3-4 weeks away from harvest.
Likes
17
Share


@HowtoBubatz
Follow
It’s week 5 of flowering, and things are looking fantastic!
The adjusted nutrients for the coco substrate have clearly made a difference, as both plants are thriving and continue to develop thick layers of trichomes. ✨
Interestingly, the non-LST plant is starting to show some unique color variations, which is surprising given that both are from the same strain.
This unexpected twist adds a bit of excitement, and I’m curious to see how it will develop over the next few weeks.
When it comes to scent, the differences are striking! The LST variant has a bold and distinct Lemon Haze aroma—zesty and citrusy 🍋💨
while the non-LST plant gives off a fruity-sweet smell that’s incredibly rich and inviting. 🍓🍭
Unfortunately, my camera broke this week, and now I’m dealing with some low-quality pictures. 📷😔
While it’s frustrating not to capture the plants in their full glory, I’ll do my best to document their progress as clearly as possible.
Overall, both plants are doing great, and I’m looking forward to seeing how they turn out in the final stretch! 💚
Likes
4
Share


@L8bloomr1008
Follow
Did another light defol, top dressed with 284,wc’s, and build a flower. I removed the trellis because I didn’t like not being able to move the girls around so I hope the silica does what it’s supposed to.
The buds are starting to thicken up so stay tuned 🤞🏾


Likes
26
Share

@Hawkbo
Follow
These were taken on day 59 I was a little late to put gettin them up. I've been doing some heavy flushes on some of them cuz the run off ppm was a little high. I mixed these with soil so I dont know if that's why it's not coming down as quick as usual but I'll keep poundin these ladies til the cows come home
Likes
19
Share


@RDWCGrowing
Follow
Week 1 Day 1 - 8/12/2023
1st Water change Day! Such a special time it is when you remove the little bit of Nutes that you gave them as an appetizer and you give them their first real meal.
Added
39 Gallons of Water to my system
SILICA= .5mil/Gal = 19.5 = 20mil
Root Drip = 1mil/Gal = 39mil
Cal Mag= .25mil/Gal = 9.75 = 10mil
FLoraMicro= 3.0mil/Gal = 114mil
FloraGro = 2.0mil/Gal = 78mil
FloraBloom = 2.0mil/Gal =78mil
ORCA= .5mil/Gal = 19.5 = 20mil
Week 1 Day 2 - 8/13/2023
Everything is looking good the roots are making thier way to the water and the new grow is looking nice and green.
Week 1 Day 3- 8/14/2023
Everything is right on track, they are looking beautiful and in the praying postition all leaves happily lifting towards the light.
Week 1 Day 4- 8/15/2023
Looking beautiful today and looked like she could use her first haircut.. gave her a TOP off. Roots are laying in the water everything is looking right on track..
Week 1 Day 5- 8/16/2023
walked in and the humidity was under 60.... ohh noooooo.. So I added 2 humidifiers to the tent and attached them to my InkBird controller which is set to 62. She had roots nicely in the water.. this grow is on!!!
Week 1 Day 6- 8/17/2023
Humidity was a little low this morning, so I refilled the humidifiers. Other than that, the temp looks great, the PH looks great, the PPM looks good the plant is in the praying position and all damage from the little drowning seems to have been fixed. Happy Happy.
Week 1 Day 7- 8/18/2023
Yay.. week 1 in the books, roots in the water growth has started first hair cut given and both side nodes are growing. Everything is looking good and on track.. A lot better than week one of the last grow when I had them drowning week 1.
Really excited on how this grow is going to come out.