
Processing
Likes
Comments
Share


@Dunk_Junk
Follow
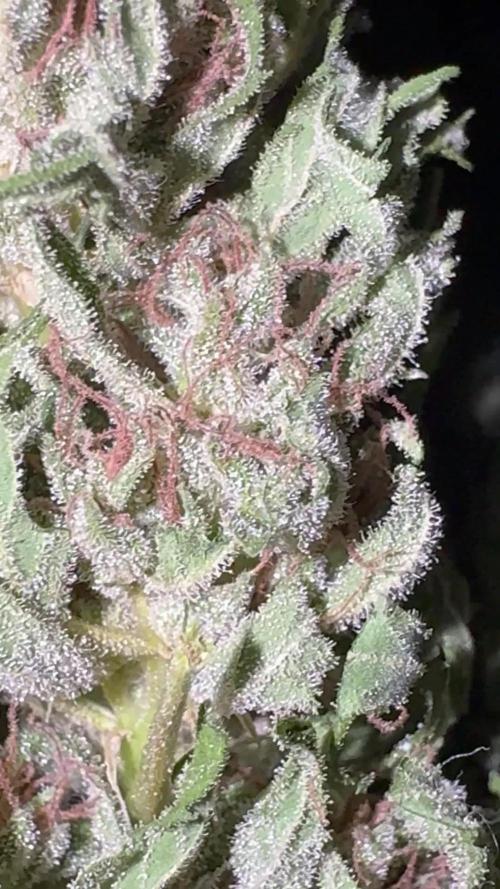
She's still doing her thing. I'm not sure she could get any frostier!! 😂 😎 A few more weeks left yet.

Likes
34
Share


@ScotlandHaze
Follow
Not a good week unfortunately. Fed them too much and burnt them slightly. Fixed my mistake so back on the mend. One week or so left I think so only plain water


Likes
18
Share


@thenotillwizard
Follow
Harvested at day 76, after 72h of darkness.
Very good yield!
3.3 pounds of dry buds + 1 pound of trim
The 2 keepers yielded 366 and 342g of premium quality smoke.
Very uplifting and energizing high :) Love it!
Likes
166
Share


@iMeus
Follow
I payed 55 dollars an eight for the same level of quality, I got 18 eights of top shelf for $10 not including nutrients and supplies, yeah I'm never going back to a dispensary unless I'm traveling. This experience has improved my life in many ways. I got a total of 7.8 ounces from this grow, I'm happy :)

Likes
30
Share


@D33jW
Follow
instagram: d33jw.420
FLOWEEK: 8
Light: 11/13
RH: max 50%
TEMP: max 24C
PPFD: 750/650 slowly go down
Start to flushing EC in soil is around 1.0 now.
Smell is amazing, some cherry with earthy aroma..


Likes
32
Share


@Fatnastyz
Follow
10/22
She grows! 😁 In the home stretch, just giving water when needed.
Shes so photogenic!
.
Likes
31
Share


@ELBICNIVNI
Follow
She is growing nice, the buds are getting fat, apparently i was expecting gorilla cookies to be the winner at the size of the buds until now, apparently i was wrong, amnezia has bigger buds than gorilla at this stage :) we will see who is going to be the winner... who you think is going to win?
Likes
1
Share


@CannabisCultivate
Follow
Just about to go into bloom, we’ll cleanup the lower part of this girl today and hit them up with some Mills Nutrients Bloom, Hygrozyme and HyShield.

Likes
51
Share

@Dunk_Junk
Follow
She's looking lovely this week! 😍 Also..... she is absolutely huge... 😲
Likes
17
Share


@Naujas
Follow
She is much prettier than she was a week ago :) I remembered that I have my first grow light, which is more compact and it will give me more space, so I changed my light, now the girl's side branches get light too:) I add a lot of video memes, because I really want to win Iphone16 pro ;) and those who don't take risks don't drink champagne:) good luck to everyone.
Likes
38
Share


@Hempface86
Follow
Well here we are guys going into our fifth week of flower and she has been putting on weight.. thank you SEEDSMAN for giving me the opportunity to grow this beautiful plant and I really mean that this girl has been amazing from the very beginning I have done absolutely nothing to her other than some small defoliation and she has been a breeze taking any strength of nutrients I throw at her.. I hope and pray everybody is happy and healthy and so are their girls.. this community rocks! Happy growing everyone ✌️😎

Likes
7
Share

@Skunkiest_bender39
Follow
Getoppte Dame in 70L. Ein paar Knollen hatten Mehltau oder Fäule. Verlust max 5g, Glück gehabt😇
Riecht leicht nach diesel dabei viel citrus, manchmal auch ein wenig nach bitter Schokolade bzw. dunkel erdig 🤓
Super resistent gegen alles. Für Europa super geeignet.
Die anderen Damen im greenhouse bleiben noch stehen

Likes
55
Share

@Qutro
Follow
Week 5 check-in 🌱🔥
We keep rollin’, growmies! 💪
Last week’s heavy training sesh is paying off, the stretch has finally stopped and those side branches are poppin’ off! The girls are starting to bush out nicely 🌿✨
Had a slight cal deficiency, so I switched over to my trusty Green House Feeding Calcium. Not too happy with the Terra Aquatica CalMag, tbh
Aside from that, they’re looking healthy and vibing strong 💚
Did the first major defoliation — mainly opened up the center to let those secondaries soak up more light ☀️
Two waterings this week: one with plain water + cal, and one full-on nutrient mix 💧💪
Seems like the girls are lovin’ the light levels, so we kept it at 60% intensity, 45 cm above the canopy ☀️💡 They’re soaking it up real nice! 🌿

Likes
13
Share


@Robeeriegenetics
Follow
Nooooot great custom dwc totes doing much better then vivosun buckets
Likes
11
Share


@Beedog
Follow
Good weed will come back with full harvest weight when it’s all fully dry total weight 1650g and a plant that went to complete shit that had about 6oz on it added to the trim to be made into something what ever she decides so over all a good harvest if I had another two weeks and not a massive heat wave in middle of flower i reckon I would of touched two keys


Likes
2
Share


@burnercorona
Follow
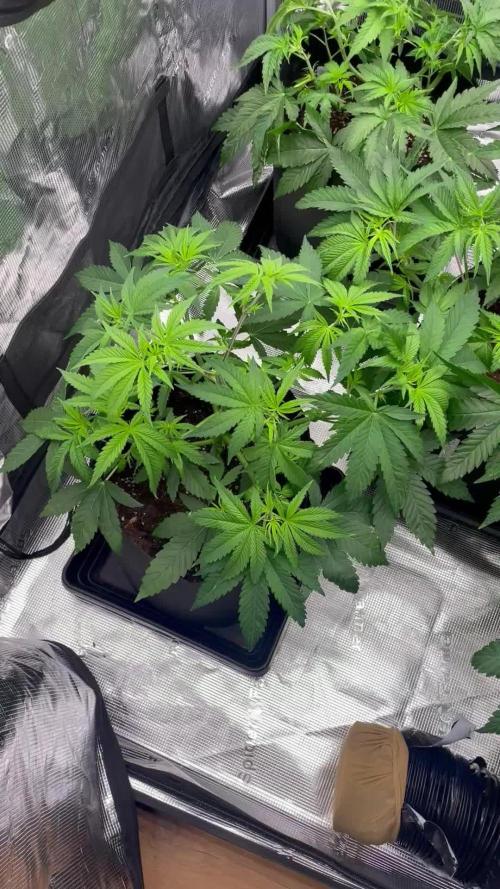
Solid week. She's recovering quite well from training and some pH issues almost time for flower
Likes
15
Share


@VanHealzing
Follow
Day 43 of flower. I took some leaves out to bring in light to the lower canopy. But other then that everything is chugging along.
