Likes
Comments
Share
@valiotoro
Follow
Hello everyone week 2 has passed for this Mint Jelly auto by Humboldt Seed 😎 this plant is doing very well growing at fast pace and with a beautiful green colour on the leaves. wish you all happy growing!

Likes
9
Share
@Chucky324
Follow
Hello. This is the end of week 9 and the beginning of week 10 of veg. Had my 4th year cancer check-up and passed... Doctor couldn't find anything wrong. So I get to wait a year before my next/last check-up. If I pass that check-up they declare me cancer free. 😁 Thanks Rick Simpson.... Got this magazine a couple of days ago and wanted to show some of the weird adds and the articles. There is a Cheech and Chong story and interview in the Captain Future diary, and a Cheech story and interview in my LemonPaya diary. If your a fan of them have a peek at this weeks... Things are going well in here. The plants are stretching to fill out their areas. Plant #1 looks like it going to be a big plant with inches between leaf sets. Nice tangy smell though. Thinking of putting these girls into flowering around June 1st. And harvesting around Aug.15 or so. Got the tent so I could flower when the sun is strong, middle of summer. Not the weak ass fall sun where there's lots of mold and fungus. OK. Keep Growing Straight. Chuck.
Likes
15
Share
@DevelGrow
Follow
Hallo Freunde 👋 Frost Banger von Fast Buds ist 42 Tage Alt! Sie steht schön in Blüte und baut schön ihre Buds! ✌️🍀💚🍀
Likes
27
Share
@Hydronaut
Follow
Big healthy plant for the most part, but the flowering just won’t kick in! This is the week that says she’s running behind or that she’s going to be on a cocaine diet till the end? Need some bulk, it’s week 8 already. I don’t like my girls fast anyways, so I’ll be a patient gent. Day 51: Early AM: It seems that the flowers are starting to fatten up at a familiar rate now. Stretch is definitely over to boot. Feels like a week or so behind my other Auto grows, but I am gathering from the peeps on GD that grow times can be all over the place with Autos; even with seeds front the same plant. I won't be a Debbie-downer, but I cant help but think what this thing would have done in a bigger space. I left her alone a couple days ago as her stretch slowed noticeably. A pluck here and there moving forward, but that's about it for the sadistic stuff. Day 51: Late Afternoon: She's about to take off in the flower it feels. 6 hours passed, and I was like "oh, hello there!" If nothing goes too crazy, I'm hoping she'll be a good one regardless of her 3.8 sf living quarters. I never did move the top shelf, so the light is less than 8 inches from the canopy. I'll keep an eye on the "crispy effect" out of complete laziness and fear of dropping the light on the plant! Tallest branches are around the perimeter and still hitting their DLI. The center/down the plant is getting blasted by the light, so I suspect about 6 or so runners to hit the canopy and hang out with the FIM family in the next week or so? Day 51: Evening: Bigger bucket = bigger plant in hydro? One heck of a root mass going on in her trough. I tried pushing the roots to the back of the bucket so I could ph without getting roots directly. Nope! That bucket is filled with roots, and its an 8 gallon bucket. I would have never thought an auto would have enough time to grow into an 8 gallon bucket. I was banking on some extra nutrient volume, so I could go out of town for 4-5 days. Hard to say on bucket size though, I have grown 10 foot tomato monsters in 3 gallon Ebb/Flow pots so maybe she would have grown the same in a 5 gallon bucket? I don't think that much root volume could grown in an 5 gallon bucket, so bigger bucket = bigger plant here? Things that make you go "hmmm..." Day 53: A lot of undesirable undergrowth that blew up during stretch. Like a ton of it, but I’m done messing with her. Took out the top shelf and reconfigured exhaust. What a pain. I didn’t drop the light but the IP cam took a nose dive on a branch. Now the light is about 12-14” from canary instead of 6-8'. She started to get some light burn so I had to do the deed. Wider IP camera view with added distance so that's a plus! Plant is very happy at 550-575ppm. 600ppm seems to be the number without burning plants? Humidity, temp, and ppm AND light distance in check. Raising the light opened the focal point of this light quite a bit; especially in the center where the PPFD was over 2500 at the center and light less than 8 inches from the canopy. Feeling good. All is in check with some room to grow. She will gain another 2" in height I presume through flower. Day 54: The jury is out of this light. I hits my dli from veg to harvest with it's fixed position design, but wondering if 50watts more would have been the number. I'm going to keep the light in there to keep the data flow congruent to its original design. I hit my DLI right now from the top of the canopy to about 10-12" down the plant. Lighter specs from my last grow, but its hard to tell what is getting what once you leave top of the canopy. Hopefully it will suffice! I moved the light a few inches closer as my DLI was getting light in some of the corners/perimeter. She right 10-11" and is about as good as she is going to get given150watts. I am realizing that 200 watt is probably the optimized wattage here if some canopy penetration is desired, but light these dimensions are not plentiful[. 250 watt and that would be max with managing heat and exhaust sound levels. 250 watt would accommodate a fix state design no problem. I hate to change the light variable but I only have the luxury of one-at-a-time grows, so everything counts on some levels. Been using the PAR meter on and off throughout the day. Penetration needs to be about 25% stronger. Its a perfect light for your average auto grow, but if these results repeat themselves a 250 watt is probably in order. I am making the executive decision to install a 250 watt bar light. I found one with a small footprint at 240watts. Hard find, specs are more than adequate for 4 sf. Will maybe get down a bit deeper but things are looking really crammed with the bottom half. It is PACKED with bud sites and likely not enough light. Questioning the light change, but will definitly thin some lower stuff and "officially" let her be. Since in bumped up the CalMag to about 1.5 ml/gal the reservoir has been running ph equilibrium for 6 days now at 600ppm. I’m guessing this deficiency was driving down ph instead of the usual up/equilibrium in week 7. My first auto to eat at 600ppm for a week with no tip burn. She looks fit, I’ll keep her diet here as the max. I have never cut MicroGro out completely in a grow before. I have been faithful to GH 7 part series since for long time. This grow I took the GH feeding chart and worked backwards to a ppm level I found on the web to be an acceptable range for Autos. These ratios have traditionally been acceptable and without issue. Beautiful plants every time. On the last two runs with this concocted feeding schedule Cal/Magic was very light until week 7, and exactly when I started to see rust spots, etc. in this grow. After a 2ml/gal dose of CaliMagic plus addbacks on watering, that issue disappeared overnight. I mean zero issues with any new or progressing growth. Here's the take away with this. Although CalMag issues are easy to spot and resolve, I did learn is that in both runs they HAD A PERSISTANT DROP IN PH IN MY RESERVOIR in late veg/tranistion. Another wards, if you PH is dropping and your ppm are not doing anything, it very well could be a CalMag deficiency. An indication know before the leaves start getting spotted, etc. I guess if one were perceptive enough, you could resolve this issue as it happens, and never see the effect on the leaves? On this current run, as soon as I dosed the bucket good with Cal/Mag and kept my add/backs a 1.5/ml/gal the PH locked in big. Going on 7 days at 600ppm, 6.0 and the ph is steadily rising. Maybe another bump in ppm. No sign of tip burn yet, why the heck not!:) Not really the expected progress this week but she may just need time. I don’t think she’ll really bulk up until the end of week 9 / week 10. New light to arrive Tuesday but not sure a stronger light will get much further down. It’s almost a roadblock to get beyond the main tops and they are getting well more than they can handle light wise. Bigger light may only mean more heat.
Likes
37
Share
@Pugbutt
Follow
The ladies are looking good this week. 2 of them on Wednesday had a few twisted leafs, so I have been trying to figure out how my ph got high. My normal routine is to prep the water the day before feeding to the correct ph. But finding after it sits over night, it rises from 6.5 to 7.1. This has now been corrected and only time will tell if these two ladies decide to untwist. My topping is looking really good, I've enclosed a photo of the beautiful knuckles on them. Trying to decide if I should top again, and when can I? I think the SCOG net will be coming out real soon, maybe this week or next. My one shorter girl has gotten bigger, but still considerably shorter than the rest. SCOG, should give her a chance to catch up. I'm really looking forward to this grow, and being my first, it's been really enjoyable. I only wish I picked up this hobby sooner. I find it fulfilling and relaxing.
Likes
15
Share
@Uwish
Follow
Hello guys, Here I am again to present you a new run, still with the best leds of the market nevertheless as I changed my growing space from 120x120 to 150x150. So I had to update the material inside... I will run with 3 EVO 5-150 lamps of 320W or 960W with Bluetooth dimmers. For the Hydro system, it will be the V-SYSTEM from Alienhydroponics. In fertilizers I am always with Advanced Nutrients. I work with osmosis water. Currently, 4 clones took on 4. Once the roots are ready, I will transfer the cuttings from the propagator to the V-SYSTEM. ------------------------ since the 16/08, when I transplanted the plants in the RDWC system, I noticed some points that I will mention below and correct next time. 1. The cuttings are too small, allow enough time so that I can completely fill my pots with clay balls. 2. Cut out the bottom of the pots from the cuttings. 3. 3/4 of the cuttings are touching the water, so one is late. Next time when transplanting, add more water, up to the basket in order to immerse all the plants and not to create a difference between each one, consequence now I have 3 that are ready to explode and one that will struggle behind, problem corrected today by increasing the volume of water. 4. The b-52 is a real pain in the ass in RDWC, you have to clean the 2 filters almost every day, with this new soup I'm testing without and I think I'll continue like this just with the base sensi grow A and B, as I use Root rot X, I won't use voodoo juice since all the bacteria would be killed. 5. Use of Voodoo Juice is useless if using Root Rot X which will kill the bacteria. I don't know why but when I transplanted in the RDWC, I put my set up in growth mode, except that the plants were not ready for it, moreover, I made a FIM on each. So I lost some days, these last days I went back to a ppdf of 150, now that my roots touch the water, I declare growth 0 on 22/08, I will do between 21 and 28 days of growth. And as my roots are doing well and touching the water I'll go to a PPFD of 300 ++
Likes
47
Share
_____📅 Week 5 | 📅 Day 29 - 35 | 27.05 - 02.06 ______ 27.05.25 | Day 29 🌞💧 🔸The ladies moved into the big tent on the 29th day after I had cleaned it and hung up my new lights. 🔸Grape Guava: At the beginning she looked very thin and sparse, but has developed splendidly, she tolerates the LST very well. 🔸I only work with hooks and occasionally with clips, but I've often broken branches with them so I prefer to use hooks hehe :D 01.06 | Day 34 💧 🔸 1500 ml 🔸 Sorry not the best pictures/vids this week, we are currently down with the flu again - only the bare minimum is being done 😅 _________________________________________________________________________________________ current conditions: 🌡️🔆= 24-25° 🌡️🌜= 18-19° 💨 Hum. = 65% 🔦 PPFD = 500 umol 18/6 🔦⌚DLI = ~ 32 _________________________________________________________________________________________ Equipment to use: 💡 Light: 2 x Sanlight Evo 4- 120 on 50% ⛺ 120 x120 x 180 🍯 Pots: 18 liter pot 🌱 Soil: Bio-Bizz light mix 💊 Nutrients: Advanced Nutrients 💧 Water: Tap Water 0,5 EC
Likes
4
Share
@BudBeezy
Follow
Strawberry Gorilla Auto - FastBuds Welcome to week 11 of my grow diary, which is also the last week. As predicted last week, the weather has become even warmer. The heat has now completely taken over the house, and it has also rained for a few days, causing the humidity to rise again. Unfortunately, this led to mold forming on one shoot, so I decided to take action. Normally, the plant could have stayed in place for another 1-2 weeks for my needs, but I didn't want to take any risks and harvested it in week 11. Overall, I was satisfied with the growth of the plant. Environmental conditions are unpredictable in summer and more difficult to control than in winter/spring. I was able to gain more experience with this grow and now know that I should take a break in summer from now on. I really liked the mainlining. Before, I topped above node 2 and left 4 main shoots. With 2 main shoots, it is much easier to work with and does not require as much defoliation as with 4. I will definitely use this technique again in the future. Here's some initial feedback on the Strain "Strawberry Gorilla Auto" from FastBuds and the Organic Starter Kit from Advanced Nutrients: The plant grew really well and has enormous potential. The buds were so swollen towards the end that I was amazed. The organic fertilizer from Advanced Nutrients probably also had an influence. This was my very first purely organic grow, and I think I can be satisfied with the result. I can wholeheartedly recommend the fertilizer. I will definitely use it again in future projects and will probably do a comparison grow between the mineral and organic starter kits. Avg. Temperature - 27°C Avg. Humidity - 68% Avg. VPD - 1,16kPA The lamp runs at 60% which is 356w according to the energy meter. At a distance of 20cm the plant gets around 950-1100ppfd. Thank you for following me so far. I will give you an update after it has dried. I hope you enjoyed my grow diary. If you have any questions, please feel free to ask me. See you next week ✌️ Soil: Plagron Lightmix N 180 mg/L - P 210 mg/L - K 360 mg/L Fertilizer used: Advanced Nutrients - Vodoo Juice Plus Advanced Nutrients - Iguana Juice Bloom Advanced Nutrients - Big Bud Tent: AC Infinity Cloudlab 844 Exhaust air: AC Infinity Cloudline T6 incl. activated carbon filter Lamp: Kingbrite P55 / 480w, dimmable Fan: AC Infinity Cloudray S6 Gen. 2 Controller: AC Infinity Controller 69 Pro Pots: Gronest 25L PH Pen: Bluelab Onepen
Likes
7
Share
@WeedBerry
Follow
Updated pics, smell getting stronger, for first grow looking like a decent yield without no lst or anything just tied down the leaves so the buds can get the light, only found out about what lst can do for the plant when it was too late so thats the only thing I'll change on my next grow. Thanks for the support. Without u guys I couldn't of done this. If only I could show how much I appreciate the help.
Likes
9
Share
Sie bilden schon schöne Blütenansätze und wachsen sehr gut.Die Blattläuse lassen nicht nach,jedoch erwische ich sie bevor sie sicht richtig vermehren.Sie sind teilweise schwer mit den Fingern zu erreichen.
Likes
5
Share
Very enjoyable grow, awesome cultivar, this is what I work for, my nuggets have been grown with love and dedication and the final result is a a plant that has been very thankful and she has provided me amazing sticky flower with those red hairs that I love so much, very strong cerebral buzz, sativa high definitely, makes me remember a lot sour diesel, definitely super pungent loud 🔊 aroma coming from the jars but she was stinking the grow tent when she was there, amazing strain!
Likes
32
Share
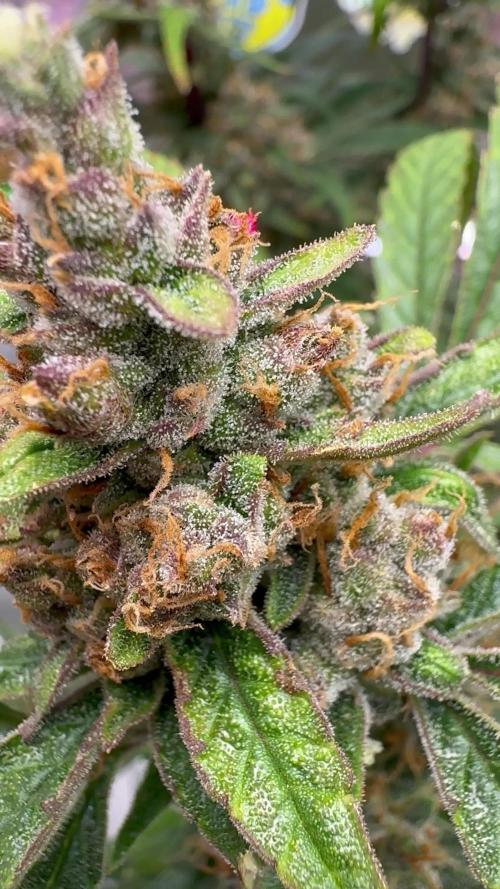
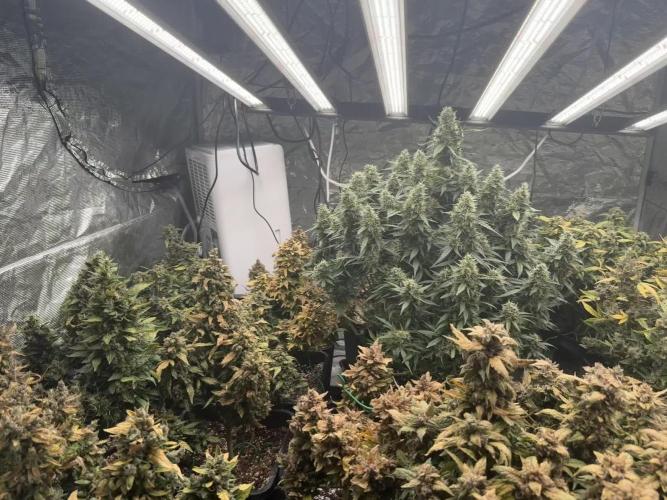
Day 107 Today marks day 107 of the grow, and the plants are looking mature and well into the flowering stage. The front plant shows a stunning display of dark green to purple hues across the fan leaves, a clear sign of late flower coloration - possibly influenced by genetics and cooler night temperatures. The buds are dense and frosty, with trichomes covering nearly every surface, giving a rich, sticky appearance. The pistils are starting to darken and curl inward, indicating that the plant is approaching its final weeks before harvest. The canopy is nicely even, suggesting that training earlier in the grow paid off well. Some lower fan leaves are showing slight discoloration and minor nutrient wear - normal at this stage as the plant redirects energy toward finishing its buds. The leaves' darker tone and slightly glossy texture suggest nutrient levels are still balanced, though it might be time to begin thinking about tapering off feeding soon and preparing for a flush.
Likes
93
Share
@Roberts
Follow
Auto Opium has filled in and is starting to look good in the course of her bulking. She has about 2 weeks left roughly. She has endured some light burn or bleaching on the upper leaves. Everything is looking really good. She is starting to develop her smell. As it is becoming more every day. She will likely go to ph water around the next update time. Thank you Medic Grow, and Divine Seeds. 🤜🏻🤛🏻🌱🌱🌱 Thank you grow diaries community for the 👇likes👇, follows, comments, and subscriptions on my YouTube channel👇. ❄️🌱🍻 Happy Growing 🌱🌱🌱 https://youtube.com/channel/UCAhN7yRzWLpcaRHhMIQ7X4g
Likes
4
Share
She is shaping up nicely. Buds are coming in really good. I pulled a few of her branches down to let a little more light thru. Tricomes are coming in good as well. I think she is going to be a good one 👍!!!! Her buds have doubled in the last few days and the tricomes really started kicking in. She is taking shape very well. Super happy with 420 Fast Buds!! Will definitely be growing again
Likes
5
Share
I'm doing an organic soil grow using Purple Cow Organics for the substrate. For germination and seedling phase, I'm using their Seed Starter mix. Once they are ready to focus on vegetative growth, I will transplant them into 5 gallon fabric AutoPots using Purple Cow's Indicanja soil. This is a "water only" soil that I will be attempting to use without feeding much additional nutrients, except for Bloom City Cal-Mag, since I will be using RO water. My tent has CO2 enrichment, so I will be using ~25% higher DLI levels starting at week 2 or 3 than are typical for photoperiod grows. I will adjust as necessary based on how the plants react. #2 and #3 emerged from soil after 2 days (August 22). #1 and 4 took two extra days to be fully emerged with open cotyledons (August 24). During germination, I had VPD set to 0.5 kPa. PPFD was 200 and DLI was around 13, with an 18 hour light cycle. CO2 levels are between 1000-1400 ppm. I included a video showing and explaining my AutoPot and AirDome setup and my general plans for this first grow.
Likes
2
Share
@dwotTV
Follow
Moving into early flower and stretching out.
Processing
Likes
39
Share
👉The plant was 11" tall. it probably would have been 12 or more if not FIM'd. It almost doubled in its overall size and total vegetation. The FIM has all the secondary branches poking out from under the large fan leaves. I do a little tucking to help them soak up the rays. I may not have FIM'd low enough or something because the leaves that were the outside of the growth node I snipped have gotten big. They just look like they have no tips. I think I ended up with the desired FIM goal of 4 new growth tips that will be cola's. 👉I will assist the branches get maximum access to light by rotating the pot frequently, I will also either support or direct them with bamboo steaks that I will attach to the metal spikes that are attached to the hoop ground the base of the pot. Its just the top of a tomato cage turned upside down with the top hoop around the base of the pot. It fits it snugly and doesn't slip. This allows me to attach the support steaks to the outside of the pot instead of inside in the media. I didn't like having the plant inside a cage or with sticks in the way when its small. It allows me easy access to the plant, and an easy way to add the support when the plant needs it as it get bigger. 👉I switched to week 4 nutrients this week and will probably be a week behind the timeline of the nutrient chart from GH because the plant had a slow start. The pH is always targeted to 5.9, the EC for a batch is 1.54. I have learned enough in the short time Im growing to understand what each nutrient week batch can do for the plant and am fairly confident I can judge the plants growing stage to match it. The 4th week is called transition and I believe thats accurate for my plant. it hasn't declared as of today, but I am anticipating that this coming week some time. 👉The runoff has been very consistent and I only added the low EC rinse of 1.5 liter one time. I always immediately follow a low ec feeding with a regular batch of nutrient. The last two days the run-off volume has started to lessen and the EC staying only 20EC above the inflow. Ive been averaging .75l for total run-off volume following a 1.5l fertigation. Tonight's run-off was .5l and 1.74EC. The lower run-off is due to the plant having more roots and being able to drink more of the moisture. when the run-off drops below 20% of the inflow volume I will increase the total volume in 1/4l increments.
Likes
10
Share
@barlobruz
Follow
09/08/2021 - Fly traps collected a plethora of gnats - Had to till the first few inches of the soil while top dressing, as it was incredibly hard and dry - Fertilized with Gaia Green Power Bloom + EWC + insect frass - Carefully watered with a half gallon tea of DIY kelp extract, molasses, LAB and neem extract