The Grow Awards 2026 🏆 


Likes
75
Share
@Sider79
Follow
Starting to smell sweet again ,straight distilled H2O maybe there last drink. Purple Lemonade was a big girl with no sign of stopping she would had foxtailed another flush


Likes
4
Share
@MistaOC
Follow
**************
13.03. Day 1
**************
🤞🏼😎
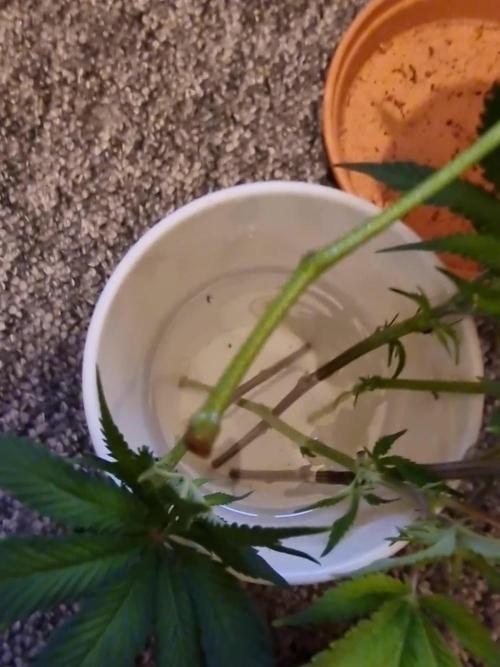
I have new cuttings. Sour Frootz from Karma Genetics. I planted the cuttings in 0.2 L pots. I only applied fertilizer to the large pot.
So Let’s grow again 💚💯
*******************************************
18.03. Day 6
sprinkled with bactrex and transferred into the large pots
*******************************************


Likes
55
Share
@Hempface86
Follow
Day 79 and she keeps getting fatter stinkier and heavier and I couldn't be happier.. for such a little girl she's a little beast.. all golf ball size nugs... Very impressed with how much can be produced with such little dirt.. Divine seeds big shout out to you guys and good luck to everybody else in the competition and to everyone else I have plenty to come as I just sewed four seeds this morning and have a diary that I erased coming back as the plant did a 360.. happy growing and God bless

Likes
Comments
Share
@LittleBigTrees
Follow
Defoliated this week, they don't seem to bothered. 😅 maybe they didn't even notice.
I will give them a week then Defoliated again if necessary.

Likes
4
Share
@Osavv_OTGUK
Follow
Again thank you so much to barneys farm for letting me grow there seeds


Likes
5
Share
@thenotillwizard
Follow
This strain is very heterozygous. 4 seeds were started. The 4 phenos were very different. I saved 2 of those phenos for my arsenal, which is quite exceptionnal. I ususally save just one pheno from a strain.
The Pheno #1 was mainly sativa (75%). Long branches. Lots of fluffy buds. The more resistant to mold, but it has to be with the fluffiness.
The taste was cheesy and spicy, which has nothing to see with the 3 other phenos. Not a single ressemblance with ak-47 parents as well.
It shares the musky undertones of the strain, but nothing else.
That pheno is gone. Not enough potential. Terpene profile was deceiving, just as the cannabinoid content.
The Pheno #2 has more indica in it (45% indica). robust and tall plant with dense heavy buds. No mold resistance at all. Biggest producer.
The taste was earthy and musky with hints of wood.
That pheno is gone. Not enough potential.
The Pheno #3 is my favorite one. It reminded me of the good old Ak-47, with her flowery/sweet/skunky smell and taste. Pure nostalgia!
Tall and quite robust plant with huge fluffy buds coated with trichomes. She grows pretty similar to Lemon Skunk if you know the reference. Great producer of top quality buds. So sticky! In my top 3 sativa for 2 years.
The aroma is very close to the old school Ak-47: sweet, flowery and skunky.
It tastes like sweet lemon on the inhale, with a sharp touch of spicy lavender and earth on the exhale.
IMO, that is the pheno we want to save from that heterozygous strain.
Backcrossing this one would be a very good idea.
The Pheno #4 is just as interesting as my favorite #3. The only issue with this one is about mold resistance.
Crazy compact and heavy budst! One of the most productive I’ve ever seen too. More traits of the Ak-47 in the aromatic profile, but nothing like the #3.
On the structure side, we can immediately recognize the sturdy and bushy structure of Ak-47.
THC content is very high too. I suspect the CBD content to be high as well.
The effect is a mood elevation, with good focus and a deep body relaxation; a bit similar to what White widow does.
The aroma is earthy and pungent. Very skunky and musky.
It tastes very sweet and earthy on the inhale, with hints of skunk on the exhale.
That pheno #4 expresses the best traits of the Ak-47 in its structure, while pheno #3 kept the aromatic profile.

Likes
32
Share
@Hawkbo
Follow
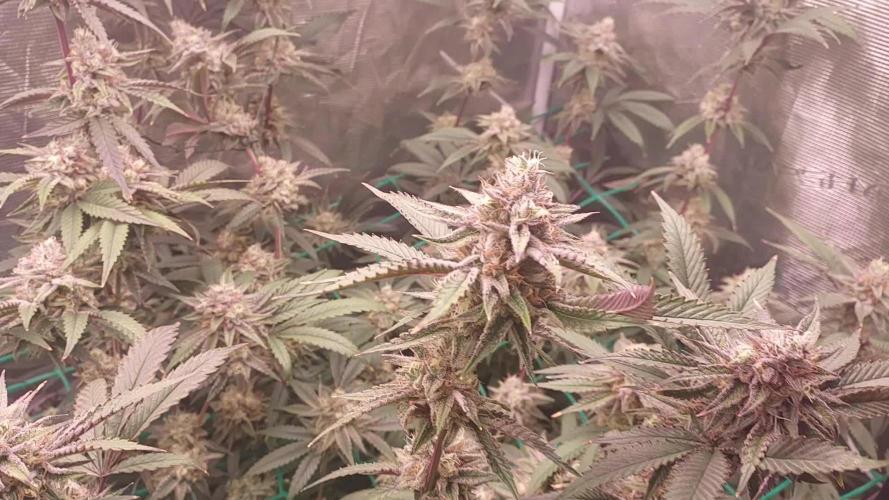
Harvested one last night on 6.17 the other got last watering today. The nugs are real solid I like the purple tint and the smell is strong.These came out much better compared to my last ones.


Likes
8
Share
@Chubbs
Follow
420Fastbuds-Week9
Strain:FBT2312
What up grow fam. Weekly update for these gorgeous girls. They're definitely getting close to being done and getting the chop. I did a defoliation this week to allow the light down to the lower bud sites. All in all Happy Growing.
Likes
32
Share
@Mrs_Larimar
Follow
Monday, March 1st.
What should I say, than iam getting used to that small Pots
I filled some Clay Granules on the Surface of the Eggcups ( Sheeps)
That helps me keep them happy
The autoflower is performing well.
Nice Flowers appear everywhere, and she looks quite happy


Likes
14
Share
@Dunk_Junk
Follow
She grew 10cm this week!
Next week I'm going to change the HID bulb I use in the tent. Currently it's quite a red spectrum. I'm going to swap it to a more blue/daylight 1000w item.
Likes
4
Share
@GERGrowDesigns
Follow
Welcome to Flower Week 4 of Sweet Seeds Strawberry Cola Sherbet F1
I'm excited to share my grow journey with you from my
Sweet Seeds Project . It's going to be an incredible ride, full of learning, growing, and connecting with fellow growers from all around the world!
For this Project , I’ve chosen the Feminized Photo strain Strawberry Cola Sherbet F1 :
Here’s what I’m working with:
• 🌱 Tent: 120x60x80
• 🧑🌾 Breeder Company: Sweet Seeds
• 💧 Humidity Range: 50
• ⏳ Flowering Time: 7weeks
• Strain Info: 18-22%THC
• 🌡️ Temperature: 26
• 🍵 Pot Size: 16
• Nutrient Brand: Narcos
• ⚡ Lights : 600W x 2
A huge thank you to Sweet Seeds for allowing me to try my Best with this amazing collection from Photo Strains they managed to Sponsore . Big thanks for supporting the grower community worldwide! Your genetics and passion speak for themselves!
I would truly appreciate every bit of feedback, help, questions, or discussions – and of course, your likes and interactions mean the world to me as I try to stand out in this exciting competition!
Let’s grow together – and don’t forget to stop by again to see the latest updates!
Happy growing!
Stay lifted and stay curious!
Peace & Buds!

Likes
7
Share
@Isle_of_dank
Follow
Start of week 2flower buds forming nicely will update at end of week
Updated 4th July 2020 really bouncing back after pH corrected
Likes
5
Share
@Staffedition
Follow
Очень хороший сорт, не грузяший, держит на позитиве. Хочу заметить при приобладании больше% индики в сон не клонит.
Так же хочу заметить приятный аромат который не похож на другие! Приятное послевкусье. сильно не сушит. Привыкания не вызывает.
Likes
8
Share
@Canna96
Follow
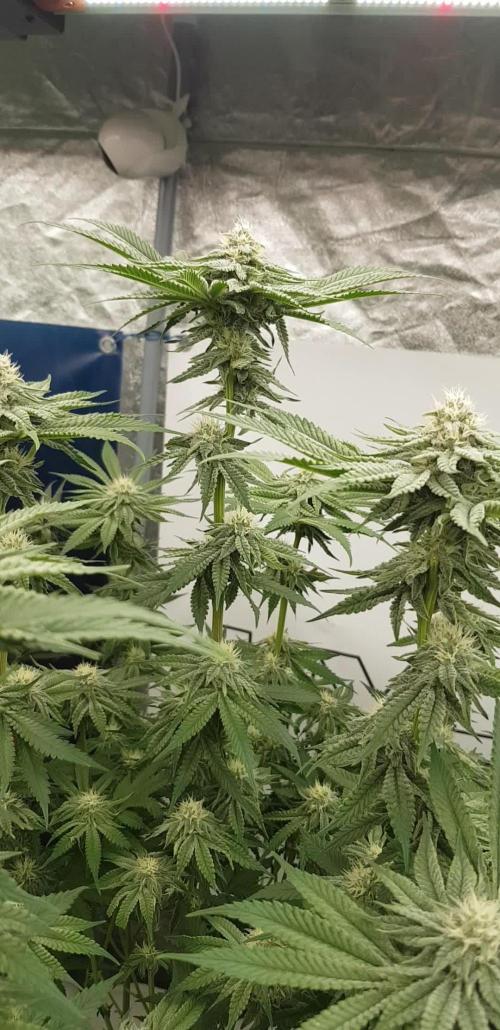
Hey now, I hope everyone is having a great weekend. This was a good week for the Purple Punch, she really started to stretch and grew 14 inches in the last 7 days. I did start transitioning her from veg to flower nutrients yesterday. She is now feeding on Silica, Cal Mag, and 50/50 veg and flower nutrients.
She has 3 shoots coming off some nodes and only one coming off other nodes. This is the first genetically mutated cannabis plant that I have grown so we will see what happens.
The Medic grow light is now running at 100% in F1 Flower mode and I am also integrating the UV/IR bar for approximately 90 minutes per day just before lights off. I will continue to transition her to flower nutrients over the week and by next week at this time all three ladies will be feeding from the same reservoir with Silica, Cal Mag, Maxi Bloom, and Liquid Kool Bloom which is a PK booster. I keep the PH in the reservoir between 5.5 and 6.5 and prefer fluctuations between this range as some nutrients uptake better at different PH's within this range.
I will probably do one last light defoliation in the next couple of days and that will be about it other than keeping the reservoir full and in the correct PH range. The tomatoes outside are absolutely loving the runoff from these autos, as that is all they have had to drink since they were about 3 weeks old.
Thanks for stopping by, Stay Safe and Blaze On!!! 💪
Website: https://medicgrow.com/
https://growdiaries.com/grower/medicgrowled
Likes
9
Share
@BLAZED
Follow
Week 11 (26-8 to 1-9)
26-8
Temps: 20.5 to 26.1 degrees
Humidity: 50% to 56%
27-8
Temps: 20.7 to 27.3 degrees
Humidity: 50% to 56%
Watering: Both 1500 ml. (Only Calcium) EC: 0.4 PH: 5.6
Defoliated both plants
Dry Weight: Both 2.6 kg.
28-8
Temps: 21.5 to 28 degrees
Humidity: 51% to 56%
29-8
Temps: 23.3 to 27.4 degrees
Humidity: 55% to 62%
30-8
Temps: 19.9 to 27.7 degrees
Humidity: 50% to 60%
31-8
Temps: 20.2 to 26.6 degrees
Humidity: 50% to 55%
1-9
Temps: 21.1 to 29.1 degrees
Humidity: 49% to 55%
Watering: Both 1000 ml. EC: 1.4 PH: 5.6
Dry Weight #1: 2.5 kg. #2: 2.3 kg.
Recalibrated my PH pen and it was only 0.1 off, so i dont think the leaf problems are PH related.

Likes
38
Share
@Danger90946
Follow
01/04/2022- Hello and welcome all been away on some family matter. So today was the last day this girl got watered and will also be the last day she got light as well, she will be cut down Friday morning. The smell has gotten a lot more stronger since flush was started last week Wednesday. Will update before I chop her down.
