
Likes
Comments
Share


Likes
17
Share


@Dunk_Junk
Follow
Wow she shot up this week! grew 31cm!
Also she looks like she has just entered flowering!
I wonder how long this haze takes to flower. Her leaves are quite broad and indica like. 😔

Processing
Likes
Comments
Share


@SGCFarms
Follow
Day 12, more and more flowers appearing everyday. Still looking healthy, but might have made her too big for her container. She’s drinking 3 gallons or more a day at this point.

Likes
9
Share


@Ryno1990
Follow
Wedding glue from @fastbuds is flowering along nice an stacking up the trichromes as the gelato from @herbies is comming along a little slower as i feel like the gelato has a longer veg cycle by a week or 2 but shes comming along beautiful just like last time i grew her


Likes
180
Share


@SlowpokeFuegobud
Follow
DAY 84
Watered with 1ml Grow + 4ml Bloom 💧
DAY 86
Watered with 0,5ml Grow + 3ml Bloom + enzymes 💧
I don't know, today she looks wayyyy more ready, I need to check trichomes, keep you updated!! 😘
DAY 88
Watered with BioEnhancer. 🐚 🐡 🌊
DAY 90
Watered with pH adjusted water only. 💧
Checked trichomes, they look ok, mostly cloudy, maybe some are like milk-coffee.. I asked Delicious and they said it's a Sativa, few more days and then I'm done. 😎
I wish I could invite everyone to test smoke this, it is something completely new, the aroma is more than I ever expected to come out of a cannabis plant. And being a cannabis plant is awesome already on its own! So.. I think chop chop next week! 🔪
This is an Early Version for sure! Flowering went so fast and I want to grow it again! I understand the seeds will not have as much time to ripen as with a 8 weeks flowering mum, but they can sprout. I will order more next time. And also will order the photoperiodic normal version, Caramelo, I love you! 😍
💚 🤤 💚 🤤 💚 🤤 💚 🤤 💚 🤤 💚 🤤
Have a great week!! 😘
__________________________________________________
SET UP
240W Fullspectrum LED 660nm 730nm 3500K dimmable
custom exhaust fan 270/320 m³/h
3x Garden High Pro fans 5W
tap water EC 0,25 - adding Calmag to EC 0,4-0,6 - adding pH minus Bloom (AHH) to pH 6,5


Likes
12
Share


@Gardens_of_Of
Follow
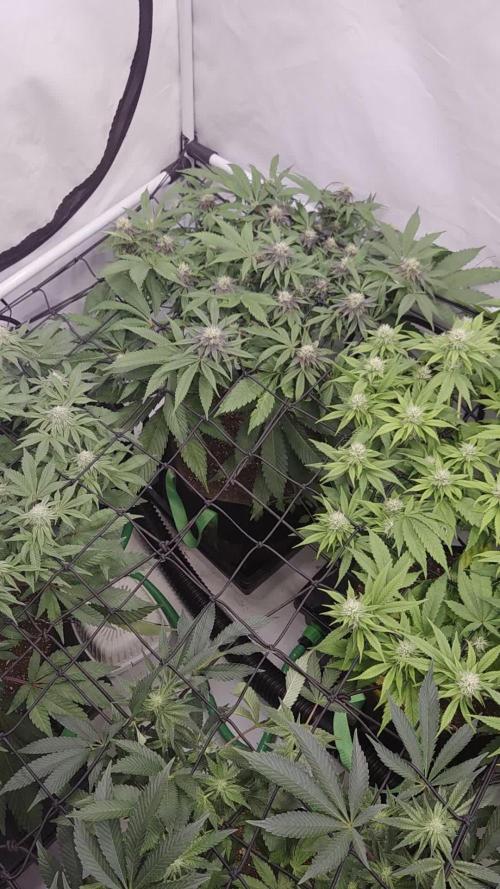
- VPD fluctuated this week between 1,0 and 1.50 kPa, averaging at 1,35 kPa.
- Tent temperature fluctuated around 24 at night and 28 Celsius at day time, averaging at 25.9. Slightly higher than last week.
- Humidity spiked a lot beginning of the week and stabilized towards the end, averaging at 59.6 which is worse than the last week.
- I am still giving standard 6.4 Ph Water.
- Frosting slowed down but the flowers keep getting bigger. Trichomes are filling up. Some amber ones appear (%5). I am guessing we have one more week for harvest.
- Stickiness and smell are difficult to describe. Just beautiful…
Likes
12
Share


@GrowGuy97
Follow
Day 14 - 3 out of 5 are growing a little slow/weird, all 5 seem to be growing kinda slow compared to my first run of autos but hopefully everything does good🤞🏼 Happy growing friends🌱✌️🏼
Day 17 - Still have 2 extremely weird looking ones, really hoping they bounce back🙏🏼🤞🏼
Day 18 - 3 out of 5 still going strong, the other 2 havnt changed much!


Likes
83
Share


@MrJones
Follow
mrjones Gorilla Cookies === IN TENT DRYING PLEASE CHECK BACK IN A FEW WEEKS!===
🔹🔹🔹🔹🔹🔹WEEKLY GOALS🔹🔹🔹🔹🔹🔹
PREHARVEST REPORT
🍃 Harvested 5 Gorilla Cookies from FastBuds today, the Buds looked amazing and put about 1500 grams into the Drying Tent!
🔹🔹🔹🔹🔹🔹🔹🔹🔹🔹🔹🔹🔹🔹🔹🔹🔹🔹
Rambling - Going to be shooting for a week to 10 days, the dry tent variables will be 55/60% RD and 65F Light Air Movement.
🔹🔹🔹🔹🔹🔹🔹🔹🔹🔹🔹🔹🔹🔹🔹🔹🔹🔹
▶️Saturday 02.06.21 / Harvested today these buds are sticky, sweet, and just beautiful!
🔹🔹🔹🔹🔹🔹🔹🔹🔹🔹🔹🔹🔹🔹🔹🔹🔹🔹
SOIL MIX
COCO - 70/30% Tupur Royal Gold 30 GALLON
WORM CASTINGS 5 GALLON
LOBSTER COMPOST 5 GALLON
PERLITE 6 GALLON
INSECT FRASS 2 CUP
ORGANICALLY DONE GROW 5 CUPS
BUILD A SOIL COCO MINERAL MIX 6 CUPS
Likes
22
Share


@pauronxd
Follow
Day 9 height 8cm
Day 10 400ml water 6,0 PH + 0,75ml/L vodoo juice
Day 12 450ml water 6,0 PH + 1ml/L vodoo juice + 1ml/L Bio Grow
Day 14 450ml water 6,0 PH
Day 14 height 12cm
Likes
10
Share


@PEAKYPLANTERS
Follow
Hi guys, what's up
I had set up this very small tent to test my gardening skills but I have to admit that even on this occasion I outdid myself .. the rest I leave to you to judge

Processing
Likes
5
Share


@Rushif90
Follow
Catching up to the Alaskan purple now very bushy have had to tuck and trim quite a few leaves this week by the next morning it’s always twice as full started getting buds this week just the first hairs but right on track the bud blood and igniter work well for helping in transition 2 feeds per week now


Processing
Likes
4
Share


Likes
25
Share


@BudGardener420
Follow
Week 2
This week I put a humidifier in the tent for a few days. Without it the humidity is around 42-49%, with it it is around 55%. I don't know if this makes sense.. Maybe one of you has some advice for me, thanks in advance.
I noticed that the leaves were slowly starting to curl up at the edges. I then did some research and hung the lamp higher, about 120cm above the leaf tips and reduced the power from 50% to 40%. I hope that I have solved the problem. So far I think the leaves of the plants look better.
I watered every ~ two days - without draining - and since yesterday the water quantity has been 1.5L per plant divided into 3x0.5l watering units (water, wait 30min to 1h, water again, wait, etc.). I added 6ml of CalMag to 3 liters of osmosis water.
I put the last Biobizz tab into the soil and filled the pot with some more soil.
Music 🙏👇
Song: sumu - apart [NCS Release]
Music provided by NoCopyrightSounds
Free Download/Stream: http://ncs.io/apart
Watch: http://ncs.lnk.to/apartAT/youtube

Likes
31
Share


@The_Bearded_Grower
Follow
Welcome to 📅 Day 22 of veg 4/5/2021 and boy am I happy with the growth on the girl under the MH TS1000 she is growing fast and strong and that's just what I want to see later today I will be mixing a new batch of nutes but that's about it
Update 📅 Day 25 of veg 4/8/2021 she is still growing very fast under the TS 1000. I have done some more LST as she grows. I have noticed some problems in the leaves but it is very little and I hope it will not get worse only time will tell. Happy growing and keep your stick on the ice 🏒
Likes
18
Share


@rhodes68
Follow
9/8 D65 Seems our "good" weather is ending and if the forecast is correct for the next three days, only three of the last ten were sunny.
That aint good folks not sure what can be done about it outside of artificial light and that would go on the ATF if any were available.
Ah well learning is fun
She looks good just needs some blasted sun
Zombie is thriving, go figure
Full feed yesterday
9/10 Sunless days continue, maybe two hours sun today then the rain moved in and the temp dropped... global warming my arse
The forecasts were correct now I can only hope that continues as it is forecast for much better the next 2 days and then right back to this mess.
9/11 Yep today was a big improvement glad to have it
9/13 Day 70
New vids, top dressing seems to have triggered a new run of bud building on both Gloria and zombie Quasimodo (cant kill some of these Mex Air plants). The moster crop growth pattern is interesting as hell just letting it grow. Gloria looks to be building a basketball bud on top :)
Weather degrading harvest in a couple weeks max trics say same