


Likes
Comments
Share


@603grower
Follow
The girls got their mid flower feeding gave each box about a half cup of Gia green bloom and a few tablespoons of terp, tea bloom, as well as 3 cups of build a flower top dress watered in with recharge and a little bit of Neptunes harvest.
The girls are starting to throw some sense getting some fruity terps could just be the runts layer cake I have in the back she’s so strong but the girls are growing. I’m gonna do a tea tomorrow and then sit back and watch these girls stack.

Likes
3
Share

@GoodTimesOrganics
Follow
Hi liebe Community and Welcome Back! 🌿💚
Permanent Marker von Seed Junky Genetics x Doja Exklusiv!
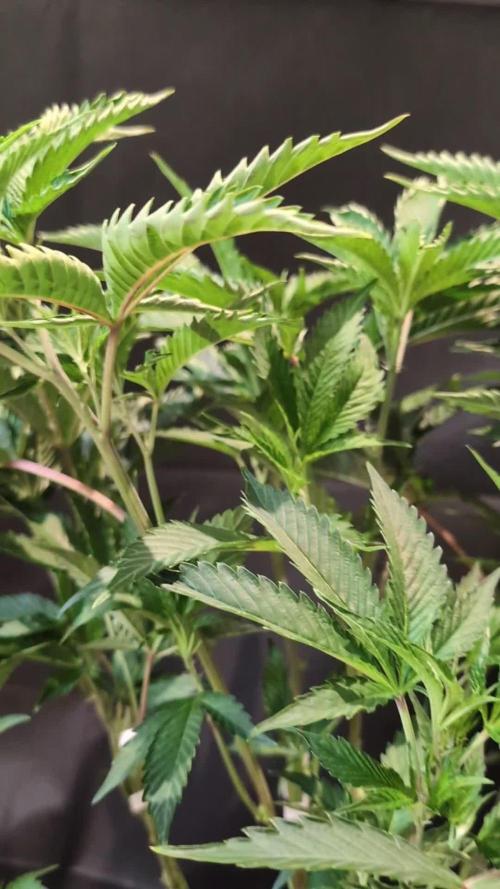
Wir befinden uns in Wachstumswoche 6 seit dem Eintopfen (Tag 36).
Sie hat nun 15 cm in einer Woche zugelegt und ich habe einen der Triebe getoppt um die Pflanze schön in die Breite zu fächern.
Die Triebe entwickeln sich super.
Die Pflanze legt eine top Performance hin.
Gegrowt wird wie immer rein Organisch!
Die Bedingungen für einen Steckling, bis er gut angewachsen ist sind gerade Top:
—————
🌞 Temp: 26
🌚 Temp: 18°C bis 19°C
💨 RH: 64%
VPD: 1,1 kPa
💡ppfd: 330 mpm
—————

Processing
Likes
5
Share


@Ninefold
Follow
Same as week 15, missing a lot of pictures in the timelapse :(.

Likes
45
Share


Likes
9
Share


@JoeyGonz
Follow
Seems their all adapting pretty well.. Black Sugar and Gelato moving slow but still moving. Other two seem to be moving little quicker.

Likes
9
Share


@bigolebuds
Follow
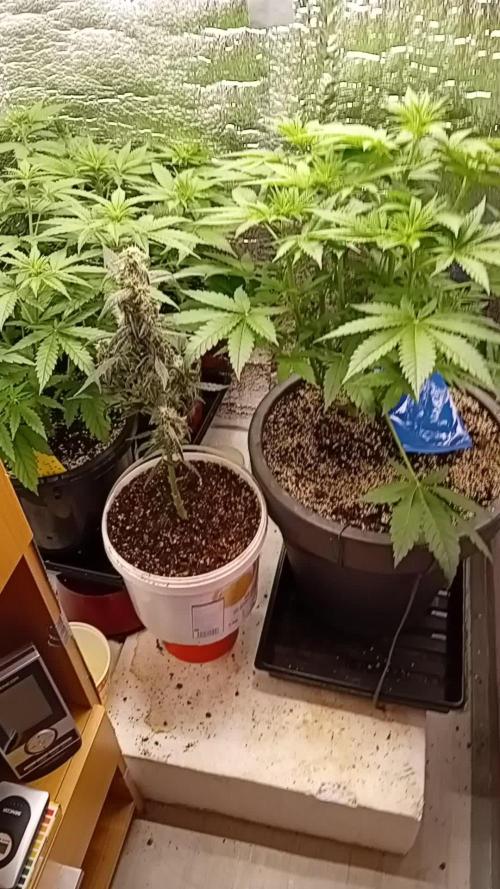
Week 5 (11/30 - 12/6): Things are getting excitingggggggg!! I had to get some gloves because the buds are getting sticky -icky -ickyyyyy. I mean over these two weeks you wouldn't even recognize this tent. The flowers have really packed on some size and the smell is increasing by the day. It feels like we are coasting and just need to keep things watered at this point, but we have our lights up as high as they can go, so we are hoping we don't get too much more of a stretch from the plants. Next week will be our last topdress for these plants with our Gaia Green 2-8-4, and from there we will have about 4/6 more waterings with our terp tea and we will be just about done with our feeding schedule.
We are considering another layer of trellis, and we had to upgrade our PH pen AGAIN.. so to all new growers, don't waist the money, get the Blue Lab from the start and take good care of it. We learned our lesson with $20. Otherwise, I don't have much to say other than stand by for some big ole harvests coming your way.
Check out our before and after pics!

Likes
4
Share
@Canda
Follow
Holkám se daří dobře, vypadají zdravé a vitální, co se týče stretch,. tak vystrelili ze do 300% moc nechybi
Guano odvádí spolecne s vodou dobrou práci a v jidelnicku mame kdyztak biobizz bloom ,jestli bude potřeba tak uvidíme. .jedna z holek ukázala lehce bile spicky listu ale nesiri se to, nemění to barvu tak mam zato ze jde o projev toho ze substrat je nabitéj a chce jenom vodu ..uvidime jak to pujde dal ...
At vám to roste Hombres..Dasvidáňa :D

Likes
22
Share


@soloczek
Follow
Smells very fruity and Sweet. Very dense trichomes. Very dark and frosty buds

Likes
32
Share


@Cultivatelove21
Follow
Ah it has come to an end! A grow for the books for sure! Coming in at 5lbs 3.8oz wet bud, this lady went above and beyond! I cannot say enough good things about this grow, genetics and strain, and will be growing another from her seed packet in a couple cycles! Cultivate love my friends! ✌️🏻

Likes
29
Share

@Greenkush420
Follow
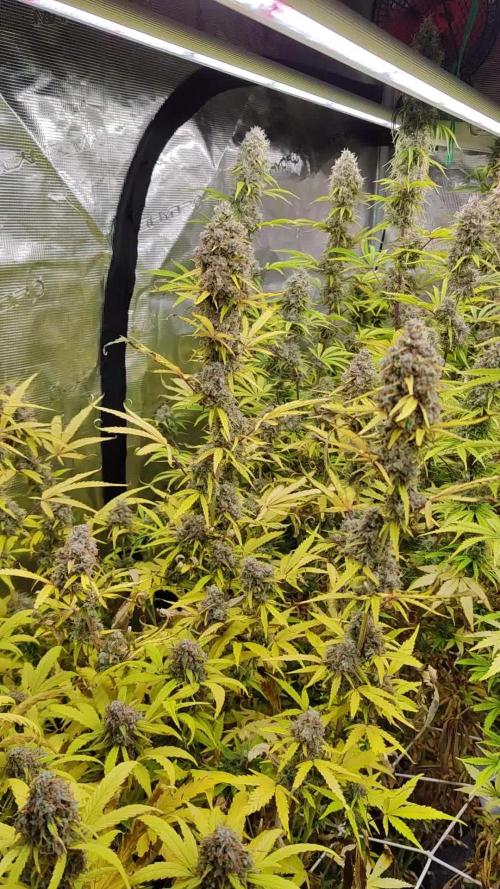
Cosechamos la blue mazar, cogollos muy resinosos y un gran olor, y también muy compactos, esperando que se seque para probarla y ver qué cantidad de gramos hemos sacado


Likes
16
Share


@Chocolopeison
Follow
Comenzando la semana 4 de floración y a las nenas le dimos una bienvenida para que comiencen de lleno esta fase de engorde.
Estos día bajamos a 2 riegos por día. Normalmente hacemos 3. Ya a mitad de semana volveremos a los 3 riegos.
A las nenas le sacamos prácticamente toda las hojas de abanico, ahora tenemos muchísima más penetración en la planta. Quizás tengamos problemas de altura pero ya estamos buscando la manera de resolverlo.


Likes
65
Share


@MadeInGermany
Follow
Hey guys :-) .
Today the plant was sprayed again with neem oil.
There weren't any more trips to be seen after the second application, but to be on the safe side, you did it again today get a cure.
That's why the beautiful dark shimmer on the leaves :-).
She has developed very well this week.
I will give you 7-10 days before I switch to flowering.
This week it was poured 3 times with 1 l each (nutrients see table above)
I will tie the Dr Grinspoon down again with LST and apply topping because it will be damn big 😂.
Otherwise everything was cleaned and, as always, everything was checked.
Have fun with the update and stay healthy 🙏🏻
👇🏼👇🏼👇🏼👇🏼👇🏼👇🏼👇🏼👇🏼👇🏼👇🏼👇🏼👇🏼
You can buy this Nutrients at :
https://greenbuzzliquids.com/en/shop/
With the discount code: Made_in_Germany you get a discount of 15% on all products from an order value of 100 euros.
👇🏼👇🏼👇🏼👇🏼👇🏼👇🏼👇🏼👇🏼👇🏼👇🏼👇🏼👇🏼
You can buy this strain at :
https://www.barneysfarm.com/dr-grinspoon-5
Water 💧 💧💧
Osmosis water mixed with normal water (24 hours stale that the chlorine evaporates) to 0.2 EC. Add Cal / Mag to 0.4 Ec Ph with Organic Ph - to 5.8 - 6.4
MadeInGermany
Likes
24
Share


@deadstockgenetics
Follow
10.29 day one, flipped to 12-12, I’m gunna run this first week with my MH then next week HPS!
10.30 might feed flower nutes later at night if I stay up, if not in the morning
Likes
13
Share


@Robeeriegenetics
Follow
I’m using gh maxi gro but it don’t exist any more so I’ll put as the company who took them overs equiv
Processing
Likes
5
Share


@EUPHORIC
Follow
Plants are really taking off now and i decided to switch 12/12 yesterday. They have been super-cropped in the final veg week. Knuckles are forming on the stems as the lower nodes spurt upwards, cannabis is known for stretching most shortly after the switch. Most strains will remain growing a few weeks more before actual P-K uptake.
Likes
40
Share


@Ukfarmer420
Follow
Hi guys
This week we done some lst on the potnoodles, the wifey got a extra node from the bottom, while my plant developed aids lol all fun tho,
I got 2 x cheese autos 2 stardawg autos and another blueberry auto in there, all from fastbuds so should be a full room I the next 10 weeks.
Happy growing guys

Likes
10
Share


@Cultiprospain
Follow
Entra en el último mes de floracion y solo le queda madurar y el último engorde de cogollos al final se pudo parar la sobrefertilizacion pero a causa de eso se quedó casi sin ojas , veremos si merma la producion fina...

Likes
15
Share


@tokesly
Follow
Spent eternity trimming! So this is why people call it trim jail.
Yield:
TM1: 205g Dry | 61g trim - Best growth and color, 7.2 oz yielder!
TM2: 177.5g dry | 72.5g trim - Frosty and colorful fruity
TM3: 154g dry | 67.2g trim - Even frostier than TM2 but no color more gas
TM4: 71g dry | 33.6g trim - Super larfy, still decent taste
TM5: 65.3g dry | 19.3g trim - Best Flavor, super gas and sweet
Total: 672.8g dry (23.8 oz) | 253.6g trim (9 oz)
Flavor is a gassy guava candy with sweet cake after tones. Frost and color is up there, structure is lacking in cola formation. There's a lot more popcorn nugs than hoped for. Definitely due to poor defoliation, lack of scrog, and late PK. Also
Besides that, a 672.8g yield would be ~1g/watt - an ideal goal for any starting growers


Likes
3
Share

@Daw33d41
Follow
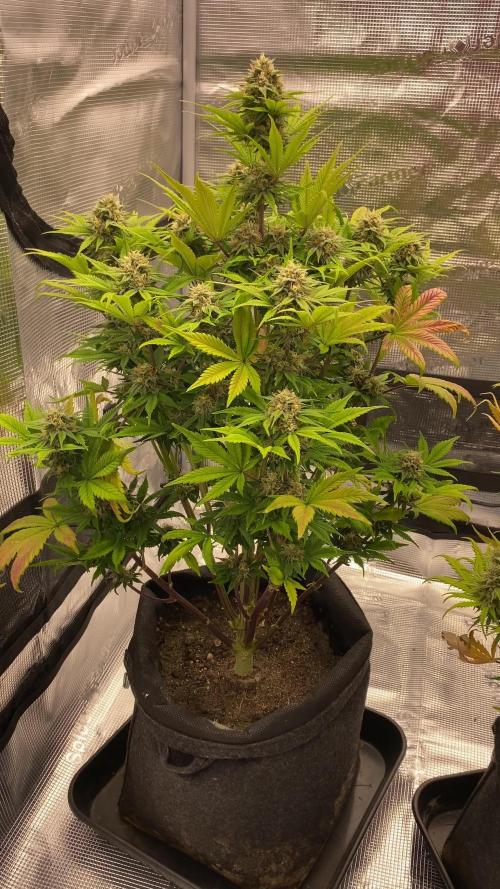
🇺🇸 Week 5 of flower. Getting close to the finish line. Buds have bulked up nicely, tons of sugar everywhere and a strong smell coming through. Had a few days where I couldn’t get temps below 28–29 °C, and I think that caused quite a bit of yellowing on the leaves.
Also added some NPK (Top Dress by Lurpe) because of the purple stems.
Trichomes are around 60% milky, no amber yet. Not rushing it.
🇨🇿 Pátý týden květu. Pomalu jdeme do finále. Palice pěkně nabraly na objemu, všude hromada cukru a výrazná vůně. Pár dní jsem bojoval s teplotou, nešla dostat pod 28–29 °C a podle mě to odnesla spousta listů, které zežloutly. Ty které šly nenásilně rukou jsou pryč. Přidal jsem taky NPK (Top Dress od Lurpe) kvůli fialovým stonkům. Trichomy jsou zhruba z 60 % milky, amber zatím nikde. Nikam nespěchám.

Likes
60
Share


@m0use
Follow
The time has come! Flowering has been initiated and is off to a good start,
The Photoperiod is now running at 11/13 on/off and the intensity of the light has been bumped up to 60% giving me a DLI of aorund 37.5 at 30" hang height in my 2x4.
As the plants where topped a bunch I have found in previous grows the stretch will not be as crazy as if I left them on their own, however the increased pot size may negate that effect, only time will tell :D I also gave them a 2nd watering as the last one was leaving the pots a bit to light. This could be their new normal 1gal one week, 2 gal the next separated by a few days.
They have all been amended with a 50/50 mix of grow and bloom from Gaia, Also added in some extra Insect Frass, Yeast and Bokashi grains, mixed this all with worm castings and compost for the top dress. added the compost after mixing it into the top layer so it gives it a bit of a blanket. made a little video of it and me watering the plants on a speed run. One thing I need to find is a sprayer head that has a 70-90 degree bend on it. I'm tired of watering from overhead as my wand is straight and does not have a bend. Its made of hard plastic and was thinking I would toss the tip in the oven to soften it up and place a coat hanger though it, then bend it ever so slightly and wait for it to cool, can snip off the wire and pull it out once its all done and have a bent tip. or I can get a 2nd wand attachment for it. Just been so busy have not had time to search for it,
the peppers are doing much better as well, after the defoliation from last week they where getting a bit more light but that is all gone now, the plants have taken it back. and they are in shade, the plants seem to like it more. only the one strain likes the intense light of the led's, Fatalii peppers, It might be the hottest ones I'm growing if the goronong don't measure up. The JigSaw peppers are also starting to show some of their variegation in the leaves that make them pretty to grow now they are in the shade more. and its bound to be better then pure purple leaves from the LED"s Butterwort is eating all the gnats as well. so no problem there. Will apply the nematodes later next week to kill em off in the medium. Don't want them getting trapped in the flowers. stupid little fuckers.
I left out some of the extras in the water this week as it was its first topdressing, didn't want to stress it out to much, I will be topdressing every week and diving the total ammount of amendments in 4 parts. vs one big feeding at beginning of the month like its been suggested on the label, I find this helps avoid the N burn I normally see and gives them a bit better of a breakdown for flowering period. It worked really well with my G13 Labs Blue Cindy grow so I am repeating the process and will likely make this my new standard. I will also be adding in some Mg into every other water till stretch is done same with a very light feeding of molasses, I know it has been negative in past grows but going to try it out again with much smaller amounts. 1tea/pot, the extra sugars should work wonders on the Bokashi added into the soil and allow it to thrive.
Plants are starting to get more of a funk to them as well, So i feel that's what was happening with the gifted plant to my parents smelling up the place, it was just entering flowering as it was not in a tent n the lighting must have been to low. And the little cuttings I did last week are fine, no roots but will soon have a bunch of little clones to go. Just in time for spring.
I think that's it.
Big shoutout to Medic Grow for sponsoring the lighting in my tent, They have provided me with 2x Mini Sun 2's in the 240w configuration, They use the v1 growing spectrum that is a all purpose seed to harvest spectrum so their is no hassle of switching it mid grow. If you interested in learning more about Medic Grow products please visit the web link below.
https://medicgrow.com/
https://growdiaries.com/grower/MedicGrowLED
