
Likes
Comments
Share


@Elysian_gardens710
Follow
Bravo Genehtik! They did an awesome job with this strain! She has been extremely vigorous and resilient (only auto that didnt stunt from transplant) we began LST this week as she has enough spacing between nodes and strength to withstand the stress. I managed to get her main branch bent to almost 90° and exposed 90%of her branches( ones is stubbornly hiding 😡) without stopping this is the best I could do🤷♂️
She is also starting the very beginning of a stretch she is drinking a bit more and her lower stalk is hardening up.She also popped flowers, earning her a name officially! Ashoka will be this girls name from here on out!
Stats:
Vivosun 2x4 tent
1gal water pitcher
Fox farms happy frog soil
2x viparspectra 600w refractive LEDs
Durabreeze carbon filter
4" inline fan

Processing
Likes
17
Share


@Easygrower
Follow
Hello growers day 63 red poison is in the net 😁 well what can I say about this incredible strain 60 days from seed I thought was abit of an ask but what do you no it is possible lovely red/ purple colours absolutely stinks my whole house is humm dinging i had them on a 20/4 light cycle from start to finish and I used biobizz allmix soil with biobizz nutrients and didn’t have any problems I will put a smoke report up when the buds are ready so if you’re looking for a very quick strain this is defo 1 for you super easy to look after and rewards you with stinking buds 10/10 from me on speed and smell and colour 👌🏻 And a very big thanks @sweetseeds for sending the beans for me to test much appreciated and big thanks to everyone who checked out my grow hope it’s useful for someone so until next time be safe and happy growing easygrower out✌️

Likes
42
Share


@AutoCrazy
Follow
All I can say is that this thing is a beast. She likely only has a week or two left so I did one last small top dress with dry amendments as well as some ewc and super soil to top it off.
Cant wait to watch this girl really fatten up. She’s already having trouble holding up the colas.
😎🍿🍻🌱
Likes
6
Share


@GrowFOUR
Follow
This plant drank a ton of water from early veg to end of flower. Only 3 big pH swings. Should have fed less because ppm rose about 200 a day

Likes
5
Share


@CreoWeed
Follow
Last week of nuts is on the book... Plant is building up and a pretty intense smell is starts to spread all over the tent.
As said this past was the last nuts week, I pretty much increased all the nuts for the last 3 watering and starting next week shes gonna receive only plain pHed water.
I was expecting a bigger plant overall, but she's beautiful anyway and I truly love her colours.
My estimation in yield is around the 30/40 grams dry, let's see if my guess is going to be right.
That's all for this week lads... Have a great day out there and stay tuned, stay high!

Likes
Comments
Share


Likes
9
Share


@MacBrGrow
Follow
This week I start my varieties for new mothers for 2022; coming straight from the Netherlands from Neerland seeds Bank


Processing
Likes
9
Share


@HollowSource
Follow
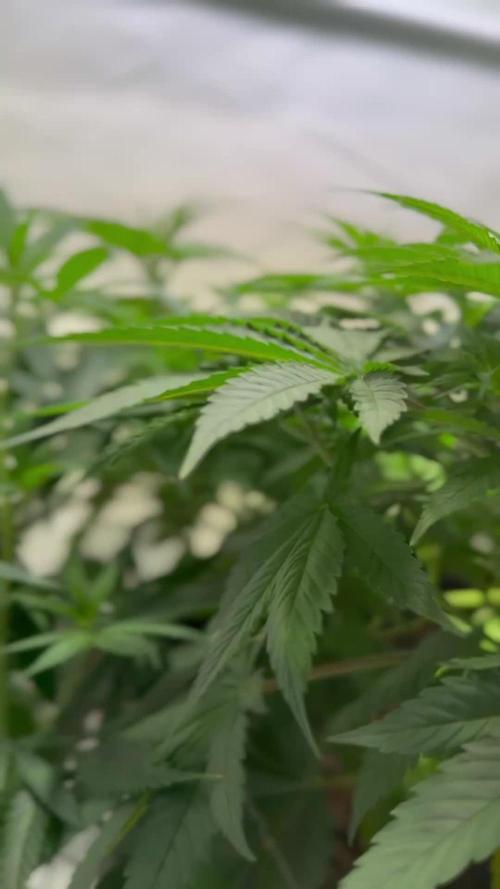
All looking good with the banner. The frost is coming and the smell is developing. She has stacked well and I think she might give the largest colas of the smaller plants. Hoping this makes up for the fact that she hardly stretched. The small plants are being raised so I can keep them close to the light. The amnesia is trying to bully them all. Been defoliating continuously with this lady. Hoping that can stop now and I can just watch her ripen up!

Likes
4
Share


@eldruida_lamota
Follow
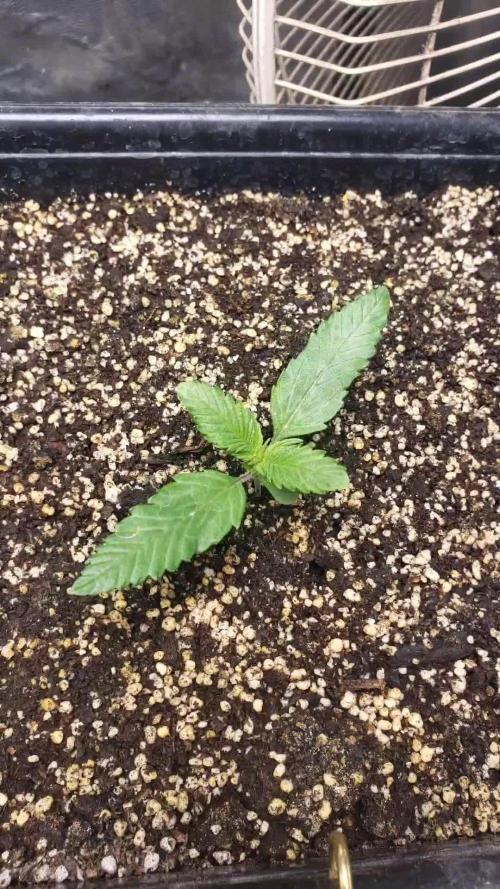
Que pasa familia, vamos con la segunda semana de vida de estas Tropicana poison F1 de Sweetseeds.
Vamos al lío , las 4 semillas que germinaron con éxito se colocaron en macetas de 0.6 litros y asomaron 4, 100% ratio germinado.
Realmente voy a necesitar 3 plantas así que retiraré la más pocha.
El ph se controla en 6.2 , la temperatura la tenemos entre 20/22 grados y la humedad ronda el 50%.
El ciclo de crecimiento puse 18h de luz, el foco está al 75% de potencia.
Hasta aquí todo, Buenos humos 💨💨💨
Likes
28
Share


@GodZilla_Owner
Follow
We are at the beginning of the 9th week of flowering. The trichomes are slowly beginning to change color.
I'm now going on vacation for 9 days, I couldn't have planned it any shittier. But anyway, I've decided to keep them growing and then probably harvest them straight after my vacation.
Likes
7
Share


@Totogrowuk
Follow
Had one week of flush and I think I’ll give her a few more days and then harvest.
Been a really easy grow and a pleasure to watch. Can’t wait to try the beautiful buds.


Likes
35
Share


@GODSGIFT_2005_JM
Follow
🍼Greenhouse Feeding BioGrow & Bio Bloom
⛺️MARSHYDRO
The ⛺️ has a small door 🚪 on the sides which is useful for mid section groom room work. 🤩
☀️ by VIPARSPECTRA (models: P2000 & XS 2000)
Likes
27
Share


@CHILLING_RACOONS
Follow
✅WEEK NOTES: 20/01 LIGHTS OFF! Some days in the dark and cold box are great to increase flavors and potency
✅ 🌱GERMINATION🌱 01/10/2023 SEED IN THE SOIL 03/10/2023
🔝 10th NOVEMBER 1st FLOWERING DAY🔝
🔝 10° FLOWERING WEEK🔝
📅20/01/2023 LIGHTS OFF 📅
💡💡💡Viparspectra xs2000 at 75% Power + QUANTUM BOARD AT 75% POWER💡💡💡
💉🔍Fertilization schedule:🔍💉
ONLY PLAIN WATER
🧐 🤓 CARAMELICIOUS DATA SHEET 🧐 🤓
• THC%:20%-24%
• Flowering Time:8-10 Weeks
• Outdoor harvest:End Of September
• Yield:400-500gr/m²
• Indica/Sativa:Indica Dominant
• Height:Medium: 100cm-180cm
• Difficulty:Easy
• Climate:Sub Tropical, Temperate, Warm
• Medical Conditions:Anxiety, Depression, PTSD
• Seed Type:Feminized
• Genetics:Maple Leaf Indica x Blue Black x Afghan Kush
• Effects:Uplifting
• Taste:Sweet , Flowery , Berry
• Terpene:Myrcene , Caryophyllene , Pinene
💸💸💸💸💸 Buy CARAMELICIOUS FEMINIZED BY MSNL: https://www.marijuana-seeds.nl/caramelicious-feminized-seeds
_____________________________________________________________________
🔧💡OUR SET UP FOR THIS GROW CYCLE💡🔧
✔️ 💲💲💲VIPARSPECTRA 🚀🚀🚀🌕🌕
ViparSpectra®️ XS2000 240W Infrared Full Spectrum LED Grow Light:
Excellent ratio between wattage and ppfd, excellent light penetraton, perfect light spectrum (it also has IR 🤩) and it has the best build quality on the market. You can touch that quality. Materials are really strong, excellent driver and the best leds on the market. Heat dissipation is perfect, the lamp is never too hot and it has a passive dissipator so you will have zero noise. It also has IP65 certification. I like that this lamp is bigger than others, so the 240w of power are well distribuited on the space. Viparspectra has an awesome customer service, and shipping was incredibly fast!
This awesome brand also offers 3 years warranty.
This lamp has no rivals.
A special thanks Viparspectra ❤️❤️❤️❤️
HERE YOU CAN BUY THIS PROFESSIONAL LIGHT: https://www.viparspectra.com/products/xs-series-xs2000 or https://amzn.to/3dyUoJl
and here you can buy other awesome stuff: https://www.viparspectra.com
💣Quantum board - 480w - 4x120w Boards
Samsung LM301B 288 led/board 3000K 0dB noise
+24led/board led Osram 660nm
Efficiency 2.6 umol/J 220 lm/w
Driver: Meanwell HLG-480H-36B
-ESTRACTION FAN:
Blauberg 125 Turbo Pro Series
Maximum air flow: 430-560 m³ / h 50W 32-44 dBA
💊💉💊FEEDINGS
TOP CROP:
-DEEPER UNDERGROUND: to stimulate roots system
-TOP VEG: for an excellent growth in the vegetative phase
-GREEN EXPLOSION: to promote creation of bud sites and to allow a faster growth
-MICRO VITA: bacterias for equilibrate the soil and to make the plant healty
-BIG ONE: to stimulate bud sites and to stimulate resin production
-TOP BLOOM: to achieve excellent big and hard buds
-TOP CANDY: to feed the buds with molasses for a tastier smoke and to gain weight
-TOP BUD: to enlarge buds and to gain weight
PLAGRON: PK 13-14 to have big and hard buds and to feed plants with lower effort
ADVANCED NUTRIENTS: Sensi Cal-Mag Extra- for cal mag deficiency
GROTEK: CAL MAG for cal mag deficiency
HESI: PowerZyme to clean and balance the soil. It feeds the plant cleaning the soil.
GHE: - Final Part (ex Ripen) accelerate the final flowering phase, dissolves minerals in excess
- Flash Clean to flush the plant and to be sure that all excesses are out from plant and pot
These two products improve A LOT the smoke of our babies
-PURPINATOR to stimulate flavonoids and to have a better taste and smell.
-BIOBIZZ: CAL-MAG, great product to correct deficiencies without Nitrogen!
____________________________________________________________________________________________
🙏❤️ THANK YOU FOR BEING HERE ❤️🙏
Please leave a comment with your opinions, it is very important to us to have a comparison.
If you like our job, tap the weed button and follow us. It will be really appreciated.🙏
We want to thank again everyone that help us in our project. You support us to support our dream. ❤️
SPREAD THE LOVE OF THIS PLANT ALL AROUND THE WORLD
🌿Thank you again🌿
❤️Sweet hugs❤️
👨🌾CHILLING_RACOONS👩🌾

Likes
11
Share

@All_our_small_plants
Follow
Bewässerung: 5000 ml jeden 3 Tag in der Elften Woche
pH-Wert: 5,8
EC-Wert: 0,4 mS/cm
Temperatur: 20ºC
Luftfeuchtigkeit: 65%
Schädlingsbekämpfung: Diese Woche haben wir ihr Wasser mit Nematoden gegeben da sich doch vermehrt Trauermücken im Bereich aufhalten.
PPFD: Direktes Sonnenlicht
DLI: Direktes Sonnenlicht
-Tag 65 Heute wieder mal gegossen und wir haben den Zaun entfernt und ein Gestell um sie gemacht so können sie sich anlehnen und gleichzeitig auch die Membrana :)
-Tag 69 Heute haben wir die gegossen mir ca. 5l Wasser und 500ml Brenneseljauche

Likes
14
Share


@KannaKullektiv
Follow
Sie ist soweit. Die Farbe ist intensiv und sie richt verdammt gut.
Zum schnellen trocknen im Zelt, habe Ich jeden Zweig einzeln aufgehängt und versucht die Relative Luftfeuchtigkeit zwischen 58 - 62% zu halten und die Temperatur unter 18 Grad Celsius zu bekommen.
Sobald die Stängel knacken schneide ich die Buds runter und lege sie im Zelt in Pizzakartons damit sich die Feuchtigkeit gleichmäßig verteilt.

Likes
5
Share


@Prempavee
Follow
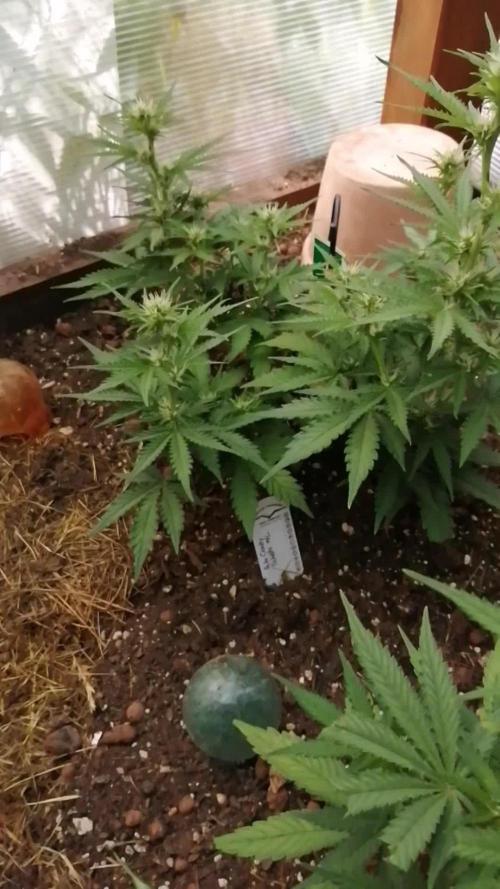
This plant during her life have passed trough many issues but she overcame them all and she express an incredible vigor.
This week I just added some straw on the ground and I have watered with a solution of EM that I made, also a light solution of molassa have been added to the foliage
OMG is not even possible to make a diary longer than 30 weeks here lol 555555

Likes
22
Share


@GreenISR
Follow
Flashing time ~~
Mid week did a hair cut to the plant .
That smell is so lemon🤩🤩😍
So there is nothing much to say except my vent take a brake for a night and i have look at termo and it said 99 humidity ⛔⛔ omg the tent was sweaty ,long story short big problen with fast fix .

Likes
2
Share

@The_Doctor_Green
Follow
Hola a todos! Espero que anden bien!!..
Les comento que hice esta semana, la he regado con agua un riego y el último hoy, con nutrientes en sus dosis indicadas más arriba.
La planta ha crecido mucho esta semana 35 cm en 7 días, ha pegado el estirón, y también han mostrado sus preflores.
Esta semana he tenido una humedad alta 70% y no la he podido bajar,pero con humedad y una temperatura que ha rozado los 28 grados por momentos, he notado que las plantas les gusta ese ambiente, por eso el crecimiento que ha pegado.
Hoy (17/09 ) ,dia 35, de la Strawberry Gorila Auto he quitado las hojas más grandes que tapaban las ramas bajas, espero que en este momento no estrese la planta.
Bueno, no los aburro más, nos vemos la próxima semana!.
Buenos humos!!

Likes
24
Share


@Groweedo
Follow
Semaîe 5 fini, les têtes grossisent lentement mais surement, je pense pousser les nutriment 1 semaine de plus ou 2 avant rinçage car pistil encore bien blanc pour un debut de semaine 6.
Likes
177
Share


@DreamIT
Follow
⏳🍁 The Endless RED Garden 🍁⏳
____________________________________________________________________________________________
🍊 3.2 All regular, it seems they are in a hurry to bloom. I hope to be within sweet seeds with 7 weeks of flowering, it would be the best of the best of the best 😁😁
🍊 4.2 ...
🍊 5.2 ...
🍊 6.2 ..
🍊 7.2 Nothing to say, the difference between these red mandarins and the same (mother plant where these clones come from) is immense. The only real difference is the light with which they are growing. I currently use Viparspectra p1500, first a very common cheap pink led bought on amazon. Seeing is believing XD I will understand in the harvest phase how different there is also between viparspectra and marshydro, another lamp used for the growth of this plant.
🍊 8.2
🍊 9.2
_______________________________________________________________________________________________________
📜👀 A look at the details of what I'm growing 👀📜
🍊💚 Red Mandarine F1 🍊💚🌱🍭 Sweet Seeds 🍭🌱
📋 Details 📋
⚧ Gender
▪️ Feminised
➰ Genes
▪️ 55% Indica / 45% Sativa
🎄 Genetics
▪️ Red Poison Auto (SWS39) хCalifornia Orange x Skunk hybrid)
🚜Harvest
▪️ 400 - 500 g / m²
🌷Flowering
▪️ 49 - 63 days
✨THC
▪️ 16%
✅CBD
▪️ 0,2%
🏡Room Type
▪️ Indoor
🌄Room Type
▪️ Outdoor
🕋Room Type
▪️ N/D
🎂Release Year
▪️ 2019
_____________________________________________________________________________________
👀📷🥇 Follow the best photos on instagram 🥇📷👀
https://www.instagram.com/dreamit420/
🔻🔻🔻Leave a comment with your opinions if you pass by here🔻🔻🔻
🤟🤗💚Thanks and Enjoy growth 💚🤗🤟