Likes
Comments
Share
@deFharo
Follow
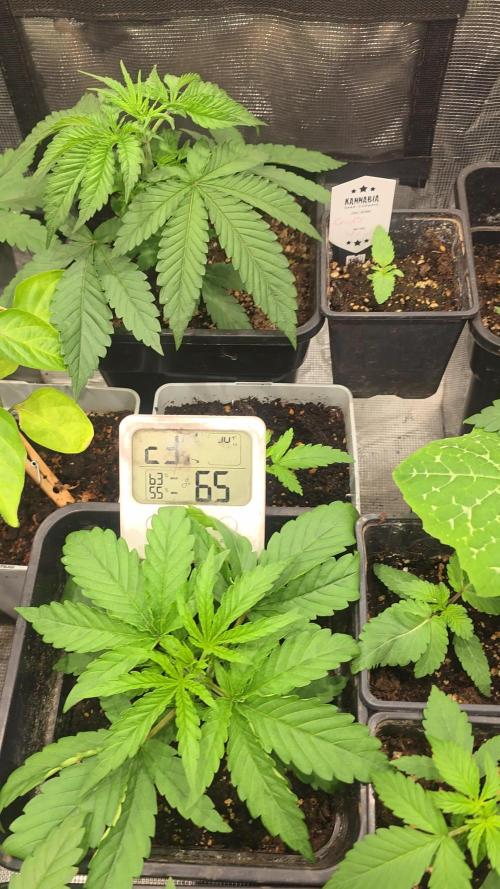
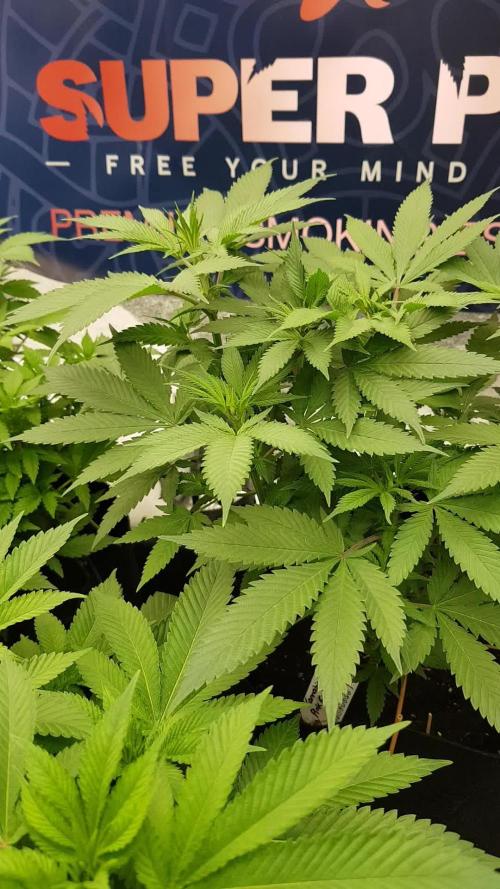
Bienvenidos cultivadores de marihuana clandestinos, y también, a los que tienen la fortuna de no serlo!🖐️👨‍🌾 Octava semana de vida y quinta en su nueva maceta, la planta se esfuerza en crecer, todavía no ha consumido el riego de hace 3 semanas, las temperaturas son bajas, la humedad alta pero la planta parece estar a gusto en su carpa de cultivo, voy a esperar un par de semanas antes de pasarla a floración, quiero la planta muy fuerte y dispuesta a dar lo máximo antes del paso a floración. Adiós amigo Shane MacGowan, descansa en paz! 😢 Hasta la próxima... SALUDOS A TODOS!! ================================ Info de la cepa Gorila Bilbo: https://www.genehtik.com/producto/gorila-bilbo/ "Con la GORILA BILBO reproducimos las características originales de la GG4 fka GORILLA GLUE #4..." Genehtik Seeds - Genética: CHEM SISTER, SOUR DUBB y CHOCOLATE DIESEL - 63% índica, 37% sativa - Tiempo de Floración - 9 semanas - Rendimiento: 500-600 g/m² - THC Alto - Hasta 25% ================================
Likes
2
Share
Week 3 and a repot is done and now in day 3. Finally it’s settling down after the repot, which was not pretty at all😂 Hope to get some massive plants this run 🌱 ________________________________________________________________________________________ Light from @MedicGrowLED 😎 NEO 780 LED🔥 780 Watt⚡️💥 PPF of 2184 μmol/s & 2.8 μmol/J🔥 Full Spectrum V1/F1 🌈 WiFi smart connection & Smart Aura Control 😱
Likes
6
Share
@jaydee702
Follow
The 2 cuttings of my Tiny pot bubba cheesecake on there second topping. these girls look good and im super cropping for strong stems to hold all the main tops.
Likes
4
Share
Oh, I am nervous. Its my first time in a long time...…. hopefully this doesn't end as bad as the first time these feelings came up. Very quick and very disappointing.😅 11/26- At around 7:30pm these autos got put into Ice Mountain Spring Water temped to 68 degrees. After just 3 hrs 2 have already sunk to the bottom. 11/27- Its been 12 hrs and all but 1 of the Cinderella Jack have dropped. 11/27- The last straggler sunk after 18 hours. At around noon, I transferred the seeds into paper towels. Then put the paper towel into small baggies. 11/29- Seeds have been germinating in paper towels for around 30 hrs. They are starting to show taproots. The Fastbuds are just that FAST. They were showing taproots in under 12 hrs. One was over a half inch. 11/29- At around 6pm, I transferred these little ladies into a cup and a half of some naked Happy Frog and placed in the germination dome. 11/30- At 2:30am these gals got their first dose of light. Since I'm a born again grow-virgin and have never messed with autoflowers. I'm going to just keep the traditional 18/6 lighting schedule. 11/30- With less than 6 hours of light I already have 2 sprouted around 1 inch. The Fastbuds green crack seeds seem to be outperforming the others. The Dutch Passion seeds are performing too but the Fastbuds are impressive. Note: These seeds are germinating under a 7.83hrz frequency. It is coming from a small 4" subwoofer connected to 2 small speakers hung in the top corner of my tent. I plan to continue though to harvest. My thinking that if our goal is to mimic the conditions outdoors why not amplify everything we can. 7.83hrz is the natural frequency omitted by the earth and can be nothing but beneficial. To my research it should help the plant develop on a molecular level.
Likes
12
Share
@Tazard
Follow
WOW 🤩 she got HUGE. The longest meter on earth! Seriously she looks amazing. I’ve seen some harvests from her her on GD and I’m super excited to have somehow gotten her over 5 feet tall! Stay tuned this is going to be special!
Likes
Comments
Share
@Sn3ak92
Follow
Jan 7: Beginning of the week Light @ 150w (raised it from 24 to 32 inch) Jan 8: began a brew of compost tea and will feed tomorrow. Jan 10: Topped the two C&C Jan 13: Began training the plants (LST) and cut all the big leaves for better light exposure Slight discoloration on some leaves I removed... Not sure what it is... Compost tea recipe: 2 gal dechlorinated tap water 1 tbsp Wholesome Molasses 2 tbsp GaiaGreen Kelp meal 2 tbsp GaiaGreen Alfalfa meal 1 tbsp GaiaGreen 444 2 tbsp Bat guano 842
Processing
Likes
5
Share
@Ensign420
Follow
Week 02 Introduction This week has been a bit of a struggle. Had my first experience dealing with slime and brown algae. But I think adding enzymes and increasing the beneficial bacteria helped to fix the issue. Also experienced nutrient burn for the first time. My nutrient solution strength got as high as 671 PPMs. So backed it down to about 430 PPMs during the end-of-week reservoir change. Also cut Hydroguard (expired?), CaliMagic, and Superthrive from this grow. Now she's still stunted, but is starting to recover. Hopefully... [START OF WEEK 02] Day 01 - Monday - 08/10/20 - Total Days: 008 ----------------------------------- - [0830]: Still looks a bit yellow. But getting larger! --- Solution strength was at 248 PPMs. --- Just topped off with a bit of distilled water --- PH went up to 6.1 so PH'd down to 5.8 --- Ran the top feed for a bit to wet the hydroton. - [2130]: She's looking even more yellow now. --- Even the new leaves are really yellow. --- Decided to add more base nutes. --- Added 4ml of Sensi A --- Added 4ml of Sensi B --- Now at about --- Solution Strength went up to 304 PPM. --- PH was at 6, --- Also raised the water level a bit more. --- I really hope it's a nutrient deficiency and not an over-watering issue. --- Please live! Day 02 - Tuesday - 08/11/20 - Total Days: 009 ----------------------------------- - [0830]: Looking less droopy. But still yellow. --- Decided to do a reservoir change. --- 4.5gal of distilled water --- 8ml of Sensi Grow A --- 8ml of Sensi Grow B --- 8ml of Voodoo Juice --- 4ml of B-52 --- 4ml of CaliMagic --- 4ml of Hydroguard --- 4 drops of Superthrive --- PH'd down to 5.8 --- Solution strength: 302 PPM --- Since I didn't want to risk over-watering the rockwool, I did not to do a top feed, may do one tonight after the sleep cycle (lights are still set to go off at 10am and back on at 4pm). --- As I was doing a reservoir change, I noticed that the tubes and bucket were a bit slimy. Didn't really stink or anything. Is this normal? Maybe due to the Hydroguard and Voodoo Juice? --- I hope she gets better soon! - [2215]: Getting larger! But still yellow. --- Also can see a root growing through the net pot! Tiny little thing but it's there! Will have to start dropping water once more appear. --- After looking over a few DWC diaries using AN nutes, seems like my solution strength is still too low. Most around this stage average around 500 PPMs with about 4ml per gallon. --- Top fed for a minute to wet the top of the hydroton. --- Solution strength went down to 263 PPM. --- Added 8ml more of Sensi A --- Added 8ml more of Sensi B --- Now base nutes are at 16ml for 4.5 gal of water. --- PPMs went up to 411. --- Still lower than 500 PPMs, but that's okay. --- PH was at 6. Not sure if I should adjust PH using AN nutes. So going to not ajdust unless PH goes above 6.1. Day 03 - Wednesday - 08/12/20 - Total Days: 010 ----------------------------------- - [0830]: Looks like more root growth! --- She still looks yellow. But leaves are perky. --- PH was at 6.2 so lowered down to 5.8. --- Solution strength was at 394 PPMs --- Since roots are still growing, I decide to lower the water level a bit. Now water level is a bit below the net pot. - [2200]: Root is getting longer! --- Slime is returning. Not sure why. --- Solution strength: 357 PPMs --- PH: 6.1 --- Decided to add an enzyme along with more beneficial bacteria to hopefully cure the slime. --- Added 16ml of Sensizym --- Added 5ml of Hydroguard --- Added 8ml of Voodoo Juice --- New solution strength: 430 PPMs --- New PH: 6.1 --- Top fed for a minute. --- This slimy residue is really freaking me out! I hope the added enzymes will help eliminate the slime. --- Going to do a full reservoir sterilization/nutrient change over the weekend. Please survive until then girl! Day 04 - Thursday - 08/13/20 - Total Days: 011 ----------------------------------- - [0930]: I think the enzymes worked! There is little to no slime now! --- Although I think the root was also dissolved in the process. It's now just a little stub sticking just below the net pot. The enzyme is also suppose to dissolved dead roots too but guess that root was too weak? Not sure what happened there. But I think the slime is cured! --- Solution strength went down to 395 PPMs. Decided to add more base nutrients. --- Added 8ml of Sensi A --- Added 8ml of Sensi B --- Added 4ml of B-52 --- Solution strength went up to 598 PPMs. --- PH was at 6.1 --- As long as the PH is between 5.5 and 6.3, I'm not going to use PH Up or Down. But still will monitor PH levels. - [1715]: Checked up on her after her nap and shes looking alive but stunted. But no slime! --- Decided to add some sugars to help maintain the enzymes and beneficial bacteria. --- Solution strength was at 587 PPMs. --- PH was at 6.2 --- Added 8ml of Bud Candy --- Solution strength went up to 671 PPMs. --- PH also went up to 6.3 --- Lowered water level a bit to hopefully promote more root growth. --- Top fed for a minute. --- She is getting bigger, but still looks yellow. Day 05 - Friday - 08/14/20 - Total Days: 012 ----------------------------------- - [0915]: Leaves look a little burnt on the tips. Still no slime. --- Going to back off on the PPMs to hopefully fix the nutrient toxicity. --- Solution strength was at 632 PPMs --- PH was at 6.3 --- Added/Removed water until PPMs were at 536. --- PH was still at 6.3 --- Raised water up a bit, then top fed for a minute. - [2200]: Looking better. Still yellow though. --- Solution strength: 514 PPMs --- PH: 6.5 --- Added PH down. --- New solution strength: 518 PPMs --- New PH: 5.2 --- PH was kind of high. So decided to PH down. Had to use quite a bit to bring it down. But eventually got it to drop down to 5.3. A little low, but so far, the PH has always gone up so wanted to start it really low. --- Ran the top feed for a minute to re-saturate the top of the hydroton. Day 06 - Saturday - 08/15/20 - Total Days: 013 ----------------------------------- - [0830]: She looks stunted. leaves are still yellow. --- Solution strength: 514 PPMs --- PH: 5.6 --- Top fed for a minute. --- Not sure what to do at this point. Going to do another reservoir change soon. Hoping she lives until then. - [2145]: Looking pretty much the same. --- A bit of slime has returned. Since I've been diluting the nutrient solution, the enzyme ratio has dropped. So I guess this is expected. --- Also noticed that slime build up was on the air-stones. Never really checked the stones so not sure how long that has been there. Looks brown too, which can't be good. --- Going to do an H202 sterilization of the system (minus the net pot) tomorrow so did not add anything. --- Lowered the water level to below the net pot. --- Then top fed for a minute. Day 07 - Sunday - 08/16/20 - Total Days: 014 ----------------------------------- - [0900]: STERILIZATION DAY! --- Decided to skip today's night cycle for a deep clean. --- I'm hoping that skipping a night cycle won't be too stressful. --- Temporarily moved her to a new bucket. --- Used about a half of gallon of straight distilled water to flush out the net pot. --- Drained the system and wiped up all the brown sludge. Also removed the air stones and cleaned up all the goo. --- Filled the system with 2 gallons of distilled water and at least 30ml of food grade hydrogen peroxide (35% strength). --- Yea its a lot, but since I'm not going to sterilize the system overnight, I went with a really high doseage. Basically I kept adding until I started to see little bubbles start to form. --- Then I ran the water pump. - [0915]: Boiled the air stones in tap water for about 10 min. Then reconnected them to the airlines. --- I let the air stones and hose soak in the sterilization solution for about 5 minutes so the peroxide can absorb into the stones. Then ran the air stone to help mix and agitate the solution. --- Occasionally, I'd repeat the process of turning the air pump off for a few minutes to let the stones soak. - [1000]: Covered the top two row of holes of the net pot with some aluminum tape. Hopefully this solves the light leaking in through the hydroton. - [1200]: Used an old toothbrush and scrubbed the pump clean. Then drained the system. --- Refilled with more distilled water and peroxide. Again added a lot. --- Ran system again to sterilize even more. - [1530]: Drained the system and refilled with distilled water to rinse. --- Ran the system for a few minutes, then drained and rinsed again. --- Did this a few more times over about an hour. - [1630]: Added 4 gallons of fresh distilled water. --- Added 15ml Sensi Grow A --- Added 15ml Sensi Grow B --- Added 12ml of B-52 --- Added 16ml of Voodoo Juice --- Added 16ml Sensizym --- Solution strength was at 430 PPMs --- PH was at 5.6 --- I was going to add Hydroguard, but I think the bottle is expired. Since 2017 or 2018!? I think Hydroguard is good for up to 2 years from the date on the bottle or 6 months after opening. So not going to use from now on. I wonder if this could have contributed to the slime build up. --- Also removed the CaliMagic and Superthrive too. Going to only use AN products to eliminate the chance of incompatible nutrients. --- Placed her back in the bucket and top fed for a minute. --- Here's hoping for the best. Going to let it ride until morning! Please feel better! [END OF WEEK 02]
Likes
2
Share
Almost at the finish line with these beautiful girls!!! Smells like someone is shoving an orange up my nose whenever I open the tent. Adding a new light to the grow for the next run so stay tuned!!!
Likes
24
Share
@BunnyBud
Follow
31 Aug. I start the third week of my autoflower. The plant is growing well, but I noticed small yellow spots on the leaf tips, which seem like a mild calcium deficiency. This is probably due to the fact that so far I have been giving water with a slightly low pH, around 6, while the ideal range would be 6.5–7. At the beginning, to lower the ppm of the tap water (which was around 211 ppm), I mixed it with demineralized water. This brought the ppm down to about 109–140, making it harder for the plant to absorb the available calcium. Additionally, the soil I am using, Biobizz Light Mix, is lightly fertilized but does not contain enough calcium to correct this small initial deficiency. For this week, I will not add any fertilizers. I simply want to raise the pH to 6.5 and use water with higher ppm, so the plant can better absorb the nutrients already present in the soil. The lamp is positioned about 35–36 cm from the plant and so far there are no burn issues. Temperatures range between 25 and 30 °C depending on the day, while humidity in the room stays between 40–60%. The humidifier is always on because I keep the window open, but the dehumidifier is not being used, as it is not necessary at the moment. I also have a new oscillating fan arriving to replace the current fixed one, and I’m waiting for a regulable extractor (90–145 m³/h), which will allow me to control the air perfectly during winter if needed. This week my main goals are: Increase the water ppm without overdoing it Adjust the pH to 6.5 Keep observing the plant without adding any fertilizers Everything else seems fine and growth is regular. With these corrections, I expect the new leaves to grow healthy and free of spots. ==UPDATE 31/08== To control the calcium deficiency, I will administer an eggshell solution until I reach 300 ppm (I will boil some eggshells and administer the solution in tap water).
Likes
5
Share
@Bamz84
Follow
Did a little Defoilation in the garden trimmed of any branches thar werent going to reach the top cleaned up the fans leaves that were blocking air circulation so far so good getting these ladies ready for transition😶‍🌫️
Likes
48
Share
~ WEDDING CHEESECAKE FAST FLOWER by FastBuds ~ Well fam, here we go again with another epic strain from FastBuds Fast Flowering stable. After having such tremendous success growing their Gorilla Cookies Fast Flower outdoors last year, I've decided to run another of their fast flowering strains outdoors this year... Wedding Cheesecake Fast Flower! The best description of this awesome cultivar comes directly from my friends at FastBuds which is as follows: "A delight for the mind and body: Wedding Cheesecake FF (Fast-Flowering) is a delicious strain that offers XXL yields in a 7-8 weeks flowering cycle. This terpene powerhouse produces loads and loads of mouth-watering vanilla-creamy-cookie-scented terps with hints of citrus and cinnamon. In addition to its delicious aromas, this variety grows very well in both indoor and outdoor setups, yielding up to 650 g/m2 without extra maintenance, making it the ideal strain for beginners as it allows you to maximize yields while minimizing work. This super-fast feminized photoperiod version offers upbeat and energetic yet deeply relaxing effects that are perfect for consumers looking for a heavily focused, motivating, and creative high. It’s the ideal strain for those needing that extra energy boost to start a busy day on the right foot. Wedding Cheesecake FF boasts chunky, large-sized buds with a thick layer of silvery-white resin and bright orange hairs scattered all over: that just screams ‘quality’. The lime-green flowers sparkle with an array of hues ranging from dark to light green, to magenta and purple, and reek of a delicious aroma that’ll remind you of fresh store-bought cheesecake. This is an XXL hybrid that grows extremely tall in height, reaching up to 3m with one huge main cola and multiple long side branches that can withstand enormous yields of up to 650 g/m2 with ease. Wedding Cheesecake FF is extremely resilient to the elements and can be grown in almost every climate as long as you’ve got the space and basics covered, making her an excellent choice for those looking for large-scale harvests with a quick turnaround time without much effort." ________________________________________________________________________________________________________________________________________________________________________________________________________________________________________________________________________________________________________________________ The Setup: This is going to be an outdoor grow, but I have started the Wedding Cheesecake FF indoors as our weather is still too cold to put her outside (nighttime temp's dipping regularly into the 30's℉). The plan is simple... let her grow inside under a 19/5 light schedule until the nighttime temperatures stay above the mid 40's℉, at which point she'll be moved outside and transplanted into the soil which I have already setup and inoculated with beneficial microbes, and then let the fun begin!🤪💚 ________________________________________________________________________________________________________________________________________________________________________________________________________________________________________________________________________________________________________________________ Weekly Updates: 6/1- Ten weeks from seed and the FastBuds Wedding Cheesecake Fast Flower has the pedal to the firewall now! Today I top dressed the Wedding Cheesecake Fast Flower with 2 cups of Gaia Green 4-4-4, 1 cup of Down to Earth Bio Fish along with 1/2 gallon of worm castings. After top dressing and working the amendments into the soil by hand, I watered it in via garden hose with straight well water. 6/3- Rained hard today so I skipped watering the Wedding Cheesecake FF. 6/5- Today was sunny and warm. I watered the Wedding Cheesecake Fast Flower with straight well water from the garden hose. 6/7- There goes another week for the Wedding Cheesecake Fast Flower from FastBuds and she continues to impress and amaze me. I hope to see you next week! Thank you for checking out my diary, your positive comments and support make it all worthwhile! 💚Growers Love!💚😎🙏
Likes
16
Share
Flowering day 49 since time change to 12 / 12 h Hey guys :-) All ladies look very healthy and delicious :-) We're slowly getting closer to the end. Watering was done twice this week, each time with 1.2 l (sewing materials see table above) At the next watering there is a very light rinse with Clean Fruits so that the last nutrients can be slowly used up. The trichomes are now checked every day. I'm looking for my microscope with an app so I can take pictures of it 👍. I wish you a lot of fun with the update and stay healthy 💚🙏🏻 👇🏼👇🏼👇🏼👇🏼👇🏼👇🏼👇🏼👇🏼👇🏼👇🏼👇🏼👇🏼 You can buy this Nutrients at : https://greenbuzzliquids.com/en/shop/ With the discount code: Made_in_Germany you get a discount of 15% on all products from an order value of 100 euros. 👇🏼👇🏼👇🏼👇🏼👇🏼👇🏼👇🏼👇🏼👇🏼👇🏼👇🏼👇🏼 You can buy this strain at : https://www.ripperseeds.com/en/feminized/kmintz-feminized-cannabis-seeds Water 💧 💧💧 Osmosis water mixed with normal water (24 hours stale that the chlorine evaporates) to 0.2 EC. Add Cal / Mag to 0.4 Ec Ph with Organic Ph - to 5.8 - 6.5 MadeInGermany
Likes
1
Share
@Bowser45
Follow
Big one got 4L last time and the other one 3L still. i think they want more fertilizer because i was a bit careful this time with it. thank god the temperatures are lower this week so i can maintain 26 degrees. buds thicken up good and i have spotted the first amber trichomes. ill still leave it for around 14 days.
Likes
11
Share
I am living in South Africa, Cape Town, we are heading into summer now so it is the right time to plant.... I potted this lady today so when the sun is out she'll be going outside.
Likes
12
Share
The first week after the flip. What I have been working on is bringing Gelato's soil pH up. Gelato was given water at 6.5 pH and the run off was measuring 5 pH (yikes.) After flushing with 3 gallons of water at 8 pH, the soil pH was still measuring 5 pH. The reaction the plant had tho after the flush was positive, which is to say, no more burning or yellowing leaf tips 5 days post flush. Sour Diesel and Do Si Dos were fed VEG nutrients at 50% strength ( 1.5 tsp Big Bloom and 1.5 tsp Grow Big.) and the pH of the liquid was 6.5. Everyone is looking good. Because it is only the first week of flower, "the stretch" is yet to be seen.
Likes
33
Share
Topped her on day 11 and upped the maxigro a little. She is making steady progress. I expect her to take off in the next few days. Will start some training before the end of week 3. Just another boring plant at this point but stick around for a while and I bet that will change....
Likes
3
Share
Flower development definitely set back right from the beginning with extreme light intensity reaching 1650 ppfd before corrected. Never fully took off I don’t think. Midway through week 7 started to slowly dial back the intensity from 900 at tops to 650 ppfd. This is a 9.5-10 week strain. Using fish shit to keep things ramped up, also Bokashi Bran and worm casting. Also mixing in Gaia seaweed extract 0-0-17 with the fish shit. Not a whole lot more needed that the soil and top dressings doesn’t already have, if anything at all. I just like to give it that extra kick. I had completely wiped out those pesky fungus gnats and future offspring before flower, but they came back after top dressing and adding more soil. They come in the bag soil, and while I was on holidays for 10 days they came back and I wasn’t on top of the new wave of those dirty bastards. Just about got them cleared out again with the use of nematodes and sticky traps.
Likes
23
Share
@Athos_GD
Follow
D20. I got rid of the plant in front right. The plant wasn’t growing fast or getting much light because the other two plants stretched a lot. I am actually running out of room and had to already lower my tray.
Processing
Likes
5
Share
Beutiful hard diesel, she's growing super fast and looks like she's even happier after the transplant to her definitive 11l pot, let's see how this wonderful lady keeps developing, she's being fed with nothing but water since I grow using Florian's living organics (living soil blend) tomorrow this wonderful lady is gonna be flipped into flower finally. As said this lady has been flipped into flower under the light schedule 12-12 on February 15th so now we're gonna se a beautiful stretch before actual flower starts