
Likes
Comments
Share


@Vegetoo420
Follow
Hey hey ! I left my girls during 4 days without watering due a hospitalization !
I discovered this girl like this when I opened the room and she exploded !!
Day 3 : floweeeers comin !
Day 6: little defoliation and 🍭 lollipop on this girl : she’s clean now !

Processing
Likes
44
Share


@MissFlowerPower420
Follow
Marge is literally romping away now . She looks healthy n very bushy . Have high hopes for this lil beauty

Likes
2
Share


@Sunshine_Boutique
Follow
First attempt at attending the Eternity Grow Cup was a major fail.
2 seeds did not sprout.
I planted two new seeds and they came to life.
Lost a lot of time. I think my chances to get this run finished within the deadline is almost zero.
Now it's a passion project and my training for next years collab between Zamnesia and Plagron.


Likes
12
Share


@Homestickycannabis
Follow
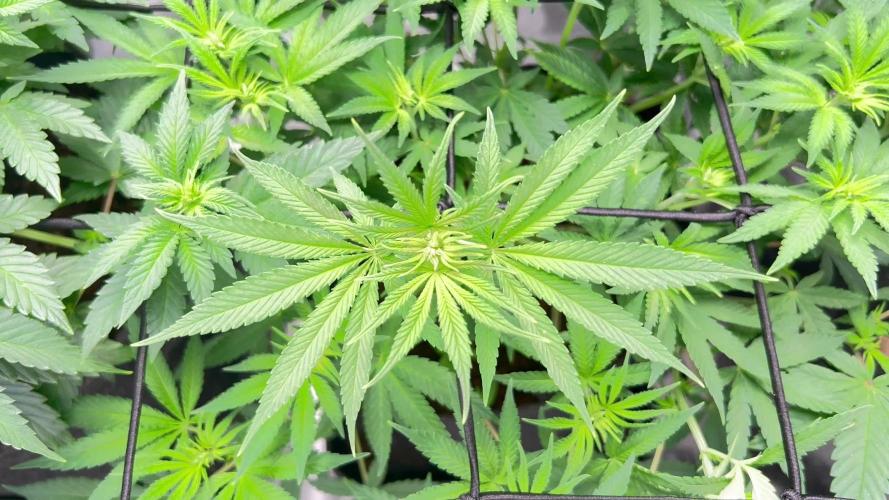
Wow 😲 I was thinking this was going to be a total runt. As if turns out I am starting to think of it as having a lowryder auto. I know I know 🤣 it's not a lowryder. She's actually a Northern light crossed with Big Bud Auto from Seedsman. This little lady was barley 3 weeks old when I noticed her transitioning to flower. I was about to pull the plug and decided otherwise. I mean what could it hurt to grow her out. Anyway she's more than doubled in size and her bud sites are well formed, stacked up and just looking good.
Question? Would it be better to turn my 250 true watt down and move the light closer?,or run it full power and set it higher ?
Likes
44
Share


@XperencdGmanXG
Follow
a week after the 100mm storm and just some spitting since then. To get good buds this plant needs regular water, so I hope mother nature starts giving us some more regular rain here.


Processing
Likes
7
Share


@Laplantadelpie
Follow
dia 21
•se seleccionan 16 plantas
•se realiza transplante a macetas de 11 litros
•riego foliar con acidos humicos y aminoácidos
•se instala el riego por goteo


Likes
17
Share


@Naujas
Follow
To tell the truth, I am very surprised myself, how amazing she is FastBuds Gorilla cookies, she copes well with a small space:) she drinks 1 liter every day :) everything looks better than expected:) good luck to everyone.


Likes
64
Share


@Prof_Weed
Follow
Heute startet die Woche 7, hohe Luftfeuchtigkeit und hohe Temperaturen.
Ist immerhin 10 cm gewachsen und supergesund.
Hier und da mal paar Blätter und Mini Blüten entfernt und ein wenig Super Cropping..
Pre Flowering hat ein wenig eingesetzt.
Die Madame Sour Jealousy von FastBuds soll nur wachsen nicht das blühen anfangen!
Likes
6
Share


@CanarianGrow92
Follow
Week 5 already, thats why they call it fastbuds... In no time its harvest time! We had some bugs (trips) running around, i think i took them from outside as i was working on my garden, my outdoor plant is also affected, that happens for being a dirty old man 🤦🤷 but not much we can do now, i tried to clean the leaves a bit and remove some, but i think its better to harvest and clean the room as i dont eant any pesticides on the buds, but for the rest quite ok, we gave aome extra pk and bloom this week so lets see how the plants do next weeks 😁
Likes
4
Share


@Drtomb
Follow
By the looks of the trichomes these are almost ready. Looking at the hairs though it looks like it could be a bit. We will see how things turn around in the next 2 days. Harvest is set for Saturday.

Likes
27
Share


@AbroCadabro
Follow
Very difficult for me to grow. So much foliage. This plant bushes out like crazy. She was also a real pain in the ass to harvest. You should strip her of every god damn leaf except for the top nodes right before flower or she will fill out to the point of cover up all the bud. I had to throw out a bunch of under developed flower because it was so bushy..

Likes
13
Share


@RoyColt
Follow
Always R.O Water
Watering the plant 3 times for per week
1st Watering with nutriens.
2st Watering with nutriens.
3st Watering with only R.O water & CalMag
this time is preflowering.
Likes
45
Share


@AsNoriu
Follow
Day 151. Girl is harvested, sticky, stinky, oily, a bit too leafy and kind of light, cant see even 100 of her .. ( 8.5 is already choped, the brushed by wall branch ).
She stinks like skunk with some aftertaste ( tried scissors hash already).
Now it looks like she had to go couple weeks more, trich mostly milky and leaves after darkness are green, looks like she was beging me to leave her and put makeup to look younger ;)))))
We shall see ..
Day 157. Boy oh boy ... how i love to be wrong ...;))))
Girl is a record braker. 141 from one plant, my new pure indoors record.
Long journey , desent result, she could make in 6 weeks earlier, but she had a crazy life, lets hope it will be crazy smoke ;)))
Report to come ....


Likes
24
Share


@Jays_Not_Here_Man
Follow
The Apple Betty babies are doing great 😊 I’m very pleased with the results so far, I just wished I would have known they would have such a large stretch, they D almost doubled in size in 14 days.
At day 8 I stopped tucking the branches and allowed them to grow up. In hindsight, I probably should have kept going for another couple of days. They continued to stretch rapidly all the way up to date 12 or so, much more than my other strain that I have going as well.
At day 10 I cleaned up some of the small bud sites and leaves that were below the 1st trellis. These sites do not get enough light to make anything good, and take away energy from the main tops as they grow and compete. A quick snip here and there will really help the end result.
At day 13 I decided to add a second trellis net to provide support to the tops that came up so fast. They seem to have stopped their main stretch faze, and are looking happy and healthy now. I’ve continued my water, water, feed schedule and have not seen any cause for concern. The girls are taking a little over a gallon of water every 72 hours at this point.
Humidity is being controlled automatically with my in-line fan and humidifier. RH is set to 57% and temps hover between 77-80 degrees with lights on, and about 70-72 with light off thanks to my furnace being back on for the cooler temps.
The 2x4 5 gallon girl is doing great as well. 😊During the stretch, she flourished just as the girls in my big tent did as well. She is going to have some great bud, the branch structure is nicely developed with tight node spacing and large tops.
I’ve been plucking off all the lower growth, and tucking leaves as they block bud sites. I will be doing a defoliation next week. Happy Gardening 🇨🇦👊❤️

Likes
8
Share

@ohcibi
Follow
Flower starts in this week. Ima start off 1 day later, so the first night is still on 22/2 because I want the topped shoots to develop properly. Also I have done some more defoliation and just want to give everything another day of recovery.
I pushed training hard in the final veggie week because I had two squeeze everything into one week. Additionally I did the mistake of watering the leaves with fertilized water which caused some heavy burn marks. Fortunately as this happened to fan leaves mostly I had to defoliate them anyway. With no hanging leaves and all shoots developing properly ima switch to flower on January 2nd.
Likes
7
Share


Likes
5
Share


@Del_grow
Follow
So this plant was a dream, stayed so lush and healthy throughout, grew tallish, strong really bobbly, swollen calyx structure to the buds, really sparkly with crystals, just lovely.
Smell is fruity and pungent, impressive yield, just great.


