The Grow Awards 2026 🏆 


Likes
Comments
Share
@DeadJoke
Follow
i think pistills are changing more oranger this week..
but i guess buds are not growing fat this week ..
something isn't right...

Likes
15
Share
@Badya
Follow
Вона вдячна. Не рубайте листя та гілки ніколи. Тільки LST і ScrOG .
Листя можна забирати лише сухе - мертве, яке рослина сама скидає
Likes
Comments
Share
@TheCannaHouse
Follow
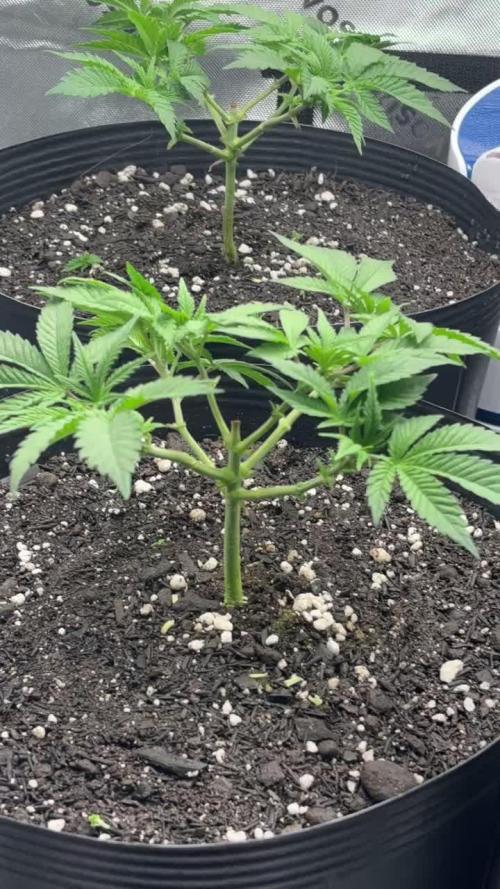
Week 3:
Hoping to set this one on cruise control for a couple weeks. Watch her do her thing. I’m trying to train her low and wide with as many bud sites as possible. I’ve watered with dechlorinated tap water at 6.5 PH

Likes
Comments
Share
@mTuff
Follow
Transplante para vasos de 18 litros, antes estavam em vasos de 4 litros

Likes
54
Share


Likes
88
Share
@DogDoctorOfficial
Follow
🌾 Harvest Day — The Grand Finale of the Eternity Grow Cup 🌾
Days 72–73 | Trimmed on May 25 | Posted May 27
What a journey this has been — and what a finish. These five incredible Runtz phenos have now completed their cycle, and today, we celebrate the final stage of their flowering life: the Harvest.
We sent the girls into darkness on Day 70, allowing them a full 48+ hours of rest and reset. The dark period was just a bit longer, truth be told, because time… it flows as it must. This extended dark time helps increase resin production, allowing the trichomes to mature just that final bit more.
On Days 72 and 73, we harvested them with care and reverence.
Each plant was hung upside down, whole, in a perfectly controlled 60% humidity environment for 13 full days. Before hanging, we gently removed only the fan leaves, leaving all trichome-rich sugar leaves in place — a natural armor for the delicate resin glands during drying. Why do we do this? Because those sugar leaves help protect the essential oils and terpenes, preserving potency, flavor, and aroma for the smoothest experience later on.
🌿 The Dry Room & The Trichome Guardians
Throughout the drying, we used a moisture meter to monitor the moisture content in the stems. Once it dropped to around 12–13%, we knew it was time. This tool is a simple but game-changing ally in ensuring a perfect dry — not too fast, not too slow.
We then trimmed everything by hand over a 6.5-hour focused session. Armed with trim bins and good energy, we collected an abundance of glistening trichome heads in the process — a golden bonus from these resin-packed beauties. The leaves themselves told a story: deep purples, near-black shades, autumn fades and metallic tones — just stunning.
Each girl was trimmed in order:
#5 → #4 → #3 → #2 → #1,
revealing dense, chunky buds all the way from top to bottom. Not a single pop-corn bud among them — only rock-solid nugs, heavyweight champions in every sense.
📦 Cure Begins – Grove Bags & Glass Jars
Once trimmed, the buds were tucked carefully into Grove Bags and glass jars, each stabilized at around 61% RH. The Grove Bags handle the microclimate beautifully, keeping humidity between 58–61%, perfect for preserving all that hard-earned quality.
We’re now opening the jars daily, monitoring aroma and feel. This part of the process — the cure — is where the soul of the flower truly comes to life.
☀️ UV, Reds & The Perfect Run
Part of what made this run so special was the precision in light spectrum. 40% whites, full reds, UV and IR, and the girls responded like royalty. The UV pushed trichome development to the max. The deep reds gave us thickness, color, and weight. All of it under ThinkGrow Model Ones powered through the Trolmaster ecosystem — everything syncing in harmony.
This run was stable, lush, expressive — a grower’s dream. To my eyes, this was a perfect run.
⚖️ Final Yield: 1,302 Grams (1.3 kg)
In a 4x4 tent — that’s just 1.2m x 1.2m for metric friends — we pulled in 1,302 grams of flower, not even counting the buds that were taken for filming, photos, or “quality control testing” along the way. 😉
Dense. Loud. Sticky. Resinous.
🌿 The Hidden Half: A Tribute to the Roots
In every grow, there’s a part we don’t always see — a part that lives underground, quietly holding everything together. The roots. And this time, I wanted to honor them too.
When we unpotted the plants after harvest, we were met with massive, dense root systems, completely filling the Autopot trays. These roots were vibrant, white and healthy, looking like noodles in a thick herbal soup — a true sign of vitality. The Autopots system, combined with the Aptus Holland Clean Program and Plagron Green Sensation, made sure they had the perfect environment to expand, absorb, and thrive. The PRO-MIX soil was the perfect foundation — light, fluffy, with excellent aeration. It all worked in harmony.
After unpotting, I carefully washed every root system, removing all soil to prepare them for the next chapter of their story. Now, they’re hanging and drying — and will be left to cure for at least one month, possibly more, in a dry, dark, and well-ventilated space.
But why keep the roots?
Because cannabis roots hold ancient value — both medicinal and ritualistic. Though they don’t contain cannabinoids like THC or CBD, they are rich in alkaloids, triterpenoids, sterols, and other therapeutic compounds that can be anti-inflammatory, analgesic, antifungal, and calming.
Medicinal Benefits of Cannabis Roots:
• Friedelin – known for liver protection and anti-inflammatory effects
• Pentacyclic triterpenoids – believed to support immune and anti-tumor functions
• Alkaloids – some studies suggest pain-relief and muscle-soothing properties
• High levels of fiber and tannins – excellent for digestive and skin applications
🍵 Root Medicine — Ways to Use Dried Roots:
Once fully dried (they should snap like twigs, not bend), they can be gently crushed, powdered, or infused:
🌿 Cannabis Root Tea
Soothing & Detoxifying
• 1 tablespoon of dried, ground roots
• 3 cups of filtered water
• Simmer gently (do not boil) for 20–30 minutes
• Add a bit of ginger or lemon for taste
• Sip warm, especially good for menstrual discomfort, inflammation, and general relaxation
🍲 Healing Root Soup Base
Brothy & Nourishing
• Add a handful of dried roots into a veggie broth or bone broth
• Simmer for 2+ hours
• Strain before serving
• This adds a subtle earthy tone and allows the healing properties to infuse your meal
Topical Root Cream or Balm
Great for sore muscles or irritated skin
• Infuse roots in olive oil or coconut oil (low heat, 2–3 hours)
• Strain and mix with beeswax to form a balm
• Add essential oils like lavender or eucalyptus
• Apply to temples, joints, or sore areas
🛁 Root Soak Bath
Perfect for grounding and full-body relief
• Bundle dried roots in muslin or cheesecloth
• Steep in hot bathwater for 15 minutes before entering
• Let the soak draw out toxins and ease tension
⸻
The roots are more than just the anchor of the plant. They are its memory, its foundation, its quiet miracle. By using them, we honor the entire lifecycle — nothing is wasted, and everything has a purpose.
This part of the process is new for many growers, and I truly encourage anyone reading this to try saving and reusing the roots. Dry them, process them gently, and let them offer you one final gift.
Much love to Aptus Holland, Plagron, Autopots, and PRO-MIX — this wouldn’t have been possible without their harmony working underground while the beauty bloomed above.
🌱 The Gift That Keeps Giving: Reusing the Soil
As we say goodbye to one incredible season, we begin quietly preparing for the next. But not everything gets thrown away. In this garden, nothing is wasted. Just like the roots, the soil gets another life.
After each harvest, I carefully remove the remaining roots and break up the soil. I inspect it, rejuvenate it with compost and beneficial microbes when needed, and most importantly, I repurpose it — giving it a second life in my outdoor veggie garden.
Why do I do it?
Because this soil has already done something extraordinary. It has supported life, held moisture, breathed air, balanced nutrients, and fed plants that became medicine. It’s not just dirt — it’s a living ecosystem. And to throw it away would be to ignore its potential.
In my veggie garden, this recycled soil now nurtures cucumbers, tomatoes, courgettes, and so many other little miracles waiting to unfold. It’s a beautiful way of continuing the cycle, taking all the energy and intention that was once used to grow cannabis and transferring it into growing food. 🌞🍅🥒
🌾 The Benefits of Reusing Soil:
• Sustainability — less waste, less environmental impact
• Cost-effective — no need to constantly buy fresh medium
• Soil memory — rich in organic material, microbial life, and structure
• Nutrient potential — amended soil still holds value for many plants
• A deeper connection — a way to honor the entire cycle of growth
When we reuse our soil, we’re not just being resourceful — we’re believing in tomorrow. We’re trusting that what we’ve built can be rebuilt. That what has been used can become useful again. That from what seems like an ending, something new can always emerge.
And maybe that’s the most powerful message of all in this journey:
Planting is believing in tomorrow. 🌍🌱
Every seed in the ground is a little act of faith.
So as this season comes to a close, the first tomatoes have been planted. The cucumbers are reaching for the sun. The courgettes are settling in. And the same soil that once gave us dense, resinous flowers is now feeding the vegetables that will grace the table.
From harvest to hope — the cycle continues. And it’s beautiful.
🎉 The Final Touches
Fun fact:
• Trimmed on May 25
• Photo shoot on May 26
• This report: May 27
• Dry Bud Exclusive Photo Set: Coming soon
Stay tuned — the next upload will be something special, just in time before the Eternity Grow Cup closes on May 31st.
⸻
💚 Thank You
To Zamnesia — your genetics were nothing short of extraordinary.
To GrowDiaries, for hosting such a powerful space for community.
To everyone following this journey, your support, love, and kind words fuel this project and keep the spirit alive.
Let’s keep pushing boundaries, together.
With roots deep in the earth and eyes on the stars — the next chapter begins soon.
Much Growers love always,
🌱 Dog Doctor Official 🌱
Genetics - Runtz https://www.zamnesia.com/6000-zamnesia-seeds-runtz-feminized.html
Nutrients - Plagron https://plagron.com/en/hobby
- Aptus Holland https://aptus-holland.com/
Controls - Trol Master https://www.trolmaster.eu/
LED - https://www.futureofgrow.com/en
LED - https://www.thinkgrowled.com
Soil - https://www.promixgardening.com/en
Germination - Cannakan https://cannakan.com/?srsltid=AfmBOopXr-inLXajXu3QFgKXCXXos4F1oEvScjMKIB5MR5dk8-GJ-F49
DOGDOCTOR 15% off
Smoking Papers - https://ziggioriginal.com/
Terpene saver - https://grovebags.com/
As always thank you all for stopping by, for the love and for it all , this journey of mine wold just not be the same without you guys, the love and support is very much appreciloved and i fell honored with you all in my life
With true love comes happiness Always believe in your self and always do things expecting nothing and with an open heart , be a giver and the universe will give back to you in ways you could not even imagine so
As always, this is shared for educational purposes, aiming to spread understanding and appreciation for this plant. The journey with nature is one of discovery, creativity, and respect. Let’s celebrate it responsibly and continue to learn and grow together!
Growers Love To you All 💚
#EternityGrowCup #RuntzHunt #GrowersLove #CannabisCommunity #AptusHolland #ProMixSoil #TrolMaster #Zamnesia #Plagron #ZiggiPapers #Grovebags

Likes
16
Share
@Samsemilla
Follow
Die fünfte Woche startet mit einer (Teil-)Entlaubung, das Blätterdach ist wieder sehr dicht gewachsen.
Die Blätter bekommen wieder ein satteres grün.
Irgendwann innerhalb der nächsten Wochen sollten sie ihr Geschlecht zu erkennen geben, noch sind sie etwas schüchtern.
Ich sehe die ersten Anzeichen, kann es aber noch nicht klar deuten - abwarten und Tee trinken.
Ich habe dem Wassertank meines Autopot Systems einen Luftstein hinzugefügt.
Wird das einen großen Effekt bringen? - keine Ahnung.
Kann es schaden? - ich denke nicht.
So langsam zeigen sich die ersten weiblichen Vorblüten, ich kann aber noch nicht bei allen 13 Pflanzen mit Sicherheit das Geschlecht bestimmen.


Likes
24
Share
@Firepharmer
Follow
This last week shit got really frosty !! The monkey berries is wicked the terps are creamy sour milk and cherry halls mmmmmmm I’m thinking about 7 to 10 days more then start flushing the monkey berries . Slurricane is putting on the weight like there’s no tomorrow and frosty too with 4 weeks to go she will be my best run by far, terps grapefruit and sweet skunk


Likes
2
Share
@EyeMKing
Follow
Well Ogreberry #3 is growing more on the short and bushier pheno measuring at only 4". While #1 is the tallest at just over 8" and already showing signs of preflower at only day 19 of veg. The other 3 phenos are growing in between at 5", 6" and 7".

Likes
6
Share
@hinterhofgrower
Follow
🌱:
💧 : 10l, added 0,1ml/l PK13-14 on day 41
💡 : Dli: 45 mol/m²/d
🤔: Switch to Spider Farmer equipment on day 41
Likes
28
Share
@MadeInGermany
Follow
Flowering day 65
since time change
to 12/12
Hey guys :-) .
It is nearly time .
Harvest next week :-) .
Watering would be done twice this week with 1 l each (nutrients see table above)
Otherwise it was checked and everything was cleaned.
Have fun and stay healthy 💚🙏🏻
👇🏼👇🏼👇🏼👇🏼👇🏼👇🏼👇🏼👇🏼👇🏼👇🏼👇🏼👇🏼
You can buy this Nutrients at :
https://greenbuzzliquids.com/en/shop/
With the discount code: Made_in_Germany you get a discount of 15% on all products from an order value of 100 euros.
👇🏼👇🏼👇🏼👇🏼👇🏼👇🏼👇🏼👇🏼👇🏼👇🏼👇🏼👇🏼
Water 💧 💧💧
Osmosis water mixed with normal water (24 hours stale that the chlorine evaporates) to 0.2 EC. Add Cal / Mag to 0.4 Ec Ph with Organic Ph - to 5.8 - 6.4
MadeInGermany
Likes
16
Share
@Archieballs
Follow
Ultimate #1 10 cm
Ultimate #2 12 cm
Ultimate #3 9 cm
We are conducting a light experiment with these 3 #3 is solely under the Phlizon 600 watt LED
Ultimate #1 is solely under the Mars Hydo TS 1000
Ultimate #2 is in the middle so getting most of the light from Mars Hydro and a bit from Phlizon
Our belief is the #1 will have the biggest and most dense buds and that #3 will be the shortest and fluffiest buds. So sit back and and enjoy the ride let’s see what they do. These are in a 2x4 tent with Crè soil using solely BioBizz nutrients. All three seeds were direct from DutchPassion.


Likes
17
Share
@ScouseCityLX
Follow
Really suffered in the summer with heat waves. Temps in the tent when the lights were on was going as high as 93⁰f (33.88⁰c). The buds have foxtailed as a result and I beleive I had pheno #1 hermy in its final days. 0 seeds found in both phenos so I got lucky. It flew through the veg stage, growing faster than the runtz muffin it was sharing the tent with. Flower period felt fast too, it was looking stacked already in week 5.


Processing
Likes
10
Share


Likes
15
Share
@TheCannaProphet
Follow
~ DUTCH PASSION / SUPER SATIVA SEED CLUB FAST FLOWER 'TESTER' A and 'TESTER' B ~
Well cannafam, here we go again on another growing adventure together! This diary will be special to me for two reasons, one because I have the opportunity to cultivate some new and exciting strains from two of the TOP breeders in the industry! The second reason this will be special to me is that I will be growing these two strains in a brand new greenhouse that I put up! I'm super stoked to see how these two ladies turn out in this new setup.
On to the strains:
'Tester' Strain A info: Hybrid (I/S) | 6-7 weeks flowering | Fruity, Sweet, Candy
'Tester' Strain B info: Indica-Dominant (90%) | 7 weeks flowering | Fruity, Peppery, Sweet
I hope that you enjoy this run as much as I will... It's going to be fun and interesting for sure!
~GROW WHAT YOU LOVE, LOVE WHAT YOU GROW!~
____________________________________________________________________________________________________________________________________________________________________________________________________________________________________________________________________________________________________________________________
The Setup:
These beauties will be growing in a brand spanking new 10x14' greenhouse that I have equipped with automatic window openers, a complement of Hurricane fans and a de-humidifier/heater to help keep the environment as dialed in as possible.
I started both tester in glasses of tap water, where they soaked for 24hrs. After soaking, they were placed directly into whole eggshells with just their tops removed to make a natural seed starting pot that I filled with a 70/30 blend of Coco/Perlite which was pre-moistened with well water ph'd to 6.2, then placed under a 50w full spectrum LED on a 24hr light schedule.
Once, they both have their second set of leaves emerged, I plan on starting to put them in the greenhouse for 2-3 hour a day for a few days to help them acclimate and 'harden off' in the greenhouse. I'll be starting both off in 1qt pots, then transplanting them into to gradually larger pots until they're around 6 weeks old, then they will go into their final pots which are 25g fabric pots.
I mix my initial medium using 3 tbsp/g of Gaia Green Organics 4-4-4 along with 1 tbsp/g of Gaia Green Organics Glacial Rock Dust for the trace minerals it provides, 1 tbsp/g of Down To Earth Kelp Meal, 1 tbsp/g of Trichoderma/Mycorrhizae, and 1 cup/g of Wiggle Worm Castings. I hand mix my amendments to ensure an even distribution throughout the medium. I'll be watering with well water ph'd to 6.2-6.8 and providing bi-weekly compost tea's throughout the run.
____________________________________________________________________________________________________________________________________________________________________________________________________________________________________________________________________________________________________________________________
Weekly Updates:
5/16- Week Five is here and I couldn't be happier with how both of the Testers from Dutch Passion/SSSC are doing! Both are continuing to have excellent vigor and are 'praying' hard every day... VERY happy ladies!
5/18- Today, I watered both Testers with 1.5g of straight well water which was ph'd to 6.2 @ 70℉. I also removed some new shoots growing down low on both plants to help redirect energy towards the upper portions.
5/20- Yesterday and today were cool and rainy, so all I really did was to spend some quality time with the ladies, giving them both a good looking over to catch any issues well before they get out of hand. Both looked fantastic!
5/22- Yesterday, both Testers were watered with 2g of well water with 3 tbsp/g of Worm Tea concentrate, which was ph'd to 6.4 @ 72℉. I have also started to do some HST on both, twisting and bending branches to allow light to reach down into their canopies.
Well fam, Week Six of veg is on the books for these two gorgeous girls from Dutch Passion/Super Sativa Seed Club and I am absolutely impressed with how well both are doing despite the rather warm temp's right now... Strong ladies!💪
Thank you for visiting my diary, I hope you will follow along and hope you enjoy what I do! Stay Blessed!😎💚
Likes
33
Share
@Ferenc
Follow
Hi, I will grow 5 Cup Winner Auto Feminized Strains in this diary, mostly Indica dominant strains.
LSD-25 Auto Feminized Seeds By FastBuds:
LSD-25 Auto Feminized Seeds are another addition to FastBuds ever-growing range of automatic genetics. A cross of LSD and FastBud’s own in house Ruderalis, creating another high THC and low CBD automatic purple strain. This indica dominant hybrid has strong scents of earthy pine and wood. A short life cycle of only 8 weeks makes this genetic one of the quickest flowering seeds by FastBuds, without compromising in yield size. This strain can be treated with no extra care so can be great for beginners, but if trained correctly yields can improve massively.
Auto Glueberry OG Feminized Seeds by Dutch Passion:
Auto Glueberry OG Feminized Seeds are another cup winning genetics, awarded 3rd Prize Autoflower Highlife Cup Netherlands 2017. This strain stems from Dutch Passions Glueberry OG, a cross of (Gorrila Glue x OG) x Auto Blueberry, to ensure the same attributes as her photoperiod sister. This versatile Sativa dominant hybrid can be used for SOG as well as SCROG. Due to the Sativa dominance, you can expect large yields whatever climate with a flowering period of 77 days. Another great automatic strain from Dutch Passions USA Special Range.
Northern Light Automatic Seeds By Royal Queen Seeds:
Northern Light Automatic Seeds are a great strain for growing both indoors and outdoors in most climates. A mostly Indica strain due to its Afghani genetics. A nice, sweet taste with a comfortable physical effect, a great strain for medicinal uses. Ready for harvest in only 9 to 10 weeks the plant starts growing and producing flowers almost immediately. Northern Light Automatic has a very generous harvest and may be one of the highest-yielding autoflowering strains available today. Growing to a height of around 90-120 cm, it is quite a large plant for an autoflowering variety.
Auto Colorado Cookies Feminized Seeds By Dutch Passion:
Auto Colorado Cookies Feminized Seeds are a high yield, indica dominant Automatic hybrid. An original fruity USA flavor with a Dutch Passion yield in automatic form. A cross of the sought after Auto blueberry by Dutch Passion and an exceptional Girl Scout Cookie from Colorado. This strain has some incredible aromas as well as strength to match. With a complete life cycle of 70 to 77 days you can gain as much as possible when it comes to yield. This amazing Automatic Hybrid is yet another great addition to Dutch Passion’s collection in collaboration with USA Genetics.
Auto Blackberry Kush Feminized Seeds By Dutch Passion:
Auto Blackberry Kush Seeds are another cup winning genetic by Dutch Passion, placing 2nd in Autoflowers, Highlife Cup, Netherlands 2018. A cross between Dutch Passions Original Blueberry and a Kush Hash-Plant has created an indica dominant hybrid with a sweet fruity taste. Dominance from the Blueberry tends to give to a sweeter characteristic, combined with an indica dominance from the Kush. Expect Vigorous growth as well as great dark purple hues from this hybrid later in flower. Average height of 0.75-1m when on 20/4 and all complete within 70 days from sprout.
24 hours light schedule, 90 percent humidity, trigger spray, no fertilization.
15th of August: I prepared the seeds and tonight I will place them to be in water for at least 12 hours. 15th of August: I placed them to the water. Auto BlackBerry Kush straight submerged. Wao....:D 16th of August: I placed them between damp paper towel. Northern Light Auto is the quickest she has already sprouted out.:) 17th of August 2019: All of them are fine the LSD-25 was the slowest and the Northern Light is the fastest seed that germinated. They are ready to be planted tomorrow ;) Day 1: I have planted them. 60 W LED for 5 plants 98 percent humidity, daily water 5ml per plant plus a lot of triggering to keep the humidity very high all the holes are closed, 24 hours light schedule. I just need to wait to them to be out :) Day 2: The winner is Blackberry Kush she is the first out. :) Rest of them still not out but I think by tomorrow most of them will be. Day 3: Super Skunk is not viable. The seed isndead all were out I checked she stopped growing but I didn't not find any broken part or the seed was not even dried or something like that. It has never happened to me the seed just stopped its life:( I will grow this strain next time. I replaced with Glueberry OG. All out by the way :)❤️
Day 5: All of them grow quick, 4-5 cm already, they are so fragile ❤️
Day 6: LSD-25 and BlackBerry Kush is 10 cm long they are the tallest gamers. Rest of them are fine with 6-7cm.


Likes
3
Share
@ScouseCityLX
Follow
*Sorry for lack of photos in this first week*
Hi there, welcome to the first week of the Fastbuds Gorilla Cookies grown under the ts1000! You may see another plant in the tent, that is also Fastbuds but their new for 2022 Cherry Cola Auto strain. I'm going to try my very best with these plants, currently at seelding stage receiving around 270 ppfd each and dli is around 20 for 24hours of light. When the plants are bigger will increase the amount of light.
Likes
45
Share
@D33jW
Follow
📅 Week 11 – Day 76 / FLO42
Conditions are still challenging – warm and humid, making it hard to maintain a high VPD.
This week I removed some fan leaves to improve airflow between the buds.
Despite the tough climate, the flowers are swelling nicely, and the trichome coverage is looking great – no complaints here.
The forecast says a cooler and rainy week is coming, so I'm hoping to push them further into ripening with the help of a dehumidifier.
We keep moving forward – the finish line is getting close! 💪
