Likes
Comments
Share


@burnout
Follow
Wedding Cheesecake starting to bud. Damage from caterpillars can be seen.


Likes
116
Share


@Kitties_and_Colas
Follow
~_~_~_~_~_~_~_~_~_~_~_~_~_~_~_~_~_~_~_~_~_~_~_~_~_~_~_~_~_~_~_~_~_~_~_~_~_~_~_~_~_~_~_~_~_~_~_~_~_~_~_~_~_~_~_~_~_~_~_~_~_~_~_~_~_~_~_~_~_~_~_~_~_~_~_~_~_~_~_~_~_~_~_
10/21/20
😻 We're documenting a day early because we'll be gone for a weekend camping trip...The plants are progressing beautifully and perpetually praying, they're absolutely loving this new MarsHydro! We decided to move the light from 24" to 30" to try widening the nodes a little before dropping back to 24", we're in unamended Promix so we typically start thinking about feed this week but being autos we're going to take it slow and wait on color ques before making that move (probably next week for sure)...thanks for reading and happy harvests everyone!! ❤️💡🌱😽💨
~_~_~_~_~_~_~_~_~_~_~_~_~_~_~_~_~_~_~_~_~_~_~_~_~_~_~_~_~_~_~_~_~_~_~_~_~_~_~_~_~_~_~_~_~_~_~_~_~_~_~_~_~_~_~_~_~_~_~_~_~_~_~_~_~_~_~_~_~_~_~_~_~_~_~_~_~_~_~
10/25/21
😺 We gave all plants a very, very light feeding (<3ml/gal) to see how they tolerate it, its super early but a few were already beginning to wash out ..We started bending plants today, low stress only for these girl and everything looks great so far! This MarsHydro is intense, the node spacing is extremely tight on all plants and growth has been really steady (especially these last few days), we couldn't be happier! Thanks for reading and love all around growmies!! 😻
❤️💡🌱..
⚡Mars Hydro/SP-3000⚡ Specifications ⚙️:
Diodes: Samsung LM301B / Osram 660nm (960 total!)
Driver: Meanwell 300watt 🔌 (300W±5% @AC120V-277V)
PPF: 824umol/S ☢️
PPE: 2.8 µmol/j 〰️〰️
Lifespan: >50k hrs ⌛
Veg Coverage: 3 x 5 ft 🌱
Flowering Coverage: 2 x 4 ft 🌼
Weight: 10.1 lbs (4.6kg)
-The SP-3000 uses an aluminum heatsink (no fan) and the driver can be placed outside the tent 🌡️⬇️
-IP65 waterproof ratings, tolerant to high humidity grow environments 💦 ..
-Up to 30 of these lights can be daisy-chained together and all controlled from a single light! 💡~💡~💡~💡~💡
~_~_~_~_~_~_~_~_~_~_~_~_~_~_~_~_~_~_~_~_~_~_~_~_~_~_~_~_~_~_~_~_~_~_~_~_~_~_~_~_~_~_~_~_~_~_~_~_~_~_~_~_~_~_~_~_~_~_~_~_~_~_~_~_~_~_~_~_~_~_~_~_~_~_~_~_~_~_~_~_~_~_~_

Likes
24
Share


@Weed_marseille
Follow
Ce début de semaine l'allongement à commencer fort avec l'apparition de petits ponpons blanc.🌸
J'essaie de gérer le gros pied et l'ensemble dans une forme homogène. Je m'aguerrie à l'art de la taille.👨🌾🏼

Likes
51
Share


@GreenHouseLab
Follow
Transplanted 7 days ago they are back into high gear. Two different phenos is nice to see also nice to be back in flowering with colder weather on the horizon. Regular Gaia Green amendment mix of 4-4-4, 2-8-4, kelp meal, EWC & Glacial Rock Dust. No issues with Mg, finally solved with the rock dust.
Plants looks out of shape ever so slightly it’s cause I’ve been leaf tucking. No under carriage bs going on here and I only removed dozen lower nodes on the biggest that’s it. Trying to maintain plant height will be near impossible, plant elevators will be a must.
Still no signs of pistils I’ll need to look under canopy further to see. The higher PK food will be kicking in just now and should help with the shift in priorities.
Both drink 1.5L every 2 day's at Day 35
Likes
32
Share


@Scandinavia
Follow
Fast grow from day 7 till today day 14. I have added a humidifier to help get my RH up cause it was too low. It is still not as good as i would like, but its okay. I started doing some LST and leaf tucking on Day 12 on the biggest plants and those i felt like could benefit from it. Today i lowered my lights so now my MH 600w light is down to 50cm from the canopy and the LED is at 45cm.
I also bought a Lux meter (Urceri Cloc – Lux Meter) to measure but im really confused about it after it showed that the LED puts out way more Lux than the 600MH but its supposed to be better at measuring HID light and not catch all the light from the full spectrum LED but still the LED seems to work better. You can judge yourself with the video ill post with this update. The 2 biggest plants is under the 600W bulb though, so there is alot to take in count at this moment.
Also i removed one more plant, so now the total is 16 plants and i will continue experimint with the height of the lamps. I would love some feedback 😎
Day 15: I took both lights up to 64cm.. Changed the MH bulb to a Full spectrum Bulb which gives more light to my girls
Day 20: posted new pictures, its going good until now, i just wish they were a little bigger but i have many different phenotypes it seems. When they go into flower i may add 400w more hps, but only if they will get big enough


Likes
17
Share


@EduardoLV885
Follow
Su aromas cada vez se hacen notar mas , esta llrna de tricomas y sus flores estan mas grandes cada dia , el cultivo de esta variedad en hidroponia resulto muy facil

Likes
12
Share


@KalooNie
Follow
Cleaned up all the center and bottom growth to get those long, thick colas! Little plant only has 7 main shoots because one was just in the way... Switching them to full bloom nutes on week 3 of flower 😊

Likes
7
Share


@Mousse
Follow
Lampe bei so 90%
Terps werden immer mehr und es bildet sich immer mehr Blütenmasse,
Mann kann täglich einen unterschied erkennen.
Am Ende der Woche noch
-das Netz entfernt
-Außerdem habe ich noch ein letztes Mal entlaubt.
Likes
24
Share


@baboone
Follow
Yeah pretty decent this week. It didn't grow loads but it's looking pretty green and healthy.
Changed the nutrients to bloom gradually. I think it's gonna turn into a weed bonzi which will be cool.
She wasn't showing any sign of flowering just yet and is probably transitioning, so I thought Id do a quick defoliation to get the light on the lower bud sites and better air flow.
Any observations, advice or tips are very welcome. Happy to answer questions too. Thanks for looking! Baboon

Likes
16
Share


@Andres
Follow
I would believe this variety again ... I think it could be better ... and do not make some mistakes in it ... I recommend it to all growers ...

Likes
12
Share


@LongJohn420
Follow
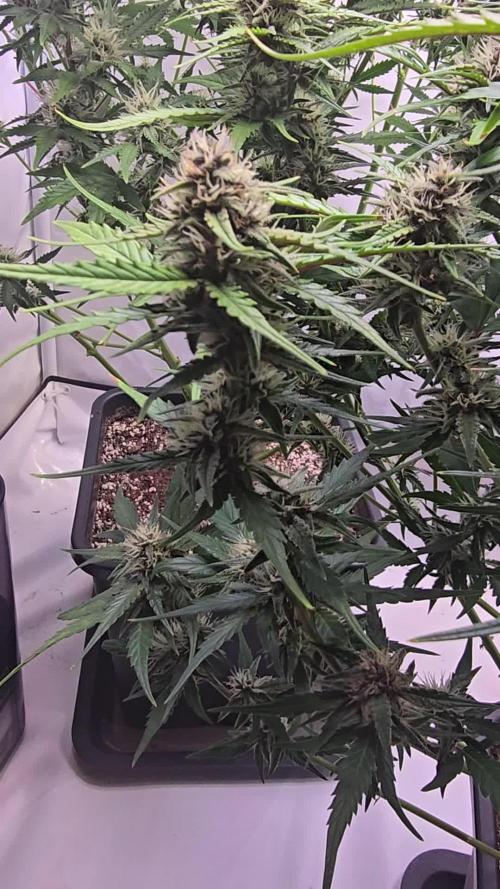
21.8 7th flowering week full and man these girls are frosty. Totally different phenos thou. But I don't mind interesting actually.. 👌 This fat leafed is one the frostiest plant I've come across more like Og nose on that. Other I guess more glue like and that smells true to her name and loud.. They've gotten good amount of mass in last weeks and I hope they still do being pretty small. Atleast 9 weeks or these girls seems like.. Others in my tent I started flushing they show signs of ripening these don't not just yet. And these were the smallest ones and started flowering last.
Really nice surprise these seeds I didn't know what to expect really but yeah 👍
happy growing boys and girls! btw that in that video is my whole tent with Shiskaberry's and Orange Shreb's
Peace out! 🙏

Likes
8
Share

@ThatsmyGrow
Follow
Another good week, i love how red some buds get. Never saw some buds purple like that, but i hope they Taste like they look.
Likes
4
Share


@TeamQuality420
Follow
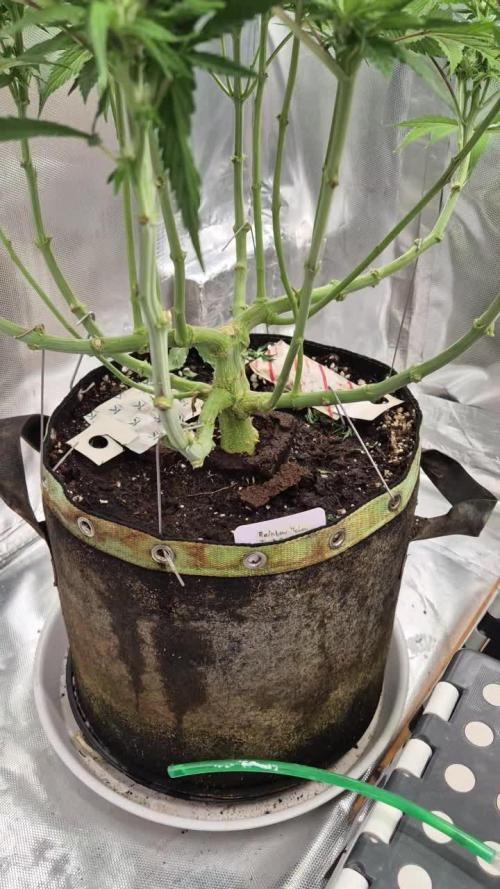
On the side note there was no stress up to this point .
ON A SIDE NOTE : I waited way too long to switch to flower for my grow area . So I am gonna be bending them in all different fun ways . Hey no one said it had to be perfect!
So lady liberty she is giving me so work to do .
Added the exhale c02 bag jan 9th .
Minor low stress training in the first week then I wont be doing more . Unreal how happy and healthy they are . I know that my dirt doesnt have proper air ratio so perlite will be mixed into this dirt next time .
Processing
Likes
6
Share


@Smokwiri
Follow
This one's going faster then thought, it's an autoflower on 12/12 from seed, so the yield isnt expected to be really high.
The seed on 18 hours schedule would finish in around 6,5-7 weeks
I've heard that it's going to be the same on a 12/12 schedule 😀
ofcourse that will lower yield too. But.. for buds in the fourth week since the first signs of flowering hairs all looks good, feeding is on the max with an EC of 2.38 !
Light is 100w chinese cob on 220v
on the sides 2x 50W - 12V, both powered at around 35 watts making 170 watts together ( to compensate the short time schedule of 12/12)
I'm kinda new to autoflowers, I heard about small yield, I'm aiming towards 30g/plant dry bud, I'll be happy with a wet weight of 200grams for the whole plant.
Likes
22
Share


@Mastr
Follow
Hi guy's
I check trichomes yesterday day 71 and she is Ready
lots amber trichomes I will chop her very soon maybe couple days
Likes
4
Share

@Borberad
Follow
Umstellung an Tag 44. Nach einer 20h Nacht wird in die Blütephase gewechselt.
Likes
11
Share


@Paflucy
Follow
The end of the fifth week of flowering and there is nothing to talk about...
There are still problems with SSH. I thought it was a calcium deficiency so I gave her an extra dose but it's hard to say if it helped much. I read that calmag from biobizza is not very strong. I don't want to give too much because too much calcium will block phosphorus. PK got quite a lot and I'm wondering if I should give her more or maybe she is sensitive and I should give her a rest from fertilization?
It certainly doesn't help that they are dry all the time...


Likes
3
Share


@HowtoBubatz
Follow
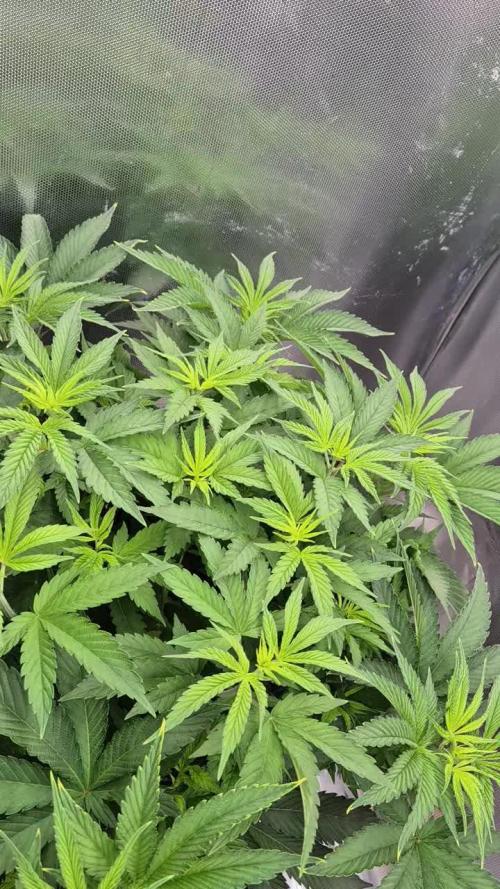
The first week of flowering is here, and things are finally looking much better!
Both plants have recovered well and are now growing much healthier.🌱
#1 has already started stretching significantly, really picking up speed. It’s exciting to see how quickly it’s developing! Meanwhile.
#2 spent about half the week still in vegetation, but towards the end, I finally spotted the first signs of flowering.
Now that both are officially in bloom, I’m looking forward to seeing how they continue to develop over the next weeks. On to the next phase! 😊
Likes
12
Share


@Manutentore
Follow
Mon. 20 added some Fan, min setting ..
Wen 22 Water
Sat. 25 Light 25%