


Likes
5
Share


@xXBorn2BreedXx
Follow
This girl is loving life right now since her burn. Her root system has flourished since she was transplanted in her solo which she has left on 4.15

Likes
26
Share


@Organic_LarF
Follow
High GD community,
Week 3,
Veg 2
Two lovely Sweet Cherry Pie by Sweet Seeds!
All on track so far!
1 feeding this week.
Thats it for this week boys and girls,
Thanks for reading and passing by and 💚💚💚👏👏👏👍👍👍 for Marshydro leds. Quality/price top!
Grow safe buds and feel free to check out my other ladies doing fine thanks!
🌈viparspectra🌈
🎟️Organic_LarF♡viparspectra 🎟️
for your discount!!!!
https://www.viparspectra.com/?aff=nbemz68cxril&utm_source=affiliate
🌈Join us now🌈
🙏🌿🌿🌿🙏
Special thanks to
🏅🌿greenbuzzliquids🌿🏅
Use organic_larF for 15% discount
👏👏👏Weedseedsexpress!!!! 👏👏👏
LarfxWSE for discount at
weedseedsexpress!!! 15% off!!!
👽👽👽Zamnesia!!! 👽👽👽
Add OrganicLarF as a code when buying your own MarsHydro LED light and get a nice reduction!!!👽🚀🛸


Likes
15
Share

@Radagast_
Follow
04.08.
Girl Scout Cookies
Day 101#
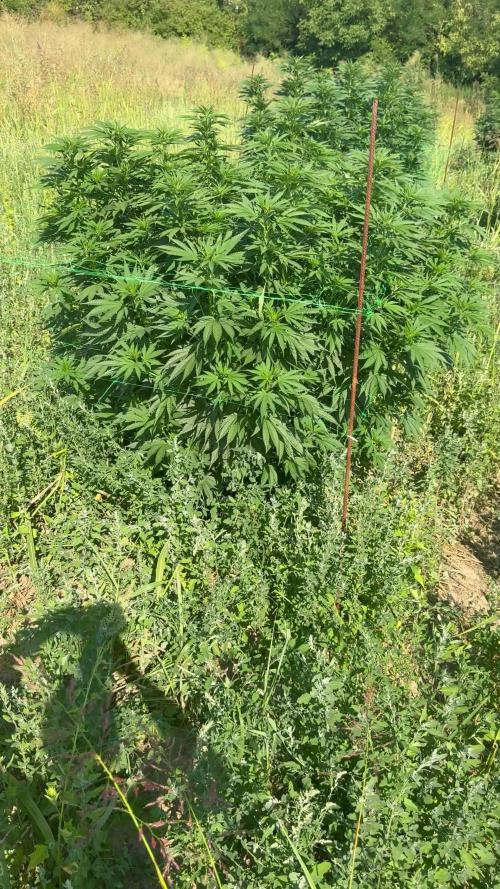
The plants are progressing well, most of them went into preflower a few days ago, the others are slowly entering... I was too lazy to photograph and record each plant separately, so I took a picture and recorded everything together... this grass has grown too much, in some places it is half way up the plant and you can't see how big the plants actually are, these days I will mow it under them and around them and in the next update I will post individual pictures where everything will look nice...day before yesterday I watered them with clean water, the next watering also with clean water and then I will most likely switch to food for the flower, I will see from the situation.
Three days ago it was the end of their fourteenth week, the pictures and videos are from day before yesterday.
I found a broken GSC this morning... last night there were strong storms, it was the only one that broke, it broke exactly where the tree splits into two main branches, right in the middle... I tied it with laces and will monitor the situation in the coming days.
Stay High and Keep Growing!!!

Likes
11
Share


@Mrniceeguy
Follow
My first time cloning I think I got it .. I’m a hands on kinda guy. If I can learn it I’ll do it.. super excited this strain is ⛽️

Processing
Likes
1
Share


@Blucha
Follow
I need to add a little bit of calmag as I'm recently avoided it at all.
Overall they growing fast. Transition week has finished.


Likes
88
Share


@Roberts
Follow
Strawberry Cake Auto has grown good. I battled with ph issues here, and there during the grow. She is really frosty, and has a strong Strawberry Aroma. I will post a harvest video if it allows me. If not it will be on my YouTube channel (link below). She did really good under the Mars Hydro FC4800. Thank you Mars Hydro, and Ganja Farmer. 🤜🤛🌱🌱🌱
Thank you grow diaries community for the 👇likes👇, follows, comments, and subscriptions on my YouTube channel👇. ❄️🌱🍻
Happy Growing 🌱🌱🌱
https://youtube.com/channel/UCAhN7yRzWLpcaRHhMIQ7X4g


Likes
72
Share


@Natrona
Follow
Fractal was harvested on Sept 12. Due to extended period of high temperatures and humidity with more rain expected every day following another hurricane. The other gals were showing disease. That was the determining factor to chop all outside girls down.
Fractal hung in the dark for 2 days. Because her grow family experienced bud rot and wilt, she was examined carefully for any disease. She was disease free.
Fractal had a long vegetative phase. Probably too long since I started my outside grow in April so they would be hardened off before I went on vacay in May. Three months of veg caused massive vegetative growth. The various breeder notes on photo period seeds indicate late September or October harvest. So that was in the back of my mind during this grow.
👉
Note for next year start seeds later in spring.
👉 Plan start date based on counting back from the vernal equinox.
👉 Based on such a long growing season, Autos may be preferable to finish quickly and not have extended vegetation phase before flower.
Thank you @DivineSeeds for the opportunity to grow your exotic strains and participate in your contest. I will definitely grow fractal again.

Likes
5
Share


@Stoolboxx
Follow
Last time I trust autofocus because lazy...
Week 8 is going good, still some burnt tips but just letting it go. The smell is too much for the carbon filter to handle at times which is a good thing.
Need to start thinking about a drying setup as the left plant will definitely be done first.
Likes
7
Share


@Naujas
Follow
this is my new project :) the balcony is on the north side so it doesn't get much sun :) we'll see how it goes :) good luck to everyone.
Likes
33
Share


Likes
47
Share


@Targona
Follow
37 days since my little girl sprouted from a seed🌱
Sixth week of growing my Lemon Oasis Auto 🍋🍋🍋
Nutrients:
I use Advanced Hydroponics Of Holland nutrients - three basic components, always according to the table for vegetative growth 💓 -
- Dutch Formula 1 Grow - supplies the plant with substances necessary for the perfect development of roots, stem and leaves; intended for the growth phase 🌾
- Dutch Formula 2 Bloom - contains a large amount of nutrients needed for rapid growth and development of fruits, provides energy to the plant; intended for the flower phase 🌸🌿
- Dutch Formula 3 Micro - increases oxygen intake, improves plant immunity, ensures better absorption of nutrients; intended for the growth and flowering phase 🌴
-------------------------------------------------- -------------------------------------------------- --------
BioBizz Calmag - The special Calmag supplement was designed for professional and hobby growers who need to supply calcium and magnesium in organic quality to plants for a long time or immediately. 100% organic 💩💩 and certified BioBizz Calmag product is made from calcium carbonate and magnesium sulfate supplemented with humic acid.
-------------------------------------------------- -------------------------------------------------- --------
BioBizz Bio pH- is an organic pH regulator. Aqueous solution of citric acid, which occurs naturally in citrus fruits 🍋🍋
-------------------------------------------------- -------------------------------------------------- -------
During the flowering period, I add Advanced Nutrients stimulators:
- Bud Ignitor (first two weeks of flowering) - flower stimulator 🌸🏵️
I stopped giving it now
- Bud Candy - carbs for my girls 🍭🍭🍭
- JUNGLE - ENVIRON X is a highly effective complex product
stimulate the formation of flowers. Contains no synthetic growth regulators (PGRs).
• multiplies yield and increases product quality
In general:
Lemon Oasis Auto 🍋🍋🍋 - My tallest and most mature girl in my tent. On the sides of the main "stick" grew two long legs (one of which is about 15 cm), full of female sexual characteristics - simply an Alpha female 😁 Otherwise, the girl is growing beautifully, has regular internodes, looks optimal for her age🍃💚
Training:
During this period, I usually do another defoliation and LST 💚🌞🌞
Light: Mars Hydro TS1000 The plants react effectively and the light is technically very well managed - I try to have 50cm between the light and the plants, so I move it up regularly 💡💡💡
See you soon 😍💚

Likes
1
Share


@Genji
Follow
Blütewoche 5 läuft ohne Probleme. Die Buds werden schnell schwerer. Muss mir wahrscheinlich bald Gedanken machen sie zu stützen.
Likes
46
Share


@LittleBigTrees
Follow
Been flushing from day 70 (7 days) some nice purple and red showing as the plant uses its reserves up , I will chop tomorrow at 78 days of flower .

Likes
5
Share


@Lazuli
Follow
Super dense flowers, i stop nitrogen and use only overdrive for these final weeks
Likes
39
Share


@AestheticGenetics
Follow
4/15/25 Things are progressing nicely. Some plants dont seem to be doing too much but 3 of them or so that are really standing out.
Im curious if some of these are going to be longer flowering time than anticipated with the very obvious sativa dominant plants.

Processing
Likes
84
Share


@Undercoverbruva
Follow
Week 4 started some last and dropped my pH to try and stay to 5.5 ordered a spyder airstone and scroll net to scroll out this week growth has suddenly exploded since adding great white and lowering res just don't know about that leaf changing onto two more buckets Thursday hopefully that will sort it might have to trim a bit what u reck? This site has really helped me thankyou guys

Likes
2
Share


@Do_it_Dan
Follow
This is peanut butter cookies auto from tastebudz, week one from germination, happy growing people 😀
