
Likes
Comments
Share


@Ultraviolet
Follow
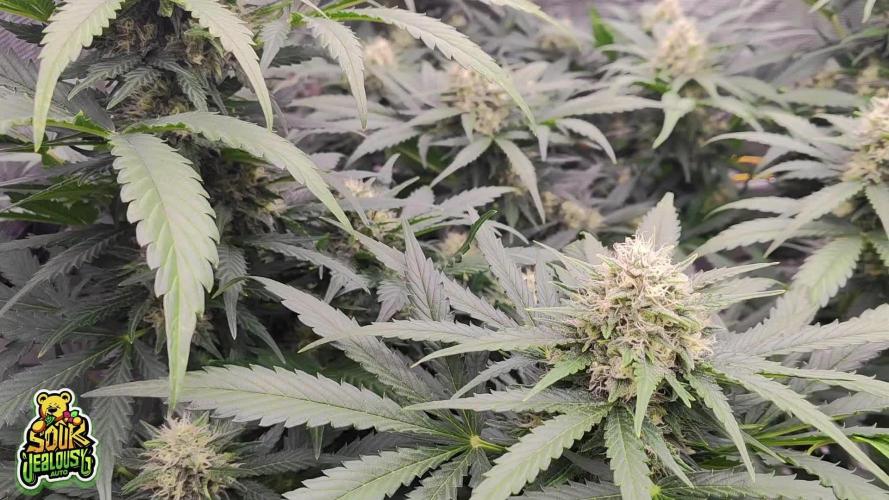
FISH SH!T THE ORGANIC SOIL CONDITIONER (used twice before and always noticed instantly)
Fish Shit is a living product! It provides a complex Microbial profile that includes thousands of different species of bacteria, fungi, and protozoa. This profile is closer to a natural ecosystem than anything you will find on the market. Fish Shit helps release essential oils and terpenes which contribute to the building of a myriad of flavonoids. Flavanoids play a key role in the development of the most potent aromas and tasteful flavors of a plant and its fruit. Fish Shit contains beneficial microorganisms that help plants maximize nutrient uptake. It does this by transforming nutrients into more usable forms and keeping these nutrients in the soil longer. During photosynthesis plants naturally produce exudates (chemicals that are secreted through their roots). Through these exudates, plants can attract the types of good bacteria that are beneficial to them at different points in their growing cycle. These good bacteria cover the roots and act as a barrier to the invasion of disease-causing organisms that may harm the plant.
What Are Enzymes?
Before we dive headfirst into how, exactly, enzymes can benefit cannabis plants, it helps to understand a little about what these microscopic proteins do. Essentially, enzymes facilitate chemical reactions. They do so by binding with a substrate and forming or breaking molecular bonds. In this context, the substrate is the molecule upon which an enzyme acts to boost the efficiency of a reaction.
•substrate /sŭb′strāt″/
•noun
•The material or substance on which an enzyme acts. A surface on which an organism grows or is attached. An underlying layer; a substratum.
Enzymes are proteins with complex 3D shapes that feature regions called active sites. When the substrate binds to these active sites, it forms an enzyme-substrate complex that causes a chemical reaction to take place, temporarily changing the structure of the enzyme and ultimately causing molecules to either come together or break apart. As a result, molecular products are released, and the enzyme returns to its original shape.
Specific enzymes are capable of binding with certain substrates, as the substrate fits into the active site more or less via a lock-and-key principle. Although, new research suggests a more accurate theory of "induced fit", in which enzymes and substrates undergo structural changes to facilitate the reaction.
If you take the human body as an example, we have an abundance of enzymes in our saliva and digestive system. These molecules bind with substrates in these regions (food particles), working to break down the food we eat into usable parts before converting them to energy.
Enzymes in cannabis work in a similar way to the example highlighted above. Typically, enzymes occur in soil naturally, but if your soil mix is lacking organic material, or you're growing hydroponically, then adding enzymes directly to the substrate is crucial.
By using them in cannabis growing, enzymes not only help break down essential nutrients into smaller, more readily available pieces, but they also support the digestion of dead root cells, clearing a direct path for nutrients.
Overall, enzymes make it easier for your cannabis plants to absorb all the elements they need to reach their full potential. For growers, a plant that reaches its full potential means a bucketload of juicy buds come harvest. This is essential if you want to reuse a pot with old systems left over like mine.
Common plant enzymes include:
•Cellulase
•Xylanase
•Beta-glucosidase
•Hemicellulase
•Amidase
Amino acids are a crucial, yet basic unit of protein, and they contain an amino group and a carboxylic group. They play an extensive role in the gene expression process, which includes an adjustment of protein functions that facilitate messenger RNA
Nitrogen, phosphorus, and potassium are the three main pillars of nutrient solutions and fertilizers, but there are countless other nutrients that your cannabis plants need to produce the best possible harvest. Amino acids are one of them.
You may have noticed that amino acids get a lot of attention from bodybuilders and other athletes. That’s because they play a key role in the synthesis of protein, which, as you probably know, is super important for sports recovery and muscle growth. Amino acids are the building blocks of protein and the foundation of both plant and animal life.
But what do amino acids do for cannabis?
WHY IS PROTEIN IMPORTANT FOR CANNABIS?
Just like proteins are important for the human body, they are equally important for the growth and development of plants.
For example, proteins help plants:
•Facilitate the growth of intracellular plant structures
•Promote energy generation
•Stimulate metabolic processes
•Facilitate the absorption and transportation of nutrients
So, where do plants get these vital proteins from? Well, unlike humans, plants can’t source proteins or amino acids from other organisms. Instead, they need to create their own amino acids, and then use these to build protein. That's why gardeners, much like athletes, go wild for amino acid supplements.
Amino acids help plants by…
• Increasing their production of chlorophyll, which ultimately improves their ability to photosynthesize
• Serving as an easily absorbable form of nitrogen
• Stimulating the synthesis of key vitamins
• Improving their resistance to pests and diseases
• Boosting the strength of their cells
Amino acids also serve as the precursors to auxins, a group of plant hormones produced in the meristems—the apex of the stems where new leaves and stems are born.
Auxins play a key role in the plant, activating genes for plant growth and development by triggering a multitude of vital plant functions. In other words, they determine what its size and architecture will look like. Auxins influence the development of branches, flowers, and roots, and even help to regulate the photoperiod response of the plant.
Some amino acids, like cysteine, also work together with antioxidants like glutathione to help cannabis plants deal with oxidative stress, which can be caused by high-intensity lighting, some nutrient solutions, and high levels of CO₂.
Unlike humans, plants can synthesize all the amino acids they need to survive and develop properly. Unfortunately, however, amino acid synthesis is a really high-energy process, and plants may struggle to produce enough amino acids when exposed to stress.
WHAT FACTORS AFFECT A PLANT’S ABILITY TO SYNTHESISE AMINO ACIDS?
Any kind of stress can affect a plant’s ability to produce enough amino acids.
This includes:
• Drought
• Temperature extremes
• Poor soil health
• Pests
• Diseases
• Poor lighting
• Lack of space
• Poor root health
WHAT DOES ALL OF THIS MEAN FOR WEED PLANTS?
If you want to push your plants to their extreme in terms of floral growth and resin production, you should look into amino acid fertilizers. By making amino acids readily available to your plants, they’ll be able to use crucial energy to grow and bloom, rather than focusing on synthesizing amino acids themselves. Game of Inches, this is another Plants can absorb amino acids via their roots and leaves. They can also benefit from amino acids during both their vegetative and flowering phases. The fastest way for plants to absorb amino acids is via their leaves. The foliar application of amino acids is believed to improve the transportation of nutrients, increase transpiration, and boost photosynthesis. Hence, I recommend feeding your plants with foliar amino acid fertilizers. When doing so, however, carefully measure the amount of fertilizer you use, as—like with any nutrient—overfeeding can damage your plants.
FOLIAR FEED AND SOIL SOAK
• 1 crushed queen anne carrot
• 20ml h2o2
• 1 crushed radish
• 0.25 tsp NPK Enzymes
• 0.25 tsp NPK Amino Acids
• 50ml coconut water ( nature's own amniotic fluid packed with amino, enzymes )
+ The sound of songbirds.
Onto the predators
1250 -Green Lacewings
Lacewings are extremely voracious predatory insects that feed on several pests. In adulthood, it feeds on pollen and nectar. In the larval stage, it feeds on aphids, thrips, and mealybugs at all stages of growth. It can also attack spider mites in moderate quantities. It is initially an aphid predator, but very effectively controls thrips and mealybugs infestations. It is so voracious that in the absence of prey, it will feed on its congeners. Lacewings are cannibalistic if there is no food available for them. It is therefore important to introduce them into an infestation situation, and not just preventively.
•congener /kŏn′jə-nər/
•noun
•A member of the same kind, class, or group.
•An organism belonging to the same taxonomic genus as another organism.
•A thing of the same kind as. or nearly allied to, another; specifically, in botany and zoology, a plant or an animal belonging to the same genus as another or to one nearly allied.
Ideal temperature 20°C – 26°C
Ideal humidity 60% – 70%
Predatory stage life cycle 21 days
Introduction rate 4 weeks
Storage Refrigerator
Use Immediately
Are there any specific instructions on how to use this predator?
Lacewings are available on small paper cards that you can hang to plant stems. On the cards are dozens of eggs ready to hatch. There are also sterile eggs they can feed on once they have hatched before they are ready to disperse in the foliage. It is important to use them quickly upon receipt to avoid cannibalism. If you don't use them right away, you can store the cards in the refrigerator for 24 to 48 hours to prevent the eggs from hatching too quickly. Avoid storing them for longer than this or you risk losing eggs. 1250 eggs are divided into 7.5 cards, 2500 eggs on 15 cards, and 5000 on 30 cards. The application rate is one card per square meter of growing surface.
Is this predator best used for preventive or curative treatments?
Lacewings are used as a curative solution.
Anything else I should know?
Lacewing eggs hatch approximately 24-72 hours after the cards are exposed to room temperature. When they emerge, the lacewings are just 1.5-2 mm long. They are very small so they are difficult to see. Once hatched, they will stay on the cards for a few hours and then disperse in the foliage. You quickly lose sight of them if you have not witnessed the hatching.
They then live in the foliage for about 3 weeks. Often, you will see them towards the end of their larval cycle. After feeding for 3 weeks, they will triple and even quadruple in size. At that point, they are easier to see. But they remain very discreet insects, it is not abnormal not to see them.
Egg carcasses left behind on the cards do not disappear after the hatching has happened. It's normal to see eggs still on the cards. Visually it is very similar before and after hatching.
Also, on the boxes, there are sterile ephestia eggs which are used to feed the lacewings once hatched. Not all lacewing eggs are viable either. Only a certain percentage of lacewing eggs will hatch. Once hatched, the eggs are white. You can observe this using a magnifying glass.
With,
5000 Stratiolaelaps Scimitus
It is used to prevent or control thrips pupae, fungus gnats larvae, and root mealybugs in the soil. It can also be used for red mites in bird farms or hen houses. The adult is about 1 mm long and is medium brown with a beige triangle on its back. Another fun fact about them is they can survive without prey. They can eat algae and plant debris. This is why they can reproduce and stay in plants for long periods.
Ideal temperature 15°C – 23°C
Predatory stage life cycle 18 days
Introduction rate 2 weeks
Storage Room temperature
Use Within one week
Are there any specific instructions on how to use this predator?
Sprinkle directly on the growing media. They can live in all types of substrates like potting soil, coconut fiber, rock wool, cedar mulch, etc. Stratiolaelaps establish easily so they are permanently fighting pests. One introduction is generally enough unless you have an infestation. In this case, introduce them at least twice at a 2-week interval for best results. If you grow your plants in a 100% mineral substrate, it will have to be released more often since there is less organic matter than in traditional soil.
Do I need to take any specific precautions?
Stratiolaelaps breed in the top layer of the soil. So it is important not to disturb them in the first days following their introduction. They don't like temperatures below 8 ° C. So be sure not to introduce them in a water-saturated or cold environment. Release them 24-48 hours after your last watering. They are very sensitive to chemical acaricides and diatomaceous earth. These methods are incompatible with their use.

Likes
26
Share


@1Right_Angle
Follow
First pic is showing off some of the stretch that has occurred.
We start “Above the Stakes”this week.
-Sun 10th; it looks like the R plant is making a solid effort in its Stretch, which has just begun & is really happening. The L plant is flourishing and nearing the end of its own stretch. There is an image of the pair with 3’ showing on a tape measure as reference.
Jan 11 Good things are happening as the circle of branches starts fill in !
** as a side note, the Uv-B is going back on for 6hrs a cycle (3+3) after some more reading and the recent stretch action from the plant on the R. Nothing wrong with a weeks delay in nature between sisters & UV-B sounds like solid tech. Power is on again **
- Dinner-time after 4 days.
- Hole drilled in overhead corner-bracket, to help Centre the Light.
- Plants have been rotated a bit, LST (lashing-some-timber lol) re-positioned a bunch of branches/stakes, meshing the two plants together, in the middle. nuf snapshots. details as the week-ends.
-Nutrient ratios are Max’d as the volume will continue to climb for 2 more big feeds.
-rapid-start & cal/mg have already been dialed back a bit.
My watering volume per/24hr now shows my water use in metric. That # is based on the last 2 meals and I’m now looking at 5 days without nutes...
14th, Steady progress all the way round. Moving lights and supports as needed. Reach continues on the Right plant, while the Left continues to look amazing
-molasses in next feed (Sat), TDS to be updated
15th -the volume of water my plants have been receiving, has been larger each of the last 4 feedings. Extra time between feeds has been allotted and watering based on Pot weight/dryness is keeping the plants Full and Green.
-The next feed will be half the volume of the last one.
The goal tomorrow (day 5 since last feed) is to immediately satisfy the plants nutritional needs with a small meal (7 litres/2), but then it’s going to scream for more food. This time I will wait only 2 days and return to the larger volume and a 4-5 day cycle. That’s the plan.
Goal was to raise both the volume and demand for more nutrients. (Without creating a swamp) It’s been kind of patchwork getting the numbers-up, and this is the first pause in that steady climb. Both plants seem to be firing in all cylinders.
Sun Jan17
- adding Molasses to each feeding from Week 5 on in to harvest.
- 2 days since last half-feed.
Big feed tonight and 5 day gap next.
-Reached my Max H2o volume with solid Nutrition #’s. Plan is to hold levels for week 5/6 and then begin to taper nutes & volume slightly in 7/8 and hold till flush (11) & harvest (12/13)
** this grow is my best effort yet, if anybody sees or feels it’s getting “sideways”... I would love to hear about your opinion/concerns. **
The buds that are forming, actually have some substance to them. Tired of Indoor Popcorn. This grow is hapnin

Likes
33
Share


@The_Moz4rt
Follow
This week's started with another defoliation 😬
Flowers are slowly forming and she's gaining about 3 cm in height every day. Glad the little stretch I hoped for is happening.
Leaves are hitting the tent sides but I've heard it's not a big issue.
Day 53: she barely grew 1 cm this night. I'm switching to bloom nutrients now (CANNA Aqua Flores), gotta give her food for those flowers.
Day 56: the stretch is not finished at all, I guess it was just the beginning.
The day after I switched nutrients I noticed dark purple spots on a couple of leaves and I still have no idea of what that is (toxicity, deficiency, fungus...?).
The spots turned into necrosis and the EC was pretty high. Decided to step back a little and lower the EC again.
It might be a P-K def., but more likely a nute burn instead. Those spots didn't spread luckily, so I'm trying to keep her healthy and looking forward to see those little buds fattening.
Hopefully they won't become pop corn buds.
Fingers crosssed and patience!

Likes
1
Share


@Chucky324
Follow
Hello. This is the end of week 9 and the beginning of week 10 of veg.
This plant has huge leaves. I want to get in here this week and do some trimming up, getting ready for flowering.
Got to remove some of those huge leaves that block the light from the lower branches.
And get better air circulation so I won't have a problem with white powder mildew.
Turned the fans up to medium too to help with that.
Don't know if this plant is susceptible to that. Just better to be ready for it.
OK. Have Fun.
Chuck.


Likes
53
Share

@Chucky324
Follow
Hello. This is the end of week 6 and the beginning of week 7 of flowering.
Things are growing great in here. Not too many yellowing leaves for 6 weeks of flowering so far.
I got some pollenating done with 2 different Kosher Haze males. The males were a little taller than I was hoping for but both had a great smell and were very resinous to the touch. All the Kosher Haze males have been cut down and have been put in the compost. You can see the difference in the pollenated buds by the brown stigmas. In the wide angle shots you can see the white tags marking the lines holding the pollenated buds up. At harvest time I can let these marked branches grow a little longer if the seeds aren't mature yet. We shall see then.
I still have 1 Lemnesia male left that I like and It will be put in the smaller greenhouse with a Pink Kush and a Nova OG to make seeds in a week or 2. The Pink Kush and the Nova OG are in their 3 week of flowering in the greenhouse now.
Ok can't think of anything else.
Have Fun. Chuck.
Likes
15
Share


@therealgrowmie
Follow
Ladies and gentlemen, the cycle has been flipped, so flowering is imminent.
The plants looked healthy (healthy enough 😅), and if I’m honest, I was also running out of patience. The canopy is set, the net is filled, and now it’s time to let the stretch begin.
I’ve got a batch of Amnesia Haze ready for the next classic run, but first, let’s see what this round delivers.
Stats so far:
💧 Watering: Every third day
🌡️ Temp: 26–28°C
💦 Humidity: 65% RH
📈 VPD: ~1.18 kPa
💡 Light: ~700 PPFD

Likes
12
Share


@Jays_Not_Here_Man
Follow
Another week has flown by! The girls are doing great, cruise control this week as I have just been monitoring RH and temps. Trying to keep them as low as possible, I’ve been getting as low as 74 during the day and 68 at night.
I finally took a look a look at the trichomes with my jewellers loop, lots of cloudy, and a few amber around the leaves and top colas, but still lot’s of clear trichomes. I’ve ordered myself a wireless/usb digital microscope to assist with the process, and looks like it will be here just in time to determine harvest day. 😎🎄
I started by eliminating the nutrients at the beginning of the week. I typically allow for 3-4 pure water feeds before I harvest, and at the rate they have been drinking, this should be enough to get through the 7-12 days they have before harvest. I don’t flush, but rather “rinse” with normal water amounts, allowing the plant to use up the remaining nutrients in the soil. This also allows me to recover most of the soil from my grows and reuse ♻️ with other soil mix.
There has been great debate and a great deal of bro science out there for many years, but the recent studies suggest there is no difference in end result when it comes to flushing or using nutrients right until the end, if a proper dry and cure is performed. What do you think? What do you prefer to do? Thanks for reading this far, leave me a comment with your preferred method 👊🇨🇦❤️


Likes
5
Share

@AvadaKedavra
Follow
Howdy, here's a brief Week 9 update:
It's become autumn in the tent! Temps are dropping, plants are showing signs of senescence one by one (although some reluctantly so, am I right SJ?).
Headbanger, as expected, is finishing up first. Leaves are crisping up, colors are showing a slow, clean fade. I was pretty sure I burned her a little juding by the green tips, but Mephisto previously described this on the profile page, so maybe a little bit of both?
Mango, finally cut out of the scrog net and turned 180°, got light-burned AGAIN and I am since giving her as many stable days as possible to get off the stress-edge, to retain those remaining beautiful terps. She is finishing faster due to a troubled history, but I am very proud to have her (alive at this point) and already learned a LOT about sativas.
SJ is still watching the show from the corner, has settled building her rainforest canopy, and is just slowly bulking every day. Most content plant (well, as indica representation more resilient anyway), is hesitantly absorbing some Nitrogen from her fluffy, roughy, textured canopy. She'll let me know when things go south.
Not gonna lie, OSMH, after some reasearch into her "natural" soil conditions, already caused me to try and wrap my hot dehumidifier exhaust around the pots, in order to avoid scary root temp collapses during nights towards 15°C. I am giving the plants warm-ish waterings to raise soil temps slightly, but watching her suffer more is driving me a little nuts. She definitely managed to take a scratch at the little pride I still had remaining 😂
I clipped some videos from my personal vid log, enjoy. I think I have a LOT of larf incoming 😓. Don't be greedy.

Likes
44
Share


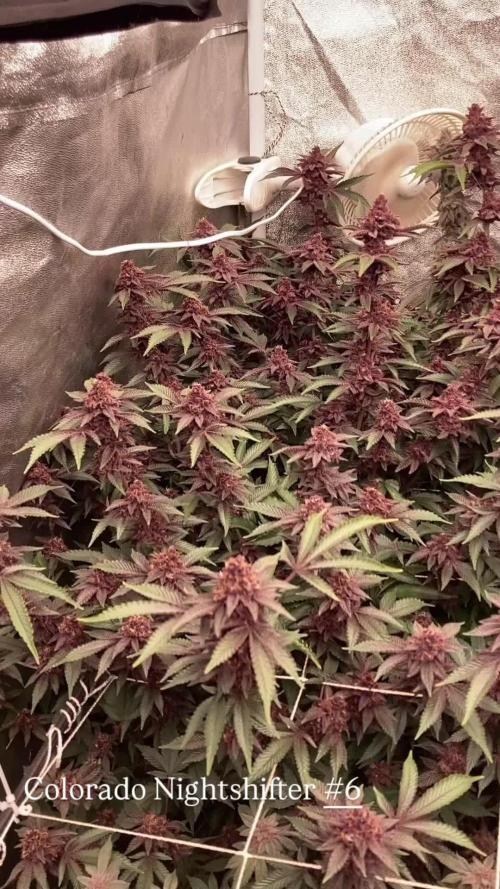
@RakonGrow
Follow
Note :
+ jegliches Zubehör wird in der GermniationsWoche aufgelistet . Zeitraffer Videos folgen immer nachträglich.
+ videos werden so geschnitten das nur ein geschlossenes Zelt erscheint , ergo Fehlen paar reale Minuten (ca 1 Std) .
Day 64:
Die Nacht war kalt und die Ventilatoren an . Ergebnis , der Hauptrieb der viel ventilation abbekommt ist wunderschön dunkel geworden.
Bilder hinzugefühgt um mal den Vergleich zu haben , beide haben die gleiche Bedingung , sowohl Dünger als auch Licht . Nur das Zoe mehr Wind abbekommt und damit halt eine kältere Nacht erhalten hat .
Wir sehen das es wohl keine wirklichen defiziete. Es ist ein verhalten auf die Kälte.
Day 65:
+ 1.75 Liter Flaschenwasser
+ + Dünger für Blühte
+ + + Canna Terrar Flores (Achtung wirkt wie PH-)
+ + + Canna Boost
+ + + Cannazym
+ + + Canna Rhizotonic
+ + + Canna PH+
+ + PH 5.91
Day 66:
Das viele Licht zeigt wie es aus allen Seiten der Buds wächst . Das ist nicht gerade ein Qualitätsmerkmal , eher ein Quantitätsmerkmal . Aber ich möchte auch wissen wie stark sich das auf die Qualität auswirkt .
Die Schwester hinkt zwar kräftig hinterher wegen ihrem Wasserschaden, aber zum Rauchen allemal gut .
Leichte Cal-Mag Probleme werden sichtbar .
Day 67:
+ 2 Liter Flaschenwasser
+ + Spülung
+ + + Canna Boost
+ + + Cannazym
+ + + Plagron PH-
+ + PH 6.0
Day 68:
keine besonderen Anzeichen , die Luftfeuchtigkeit ist so zwischen 60% bis 64% . Geht gerade nicht anders . Ist jetzt aber zum abreifen auch nicht Schlimm . Dafür sind die Temperaturen bei konstanten 26°C
Day 69:
Alles läuft nach Plan. Kein defizit, ergo , es wird nur rest Dünger in der Erde abgebaut.
Day 70:
+ 2 Liter Flaschenwasser
+ + Dünger für Blühte Generative Phase III
+ + + Canna Terrar Flores (Achtung wirkt wie PH-)
+ + + Canna Boost
+ + + Cannazym
+ + + Canna Rhizotonic
+ + + Canna PH+
+ + PH 5.91
Likes
3
Share


@AdirondackGreen
Follow
Not surprised one bean didn't pop, they're 14 months old.. 4/5 aint bad! Using the trusted paper towel method. I tried floating water cup last time and only had 70% success. I have my tent hooked up with several ESP8266 and ESP32 devices to automate the lights, fans, heaters and even nutrient dosing!

Likes
9
Share

@Chucky324
Follow
Hello. This is the end of week 11 and the beginning of week 12 of veg.
The plants are filling out their spaces out nicely. I keep pushing down the branches, under the rungs and spreading them out.
Still got a few weeks till I'm going to force flowering by closing up the tent at 8 pm and opening it at 8 am.
The plant has a tangy smell to it when I work with it.
OK. Keep Growing Straight.
Likes
40
Share

@PersonalSmok3s
Follow
All appears well with these ladies 😸
They’ve all completed their first week of flushing.
The #2 looks the closest to finished, but I’m going to let her continue until the others are finished.
Happy with how everything looks, until next time 🌱💚

Likes
19
Share


@NomadGrowDad
Follow
I’ve had to remove the humidifier to manage the RH. I also had to remove the carbon filter that lost its efficacy when I pumped the RH during seedling stage.
QueStion. Which location in my 4x2 tent ? At canopy? Between canopy and light? Above light?

Likes
Comments
Share


@TTerpz
Follow
One has a helmet hat gonna keep an eye out on her
Update: Helmet hat came off
2/16 update: all 3 doing well


Likes
20
Share


@Spudz
Follow
Day 63 — All progressing well. The Sensi bloom fertilizer has fixed all issues and the buds are really coming on now. I still have no explanation why one LB is tall and lanky and the other is stocky and thick. Only difference was I topped them a week apart. I switched to 12/12 schedule today. Read somewhere that resin production increases on that schedule. I am also just running bloom lighting for the past week. Seems to benefit them so will continue. I figure another 2-3 weeks and it will be time to harvest. Cheers!
Likes
5
Share


@Grey_Wolf
Follow
Welcome Back 😀 I hope you had a nice Christmas, The FBT02 Amnesia haze plant is doing nicely. It is more compact with tighter internodal spacing than testers number
1 11 and 13 only number 9 has a similiar structure . I gave her 1/3rd of a cup of Mr B's Green Trees Bloom mix and 1 qtr tspoon of great white and watered it in thoroughly.
I hope you have a great New Years celebration I'll be back next Year 😸
Likes
12
Share


@BrMarijuana
Follow
Ótimas plantas, floração ok, alimentação ok, rega e alimentação todos os dias, plantas satisfeitas, verde bonito, ótimos buds se formando, cheiro doce

Likes
17
Share


@CanadianFillmore
Follow
Welcome to another episode of Growfessor theatre, 4x8 edition!
Week 3F, ladies are doing good. Added B-52 to the nute mix, LSD, Green Crack and Divine storm are hungry! Did some defoliation.
Thanks for stopping by growfessors, tune in next time! 👽🌳💚


