


Likes
Comments
Share


Likes
12
Share


@Lushbloomz
Follow
After a comeback, the train is in the station! Even though I broke the main stem, she was an easy grow. I just basically let her do her with great results. Buds are thick and dense. Time for the drying and curing.

Likes
22
Share


@Polliceverde18
Follow
E quasi la fine lascio andare fino a fine settimana per colorare i tricomi
Likes
8
Share


@Bluedreaming
Follow
Yum, yum !!! Took some cuts of all three this week and think the gorilla girl is going to be a great candidate for half the garden next grow. Just love the size and smell of the flowers!!

Likes
5
Share


@ErreTheGrower_IT4
Follow
That’s the baby after 48 hour of completely dark.
And now start to dry. :)

Likes
9
Share


@pareto
Follow
She foxtailed but all in all was fine. Smell and Taste is nice!
--------------------------------------------------------------------------------------------------------------------------------------------------------------------------------
Set up cost (fixed costs)
-Lamp: 40€
-Timer: 3,5€
-Pot: 4€
-Total fixed costs: 47,5€
Given 5 years (or 15 grows) usage time translates to around 3,17€ per grow in materials.
Variable costs:
-Seeds: 6,33€
-Soil: 6€
-Fertilizer: 3,50€
-Power: 20,22€
-Total variable costs: 36,05€
-Total costs per grow: 39,22€
-Cost per gram: 1,07€/g
Likes
5
Share


@RastaRick
Follow
Tok off large fan leaves on day 24. Seeing preflower starting. Decided to try out a natural shape instead of doing LST. I hope this doesn't backfire... The blackberry gum on the right is getting big. I like how autopotamus has natural shape... But he also has much more light haha

Likes
45
Share


@valiotoro
Follow
Very very sticky i had to change gloves every 2-3 buds!🤓
Delicious smell🤤


Likes
3
Share

@AestheticGenetix
Follow
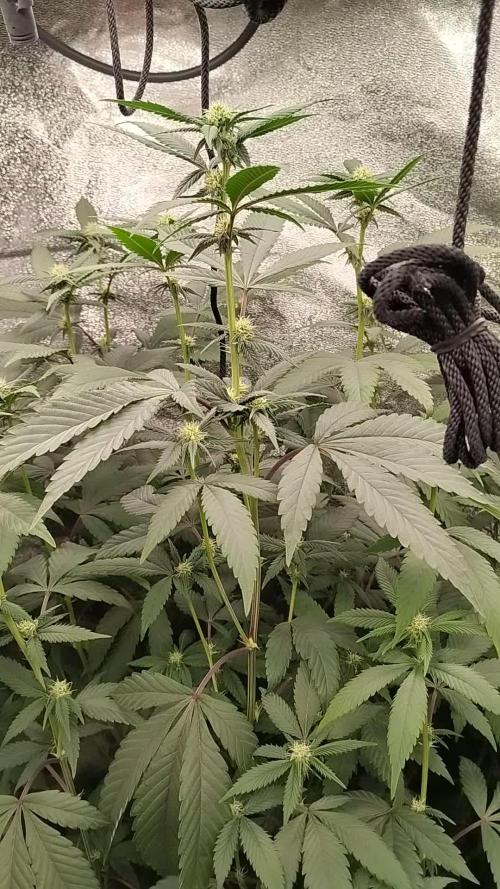
Hopefully she doesn't stretch too much more. She's getting close to the light. I really need to get in there and clean up the underbrush and everythinh
Likes
134
Share


@PapaNugs
Follow
This last week was easy. Auto pilot for sure. Only watered the self watering pots one time. The plant wasn't drinking much by the end.
Lights at 100% power.
Here are the lights details:
Medic Grow Mini Sun-2 150W LED
Model: MN150-022
Spectrum mode: V1
Efficacy: 2.8 umol/J
Thanks for stopping by!
You can find the light on Grow Diaries:
https://growdiaries.com/grow-lights/medic-grow/mini-sun-2-150-watts
You can find the light on Medic Grow's website:
https://medicgrow.com/

Processing
Likes
12
Share


@DudeGrowsWeed
Follow
March 13, 2019 Update:
Transplanted and moved one of the CBD Medi Kush plants into the Flower room this weekend. The other seedling will remain in the veg tent for another month, then I’ll pick the next plants to move into flower. I’d like to keep a 6 plant per month rotation going in flower.
Also, switching over to organic feeding. Feeding with Living Water (2-3 ounces of fish tank water per gallon of well water) and also trying Jobe's Organics Fertilizer Spikes for Vegetables 2-7-4. I planted 5 spikes per 5 gallon grow bag. I pushed the spikes down finger depth about 2/3's of the way from the base of the stem to the side of the bag and spread the 5 spikes evenly around the pots. The plan is to just add water from here on out and see how it goes. I have 'high hopes', I recently read "True Living Organics" by The Rev and he seems to be a big fan of spikes and living water.
I did change to a new 1000W HPS bulb in the flower room. The old bulb was in use for 3 months.
p.s. I'm starting a couple new diaries next, check em out! 👍

Likes
19
Share


@Haoss
Follow
This beautiful girl easily coped with stress, now she has become a giant, she feels very well 🌋😍💚
Likes
4
Share

@Beastmaster
Follow
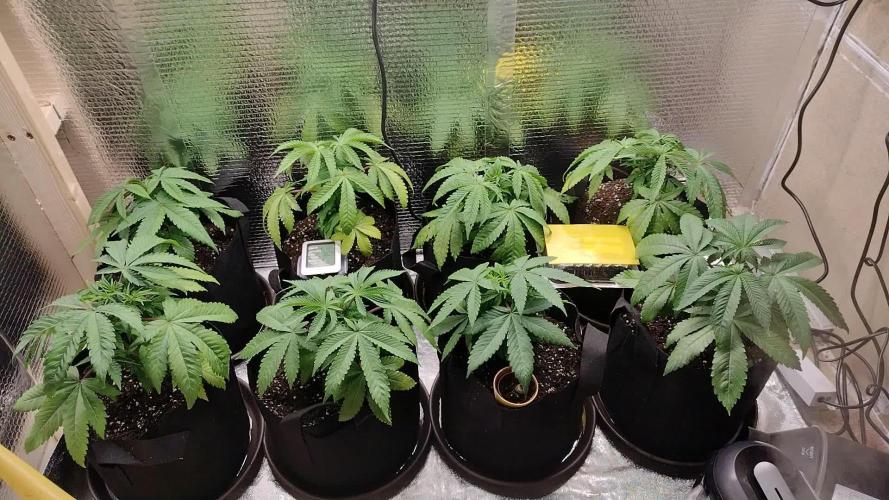
Start of week 6, day 45, 7th oct.
All topped, and have had a problem with little caterpillars, switch to flower soon, so far so good.😜

Likes
62
Share

@RockoCalenberg
Follow
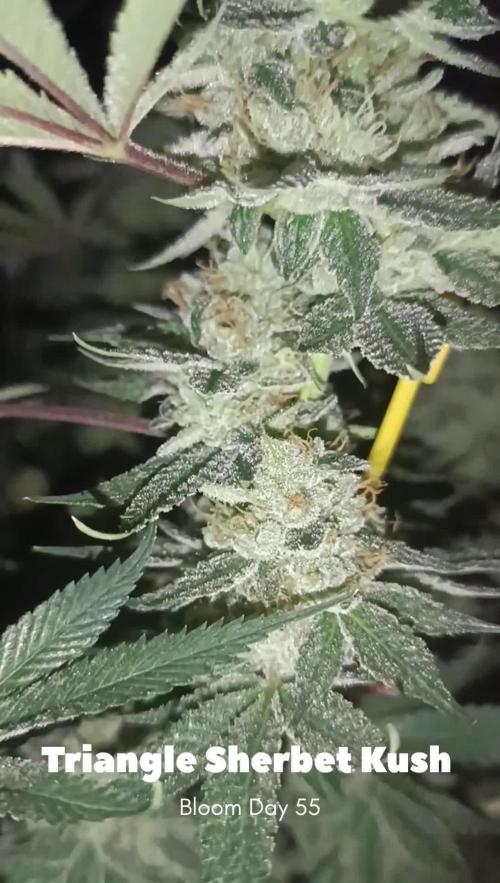
Blütetag 52 | Tag 112 gesamt
Klima – Frühling im Anmarsch
Draußen zeigt sich der Frühling deutlicher. Mehr Licht, mildere Tage, mehr Bewegung in der Luft.
Im Zelt ist dieser Umschwung spürbar. Die Pflanzen trinken mehr, der Dryback läuft zügiger durch, das Substrat trocknet gleichmäßiger ab. Der Rhythmus wirkt insgesamt ausgeglichener als noch vor einigen Wochen. Die Kurven verlaufen ruhiger, die VPD liegt häufiger im gewünschten Bereich.
Wir sind klar in der Endphase. Der Stoffwechsel arbeitet aktiv, kleine Schwankungen zeigen sich sofort – insgesamt aber ein ruhiger und stimmiger Verlauf.
🌿 Pflanzenstatus
White Gushers 33
Sie reagiert feiner auf Veränderungen, bleibt aber insgesamt stabil.
Die Blattverfärbungen nehmen weiter zu – deutliche Herbststimmung. Energie wird sichtbar aus dem Blattwerk gezogen und konsequent in die Blüten verlagert.
Das Stacking läuft weiter. Die Buds gewinnen an Volumen, wirken kompakter und schwerer. Die Oberfläche erscheint dichter, geschlossener, reifer.
Trichomstatus:
Überwiegend milchige Köpfe, nur noch vereinzelte klare. Kaum Amber. Sie bewegt sich klar in Richtung Erntefenster.
Triangle Sherbet Kush
Auch sie zeigt nun deutlichere Herbsttöne im Blattbild. Optisch etwas gelassener, aber klar in der Endphase angekommen.
Die Blütenstruktur wirkt sehr kompakt und sauber aufgebaut, extrem frostig. Minimal hinter der White im Reifegrad – jedoch im gleichen Zielkorridor.
Trichomstatus:
Milchig dominiert auch hier, mit leicht höherem Anteil klarer Köpfe als bei der WG 33. Eindeutig in der späten Reifephase.
🌸 Blüten & Duftbild
Die Buds gewinnen weiter an Struktur und Geschlossenheit.
Die Verdichtung ist sichtbar, die Form wirkt ausgereifter als noch vor einer Woche.
Aromatisch entwickelt sich das Profil weiter.
Die Frucht bleibt präsent, wird jedoch zunehmend von einer würzigeren Tiefe begleitet.
Die Komplexität nimmt zu, ebenso die Intensität.
Das Zusammenspiel der Noten wirkt runder, dichter und vielschichtiger.
Beim Öffnen des Zeltes steht der Duft klar im Raum – nicht lauter, sondern konzentrierter.
💧 Nährstoffe
Unverändert gefahren:
CalMag: 1,5 ml/L
Bloom: 1 ml/L
Keine Anpassungen.
Keine Experimente.
Konstanz bis zum Schluss.
🐞 IPM / Biologischer Pflanzenschutz
Keine neuen Maßnahmen.
Das bestehende System läuft weiter ohne zusätzliche Eingriffe.
Schimmel ist bislang kein Thema.
Aufmerksamkeit bleibt – Überreaktion nicht nötig.
🔎 Ausblick
Wir sind auf der Zielgeraden.
Noch wenige Tage – realistisch im Bereich von 7–10 Tagen, abhängig von der weiteren Trichomentwicklung.
Jetzt heißt es:
Klima stabil halten.
Nicht unnötig eingreifen.
Den Lauf sauber ins Finale führen.
🔎 Wochenfazit
Die Zeichen stehen klar auf Reife.
Herbstfarben im Blatt, milchige Trichome, fortschreitende Verdichtung.
Wir sind auf der Zielgeraden –
aber noch nicht an der Ziellinie.
Noch ein paar Tage Geduld.
Dann fällt der Vorhang.
— Rocko 🌿🔥💚
Flower Day 52 | Day 112 Overall
Climate – Spring Moving In
Outside, spring is becoming more noticeable. More light, milder days, more movement in the air.
That shift is clearly reflected inside the tent. The plants are drinking more, the dryback cycle moves faster, and the substrate dries more evenly. Overall, the rhythm feels more balanced compared to a few weeks ago. The curves look calmer, VPD stays in the target range more consistently.
We’re clearly in the final phase now. Metabolism is active, and even small fluctuations show up in the leaf expression — but overall the run feels steady and composed.
🌿 Plant Status
White Gushers 33
She reacts a bit more sensitively to changes, yet remains stable overall.
Leaf fade is progressing — clear autumn tones setting in. Energy is visibly being redirected from the foliage into the flowers.
Stacking continues. The buds are gaining volume, becoming denser and heavier. The surface looks tighter, more mature, more consolidated.
Trichome status:
Mostly cloudy heads with only a few remaining clear ones. Hardly any amber. She is clearly approaching the harvest window.
Triangle Sherbet Kush
She is now showing stronger autumn coloration as well. Slightly calmer in overall appearance, but unmistakably in late flower.
The bud structure is very compact and clean, extremely frosty. Slightly behind the White in maturity — yet within the same finishing corridor.
Trichome status:
Cloudy dominant here as well, with a slightly higher percentage of clear heads compared to WG33. Clearly in the late ripening phase.
🌸 Flowers & Aroma Profile
The buds continue gaining structure and density.
Their formation appears tighter and more developed than a week ago.
Aromatically, the profile keeps evolving.
The fruity notes remain present, but are increasingly supported by a deeper, warmer spice layer.
Complexity is increasing, and so is intensity.
The overall expression feels more layered, more concentrated, more mature.
When opening the tent, the aroma doesn’t feel louder — it feels fuller.
💧 Nutrients
Unchanged:
CalMag: 1.5 ml/L
Bloom: 1 ml/L
No adjustments.
No experiments.
Consistency through the finish.
🐞 IPM / Biological Pest Management
No new measures.
The existing system continues running without additional intervention.
No mold issues so far.
Awareness remains — overreaction does not.
🔎 Outlook
We are on the home stretch.
Likely within 7–10 days, depending on how trichome development continues.
Now it’s about:
Keeping the climate steady.
Avoiding unnecessary interference.
Guiding the run cleanly into the finale.
🔎 Weekly Conclusion
The signs are clear: ripening is advancing.
Autumn tones in the leaves, cloudy trichomes, increasing density.
We are on the home stretch —
but not at the finish line yet.
A few more days of patience.
Then the curtain falls.
— Rocko 🌿🔥💚

Likes
24
Share


@JohnnyBlaz3
Follow
lol guess the ladies arent in a rush to exit the tent. on day 8 of the flush now and still see some clear trics. maybe 80% milky with 20% clear and 0 to very small amber. other then that, not too much to report. could something be making the ladies mature a little slower near the end here? doubt lol i seem to worry alot, they looks absolutely amazing, the crystals are just absolutley caked!!!!!! like CAKED
Likes
Comments
Share

Likes
2
Share


@PatriciaGant
Follow
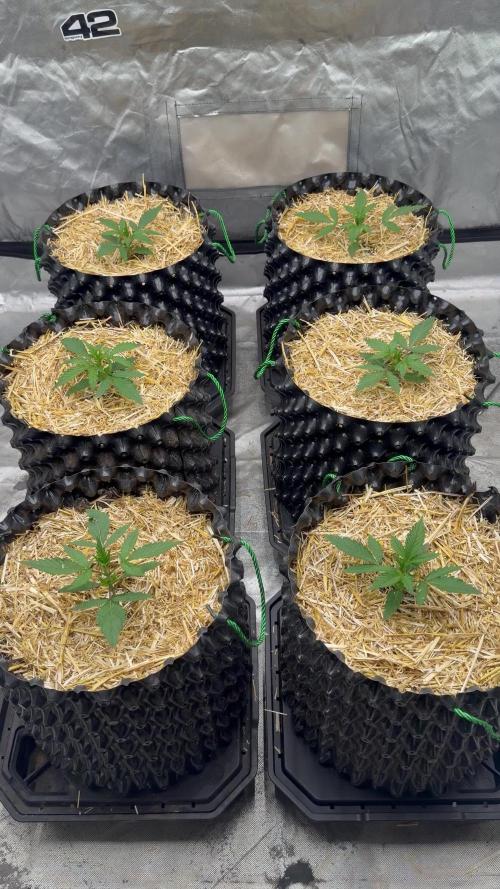
start of week nr 4. now the lady starts to get bushy and streches in the wide side, solid green leafes, harfest came colser with every day, yay.
Likes
14
Share


@Mr_Dior21
Follow
Man this week has been taking forever, my theory is it will only get slower relative to harvest just because my excitement.
I top dressed with about 2 inches of worm castings with an eyeballed mix of 2tbps of bone meal (3-14-0, bloom fert.), 1.5-2tbps of Gaia green all purp.(4-4-4, I don’t have an actual potassium fert. Like leingbenite So I use this), 3tbps of dr earth kelp meal (1-.05-2 has many different vitamins, amino acids, carbohydrates) and 2tbps of mykos (for microbiology inoculation and nutrient uptake/upkeep).
So I every time I water I have this old 2gallon water tin that I usually fill up about a quarter to half way full. Using this amount of water and the 5 gallon bucket of my soil mix makes my watering schedule once every 3 days (on average). I do use bottle nutrients but it’s mainly for the supplementing. For feeding I use 2-3ml to half a gallon for all bottle nutrients, I have never gone over, and I have never had deficiency’s that can hinder plant development.
Deficiency's: PSA: Now if anyone happens to read and actually look at my plants please do look closely and maybe let me know if you see something that I have missed since I’m still very new. I noticed my plant was having a cal mag issue so that’s why I top dressed with worm castings, I also top dressed with about 3tbps of azomite (I feel using azomite it may help with all those unnoticeable deficiency’s that a new grower might miss). I’ve been noticing on some of the leaves the very tips are showing discoloring, since the color is still so vibrant mostly I can rule out nitrogen, phosphorus, Iron, manganese, and sulphuric. It’s still very early stage so I did an extremely light foliage feeding (in the dark to prevent UV damage) of 2ml of big bud, big bloom, and tiger bloom, mixed into half a liter of water, I then emptied the spray bottle and sprayed with tap water just to make sure there’s no nute burning. Today I fed the plant through water amendments with 3ml of big bud, 3ml of bud candy, 3ml of big bloom, and 2ml of tiger bloom;(my theory is hopefully the nutrient deficiency’s will go away)
My soil mix is pretty basic. 40% coco, 10% perlite, 10% well composted chicken manure, 20% black gold compost, 20% worm castings. I’m not going to put the fertilizer amendment percentage to be honest I eye ball it but there’s a rough general measurements that I do.

Processing
Likes
65
Share

@DudeGrowsWeed
Follow
The final piece to my perpetual harvest strategy... Blue Dream'Matic by FastBuds. She is growing in organically composted 'super soil', I have not added any additional nutrients.
From the pic of the overall garden my strategy is to have the 2 youngest plants in the middle directly below the CFL. The 2 plants in late-veg or early-flower on the right. And the 2 plants in late-flower on the left (under the light with more reds). The CFL will also act as some side lighting for the 4 older plants. So far everything is going to plan. 👍
Setup:
24x48x72 grow tent
1 Viparspectra V300 300w LED fixture
1 Viparspectra R300 300w LED fixture
1 CFL 100w (26w actual)
4” exhaust fan w/carbon filter 190cfm
6” clip on fan
Electric oil filled radiator behind air intake
Likes
44
Share


@Cogollo_eu
Follow
**Encontrarás la traducción a español al final de la descripción**
From/Desde: 10/05/19 || To/Hasta: 16/05/19
From day/Desde día: 78 || To day/Hasta día: 84
You can find the Money Maker Diary here:
** Podéis encontrar el diario de las Money Maker aquí:**
https://growdiaries.com/diaries/25667-gorillamakingmoney-gorilla-vs-money-m
-----IMAGES & VIDEOS-----
5 - HomeMade Organic & Cheap CO2 generator (more info in week summary)
9, 10, 11 & 12: The bud on the right is a Gorilla one, the buds in the left or/and in the middle are Money Maker ones.
15 - Same Gorilla plant buds, one affected by CO2 in the roots and the other not.
-----WEEK SUMMARY-----
The smell is more sweet and intense every day, friends that came home turned them eyes into crystals when they see this little babys. The size isn't awesome, but the high ammount of buds full of crystals plus the strong sweet aroma makes them awesome. Buds are growing and fattenning very very well.
This week i added a boost of HomeMade CO2, i never measured the results of this invention so i can't give CO2 measurements. This method is widely used in home aquariums and there is where it comes from. For those interested i'm going to write here more detailed instructions. The 4 liters i've made will last for about 2 weeks.
---NEEDINGS---
- 250 ml Bottle
- 6~10 l Bottle
- 400 g Sugar / l water
- 1 Envelope of organic baker's yeast / l water (CHEMICAL WILL NOT WORK)
- 3 mid plastic tubes 40~50 cm
- 1 short plastic tube 5~6 cm
- 4 tube adapters
- Hot glue to seal adapters
The process of creating CO2 is simple, mix water, organic yeast and sugar in a bottle, and the sugar will free CO2 in the process of fermenting to alcohol due to the yeast.
1. Make a hole in the center of the big bottle cap, insert an adapter and secure it with hot glue
2. Make 3 holes in the small bottle cap and glue the other 3 adapters
3. Link both caps with one of the mid tubes and insert the other tubes on free adapters
4. Insert a short tube in the bottom of the small cap in the adapter that came from the big cap
5. Watch the Video!!
-----WATERING CALENDAR-----
Plants are beginning to drain the pots a bit faster so from now on i will raise the water ammount on each watering day 0.25 l.
11/05/19 - 1,5 l with All week nutrients -(Nirvana & Blombastic) also Big Bud half dosed @ PH6.4 & 2 E.C.
14/05/19 - 1,5 l with Bud Candy, Big Bud, Nirvana, B52, Bud Factor-X, Sensizym & Blombastic @ PH6.4 & 1.5 E.C.
*****ESPAÑOL*****
-----IMÁGENES Y VÍDEOS-----
5: Generador de CO2 casero, barato y orgánico (más info en el sumario semanal)
9, 10, 11 & 12: El cogollo que sale a la derecha es de una Gorila, el de la izquierda y/o el de en medio son de una Money Maker
15: Dos cogollos de la misma planta, uno afectado por CO2 en las raíces y el otro no
-----SUMARIO SEMANAL-----
El olor es más dulce e intenso día a día, los amigos que vienen a casa a verlas se quedan ojipláticos al verlas. El tamaño no es una maravilla, pero la gran cantidad de cogollos llenos de cristales añadido al aroma que entra por las fosas nasales las hacen increíbles. Los cogollos crecen y engordan de maravilla.
Esta semana he añadido un boost de CO2 casero, nunca he hecho mediciones de los resultados por lo que no puedo darlas. Este método es ampliamente usado en peceras caseras y de ahí saqué la idea. Para aquellos interesados dejo aquí instrucciones más detalladas. Con los 4 litros de agua que he preparado yo da para unas 2 semanas.
---NECESITAMOS---
- Botella de 250 ml
- Botella de 5 a 10 litros
- 400 g de azúcar por litro de agua
- 1 sobre de levadura de postre orgánica (LA QUÍMICA NO FUNCIONARÁ)
- 3 tubos de plástico de tamaño medio 40~50 cm
- 1 tubo de plástico de tamaño pequeño 5~6 cm
- 4 adaptadores para los tubos
- Cola caliente para pegar y sellar los adaptadores
El proceso de generar CO2 es simple, mezcla agua, levadura orgánica y azúcar en una botella, y el azúcar liberará CO2 en el proceso de fermentación a alcohol.
1. Haz un agujero en la tapa de la botella grande, inserta un adaptador y séllalo con cola caliente
2. Haz 3 agujeros en el tapón pequeño y haz lo mismo con los otros 3 adaptadores
3. Conecta los 2 tapones con uno de los tubos y conecta los otros 2 tubos a los adaptadores restantes
4. Conecta el tubo pequeño en la parte libre del adaptador del tapón pequeño que viene del tapón grande
5. Mira el vídeo
-----CALENDARIO DE RIEGO-----
Las platas comienzan a secar los tiestos un poco más rápido, asi que de ahora en adelante incrementaré 250 ml de agua adicionales en cada riego.
11/05/19 - 1,5 l con todos los nutrientes semanales -(Nirvana & Blombastic) BigBud mitad de dosis @ PH6,4 & 2 E.C.
14/05/19 - 1,5 l con Bud Candy, Big Bud, Nirvana, B52, Bud Factor-X, Sensizym y Blombastic @ PH6,4 & 1,5 E.C.