The Grow Awards 2026 🏆 


Likes
Comments
Share
@CRiSPrGrow
Follow
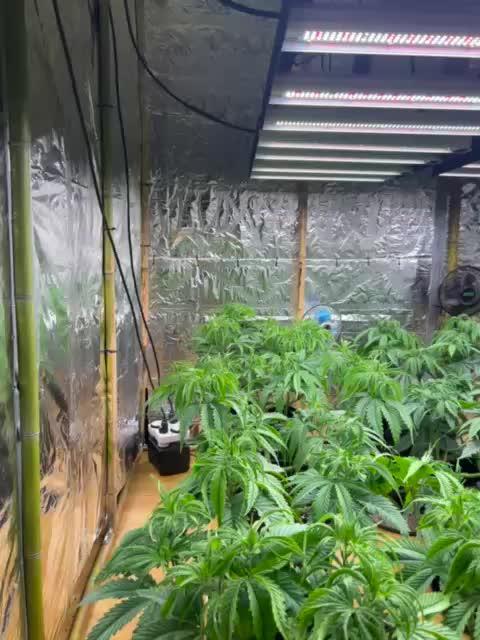
Well this was quite an experience, from the nice box the dutch passions come in to the germination , vigours sprouts came about, and took well to transplant. Potted each of these into their own soil and peat mix, layered seven of each i think with perlite. they got CELLMAX soil, best soil I've ever used for sure, it's horticultural soil so it's been steamed meaning no pollutants and no pests. The room itself this time i had reworked a bit, still loads of bends on the tubes though, but had a proper intake this time with a fine mesh filter so nothing got into the room. Had the pots elevated only by the time flower came around same for the CO2 so I only had a few good weeks with it. Didn't kill the plants though, so I'll review using it in my Six shooter diary, check it out . Anyway these plants veged out , and in the first weeks had the light too high for how strong/weak it was (it's crazy how close you need to have it actually!) and the little seedlings stretched some, so I LST'ed all of them. They all took to LST really well actually. The biotabs plant was the first one to sort of musle through her bindings, and i ended up feeling sorry for it and removing them thinking the bend was mostly done anyway. It didn't help that this was a corner plant and I just didnt really have access to it as nicely as the others. Anyway the LST wasnt done though and the plant fully redressed showing only a little bend towards its base at harvest time. The Mr. B's showed the best results on LST. It got bent 90° then grew out but managed to stick it's main cola out just in time i guess, so it had several mains maybe 3 maybe 4 and several side shoots. The Vertafort one took to LST the worst of the three (through no fault on vertafort's nutrient's part!) It basically got bent 90° but got held down too much by the bindings , and being a corner plant simply it got less light the whole grow, being overtaken by the other plants in the tent. Through veg though these grew to nice busheles, each in their own style, pushing out fat indica leaves , mostly being kept at appropriate VPDs. Note that the temps i've recorded are for maximum temperatures hey ! Anyway it I ended up with an uneven canopy by the start of flower stretch due to the different LST styles and the different growth rates, the vertafort one being basically stunted. During flower stretch these stretch ! lol doubled in size at a steady rate I can tell because the biotabs one was basically no longer LST'ed right? Anyway way blueberry styles not so much auto gsc styles that much I can tell you. The longer side colas a great too, they're much longer than the GSC's side colas and they have two or more flower nodes more each. By week 4 of flower the Mr. B's started to look pro, with a nice canopy and several distinguishable mains sticking out from the bush. The vertafort one was a corner plant so I just paid less attention to it - too bad for me ! Anyway the flowers themselves started to emerge with a calyx to larf ratio of 1:0 for the biotabs ones, and I started getting stoked. I could already tell from the squeeze that these would be nice and dense nuggy nug nugs just like I like them. The Mr.B's one was different though, the flowers grew all up and down the colas like they were all filled up. The sugar leafs themselves were like non-existant on Mr.B's but long and thin on the Mr.B's. Then the stacking began, last quite a while to finish up and rippen, i'd say from week 8 through 13. The trichomes reached out, filled up some, curled, in and were full white. I noticed some amber trichomes and it was time for the chop !
Throughout the grow I tried something new. From joining GD on my first grow I got loads of goodies from @Mrs_Larimar with the Mr.B's nutrients - thank you so much ! - and the biotabs contest , plus the Vertafort that came with seeds from the folks at Zambeza, Zamnesia, and RQS , all of these were dry nutrients, and I got those micro nutrients from my friends too. Great experience using dry nutrients, much more affordable on the whole, easier to measure too. That didnt stop me from messing up a few measures though ! So For most of the grow I planned to add my own micro. I had four micro powders made. One green one for early veg with all the "rare metals" in it at 2% , a bio cal mag, white powder for veg and early flower and a cal mag and mag sulfur I meant to use during flower. So I ended up giving a quarted dose of the organic cal mag most of the time then in flower still had them on a quarter dose of cal mag sulfur before i realised and switched up too late. My whole micro line up i think would cost 10 dollars retain and I had plenty of it left over i think it should last like 4 grows. Not that I'll use it again unless i can get a steady supply - a the travails of the underground micro nutrient market. Worked great though, pH neutral, i used it as spray too, next time I'll mix in humic acid directly in the same feed, because why not and because I would have massively helped. Sometimes in flower i used only calmagsulfur and maybe I didnt mix it in very well but i would dump everything on anyway , a couple time I would check after water and the clumps had formed like 3 inch crystal formations on the top of my soil... Anyone ever seen that before? maybe it's a good sign idk, i usually tried plain water to dissolve them asap. The biotabs worked great on the Colorado cookies though, that much I can say, no excesses of any sort detected, leaves weren't too dark green at all. Mr.B's turned out a BEAST , but that could be from the LST aswell... the vertafort one ended up being a very healthy plant that never lacked anything either. Around halfway through flower I started traing the colas upwards where they were drooping on the biotabs plants and the Mr.b's plant, glad i did because i think plants like to make colas going straight up right? Chopped these at the top of week 14 which is 95 days from the moment i dunked them into the water kept a calendar which I'll show you. Hung to dry for 10 days, then jarred with the 62% boveda, burped
inspected daily for a week, then weekly for two weeks. I weighted what I kept lol , no small buds this time, finally my grower dream realized ! So happy i got two (maybe three phenos) because I loved the flowers on the biotabs but I also loved the yielding of the LST'ed pheno. Plenty of wasted cola space though if I'm honest, should have defoliated more, maybe done that just at the edge of veg or something, maybe next time I'll try to flux like @silky_smooth so I can keep them in veg longer and make me a couple beasts.
Had to travel to for two halfway through, so what I did was to put perlite in the trays, get the pots off their grills and onto the perlite then i bottom fed plain water, the idea being that the perlite would keep the water from evaporating from the trays too quickly, just as i was loading up the trays , the nex day I saw three thrips but they were flying all wierd and all strange so i thought maybe the airflow was f-ing them up ... and i had to leave anyway. Got back and the pots were bone dry but the plants hadn't died, and the temps were way up. I think the remaining perlite absorbs heat... Anyway started top feeding them again but by this time they were showing signs of stress especially the biotabs one, the mr.b's kinda recovered, and the vertafort was healthy enough it just looked like a bit of magnesium issue. May this could be a good technique for other folks to try. Like i said the perlite might absorb heat, so remove it when you dont need it anymore (i had issues with heat).
Over all these gens are yielders, had some of my best work in here, and some less good work. I like having been able to use the GD platform as a companion app, was great fun really. it's great to be able to put all your pictures up and see them side by side, i tried to keep it organised so you and I can see some interesting things like the "three stages of LST" and other interesting nuggets of info. Speaking of nuggets I'll try to get some more and some better pics of the nugs in. Hope you'll visit this again 🚀
EDIT: made some bubble hash for the first time, grower's priviledge ! only used the stems stalks and leafs for it, and it came out really delicious, smells like perfume, burns like incense and tastes like vanila and spices/hash lol basically used some bubble bags , rand the water through once, got negligeable 120s 75s and 45s but got some 25 quite a lot. ran it again, same results with just about the same amout of 25s, i thought i could go a third one, but got negligeable everything lol. Two passes for whatever that is in bubble hash lol, it's still got to dry for another week - bubble hash is kinda of the grower's priviledge, definitely recommend doing it ! 🚀

Likes
41
Share
@Cannaguy
Follow
Plants have slowed down on water intake, and cooler nights have started to play a role in plant color. One plant has started to show purple colors on leaves as well as pistil sights! Will continue to give them Jobes organic granular feed until the point of flush
Likes
5
Share
@zspl0it
Follow
Started to give my plants Bio Tabs Bio PK5-8 one time per week which is 10ml in 1l of water. as you can see the growth is pretty fine. I still had issues to keep the VPD in range. Weather was hot outside and I had times where the tent hit 30C for a whole day.


Likes
15
Share
@Drgreenthumb627
Follow
stress free plant, its been a champ since the beginning of the grow. the buds are probably growing 3rd fastest in the tent and it has that signature cookie aroma

Likes
15
Share
@No_Clout
Follow
It’s been a while since updating as of work and also a broken phone but so far their looking alright, only problem I have is abit high humidity but they seem fine. (Night humidity: 40-45%) and (Day Humidity 55-60%) . I even clipped a nugget last week and the ash was thick and white without a flush which is pretty impressive in my opinion but I think I will be starting to flush in the next week or two.


Likes
4
Share
@PotusArg
Follow
La semana 7 fue la penúltima antes de la floración. Una vez que termine la semana 8, el 11 de agosto, comenzaré con el horario de floración. También empezaré a usar los nutrientes de Advanced Nutrients específicos para esta etapa.
Las plantas no han mostrado signos de estrés y han empezado a absorber mucha más agua. Por eso, en el próximo riego les aplicaré alrededor de 5 a 6 litros, ya que la demanda de agua ha aumentado considerablemente y las macetas se están secando rápido.
Week 7 was the penultimate week before flowering. Once week 8 is completed, on August 11th, I will start the flowering schedule. I will also begin using Advanced Nutrients formulations designed for this stage.
The plants have not shown any signs of stress and have started taking up much more water. Therefore, in the next watering, I plan to give them around 5 to 6 liters, since their water demand has increased significantly and the pots are drying out quickly.

Likes
19
Share
@EmeraldLakeCannabis
Follow
We're rolling into week 22, the 9th week of flower for these wonderful girls. Possibly the last week they'll have, at least the last week UKBS 1 may have. They've both shown great progress in terms of growth in the past week in my opinion, and the trichomes are beginning to present as cloudy with a smattering of amber. I like my CBN, so I prefer to let them amber slightly more than most.
Rest assured I'll be keeping a close eye on trichome color in this next week or two.
Timelapse is out for the week. Updates come as the week progresses, as usual.
EOS T5 shots are out.
-7/4/2021 - A cola on Carl 1 was too heavy for it's own good, and snapped. I decided to remove and dry it as I really don't see a point in trying to re-attach it at this point in flower.
-7/6/2021 - Another cola snapped on Carl 1. Unfortunate, I was hoping she'd fatten up further first. Ah well.
Likes
21
Share
@Growfornow
Follow
Week 9-10 Zamnesia + Plagron sponsored grow
End of 10th week from seed
Nugs are getting sugary

Likes
200
Share
@Ferenc
Follow
Day 65, 14th of November 2020:
Amazing week....
RQS Wedding Gelato does not strech a lot and pistils coming out nicely....
Original Sensible Seeds has amazing gentics they are so strechy except Black Ghost OG, rest of them crazyyyyyyy..... I also broke two of the sides from Gelato Original Sensible Seeds but fixed with tape and now all good lol 🤣🤣🤣
Pre flowers out and I really hope they stop growing lol.
I also noticed that the Original Sensible Seeds strains have nice purple colours of the fan leave's stem.
All the same fertilization happens every 2nd day with the mix above and ratio.
One more thing:
I set the lamp 15 minutes shorter to switch off earlier so they receive 11:45 of darkness. I would like to imitate the nature when longer nights come with time till the 4th week (when they will receive 13 hours darkness a day 15 minutes minus 4 times = 1hour) so every week 15 min longer darkness for 4 weeks and then back to 12/12 to have bigger buds from the 4th week....

Processing
Likes
142
Share
@MadeInGermany
Follow
Hi everyone :-)
This week a lot of nice things happened in the flower tent :-)
Everyone looks super nice, and is growing stronger and more beautiful week by week 😍👌.
The blue cheese smells like a dream ;-) As usual from this variety 👍.
The kosher tangie is also very, very tasty 👏🏻.
Both got Pk 13/14 this week for the last time :-)
Everyone else is developing very well 👍, That will be the last diary with several strains together :-)
In future everyone will come individually 👌.
I wish you a lot of fun with the videos, have a nice weekend, stay healthy 🙏🏻 and let it grow 😎👌


Likes
20
Share
@eldruida_lamota
Follow
Que pasa familia, vamos a añadir la décima y última semana de floración de estas Apple Fritter de RoyalQueenSeeds, empezamos con la temperatura que la tenemos entre los 21/25 grados, la humedad está entorno al 50%, el ph está en 6.2 , el foco actualmente lo tengo encendido 12 horas y la potencia es al 75% de lo que da el foco.
Las flores han madurado bien, una flor central sospechó que igual tiene moho pero todo correcto, si está contaminado tiraremos la parte mala y si no lo está mejor.
Llevan una tricomada seria, esta variedad tiene que ser brutal para extracciones.
Estás próximas semanas que coche che y la seque ya os iré contando.
Mars hydro:
Code discount: EL420
https://www.mars-hydro.com/
Agrobeta:
https://www.agrobeta.com/agrobetatiendaonline/36-abonos-canamo
Hasta aquí todo, Buenos humos 💨💨💨
Processing
Likes
20
Share
@No_Clout
Follow
Start of flower now so the stretching has begun, I’ve had to bending down plant #2 as I don’t want it too close to the light, will be adding canna boost tomorrow, would of been today but couldn’t make it to my local hydro shop ✌️🏻
Started adding some boost, looking a lot healthier now. The grapey Walters are taking a little longer to start flower compared to the sour stompers but their only a few days behind in comparison.

Likes
101
Share
@DreamIT
Follow
🌴🌞 TROPICAL FUEL BY EXOTIC SEEDS 🌞🌴
____________________________________________________________________________________
🏝️ 2.4 ...
🏝️ 3.4 ...
🏝️ 4.4 ...
🏝️ 5.4 ...
🏝️ 6.4 ...
🏝️ 7.4 fifth week almost over, from now on the photos will become more interesting, finally. It is almost boring to photograph vegetative plants, they are all the same. it is in bloom that the quality of a genetics is determined, and now the fun begins...
so far the plants have shown no deficiency and no abnormal growth. You can clearly see the difference between the fertilized plant and the non-fertilized one, but I will make the necessary observations at the end of the cycle. these will be the last plants I grow with the "classic" method. In the future only Canamatoes style 🍅🍀 (look for it here on Growdiaries, one of the best growers I know) there is little else to say at the moment about these beauties. I was hoping for some color but I'm not complaining: p thanks for stopping by 😀 🦄🤘
🏝️ 8.4
____________________________________________________________________________________
📜 A look at the details of what I'm growing 📜
🌴🌞Tropical Fuel by Exotic Seed🌞🌴
⚧ Gender
▪️ Feminised
➰ Genes
▪️ 70% Indica / 30% Sativa
🎄 Genetics
▪️ Tropicana Cookies F2 “C cut” x Tropicana Cookies F2 #5
🚜Harvest
▪️ 400 - 500 g / m²
🌷Flowering
▪️ 56 - 64 days
✨THC
▪️ 20.0 - 24.0%
✅CBD
▪️ 1.0%
🏡Room Type
▪️ Indoor
🌄Room Type
▪️ Outdoor
🕋Room Type
▪️ Greenhouse
🎂Release Year
▪️ 2020
____________________________________________________________________________________
📷🥇 Follow the best photos on Instagram 🥇📷
https://www.instagram.com/dreamit420/
🔻🔻Leave a comment with your opinions if you pass by here🔻🔻
🤟🤗💚Thanks and Enjoy growth 💚🤗🤟

Likes
2
Share
@High_Grade_Dadli
Follow
So end up losing the first set (guess that's how you know it alive n real) never the less week was great...will do some transplanting nxt week also wanna get some more gelato cuts to get the numbers up but will see how that
Likes
41
Share
@Santica_Garden
Follow
Just a quick video showing how the ladies are looking at the end of their 1st week of life. So far so good. Not much to update. Any questions just ask away.
Happy Growing guys 👍🏾💚🌱🔥
Likes
6
Share
@eldruida_lamota
Follow
Que pasa familia, vamos con la cuarta semana de vida de estas Wedding Cheesecake Fast Flowering, de FastBuds.
Agradezco a Agrobeta todos los kits obtenidos de ellos 🙏.
El ph se controla en 6.2 , la temperatura la tenemos entre 21/24 grados y la humedad ronda el 50%.Tienen un color espectacular,esta semana cambió el foco a 12-12, el tetra 9 lo añadí vía foliar, iremos viendo cómo avanzan.
Agrobeta:
https://www.agrobeta.com/agrobetatiendaonline/36-abonos-canamo
Hasta aquí todo, Buenos humos 💨💨💨
Processing
Likes
20
Share
@No_Clout
Follow
Looking good this week gonna start to add some big bud coco next feed.
Likes
4
Share
@adam_pawloski87
Follow
@twenty20mendocino Ateam R&D Update! Let’s Go!! What another great week it’s been ! Today is day 39 for all but the 2 Queen of Diamonds an 2 VSOPs got trimmed up a tied down for nice training ! Really opened them up a lot so we get all them heads hit, just wait to see how bushy these girls get, let’s get em big! Your not gonna want to miss next week’s update an see how these girls bounce back! Hope y’all enjoy Peace love and positive vibes to all y’all Cheers 😶🌫️💨💨💨💨🤙🏻

Likes
18
Share
@BrownRecluse
Follow
This week i noticed some swelling and orangish hairs on about 15 percent of the buds. The smell is less greeny and more pungent. Noticing more nutrition burn. But this week and next week is all flushing so. Dont know why everything says to flush.. But if thats the game so be it. Noticing the no low stress trained plant is fatter (cola) with fatter buds than the low stress trained plant however smaller buds but more of them so they might actually equal out lst plant is just shorter. Ive looked at alot of autoflowers and og specifically and noticed mine seem to be bigger and produced much more than white widow auto and cookie glue auto.
