Likes
Comments
Share
@maverick
Follow
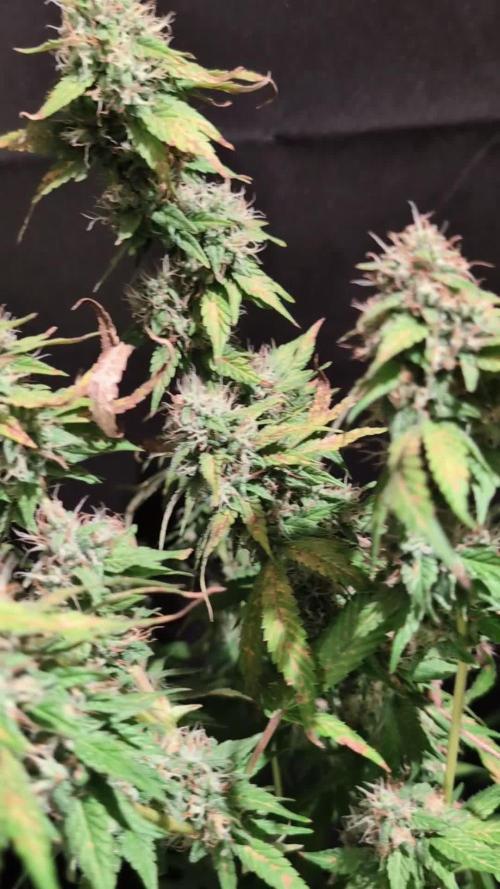
Day 85. Because she still had mostly clear and some milky trichomes last week, I decided to continu giving her nutes. Also her official flowering time (vision seeds info) is 8-9 weeks. And since see seems to be a bit slow with everything, I thought it was a good idea to keep nuting her. 5ml/L seems a bit too much though, because I notice more burned leafs. Last week (11) the fan leafs started to get lighter green. Now they are turning yellow and are hanging loosely. Is it benificial too take them of from her at a certain moment? I will check trichomes every other day and will probably will start the flush now, because the trichomescheck today showed some amber colours I didn't noticed earlier. I would love to hear from experienced trichomescheckers if there are indeed the first signs of trichs getting amber or not. Also I still got a lot of clear trichs. My goal is too harvest her when most trichomes are milky and maybe 10 to 20 percent amber. Day 86, nooooooo budrot 🤒🤕😢. Cut off the infected buds. Put vinegar on her cutt wounds. I will keep her indoors with a blowing fan during tbe night and check buds daily. Day 87, This morning I noticed a 3rd cola with a tiny bit off budrot. It was close to another one with budrot I already cut off. I cut this 3rd one also and treated the cutwound with vinegar. I will check regurlarly and probably will harvest too early in these days to prevent the loss of my whole harvest. I am currently drying the healthy parts of the buds I cut off.
Likes
2
Share
@MatthewVC
Follow
They’re growing so fast and healthy. You can easily notice the growth daily. Constantly responding very well to all training.
Likes
45
Share
🌸 Mentha de Croco | Week 2 Flower (Week 13 from Seed) Grow Style: Indoor | Medium: Pro-Mix HP | Feed Program: Aptus Holland Clean Program | Genetics: Mentha de Croco by Terpyz Genetics Lighting: FOG LED Black Series | Controller: TrolMaster Photoperiod: 11/13 (Light/Dark) Camera: Sony A6000 capturing all the vibes ⸻ This week marks a major chapter in our Mentha de Croco mutant hunt: the second week of flower — and the official reveal of who’s who in the garden. As expected with regular seeds, we had both males and females, and this was the week we identified them all. From the original 12 beans, 5 revealed themselves as proud ladies while the rest — equally stunning in structure and expression — turned out to be males. 🌿 💚 Let’s talk about regular seeds and plant sex: Regular seeds are unsexed, meaning they can become either male or female. It’s a 50/50 genetic roll of the dice — and with unique mutant genetics like these, identifying sex isn’t always easy early on. Males typically show small pollen sacs, often referred to as “bananas” in their early stage. Females develop pistils, the first hairs of the flowers we’re after. Male plants, while beautiful and structurally fascinating (especially in this mutant project), can compromise a flowering room if left unchecked. Their pollen can fertilize female plants, leading to seeded buds — great if breeding, not great for clean flower. So, we say goodbye, thank them for their beauty, and move forward with the ladies to full bloom. The males? They’ll return to the earth as beautiful compost. 🌱✨ ⸻ This Week’s Feeding Schedule (Aptus Holland Clean Program): • Regulator – Strengthening cell walls and stress resistance • System Clean – Sanitizing the water lines (preventative, even if not in a system) • RO Water Conditioner – Prepping and balancing the base • All-in-One Liquid – Increased dose this week to 1.5 ml/L • Breakout Powder – Boosting early flower development • EC: 1.26 • pH: 6.0 • Water Temp: 18.6°C ⸻ 🌿 Canopy Update: All plants are now under SCROG netting — not because these particular girls needed it, but because they share the space with other cultivars. It’s all about harmony in the garden. The stretch is beginning, and the light intensity has been dialed up to match — PPFD around 800. We’re thrilled to see some early floral development already peeking through. The ladies are loving the new rhythm, and it’s clear they’re ready to shine in this next stage. ⸻ 📸 Captured Moments: This week’s shots include closeups of the male flowers for educational purposes, so the community can see what early male traits look like — especially in complex, mutant-style expressions. All captured with the Sony A6000 under those rich contrasts of dark and light. ⸻ 🙏 Shout Outs & Love: Much love and thanks to the brilliant minds at Terpyz Genetics for the wild beauty of these beans, Aptus Holland for the clean and powerful nutrition, TrolMaster for the precision control, and Future of Grow for the innovation we grow under. And of course — endless gratitude to the Grow Diaries community, the growers, the learners, the lovers and even the haters — it’s all energy, and it all fuels the passion. 💚 📲 Don’t forget to follow the journey on Instagram and YouTube — always sharing the love and the lessons 🌍 Genetics - Mentha De Croco Nutrition - @aptusholland https://aptus-holland.com/ Led Power @ F.O.G. Future Of Grow https://www.thefuturofgrow.com/en/online-store/BLACK-SERIES-600-p489093171 Controls @ TrolMaster https://www.trolmaster.eu/tent-x Let’s see what next week brings! 🚀 As always thank you all for stopping by, for the love and for it all , this journey of mine wold just not be the same without you guys, the love and support is very much appreciloved and i fell honored with you all in my life With true love comes happiness Always believe in your self and always do things expecting nothing and with an open heart , be a giver and the universe will give back to you in ways you could not even imagine so As always, this is shared for educational purposes, aiming to spread understanding and appreciation for this plant. The journey with nature is one of discovery, creativity, and respect. Let’s celebrate it responsibly and continue to learn and grow together! Growers Love To you All 💚
Likes
9
Share
week one of flower looks cool so far no problems with the feeding just used CAL MAG and Mammoth p in the watering the media is holding the water for at least 4 days. going to use the auto flower as a gage for the flowering bump if it needs one.
Likes
92
Share
Harvest Notes ✂️ • Harvest Timing: Papaya Zoap was harvested at day 63, with select buds taken earlier at day 56 due to mold concerns. • Drying: After careful trimming, the buds were dried for 12 days. The quality and aroma during drying hinted at the stellar smoke to come. • Density & Yield: Buds were rock-solid, delivering an excellent yield with perfect density for storage and enjoyment. Terpene Profile & Aromas 🍋 • Primary Aromas: A tropical explosion with sweet papaya upfront, complemented by creamy, soapy undertones that make her truly unique. • Complexity: As the buds cure, a hint of citrus zest and exotic fruit emerges, creating a full-bodied terpene profile that’s simply irresistible. Cultivation Experience 💡 • Highlights: Her uniform growth, heavy trichome production, and response to super cropping made her a delight to grow. She thrived under careful spectrum adjustments and defoliation, showcasing her adaptability and vigor. • Challenges: The dense bud structure made her more prone to mold, especially in a high-humidity environment. However, proactive monitoring and swift action mitigated the spread. Verdict: 🌟🌟🌟🌟🌟🌟🌟🌟🌟🌟 (9.8/10) Papaya Zoap is a strain that commands attention with her beauty, aroma, and unstoppable growth. While her susceptibility to mold required extra care, her overall performance, yield, and quality were nothing short of exceptional. A grower’s dream and a frosty masterpiece! Stay tuned for their individual harvest reports, smoke reviews, and more as we wrap up this epic series! Discount Codes so you can save big on your next check out 💚💚💚 Kannabia - DOGDOCTOR 30% off SeedsmanSeeds - DOGDOCTOR 10% off CannaKan- DOGDOCTOR 15% off terpyz.eu - DOCTOR 15% off The Neutralizer - PORKIT5-DOG 15% off Fast Buds - DOGDOCT 15% off As always thank you all for stopping by, for the love and for it all , this journey of mine wold just not be the same without you guys, the love and support is very much appreciated and i fell honored and so joyful with you all in my life 🙏
 With true love comes happiness 💚🙏 Always believe in your self and always do things expecting nothing and with an open heart , be a giver and the universe will give back to you in ways you could not even imagine so 💚 Friendly reminder all you see here is pure research and for educational purposes only Growers Love to you all 💚💚💚
Processing
Likes
5
Share
Likes
14
Share
@Jcannaf
Follow
Very nice, can’t wait for it to cure fully
Likes
3
Share
@undermink
Follow
She slowly getting there, I guess... Her massive buds are getting heavier and I will have to set up support (some sticks maybe) to have her not break her stems.
Likes
17
Share
what a journey, such a beautiful result i should retire now how can it become any better. thx everyone watching by. have a nice day and an even better grow
Likes
3
Share
Hello everybody I’ve really busy trying to by seed late been so many great deal but yes , let get in it the blueberry cupcake has been very vigorous and growth during veg. I have three phenos , and by far Finno number one has been out growing everybody it doesn’t have a smell right now. It’s really low but they’re growing really good. I pop four and I have three decent phenotypes. I apologize for keeping week too. Just been really busy with work and I will be back next week this week. I did not feed them. I water thin, which is water and I think I did a compost the PPM‘s right now are exactly at maybe 400 at the highest and at the end of the week I take off till about 200 so my soul can’t be no drenched in salt, but yeah everything‘s going good. The room temps has been a little hot where I live at. So temps have been up like maybe like 80 usually there at like 77 what else can I tell y’all about these beautiful Humboldt plants other than they’re just growing absolutely phenomenal so this is a strain that I would grow in to be honest, just off the first 20 days of veg. Really quick rower really quick grower.
Likes
6
Share
@Spliffi
Follow
Week 1. 14/09/2022 Spring is full on here acourding to Google but it's just not getting warmer. Full blow rain and wind. Had to bring in the tent that I got for protection. This will impact the grow and hopefully not too much. Finally the Sun is out and it's feeling like Spring. Time to get the soils biology in the right space. I cooked up a Tea that focuses on the Micro nutrition, Root development and Pest control. Use a airpump and lift it out for about 24 hours after the mix. Tea ingredients: Aloe Vera Garlic Cinnamon Molasses Fish Poop Prawn juice 🌱🌱🌱🌱🌱🌱🌱🌱🌱🌱🌱🌱🌱🌱🌱 Take a Hit! Thanks for reading!
Likes
15
Share
@Roope
Follow
Hello this week has been so chaotic by personal life that these baby's has been not best cared but they seem to forgive it to me? My amino acids end so I put 1.3ml micro if it have some kind effect? Hairs are getting colored and THANKS big time for tips! There was some sh.t what's blocking water flow + fan burns are the things that costs perfect color at the corner but I'm clad that mistakes happend so I can learn from them. But nothing major haven't happened and amino acid stay at food circle till the end and some bud bluster come as well but till next week. ReggeyOkkey
Likes
15
Share
@Gram_Solo
Follow
Last week for these strudlesss! 🔥 I chopped the small one a few days ago and has been drying out was frosty as!! Few more days and stems should be snappy Other 2 look fatty! Covered in trichomes! Can see a couple of Amber's so Overdrive this week and then onto final flush with Flawless Finish. Smell is really good! Cakey sweet bakery! 😋 Temp 24 day 19 night Humid 45% 👊👽👊
Processing
Likes
142
Share
Hi people 🤗 A lot has happened this week 😄 The 3 Blue Cheese and 2 Kosher Tangie Kush which have been in the flowering tent for 1 week have become very bushy 👍 Unfortunately I just noticed that I completely forgot to take pictures of the Blue Cheese Phenotype # 3 🤦‍♂️🏻 The picture will be given later. The rest of the Vegi tent is also progressing very well. They are repotted in 11 liter pots this week, and then come to the flowering chamber die the following week The next week there will be new pictures, until then I wish everyone a nice start into the new week 🙏🏻💪🏻 Let it grow 🍀🌱
Likes
16
Share
@Ensign420
Follow
Introduction - Week 14|07 Summary - Ensign's log, stardate 9437.65, Great week of growing! Wow what a good week! Growth in the main tent has all around been incredible! Submitted my first submission to the Global Grow Cup! Filmed a video of the solo cup container (marked with the ticket/order number) that will be used for the competition. Also had to fill and prove the solo cup holds 2 cups of soil. Now I need to root a clone (for the first time), transplant her into this cup, and submit my 2nd entry before the 30th of this month. As far as my first attempt at cloning, have already begun the rooting process! Managed to take cuttings from 3 out of the 6 phenos in the main tent (the first cutting was also my first time topping). Soaked the cuttings for two days before planting them into Coco Coins. So far everything has gone surprisingly well! The clones are now rooting under the propagation dome with the vents fully closed. Will check for roots soon! At the end of the week, growth was just raging! Was planning on flipping to flower in a week, but decided to begin the first week of flower next week! Thus this is the last week of veg. Plan to flip to 12/12 next Monday! Onwards to next week! [START OF WEEK 14|07] ========================================================== Garlic Budder #1 - WEEK 14|07 - Full Veg Wk5 Garlic Budder #2 - WEEK 14|07 - Full Veg Wk2 Garlic Budder #3 - WEEK 07 - Full Veg Wk5 Garlic Budder #4 - WEEK 06 - Full Veg Wk4 06/03/24 → 06/09/24 This Week's Estimated Goals ---------------------------------------------------------------------------------------------- DLI: ~26 mol/m²/d PPFD: ~400 μmol/m²/s VPD: ~1.0 kPa This Week's Meter Readings & Averages [Lights On: 16:00 - 10:00] ---------------------------------------------------------------------------------------------- DLI: 24.56 mol/m²/d PPFD: 379 μmol/m²/s VPD: 0.91 kPa Soil %: [32.7, 37.6, 37.9, 34.1] ========================================================== Day 01 - Monday - 06/03/24 - Total Days: 098 ----------------------------------- Daily Averages [~23:00] - Temps: 80.7°F [27.1°C] - Humidity: 74.4% - VPD: 0.90 kPa - Soil %: [31, 34, 39, 35] ----------------------------------- - [09:57]: Quick morning check! --- #1 is looking a bit droopy, but almost lights off (at 10:00) so not concerned. --- Nice! Mainly wanted to check on #4 and she is looking great! She’s perked back up and looking good! - [23:08]: Evening check. --- Wow! It’s a jungle in here! --- #1 has gotten too big? Nah!? Keep on growing girl! --- #2 is growing and definitely getting bigger! Growth just looking really weird. --- #3 has continued to get larger and is looking quite uniform in growth! --- #4 is growing and looking perky again! --- Even the original #1 and #2 phenos (in the back) are looking good! --- Wow! #4 is really getting close to the light. - [23:14]: Checked down both fill tubes. --- Both reservoirs were completely dry! - [23:27]: Checked the Ecowitt soil moisture sensor data: --- 30% - [CH01 EB1 - Garlic Budder #1] --- 34% - [CH02 EB2 - Garlic Budder #2] --- 39% - [CH03 GFP - Garlic Budder #3] --- 32% - [CH04 FPT - Garlic Budder #4] - [23:32]: Poured 4 cups of distilled water down EB1’s fill tube. --- Poured 2 cups of distilled water down EB2’s fill tube. - [23:38]: Checked the humidifiers. --- Refilled the 4X4’s humidifier with distilled water. --- Tomorrow, plan to defoliate and start cloning for the first time! --- Going to take multiple cuttings from both #1 and #4 for sure, but still deciding on the rest. --- Getting hyped! Day 02 - Tuesday - 06/04/24 - Total Days: 099 ----------------------------------- Daily Averages [~23:00] - Temps: 81.4°F [27.4°C] - Humidity: 74.3% - VPD: 0.93 kPa - Soil %: [29, 35, 38, 32] ----------------------------------- - [11:59]: Time to film the first entry for the Global Grow Cup! --- Going to be using BuildASoil 3.0 potting soil. --- Filming the video using a stand and my phone. --- This video is mainly to establish the container that the plant will be grown in. Also to prove that the container is a 16oz container and that it can hold 2 cups of soil. --- The ticket (order) number also had to be written on the cup. - [12:36]: Done! --- The video had to be done in one continuous shot with no edits (my original submission does not have the logo). --- There was also a photo that needed to be shot which shows the cup filled with 2 cups of soil (just like the video, the original image submission did not have the logo). --- I think I did everything correctly, but also sent an email for verification of submission and validation. --- Getting hyped! --- [*smokes a bowl] --- Going to defoliate today along with for the first-time, going to take cuttings for clones! --- After a bit of online research, decided to split the cloning process into two days. --- Today going to take cuttings and will soak them in a solution of aloe for 24hrs. Afterwards will change the water out and use straight distilled water. --- Then in a couple days, plan to transplant into coco plugs (Coco Coins) for rooting. --- For optimal results, also be using a rooting hormone (Clonex). --- Well.. Here goes nothing! - [17:01]: Evening check. --- Wow! #1 is looking huge! Her main top is stretching above the lower canopy which is continuing to bush out. --- #2 is growing along. Growth is gnarly and a bit droopy, but she’s getting taller! --- #3 is looking great! Still a bit small, but she is continuing to get larger. --- #4 looks like she needs a watering. --- Both plants in the back are also looking surprisingly great as well! - [17:05]: Checked down both fill tubes. --- Both reservoirs were completely dry! --- As far as today's defoliation, going to leave #2 and #3 alone and will focus my defoliation and cloning on the rest of the plants. --- This will be my first attempt at cloning, also going to try topping for the first time today. --- No pressure Ensign. What can possibly go wrong right? - [17:27]: Time to start the cloning and defoliation process! --- Filled a measuring cup with 3 cups of distilled water. ------ Added 3/4tsp of Horticultural Aloe ------ Added 1 more cup of distilled water --- Mixed the solution and poured an even amount into three separate solo cups. --- Made sure to mark two of the cups (#1 and #4). The unmarked one will be for any other clones from amongst the 6 phenos (if any at all). - [17:43]: Time to top and defoliate #1! --- Using a pair of brand new trimmers (AC Infinity), --- Gently cut the main stalk to even out the canopy. --- Then trimmed and cleaned most of the nodes leaving the top node or two. --- Also trimmed the leaf fingers a bit before placing the top cutting into the cup of aloe solution. --- Now for the rest of the cuttings! --- [~45 minutes later] - [18:32]: Managed to finish defoliating and cutting the rest of the clones. --- Took two more lower cuttings from #1 (3 clones total). --- Took 3 lower cuttings from #4 --- While defoliating, decided to try and clone the original #2 pheno as well. Took 4 small cuttings. --- Similar to the top cutting, trimmed and cleaned each lower node for each cutting before placing them into the cups. --- Before finishing up the 2nd cutting, I noticed the first cutting (the top cut that was also trimmed) was drooping. --- So I did not trim and the leaf fingers for the other cuttings. --- In total there were 10 cuttings taken for potential clones. --- My main focus was to take cuttings and to clean up all the lower growth from both #1 and #4. --- Defoliated and cleaned up the back original phenos as well (also trimmed back the cover crop). - [18:35]: Temporarily placed the cuttings onto the floor of the 4x4 tent. --- Took the trimmings (about 3 cups) and spread them onto the top mulch of #1 and #2. --- Time to set the environmental controls for the 3x3 veg tent. - [18:43]: Within the AC Infinity App, --- For the Veg Tent [3x3] controller, --- Adjusted the 'Vegetative [18/6]' Schedule for the grow light. ------ Set the Mode to ‘On Mode’ ------ Set the START/END times to 04:00PM/10:00AM ------ Set the MAX to 1 --- The IonBoard S33 is now utilizing around 60.8W (at intensity 1 out of 10). --- Adjusted the 'Vegetative [18/6]' Schedule for the exhaust fan. ------ Increased the Humidity’s HIGH trigger value from 81% to 87% --- Adjusted the 'Vegetative [18/6]' Schedule for the humidifier. ------ Decreased the VPD target value from 1.5kPa to 0.8kPa - [18:52]: Moved the cuttings into the 3x3 veg tent. --- It begins! I think. --- Going to let these cutting drink some aloe for a day before switching to straight distilled water. --- Hmm. Could be the white floor of the 3x3 veg tent, but have noticed the S33 has a whiter spectrum whereas the FC-6500 seems to be warmer in color. --- Anyways, - [18:58]: Poured 4 cups of distilled water down EB1’s fill tube. --- Poured 2 cups of distilled water down EB2’s fill tube. - [19:06]: Filled a pump sprayer with 5 cups of distilled water. --- Focused mainly on the straw mulch of #4. --- But also misted the straw mulch for the rest of the plants a bit. - [19:12]: Checked the humidifiers. --- Refilled the humidifiers with distilled water. - [19:44]: Going to be using Clonex rooting gel before planting the cuttings into Coco Coins (pre-soaked with microbes and aloe). But before that begins, going to transfer the Clonex gel into a squeeze bottle. --- Gently peeled back the seal on the original Clonex bottle. Just enough make a tiny opening, --- Then slowly and carefully poured the gel into an empty squeeze bottle. --- Also removed the sticker from the original bottle and placed it onto the new one. - [19:54]: Perfect! --- Instead of applying the gel to the cutting, going to be applying the gel to the Coco Coin. --- This squeeze bottle will make applying the gel a lot easier. --- Will take PPFD readings tomorrow. --- Also will change out the aloe solution to distilled water. --- I really hope I didn’t screw things up before they could even begin. --- Don’t die on me ladies! --- Please. Day 03 - Wednesday - 06/05/24 - Total Days: 100 ----------------------------------- Daily Averages [~23:00] - Temps: 81.9°F [27.7°C] - Humidity: 75.5% - VPD: 0.90 kPa - Soil %: [29, 36, 38, 36] ----------------------------------- - [09:40]: Quick morning check! --- #1 is looking a bit droopy, but looking okay. Topping is a high stress technique so going to take some time to recover. Don’t plan on flipping the main 4x4 tent to flower for a good week or so which should be enough time. --- #4 looks great! The defoliation seems to have no effect on growth. Nice! - [09:41]: Also quickly checked on the 3x3 veg tent, --- Nice! The cuttings are looking great! --- No yellowing and they all seemed to have turned up towards the light. --- So far so good! - [22:53]: Evening check. --- #1 is continuing to dominate this grow! She has spread wide and looking incredible! --- #2 is looking gnarly, but getting there. --- #3 is getting larger! But still a runt. By far, her leaves are the darkest of the bunch, but she is still growing! --- #4 looks happy and growing along beautifully! Wow! - [22:55]: Checked down both fill tubes. --- Both reservoirs were completely dry! - [22:59]: Poured 5 cups of distilled water down EB1’s fill tube. --- Poured 2 cups of distilled water down EB2’s fill tube. - [23:05]: Checked on the 3x3 veg tent. --- Ooo yea! The cuttings are still green! Nice! - [23:07]: Took PPFD readings. --- The cuttings were around 121 μmol/m²/s which gives a DLI of 7.84 mol/m²/d --- Nice! These levels are on the lower range for seedlings (~100-300), perfect! I think. - [23:14]: Swapped the aloe water out to straight distilled water. --- Going to let these cuttings soak for one more day before planting. --- Please don’t die girls! - [23:15]: Checked the humidifiers. --- Refilled the humidifiers with distilled water. --- Ooo yea! --- Tomorrow is the big rooting day! Day 04 - Thursday - 06/06/24 - Total Days: 101 ----------------------------------- Daily Averages [~23:00] - Temps: 81.9°F [27.7°C] - Humidity: 75.2% - VPD: 0.91 kPa - Soil %: [32, 38, 38, 34] ----------------------------------- - [16:20]: Evening check. --- #1 is a bit droopy, but growth is looking green and healthy. --- #2 is looking bigger! She’s also looking sort of droopy. --- #3 is growing along nicely! Looking good girl! --- #4 is looking great! A bit droopy but plan to water today. - [16:23]: Checked down both fill tubes. --- EB1's reservoir still has some water. --- EB2's reservoir was completely dry! - [16:23]: Checked the Ecowitt soil moisture sensor data: --- 28% - [CH01 EB1 - Garlic Budder #1] --- 36% - [CH02 EB2 - Garlic Budder #2] --- 37% - [CH03 GFP - Garlic Budder #3] --- 30% - [CH04 FPT - Garlic Budder #4] - [16:30]: Using a pump sprayer, --- Misted the straw mulch of #4 with 6 cups of distilled water. --- Focused mainly on the straw mulch. --- Also misted the straw mulch of #3 (in the grassroots fabric pot) a bit. - [16:43]: Poured 5 cups of distilled water down EB1’s fill tube. --- Poured 3 cups of distilled water down EB2’s fill tube. - [16:52]: Checked the Ecowitt soil moisture sensor data: --- 56% - [CH01 EB1 - Garlic Budder #1] --- 44% - [CH02 EB2 - Garlic Budder #2] --- 40% - [CH03 GFP - Garlic Budder #3] --- 45% - [CH04 FPT - Garlic Budder #4] - [17:01]: Took general PPFD readings. --- #1 was around 379 μmol/m²/s which gives a DLI of 24.56 mol/m²/d --- #2 was around 333 μmol/m²/s which gives a DLI of 21.58 mol/m²/d --- #3 was around 293 μmol/m²/s which gives a DLI of 18.99 mol/m²/d --- #4 was around 378 μmol/m²/s which gives a DLI of 24.49 mol/m²/d - [17:09]: Took the weekly height and light distance measurements. --- #1 was about 21" tall. --- #2 was about 13.5" tall. --- #3 was about 9.5" tall. --- #4 was about 19.25" tall. --- Hmm.. - [17:19]: Adjusted the right oscillating fan a bit. --- Re-angled the CloudRay S6 oscillating fan upwards. Been noticing that the air has been hitting the tops of the plants so easing off a bit (#1 is still getting hit, but she’s huge so not too worried). - [17:23]: Back to the measurements! --- #1 was about 9.5" away from the grow light. --- #2 was about 17" away from the grow light. --- #3 was about 17.5" away from the grow light. --- #4 was about 11.5" away from the grow light. - [17:46]: Checked on the 3x3 veg tent. --- Cuttings are still green! They do look a bit droopy but no signs of yellowing. --- Okay! - [17:55]: Time to begin the rooting process! --- For my first attempt at rooting, going to be using Coco Coins pre-soaked in saponins, microbes and aloe. --- To further help with rooting, going to also be using Clonex rooting gel. --- Filled a measuring cup with 4 cups of distilled water. ------ Added half of 1/64tsp of Quillaja Saponaria Extract [60] ------ Added 1/16tsp of Horticultural Aloe ------ Added 1/8tsp of Mycrobe Complete --- Mixed the solution thoroughly. --- Time for the Coco Coins! --- 10 cuttings means 10 Coco Coins. - [18:09]: Dropped 10 Coco Coins into the measuring cup. --- The coins immediately started to expand. --- A bit too much.. Oops! --- Poured the solution and Coco Coins into a pitcher. --- Added 2 cups of distilled water to the solution (now at 6 cups). --- Great! The coins are pretty much fully expanded, but going to wait a bit longer to fully saturate each coin. --- [~20-30 minutes later] - [18:42]: Great! --- Took the seedling and flood tray from the AC Infinity propagation dome and placed all 10 Coco Coins into the slots. --- Gave each Coco Coin a quick shake to remove excess solution. The coins were not dripping with solution but still pretty saturated. --- Arranged them into 3 groups with the cuttings in mind. --- Also tried to keep the pre-made holes intact. --- Time to inoculate the Coco Coins! - [18:54]: Using a squeeze bottle, --- While keeping the nozzle from making contact with the coco, gently filled each pre-made hole with Clonex rooting gel. Just enough gel to fully cover the hole of each coco coin. - [19:00]: Time to plant the cuttings! --- Gave each cup a misting of distilled water. Focused on wetting the top growth with water. --- Okay! --- To avoid mixing cuttings up. - [19:01]: Starting with the original #2 pheno cup, --- For each cutting, --- Using a pair of clean trimmers, made a final 45° cut about 1/2" from a bottom node. --- Then stripped away and scared the protective membrane below the node before planting. --- Made sure the node was about 1/2" below the surface of the coco. --- To help with planting, while inserting each cutting, gave the Coco Coin a gentle squeeze to loosen the coco. This also helped to ensure the coco and gel was in good contact with the cutting. --- Once the cutting was planted into the Coco Coin, made sure to place back in the same spot (made sure to keep the cuttings in their groupings). --- Once a cup was complete, made sure to keep the label with the group. --- Re-misted the top growth as needed to keep it wet. --- Also wiped the trimmers with isopropyl alcohol in between cuttings (plan to use 10% bleach solution for next time). --- Repeated this process until all 10 cuttings were cut, planted, and in the tray. --- The coco coins fit perfectly into the tray and don’t reach the bottom. Nice! --- The bottom air gap is important. --- Poured a bit of distilled water through one of the empty slots into the bottom of the tray. Just enough to fill the bottom of the tray, but not enough to reach any of the Coco Coins (~1/4cup). - [19:35]: Placed the propagation tray with cuttings into the 3x3 veg tent. --- Placed the first layer of the propagation dome on before giving the sides a misting of distilled water. --- Also sprayed the top of the propagation dome before covering the cuttings. --- Vents are all fully closed. - [19:40]: Placed the bar lights onto the top of the dome before configuring the controller. ------ Set the START/END times to 04:00PM/10:00AM ------ Set the bar light’s intensity to 2 (out of 10). --- Also made sure the propagation light controller’s time was in sync with the Controller 69 Pro. - [19:47]: Took PPFD readings. --- The cuttings were around 136 μmol/m²/s which gives a DLI of 8.81 mol/m²/d --- The PPFD levels are similar to the floor. --- Perfect! --- Going leave the IonBoard S33 on during this rooting process. --- Will check back tomorrow to cycle the air under the dome. - [19:56]: Checked the humidifiers. --- Refilled the humidifiers with distilled water. - [20:17]: Quick night check! --- Ooo yea! Growth is raging and looking perky! --- Mainly checked on #1 and #4 which were looking incredible! --- Keep on growing ladies! Day 05 - Friday - 06/07/24 - Total Days: 102 ----------------------------------- Daily Averages [~23:00] - Temps: 82.7°F [28.2°C] - Humidity: 76.2% - VPD: 0.89 kPa - Soil %: [37, 40, 38, 35] ----------------------------------- - [10:03]: Decided to increase the ambient temp in the 3x3 veg tent. --- Within the AC Infinity App, --- For the Veg Tent [3x3] controller, --- Adjusted the 'Vegetative [18/6]' Schedule for the heater. ------ Increased the Temp target value from 78°F to 82°F --- Hopefully this will help to keep the veg tent at a more consistent temp. - [22:26]: Evening check. --- Ooo yea! The garden is looking incredible! --- #1 is looking perky and just bushing out! Wow! --- #2 is getting big! Growth is weird and leaf fingers are huge! Just going to let her grow. --- #4 is looking happy and growing along like a champ! Nodes are starting branch out and she is turning into a bush! - [10:28]: Checked down both fill tubes. --- Both reservoirs were completely dry! - [22:33]: Poured 5 cups of distilled water down EB1’s fill tube. --- Poured 3 cups of distilled water down EB2’s fill tube. - [22:40]: Checked on the propagation dome (inside the 3x3). --- Ah yea! Looking great ladies! --- Lifted the top of the dome to let some fresh air in for a bit. --- Wow! --- Leaves still look nice and green! --- So far everything looks great! --- Just going to continue on! - [22:53]: Checked the humidifiers. --- Refilled the humidifiers with distilled water. - [11:01]: Decided to adjust the humidifier for the 3x3. --- Within the AC Infinity App, --- For the Veg Tent [3x3] controller, --- Adjusted the 'Vegetative [18/6]' Schedule for the humidifier. ------ Increased the VPD target value from 0.8kPa to 1.5kPa --- The higher VPD level will essentially turn the humidifier off. --- I won’t be needing the humidifier for a good week so might as well save the water. Day 06 - Saturday - 06/08/24 - Total Days: 103 ----------------------------------- Daily Averages [~23:00] - Temps: 81.6°F [27.6°C] - Humidity: 74.9% - VPD: 0.91 kPa - Soil %: [35, 40, 37, 31] ----------------------------------- - [07:40]: Quick morning check! --- #1 and #4 are looking perky and happy! --- Also checked on the propagation dome, --- All cutting still look green! Hyped! - [20:02]: Evening check. --- Wow the garden is raging with growth! --- #1 has blown up! She has clearly recovered and growth is ramping up again! --- #2 is stretching upwards! --- #3 is now the smallest of the 4, but still getting larger! --- #4 is looking incredible! Wow! Growth looks perky and happy! - [20:05]: Checked down both fill tubes. --- Both reservoirs were completely dry! - [20:10]: Poured 6 cups of distilled water down EB1’s fill tube. --- Poured 2 cups of distilled water down EB2’s fill tube. - [20:16]: Checked the Ecowitt soil moisture sensor data: --- 35% - [CH01 EB1 - Garlic Budder #1] --- 40% - [CH02 EB2 - Garlic Budder #2] --- 36% - [CH03 GFP - Garlic Budder #3] --- 27% - [CH04 FPT - Garlic Budder #4] - [20:19]: Using a pump sprayer, --- Misted the straw mulch of #4 with 5 cups of distilled water. --- Focused mainly on the straw mulch. --- Also misted the mulch of #3 a bit (in the fabric pot). - [20:27]: Checked propagation dome (in the 3x3), --- To cycle the air under the dome, lifted the top off for a bit. --- Ooo yea! Everything is still green and looking great! --- Keep on rooting ladies! --- Oops! - [21:45]: Checked the humidifiers. --- Refilled the humidifiers with distilled water. Day 07 - Sunday - 06/09/24 - Total Days: 104 ----------------------------------- Daily Averages [~23:00] - Temps: 81.5°F [27.5°C] - Humidity: 74.8% - VPD: 0.91 kPa - Soil %: [36, 40, 37, 36] ----------------------------------- - [08:18]: Quick morning check! --- Nice! The main tent is looking great! #1 and #4 are both raging with growth! --- Checked on the propagation dome (inside the 3x3) and the clones are still looking green! --- Wow! Everything is going almost too well! Just keep on growing! - [19:08]: Evening check. --- Garden is just exploding with growth! Seems everyone has fully recovered from the defoliation and topping! --- Wow #1 is bushed out and looking incredible! --- #2 is growing really starting to get large! Growth still is funky, but stoked none-the-less. --- #3 is starting to fill in the pot! Getting larger! --- Wow! #4 is getting taller and looks healthy and green! - [19:12]: Checked down both fill tubes. --- Both reservoirs were completely dry! --- Wow the canopy is really starting to get taller and closer to the light. May need to raise it up soon. --- Absolutely surprised how low the light levels have been throughout this entire cycle. Barely moved the light and have not increased the intensity past 2 (out of 10). Less is really more. --- Anyways! - [19:18]: Checked the Ecowitt soil moisture sensor data: --- 36% - [CH01 EB1 - Garlic Budder #1] --- 41% - [CH02 EB2 - Garlic Budder #2] --- 37% - [CH03 GFP - Garlic Budder #3] --- 34% - [CH04 FPT - Garlic Budder #4] - [19:19]: Poured 6 cups of distilled water down EB1’s fill tube. --- Poured 3 cups of distilled water down EB2’s fill tube. - [19:24]: Checked propagation dome (in the 3x3), --- To refresh the air, lifted the top off for a bit. --- Sweet! Still green! Wow! --- Using a spray bottle, misted the top growth with distilled water. - [20:35]: Checked the humidifiers. --- Refilled the humidifiers with distilled water. --- Wow what a week! --- Growth has been just insane in the 4x4 tent! All plants have fully recovered and have just exploded with growth. --- I think it’s time to flip to flower! --- Also, I’m absolutely baffled about how well the cloning process has been going. --- So far no issues! --- Not complaining, but just surprised. Keep on growing ladies! --- If all goes well, should have fully rooted clones soon ready for transplanting (into solo cups of course). --- Absolutely hyped for next week! --- Maximum warp Ensign, Engage! [END OF WEEK 14|07]
Likes
3
Share
The plants are starting to recover from the N excess 2 weeks ago, this delayed a bit the starting of flower from some plants but im sure that the rest of flowering will be ok, i gave only water this week and applied a small amount of guanokalong nutrients as these are slowly absorbed to ensure the plant continues to receive some nutrients until next 2 weeks when we will start to give some extra PK
Likes
4
Share
Welcome to week 2 of flower on this lovely project! The ladies are stretching like crazy and it won't be long till we see some lovely flower tops starting! Some really cool genetics featured this run by a really cool breeder Hidden Vault Genetics. Genetic breakdown: Banana Smoothie ( Banana Split x G.O.S ) Creamy Cereal Crunch ( Watermelon Z x G.O.S ) MacMelonz ( Mac Burger x Zour Watermelon ) Huge shouts go to both the breeder and @MarsHydroLED for the awesome gear they make! Huge huge shout out goes to all my followers and supporters you guys inspire me to become the best grower I can be! Be sure to follow along for the latest updates cause this shows getting juicier by the day! -The Projexx Day#8F Put in net , trained down some of the taller plants. Plants are stretching along nicely. Day#9F Plants bounced back from the scrog training very quickly. They're picking up the pace with stretching! Day#10F Plants are just bursting in new growth, Creamy Cereal Crunch is getting huge! Day#11F We got the start of cotton balls going! Day#12F Pictures N/A. Ladies continue to explode in growth, defoliated some of the older leaves that aren't getting any light. Day#13F The ladies continue their stretch! Creamy Cereal is absolutely beasting out! Day#14F Cotton balls are getting bigger and bigger. Plants continue to stretch with minor signs of slowing down. Recap: Things went extremely well this week , the plants absolutely exploded in growth and have developed cottons balls. With some time left on the stretching period and lots of time left overall on this grow I'm very excited to see the end results with these cool genetics.
Likes
8
Share
@ohighoan
Follow
4 of 6 harvested. Gone give the other two a few more days Update… all 6 are cut down