
Likes
Comments
Share


@caliriot73
Follow
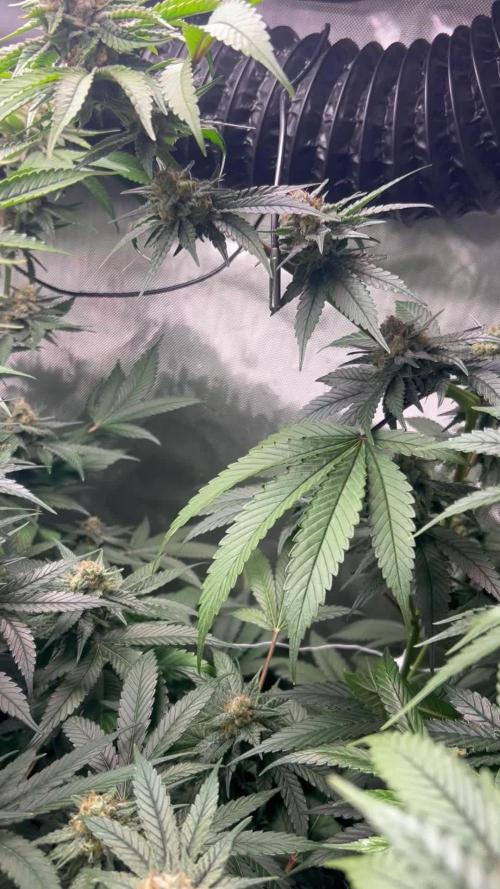
the lady are feeling good seems to
be promising and start to form the bud structure and begin the trichomes production whit loud terps


Likes
14
Share


@Kendoda
Follow
Feed 1
Grow 1ml, bloom 3ml, topmax 3ml.
Feed 2
Alg-a -mic 3ml.
Feed 3
Grow 1ml, bloom 3ml, topmax 3ml.
Three feeds of 1 litre.


Likes
Comments
Share

@XanHalen
Follow
Dec 2:
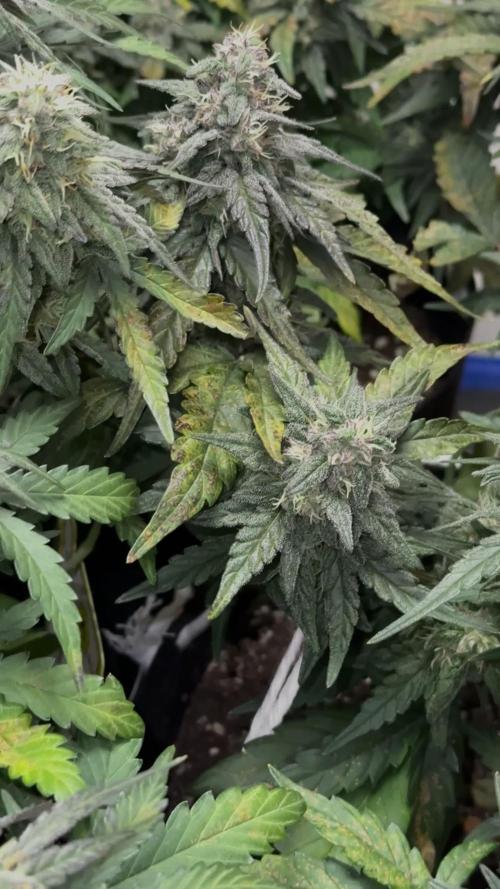
Backed off the liquid weight, only giving 1x per week, rusty spots have stopped spreading I believe. Bulking going well, one girl drinks significantly faster due to her size. Prolly week 12 finishers. These are some frosty ass girls I cannot wait to smell the cure transformation.

Processing
Likes
55
Share


@Njaak
Follow
Mid week update: did the defoliation over a couple of days. she looks gooood. so many lovely buds.
Stretch started this week! waaaaattttt. she's once again one BUSHY lady. was advised to limit pruning once flowering started, but things are getting out of control 😂. think i'm going to have to do some ladyscaping as a mid week update.
Slow growth as expected with the lower set point on the reservoir temp (19 C) - as a result of a slight smell. still has the smell, but nothing in the water on on the sides of the reservoir so not going to worry for now.
Bought another air stone and need to install ASAP. SO many roots and with sooooo much volume that the one stone just gets swamped. pretty impressive root system.
Shout out to all the growmies that have helped me on this journey. Things are good.

Likes
15
Share


@JUNGLE_B4RNS
Follow
Hello fellows growers ✌️
First week of flowering, plants started their stretch after 5 days of 12/12 lights cycle. And some plants showing their first white pistils. I gonna start to cut some shoots at the bottom of the plants, I already know these small ones won’t reach the top. And will start to unplug some few big fan leaves, that are covering shoots just below the canopy to give them some light.
✅New Growers Tips ✅
✅Switch to 12/12 light flowering cycle when your lights are half way to the ceiling.
✅Stick on your Veg. nutrients to give them Nitrogen to support the stretch and avoiding any dieback situation (plants yellowing from the bottom, moving their Nitrogen to save the top) around week 4 of flowering.
That’s all for this week folks 😉
Stay tuned 👍


Likes
8
Share


@JBOrganix
Follow
1 - 03/27 - Starting up week #2. New light is installed, will be monitoring the set up now since the new light is 800w. Tent temperature peaked yesterday at 85. Added a big fan in the tent and an additional fan for circulation outside of the tent as well. Going to need my air scrubber sooner than later to help keep my temps in check. Likely need a cool mist humidifier as well now. Woohoo. At least they are all still standing!
2 - 03/27 - The new LED at 800 watts is far too much. The tent was heating up uncontrollably past 86, so I decided to take it back and grab the single 400 for the time being. That way at a later date I can upgrade to a secondary 400 and still pull equal wattage. Also added a 6in inline fan to help keep the tent cooler. Sitting around 76 -80 now so I'm pretty happy with it. The 400 run quite a bit cooler than the 800 does. The 800 brought my tent up another 10 degrees whereas the 400 unit sits my tent up at 3 degrees. All in all, feeling good about the swap and new lights. Time will tell if I need anything additional come first week of flower
03 - 03/31 - Almost nearing the end of week 2. The girls are doing amazing. Candy Cane is finally catching up and everybody is filling out now. Super cool to see what a week does! 🌱
Each of the ladies received some very light LST last night. Light pull on the leaves downwards to pull the top open and create some more developmental growth. I also decided to run a really light liquid nutrient cycle. I'll post the product and details tonight. Happy growing! 🌱

Likes
7
Share


@Canabisseurs
Follow
Blue Cheese is officially in beast mode. She’s spread wide like a bonsai and with over 30+ bud sites across a flat canopy. Every top is reaching for the light—she’s stacking up nicely and loving the MPK boost.
The smell is starting to whisper cheesy promises, and the stretch is just about done. Leaves are praying, growth is explosive, and airflow is steady.
To do list
Light defoliation to open up lower sites. Feeding bloom nutrients + MPK for stacking.

Likes
27
Share


@adam_pawloski87
Follow
This grow was so amazing!! The purple punch’s came out super sticky dense nugs, super frosty , an a huge smell of blueberry muffins! Super fun grow along with the Forbiddin Runtz definitely one of the sweetest berry smelling strains of ever grown, highly recommend everyone to try out the purple punch’s, you will be highly satisfied!! Stay tuned for next grow!!
Likes
4
Share

@Guerrilla_grower777
Follow
23/10/2025 18:10
20.1°C 55%RH
After a very cold and rainy week today temperature raised above average,air is pretty dry and plants smells more than ever
This strange hot day made hunters come back after a chill period with no shots in the background,also this time was really near my spot(i thought he was finding us😰)

Processing
Likes
11
Share


@Blacksheep
Follow
Wow! What a difference a week makes. They are all in flower. They are all autos from Dutch Passion except one auto Dinafem Sour Diesel. There are 7 Glueberrys, 2 Colorado Cookies, 1 Blueberry, 1 Think Different & 1 Sour Desiel. It’s day 35 today. The 3 plants on the right side of the tent are only 3 weeks old. I have done a little LST and will continue to do so. A couple of the plants have shown slight calmag and slight phosphorus deficiency. I water right now every 3 days with the Fox Farm Trio combination. I use fertilizer every watering but cut the amount in half that is recommended. I also use powered seaweed each watering.
I will start another round of 12 autos in 3 weeks.
Doing this legally now is unbelievable to me. I have been partaking of this wonderful plant since 1969. That’s 50 years this last July!

Likes
10
Share


@InnerCityGardens
Follow
Week 8, looking great. Really putting on some size now, soon to introduce some plant bends. Stay tuned
Likes
9
Share


Likes
46
Share


@Juschiln420
Follow
6/18 added water, ph
6/19
Added 3ml cal mag banana, cookies
Added water
6/20 added water, ph
6/21added water, ph
6/22 added 2ml bloom to banana
6/23 added water, ph
6/24
Added water and nutrients
Runtz and cookies
Bloom(Full strength)(new)
Micro 0.75/L x 11.3=8.5ml
Gro 0.50/L x 11.3=5.65ml
Bloom 1/L x 11.3=11.3ml
Cal mag 1/L x11.3= 11.3ml
Bud candy 2/L × 11.3= 22.6ml
Big bud 2/L x 11.3= 22.6ml
Hydroguard 2/Gal x 3.5=7ml
3 gal = 11.3L
6/25 added water, ph
Records kept here
https://1drv.ms/x/s!AmTQ-7u9iyH6kDFcBT1QhRk7ttv4

Likes
Comments
Share


@Mr_nugs_lover_David
Follow
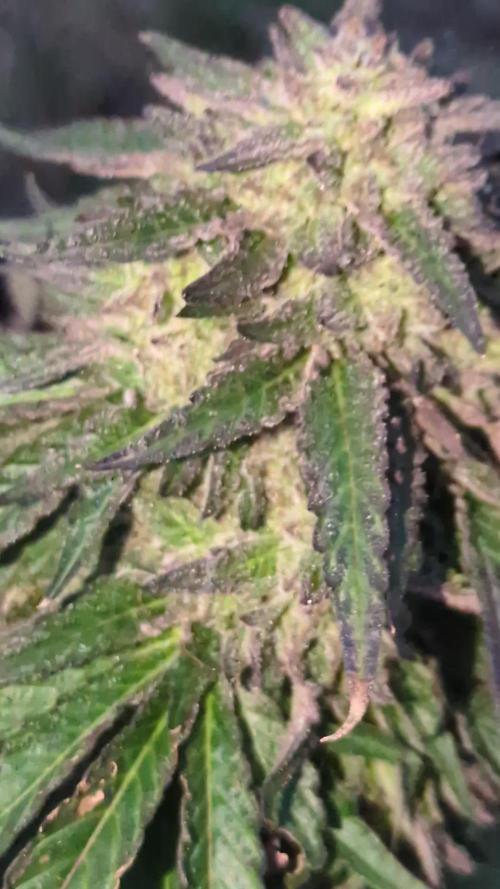
In love with all of my 5 plants of black cherry punch but this one is one of the most beautiful ones, 100% purple flowers, very dense and awesome fruity sweet smell love it!

Processing
Likes
51
Share


@Silverback_Guerilla
Follow
2/1:
I flushed the taller/skinnier Muscadine Wine and lightly fed everybody else.
2/4:
I moved the taller/skinnier MW into the dark for a day...she and several other plants will be harvested tomorrow.

Likes
17
Share


@Hashy
Follow
Week 4
Light cycle=18/6
Light Power=100w
Extractor controller settings
High temp= 25c
Low temp= c
Temp step=0c
High Rh= 60%
Low Rh= %
Rh step=0%
Speed max=5
Speed min=1
Smart controller settings (during lights on).
Lights on=06.00am
Radiator on= below 20c
Radiator off= above 21c
Smart controller settings (during lights off).
Lights off=00.00am
Radiator on= below 18c
Radiator off= above 19c
VPD aim=0.6-1.2
DLI aim=22-30
EC aim=0.8
PH aim=6.2
Fri 12/1/24
#1 (Day 22)
📋 Turned pot 180 deg
Sat 13/1/24
#1 (Day 23)
📋 pot is getting lighter, prob water tomorrow.
Sun 14/1/24
#1 (Day 24)
📋
💧💧💧💧💧💧💧💧💧💧💧💧💧💧💧💧
Method= manual
Feed= veg nutes
Total volume made=12L
Neutralise=0.1ml/L
Silicon=1.0ml/L
Calmag=1.0ml/L
Terra grow=2.0ml/L
Roots=0.2ml/L
Easy Ph down=0.2ml/L
Volume=2L
Ec=1.7 PH= 5.8/6.0
Time=4.30pm
Runoff.
Total runoff=60ml
Ec=4.98 PH=5.3/5.5
💧💧💧💧💧💧💧💧💧💧💧💧💧💧💧💧
Mon 15/1/24
#1 (Day 25)
📋 turned pot 90 deg.
Tue 16/1/24
#1 (Day 26)
📋 opened up the plant.
wed 17/1/24
#1 (Day 27)
📋 removed 1st 3 fingered fan leaves.
Installed the drippers.
🚿 foliar sprayed (cal-mag 5ml/L)
Turned pot 90 deg.
Thur 18/1/24
#1 (Day 28)****
📋 H=30cm D=43cm DLI=25.2
💧💧💧💧💧💧💧💧💧💧💧💧💧💧💧💧
Method= manual
Feed=Water
Total volume made=10L
Neutralise=0.1ml/L
Roots=0.25ml/L
Easy Ph down=0ml/L
Volume=2.5L
Ec=0.2 PH= 6.5/6.6
Time=7.30pm
Runoff.
Total runoff=15ml
Ec= PH=/ no reading
💧💧💧💧💧💧💧💧💧💧💧💧💧💧💧💧
11.00pm Increased light power from 100w to 120w.
She has grown quite well this week, looking quite healthy. Starting to grow more vigorously.
Back soon.
Take it easy.
Likes
3
Share


@OldskoolHed
Follow
In stretch mode at about 750-800 ppfd currently on full bloom nutrients. Watering about 1.75 gal every 4th day.
Likes
47
Share


@Hydro_Hiebs
Follow
🌱Welcome to my 2 x 4 ft autoflower tent. Who else is stoned as fuck? Here we have Fast Buds tester 2210. We just finished the 3rd week of flower and holy shit she's getting tall. Last week we saw her shoot up 7 inches. This week was 6 inches. That's almost an inch per day! she is now the tallest in the tent and taking on more of a sativa hybrid structure. She is looking like she's about to put on some huge flowers 😌💨
💧She has been receiving water every other day about 1 L of pH adjusted to 6.5.
✂️ TRAINING: N/A.
💡⚡Check Mars Hydro out on Instagram! @marshydro_aliexpress2 💡⚡
Likes
31
Share


@Mrs_Larimar
Follow
2024-05-15
No big thing to report,
The Planties doing well, established in the new Pot-
I placed them in the youngsters room,
so they will get stronger light, and gettting more solid structure.
BREEDER INFO
Tangerine Snow F1 Fast Feminised is a 75% sativa, four-way cross of (Boost x Tangelo) with (Lavender x Power Plant).
This Fast F1 hybrid is bred from Cali genetics and boasts great citrus terps, high resin production for extracts,
high levels of THC, very good yields and excellent mould resistance.
Tangerine Snow F1 Fast can be grown indoors as well as outdoors. Indoor flowering times are between 8 - 10 weeks
while harvest time in northern latitudes is during September while in the southern hemisphere growers will be harvesting during March.
Recommended climate regions are hot, dry, humid and warm. These are tall, semi-branched plants that grow in excess of 200cm
and display a high degree of vigour with very good uniformity.
In common with many other heavily sativa-dominant strains, Tangerine Snow F1 Fast offers excellent resistance to mould
as well as to plant pests and diseases. The combination of citrus terps and plenty of resin makes thi
a very good extract strain with the 'washing' method delivering very good yields of hash.
The citrus terpene profile is reminiscent of mandarins and tangerines and also has sweet candy notes.
THC production has been lab-verified at a strong 24% while CBD is low. The effect is uplifting and energising,
perfect for use during the day and early evening.
