
Likes
Comments
Share


@BicRed
Follow
9th Week
I'm trying to address the deficiencies, I believe it's due to using coconut substrate. I am gradually reducing the daily light exposure by 1 hour until reaching 12/12. As it's the first time with Delta 9 in the cultivation, I have trow it foliarly.


Likes
17
Share


@Lazuli
Follow
They start looking very dense now, i flushed a day ago and instantly fed 8liters per pot with 650ppm ripen so the runoff is also in the 600 range.
Now there is 9 days left with this feeding it will kick in hard now.
All buds are rockhard there is no fluf anywhere in the plant as these are small plants and can only focus on nice marure buds.
I love this strain i think this has a very good leaf to bud ratio and fattens up really fast also not much stretch diring the preflower. See u next week at the harvest day.


Likes
7
Share

@Ribemarti
Follow
COMO DICHO FINALIZO CON BARNEYS AUNQUE AQUI ESTA ALGO MEJOR ESTA BANDEJA
LOS RIEGOS SON IGUALES QJE LA OTRA BANDEJA VEREMOS SI ESTAS NOS DAN UNA ALEGRIA
PERO SE VAN A RETRASAR MIUCHO MAS DE LO QUE ELLOS TIENEN EN SU WEB


Likes
12
Share


@Ieiogrow94
Follow
Eccoci qui...
Scusate per il ritardo ma sono stato super impegnato, SIAMO ENTRATI NELLE ULTIME SETTIMANE DI FIORITURA!!
Ormai si vede una maturazione costante giorno per giorno ed ha tutte cime come PIETRE, durissime e super colorate!!!
Grazie a @KhalifaGenetics e @xpertnutrients per la collab e a tutti per il supporto🔥🌲❤️

Likes
2
Share


@Comfrey
Follow
Have some time and some ideas. Let‘s go for it, said the chicken to the bee and then they vaped some basil. 🌿
Likes
12
Share


@ktkoi
Follow
Day 73: Early/mid flower for G. Crack & Mexican.. nearing late for CBD crack. These girls are thirsty, so much watering is happening, but the smell isn't nearly as strong as the first round is even though they are all bigger. This is a test post for videos, next one will be for the contest.
Day 75:
G-crack 58cm
CBD Crack 30cm
Mexican Airlines 20cm
CBD is closest to maturity. Her leggy stature gives ample opportunity for the different buds to get light. Mex is starting to get fuller buds, but she's short and stout and her leaves are in the way. G is way too large for me to get the right amount of light on her, wish I had defoliated her more, will probably harvest in parts.
None of these girls smell as strongly as the previous grow. CBD is a bit diesely but fresh. G is smokey but light right now. Mexican is spicey and woodsy. I can't really place the scents just yet.
Likes
10
Share


@TeesTrees
Follow
Day 29 - Still change.
Day 30 - same thing still iv nearly finished setting up the room for the grow.
Day 31 - Iv finished the room and now can monitor and manage more about environment.
Day 32 - There is more leaves and plant looks healthier. Lets hope its shoots up!
Day 33 - still growing
Day 34 - everyone keeps telling me to cut it down and start again.
Day 35 - im gonna flush the plant out and give it fresh nutrients.
Likes
8
Share


@South79
Follow
Added net, did a bit more defoiliation. no signs of nute excess so added a small bit of pk booster
Likes
60
Share


@m0use
Follow
Been an ok week just counting down the days till flip. This update is a bit late and should have another soon enough. Found one leaf that was giving me some camo print. Kinda cool. Would be neat if the entire plant did that, would look amazing on the deck. makeshift bamboo.
My butterwort plant is starting to thrive again in the shade of the bigger plants and the peppers are also doing the same, the light was just to much for them. the butterwort is also eating lots and lots of the gnats in the tent and doing its job, I'm going to try and propagate it and give some to my grow shop guys and see if they want to sell them. They told me to make a bunch of clones of it and bring them some so we will see. I let my pots get nice and dry before the next water and saw some of the leaves on the underside of the canopy were wilting so the gnats might have been knocked back by a week or so from it being to dry on the soil level.
Plant is also fully showing its sex on two of them, waiting on the middle one to pop some pistils. Fed them all the same with an addition of some seaweed extract from GaiaGreen. They are really liking the fulvic acid powder I'm using. this is 100% a new thing going into all the grows moving forward.
I also went out and purchase some bubble has bags for cheep and decided to try and make some bubble hash out of a bunch of outdoor plants I had, comprised also of trim/shake from all the other diaries I did. One weird thing was the 25u size was the bigger yielding and that not so normal from what I have been told by my friends. I have a strong feeling it was from me shaking and hitting the bag like it owed me some money. I wanted to see how much keif/crystals would fall off of it in the freezer and my orginal plan was to make keif hash with it and that's part of its processing. vs bubble hash you don't want to do that. The results where ok. I did 3 washes and honestly I should have done more but it was late and I was just going to throw it out anyway if I did not make hash from it, so win win.
1st wash about 15min
2nd wash was about 15-20 min
3rd wash was closer to 30 min.
used a 220u work bag and then went into a 160u and 73u down to a 25u as final, I don't know its yeild yet but I will soon find out as its still drying. used 213.4g of trim and shake and some buds. My ideal outcome is 10% of that weight in hash so 21.3g
220u160u73u25u
u=micron
I feel like im forgetting something but IDK what it is, till next week, and that should be in a few days. Friday if I get my shit together.
Big shoutout to Medic Grow for sponsoring the lighting in my tent, They have provided me with 2x Mini Sun 2's in the 240w configuration, They use the v1 growing spectrum that is a all purpose seed to harvest spectrum so their is no hassle of switching it mid grow. If you interested in learning more about Medic Grow products please visit the web link below.
https://medicgrow.com/
https://growdiaries.com/grower/MedicGrowLED

Likes
3
Share


@Luke_Lee
Follow
—————————————————————
WEEK 6 / DAY 37-43
Mars Hydro FC-E3000
Floragard Professional GrowMix
11L Plant bag made of fleece
Light: 50cm
Schedule: 18/6;
PPFD: 686-700 umol/m2/s
20° C - 50 RH
1L per Plant
PH 6,5-7
2ml BioGrow; 1ml TopMax ; 1ml BioBloom
1ml CalMag
#1 Royal Critical Automatic
#2 Royal Critical Automatic
Fan, extractor and pump ON 24/0.
—————————————————————
-24.02.2025
The first week of flowering begins today.
The light will be switched to an 18/6 light cycle from today.
The distance is 55cm with a value of 686 PPFD (PhotoneApp).
TopMax and BioBloom will also be added to the irrigation water from this week.
I am curious to see how the plants will develop in the coming weeks.
-01.03.2025
The plants are developing very well. They were watered on Tuesday 27.02 and today 01.03 with 1 liter of water each (2ml BioGrow; 1mlCalMag; 1mlBioGrow; 1mlTopMax).
The LST was adjusted again and a few leaves and popcorn buds were removed.
Total Time-1031:04h
Total Energy-166,72kWh


Likes
26
Share


@Ilovekush17
Follow
Stopped using fish it. Started using mammoth p. .6 ml per 1 gallon in all gallons every water. Thats all im using.
I put the roi-680 on 100% its about 16 inches above and i put the diablo at 70% and thats about 22 inches above
Processing
Likes
9
Share


@Silverback_Guerilla
Follow
7/6:
Heavy thunderstorms last night and half the day today, so they won't be ready to eat again for a few days. I went out to the site about an hour after it quit raining today and saw HUNDREDS of tiny little green grasshoppers feasting on my girls!!! I immediately sprayed them all down with pyrethrins, and did it again right before dark.
I've got the fan blowing across the pots to try to dry them out faster.
I started using TPS One (one part nute solution) the other day, and the plants seem to love it. Really growing well, but I'm glad I amended their soil with some happy frog fruit and flower granular fertilizer this time. They get fed whether it's too wet or not.
7/7:
More grasshoppers this morning..I sprayed with pyrethrins. Very cloudy day...glad I've got 470w of supplemental light above them all day/every day (and another 200w in reserve)😎

Likes
16
Share


@eldruida_lamota
Follow
Vamos familia, aquí os traigo la octava semana y tercera de floración de estas Royal Gorilla de RoyalQueenSeeds.
Vaya color, y van con buen ritmo.
La temperatura maxima es de 26.5 y la
Mínima se queda en 23.5. En cuanto a la humedad está estable en 50%
No tienen vergüenza los de grow diaries lleva 3 semanas dando errores la web… y no hacen nada
Agrobeta:
https://www.agrobeta.com/agrobetatiendaonline/36-abonos-canamo
Mars hydro:
Code discount: EL420
https://www.mars-hydro.com/
Hasta aquí es todo , espero que lo disfrutéis, buenos humos 💨💨
Likes
12
Share


@TheOtherSide
Follow
6/12 - 6/18 👉👊
-------------------
6/13 - 1 Gal. 6.7 pH. 2.5 Cal-Mag+, 3 Micro, 0 Gro, 5 Bloom, .25 Easy Weed
6/14 - 1 Gal 6.7 pH 2.5 Cal-Mag+, 3 Micro, 0 Gro, 6 Bloom, .5 tsp Molasses
6/16 - 1 Gal 6.8 pH 2.5 Cal-Mag+, 3 Micro, 0 Gro, 6 Bloom, 3 Fish Shit
6/18 - 1 Gal. pH 6.7. 2.5 Cal-Mag+, 3 Micro, 0 Gro, 6 Bloom, .25 tsp Easy Weed
6/20 - 31 Inches
--------------------
Pink Clip - Fresh Candy
-------------------------
3 Gallon Fabric Pots
50% FoxFarm Happy Frog
30% Cana-Coco
20% Perlite
-------------------------
Veg & Bloom Tent:
2’x4’x5’ Green Architecture Tent 600D
Optic 1 54w COB 3500K (Seedling, Early Veg) 18/6
Optic 1 XL100w COB 3500k (Late Veg, Bloom) 18/6
1 Gal Humidifier
2x 6” Clip Fan
2x 28” Oscillating Fan
2x 4” Carbon Filter with 2x 200 CFM

Likes
14
Share


@Chi_K24
Follow
Hey folks, its been a while and I am happy to say we can start our first outdoor summer grow!
So I recently got my hands on some 4 week-old clones of some purple kush from my pops indoor grow and will give it a chance for outdoors. I do understand that they are a bit finicky to grow outdoors due to its dense bud structures, but i'm willing to give them a chance.
We are starting off with 15 gal fabric pots with Pro-Mix BX series soil amended with Gia Green Organics all purpose 4-4-4 with 2-8-4 bloom to a ratio of 70/30 @3Tbs/Gal of media.
The clones then were transplanted and watered with dechlorinated pH 6.5 tap water.
Lets see how they turn out!
Cheers! :)


Likes
4
Share

@Bear_Grows_Green
Follow
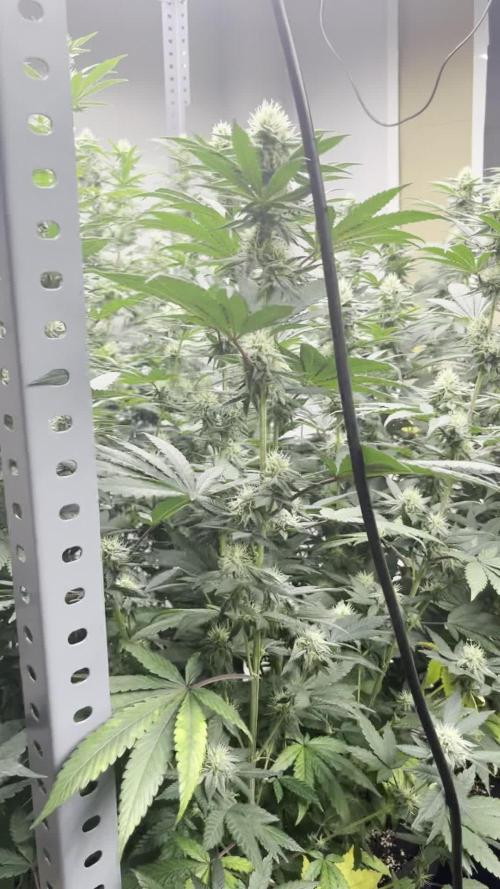
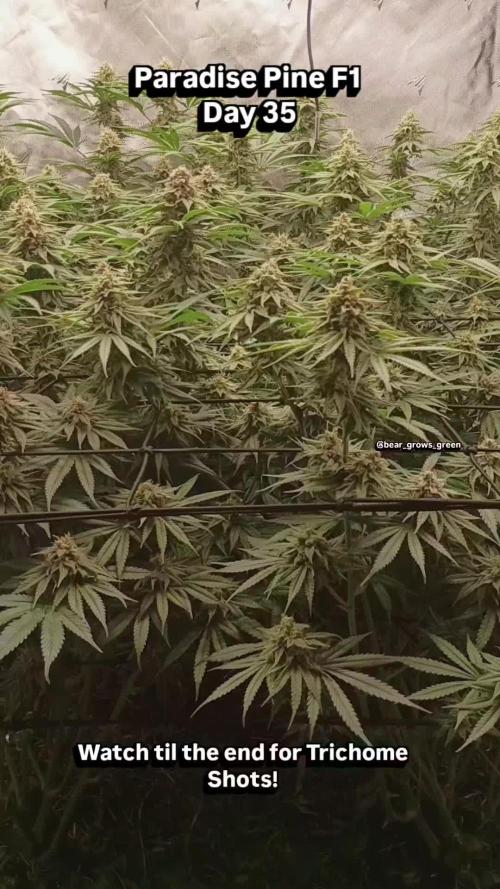
02/05 day 29 flower and holy shit things are popping. The smells are strong of tropical fruit punch on the run when I open the tent it smells of over ripe or slightly fermented fruit yummy. Stacking and filling out awesome! They got water and fed today.
02/09 got watered with bio phos, and bio catalyst 7 gallons total water. Terp check on them all. #1 straight tropical fruit punch very loud strongest and most unique terps in the tent. #2 slightly gassy pretty generic smell I feel I've smelled a million times before. #3 slight gas and fruit punch but subtle nothing impressive. #4 2nd strongest terps on the tent a even mix of gas and tropical fruit punch. I'm gonna have a hard time letting go of #1 or #4 honestly so they are both getting ran again next round for fresh frozen and will be kept around at least til I try the end rosin.
02/11 got watered 10.5 gallons with supplemental stuff in last 3.5 gallons last day of week 5.