
Likes
Comments
Share


@CanabisLoverHobbyGrower
Follow
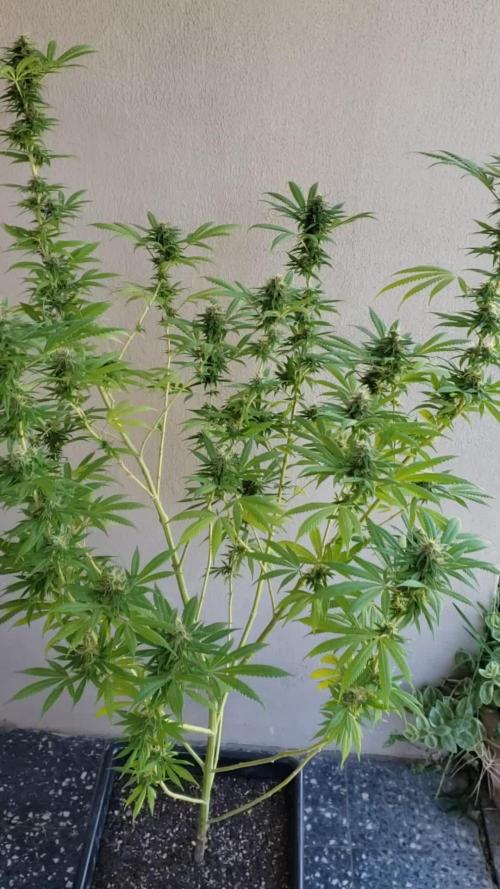
Little bit of defoliation today just to allow light to hit as much as possible,.. day 21 from breaking soil, all look healthy, started a proper nutrient feed today also, still toying with the idea of topping or just some lst, not sure yet, will see how they look next week,.. stay tuned 😀

Likes
8
Share


@frankterpenes
Follow
The plant is suffering some calcium and phosphorus deficiency.
I add more of this in my feeding chart.
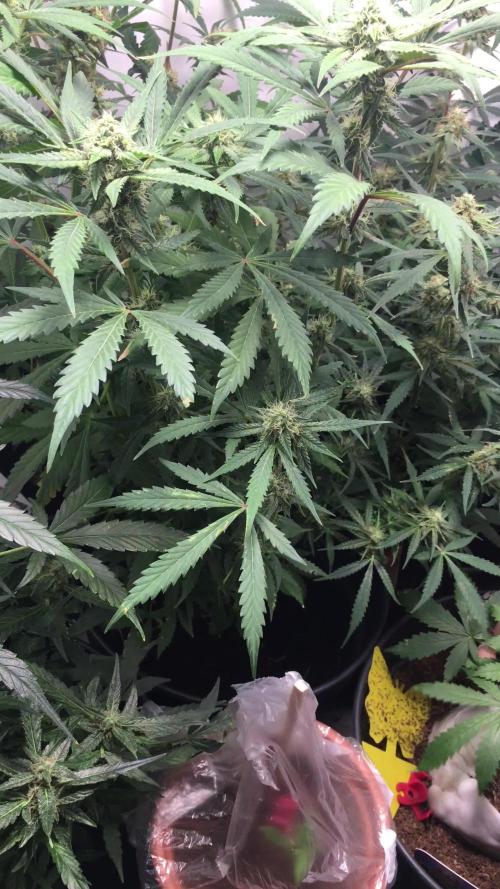
The plant is blooming now and It seems she will be nice. The smell has started and it seems to be quite delicious.
The buds are getting fatter.
Here are some pictures


Likes
1
Share


@undermink
Follow
Week 8 begins with lots of buds. I let them be for now and let the buds grow. Can't imagine that they will only have about 27 days left.. Lets see if I let them live a little longer, since they were late flowering on week 6 rather than week 5...
They all look amazing in the middle of week 8... Buds all over - everywhere you look :) And they keep on getting taller every day... The tallest one is now about 65cm.

Likes
26
Share


@GrowGuy97
Follow
Day 7 & 2 of the NHLs still havnt popped, transplanting the one NHL that did pop today!
Day 12 think 1 of the orange sherbet have nute burn so flushing it out and dropping the dose a little hopefully that helps!


Likes
14
Share


@suchydog5
Follow
2-3 buds were moldy so i had to cut them hope it doesnt spread further😳
to be honest i havent seen more beautiful flower than this purple one❤️
Likes
8
Share


@WalterWhyte
Follow
Too small box :(
Must out one of pot
In next grow buy bigger box :) :)
Can someone tell me something about HydroMars 450W LED ??

Likes
6
Share


@Growhome_90
Follow
28.02.2025:
Mit dem Eintopfen der Anzuchtwürfel in die 1l Zwischentöpfe, starte ich die erste Wachstumswoche.
Die ersten echten Blätter haben sich gebildet.
06.03.2025:
Die erste Woche lief relativ entspannt. Durch die hohe Luftfeuchtigkeit und die größeren Töpfe, hat die Erde sich gut feucht gehalten und musste kaum gegossen werden.
Die ersten Wurzeln lassen sich auch schon an den unteren Öffnungen des Topfes beobachten.


Likes
1
Share


@ChameleonsCannabis
Follow
Hung for 8 days. 75f 50-65%rh. The smell off the blueberry literally smells like if somebody blew a blueberry flavored vape in my face. I dry trimmed it and it was smelling ripe let me just say. Put it in jars and had to get rh down was floating up to about 70 but every time I opened that jar the smell got better and better. Round nugs like golf balls I smashed mine while they were wet still a little bit out of excitement and checking for dry but this bud is awesome and was strong enough to survive me so.. hope thst says enough

Likes
3
Share


Muy buena cepa, potente, productora y fácil de cultivar. El efecto fue exactamente lo que buscaba; intenté curar la yerba lo mejor que pude para poder preservar los terpenos y así disfrutar aún más. Cepa recomendada😄

Likes
8
Share


@JBOrganix
Follow
1 - 03/27 - Starting up week #2. New light is installed, will be monitoring the set up now since the new light is 800w. Tent temperature peaked yesterday at 85. Added a big fan in the tent and an additional fan for circulation outside of the tent as well. Going to need my air scrubber sooner than later to help keep my temps in check. Likely need a cool mist humidifier as well now. Woohoo. At least they are all still standing!
2 - 03/27 - The new LED at 800 watts is far too much. The tent was heating up uncontrollably past 86, so I decided to take it back and grab the single 400 for the time being. That way at a later date I can upgrade to a secondary 400 and still pull equal wattage. Also added a 6in inline fan to help keep the tent cooler. Sitting around 76 -80 now so I'm pretty happy with it. The 400 run quite a bit cooler than the 800 does. The 800 brought my tent up another 10 degrees whereas the 400 unit sits my tent up at 3 degrees. All in all, feeling good about the swap and new lights. Time will tell if I need anything additional come first week of flower
03 - 03/31 - Almost nearing the end of week 2. The girls are doing amazing. Candy Cane is finally catching up and everybody is filling out now. Super cool to see what a week does! 🌱
Each of the ladies received some very light LST last night. Light pull on the leaves downwards to pull the top open and create some more developmental growth. I also decided to run a really light liquid nutrient cycle. I'll post the product and details tonight. Happy growing! 🌱

Likes
6
Share


@Yeyup
Follow
First grow done more to come hopefully didn’t think it would be as easy as it was hopefully she smokes nice
Dry weight was 51.56g happy enough for me first grow she’s smoking and smelling lovely.

Likes
4
Share

@The_Doctor_Green
Follow
Hola a todo el mundo!!🙌😃.
Espero que anden bien amigos!, yo ando con poco tiempo (créeme que me encantaría poder cultivar y vivir de esto😅, pero esta complicado), a lo que este diario se refiere, he aumentado dosis de fertilizantes, con un ph de 6 -6.1, aun no he vuelto a medir drenaje, las plantas vienen respondiendo bien a pesar del bloqueo que ha tenido, pero prometo en el próximo resumen cargar estos valores.
Nos vemos la próxima semana! Y si lees esto y no me sigues, en instagram, ayudarías siguiendome( es gratis seguirme😅😉).

Likes
6
Share


@Gordy
Follow
Week 2 bloom:
The buds have started to arrive! And they are everywhere. This girl is huge and looking great. She seems to have liked the feeding I gave her last week.
I’ve continued to train her, but at the point that the buds have started, I don’t want to be touching it very much. Maybe it’s OK because the trichomes haven’t started? I just want to control her… I’m concerned about height. Currently she’s half the height of the tent and is only 1 week into bloom.


Likes
9
Share


@Josh9260
Follow
Had the seed capsule stick to the seedling, making it bend but it fixed itself and had no issues afterwards.

Likes
35
Share

@wolfvb
Follow
Week 8: The Bakery is Open! 🎂👃
The Update: We are officially in full bloom mode! If last week was about the frost starting, this week is all about the bulk. The Wedding Cake is living up to her name the smell is getting sweeter, heavier, and definitely more pungent.
Bud Development: The PK 13-14 is doing its magic. The colas are visibly swelling day by day, and the calyxes are stacking up beautifully. The "popcorn" buds lower down are hardening up thanks to that defoliation last week. Most pistils are still white, but I'm spotting a few starting to turn amber/orange as she matures.
Nutrients & Care: Continuing with the "heavy hitter" mix:
Bio-Bloom & Top-Max: keeping the sugars high.
PK 13-14: pushing that density.
Environment: Temps are steady at 25°C. I'm keeping a very close watch on humidity (aiming to drop it slightly below 65% if possible) to keep mold away from these chunky flowers.
Next Steps: Just letting her bake! The structure is set, now it's just a waiting game for them to ripen. ⏳

Likes
23
Share


@JeyGanesha
Follow
Primeras semanas de flores.passaggio da 18/6 a 12/12
.adesso care piante sacre mie, ora datemi dei bei fiori per la mia terapia
...Om namah shivaya 🙏

Likes
27
Share


@Jungle_James_Grows
Follow
They are looking great really really nice now starting to put some weight on and the smell is sweet and stinky.
Might add some bloom booster to help them along as well as molasses. I've got 5 of the same strain and they are all different. The one I topped seems to be doing the best.
30/8 Did a bit of a defoliation and leaf tucking tonight. They are fattening up nicely now.
Likes
27
Share


@Ganjagrandaddy
Follow
Hi Growmies
Here we are on the last week possibly for these beautiful smelling Biscotti Girls.
It has been a week of slowly adding weight to the mains for the most part but the #1 girl looks very close to finished already. She has a lot of browned pistils and her buds are rock solid too. Her lowers do still look fairly fresh but I will have to get her on the water inly to give her a flush in case. It is not uncommen to get a second pistil flush that boosts them again but they do look fairly close. Will be using the loupe to check the trichromes in the next day or so too.
The other two ladies are happy to continue on amd will get their final full feed tomorrow too.
They ate getting nice and sticky to touch now amd are smelling so pineapple sweet too but up real close you can definitely get the diesel whiff too.
While there are a lot of bud sites over the grow , I am not overly impressed by any of tje mains sonfar and hope that the last push will get them adding some girth and weight with oil filled sacs to get that potency cooking.
So close to the finish line now. Thanks for sticking with me on the journey. I hope your grows are steller and producing well. Until next time. Be well.