
Likes
Comments
Share


@MR_PUUF_K93
Follow
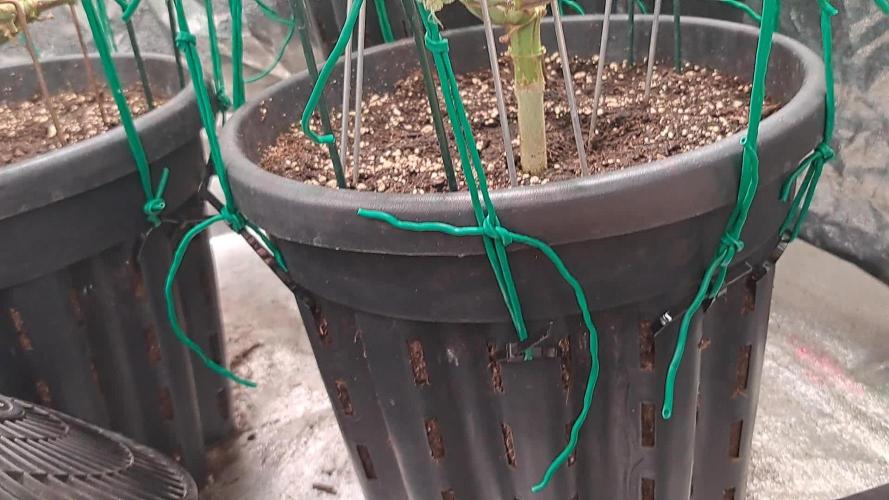
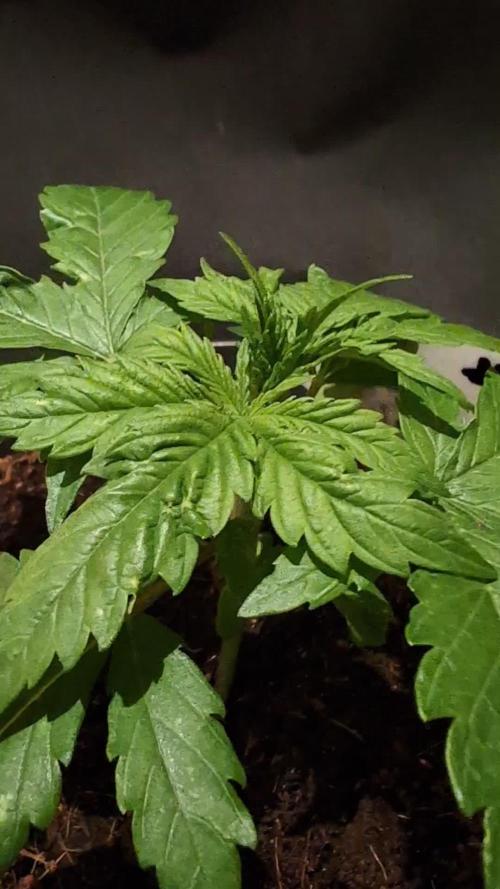
Están creciendo muy bien! 😁 😁 He notado que el Rino Skin está haciendo que los tallos engorden bastante!! no lo había probado nunca y me está gustando.
🔴 He comenzado a hacer la técnica
-LST -
hay algunas Runtz que están germinadas después y la verdad es que están un poco pequeñas parece que la genética ha salido un poco rarita.
Las Zkitllez hay dos que germinaron solo con un cotiledón, una de ellas está a la par pero otra está un poquito atrasada... creciendo poco a poco pero luchando 😊😊 y otra de ellas la que salió bien está espectacular me encanta! 😍😍
Las Banana Cream 🍌 están super grandes! Creo que un poquito más de lo normal la distancia internodal parece un poco larga no sé a qué se debe... y están alimentándose de lujo


Likes
24
Share


@LittleBigTrees
Follow
Still only giving them water at ph6. 5
The soil I started them in is a full strength soil. House and garden bat special 🦇💪👍
Some people say I shouldn't plant seeds direct into full strength soil, I've been doing it for 20 years and never had any issues . Each to there own I say 👍

Likes
9
Share


@SgtDoofy
Follow
June 26
Getting bigger and bigger! Makes me wonder if I should flip her to flower here soon to control the size since she's not an autoflower which is usually smaller, genetically. She hasn't used up all of the nutrients in the bucket yet either.
June 27
Plant was a bit droopy, so a half gallon of PH'd water did the trick.
June 30
Some lower leaves are getting yellow and dying. I'm taking that as a sign that the soil is almost out of nutrients. Mixed up a 1/8th strength of General Organics GO Box nutrients (week 1 to avoid nute burn), but upped the CalMag to 1/4 strength. Fed one gallon at a PH of 6.7 to slight runoff.

Likes
3
Share

@Spy-Nello
Follow
Le 3 genetice dichiarano tutte 56/63 gg di fioritura ma Zillions è chiaramente piu' avanti di tutte come maturazione e ha iniziato il Flawless Finish , Polar Gelato e Persian Pie continuano col bulk.
La scorsa settimana ho avuto dei piccoli problemi di temperatura risolti con un condizionatore portatile tuttavia, questa settimana è l'umidià a preoccuparmi, sto facendo fatica a mantenerla sotto il 55%.
Devo prendere una decisione, a breve taglierò Zillions, mentre per Polar Gelato e Persian Pie volevo aspettare almeno un'altra settimana ma, se continuerò ad avere problemi di umidità nel box credo che anticiperò... il rischio di rovinare tutto sarebbe troppo alto, i profumi ci sono e la sostanza anche, le cime sono dei sassi innevati, quindi nei prossimi giorni deciderò come comportarmi... o meglio decideranno loro😂


Likes
38
Share


@Aedaone
Follow
All the plants will be in the generative 3 phase of flower this week. I've updated the nutrients section for the week to show what the are being fed. I'm still feeding 3 gallons per plant daily. The number 3 plant is a few days behind the other two so it will get the Generative 2 feed, in the nutrients section for week 12, a few days this week.The two short plants have slowed their feeding way down on day 3 this week. The organic nutrients have a tendency to build up in the soil. Day 3 the two short plants got tap water. I'll wait til some of the leaves lighten up before I feed again. Day 4 the two short plants got fed. They didn't seem to be hurting for nutes but the leaves appeared to be losing color and the buds are still filling out. I had been feeding everyday until day 3. Day 5 and 6 the short plants got tap water and the tall one got the nutrients formula. Day 7 this week, the tallest and one of the short plants were fed the listed nutrient formula. There was no change in height this week. The tallest is 87.5 inches the two shorter ones 62 inches. I believe the two shorter plants will enter generative phase four/ripening next week. They are getting super frosty.

Likes
5
Share


@CreamyNuggets
Follow
Day 64. Harvested the AK -47 and the tallest bubba pupil. The rest of the plants are flushing out and will be harvested around 70 days.

Processing
Likes
3
Share


@Sunday_Grower
Follow
Got hit by a severe heatwave this week! Temps reached 104 in the grow tent even with the lights off and fans at full blast. Threw some ice in front of a fan to help but it was not enough. Also doesn't help I went one day over when I would normally water them. First day of reasonable weather today. Plants seemed sad and droopy for a day, luckily after feeding they perked right back up. Defoliated slightly this week. Will definitely NEED air conditioning moving forward. Aside from that, the odor these two are creating is already mesmerizing. Best I can describe the smell so far is, a mixture of sweet pineyness with a light pungent funky undertone. Can't wait to switch to flower in a few days! Going to be flushing both plants this Sunday 05/31.
Likes
26
Share


@Roberts
Follow
G13 auto is doing good under the Medic Grow Mini Sun-2. She is in the Athena blended line nutrition. She is in bulking now. I had a little mistake. I accidentally hit the on off value for the air and shut it off to this plant. So it went for a few days with no aeration. I immediately changed the solution, and got the air going again. The solution was rancid from sitting. Hopefully I can ride out the rest of the grow with a decent result. Thank you Medic Grow, Athena, and Weed Seeds Express. 🤜🏻🤛🏻🌱🌱🌱
Thank you grow diaries community for the 👇likes👇, follows, comments, and subscriptions on my YouTube channel👇. ❄️🌱🍻
Happy Growing 🌱🌱🌱
https://youtube.com/channel/UCAhN7yRzWLpcaRHhMIQ7X4g

Likes
11
Share
@Schubsen
Follow
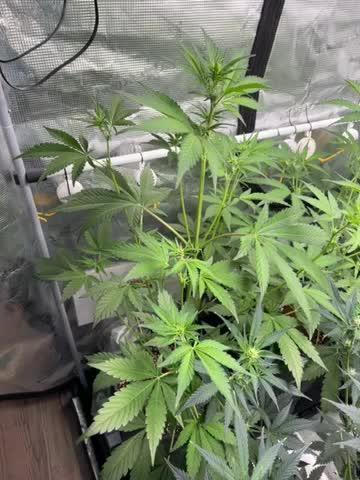
Hey Growmies, I needed to defoil, too many and too big Fan leafes.. bigger than my hands. The mendo guava stretched much to much. All others are ok.do not know whats her Mission.. but needed to top it and pull it to the side.
Likes
51
Share


@Chumpkilla
Follow
12/17/23 - Day 41 - It flipped to flower today. I didn't document it via video because it's just like all the other videos. Except this change uses different level of the nutes for Flowering.
Alot of the bud sites have tons of pistles on them. The plant itself is so round and bushy. The plants branches are very close together.
There is a video up there of me using the software to change from veg. to flower.
I'll update you tomorrow once the lights come on. Now I only get 12 hrs of light instead of 18.
12/18/23 - Day 42 - FLOWER POWER! Look at those flowers starting to form! It looks amazing!!!!! I think starting from a good seed is better than a clone. If this ends up better than the last grow..... it's already off to a better start. The leaves looks super healthy.
12/23/23 - Day 47 - What a WEEK! The whole family got sick and I was the lone ranger on the battlefield taking care of all the units! So posting had to take a back seat! I did manage to grab some pictures during those days. I posted them up top. This week is the first week of Flower, and its going great! As you can see in the pictures that the buds are starting to take off from the bushy part of the plant.
I installed a second Scrogg net, the buds are already starting to launch upwards and I can tell they are going to need some support as they get bigger.
The Leaf box has been taking great care of the nutes, humidity, temp, and lighting. There is only one thing that I have had to do manually. Toward the last day of the week, the day before the water change the PH seems to dip down to 5.5. It's not a bad thing to be there for a couple of hours, but it is the lowest range I would ever let PH go in a hydroponic (DWC) setup. I have been adding 2 cap fulls of PH+ to get the PH in check. To be honest, adding 2 caps full of PH+ once a week is NOTHING. I feel like it's the least I could do. The box is creating the perfect environment. It's the perfect Cannabis Oasis, I treat my girls to the finest of living before the end. :)
Happy growing and I'll post again after the water change tomorrow!
If you like this experience and would like to have the same one, you can order your Leaf system from www.GetLeaf.co.
(full disclosure, I paid in full for my Leaf unit. I was a Kickstarter backer back in 2017 this is not an advertisement, this is real life)
Likes
1
Share

@Organic_bud21
Follow
Endlich ist es soweit und die erste Blütewoche stand auf dem Plan. Insgesamt muss ich die vegi nächstes Mal etwas verkürzen. Diese Woche hat sich viel geändert. Angefangen habe ich mit der Einleitung der Blüte unter 24h Dunkelheit. Meine Zeitschaltuhr war noch im Sommer Modus, also lief Nachts. Den Zyklus habe ich auf den Tagesverlauf angepasst um die hohe außen Feuchtigkeit von momentan 85-90% ideal über den Tagesverlauf nutzen zu können. 6Uhr Licht an, 18:15 Uhr Licht aus. 30min auf und Untergang. Natürlich habe ich auch einen Entfeuchter, der dadurch nur selten lief. Die Nährstoffe habe ich Angepasst auf ein 1:1:1 Verhältnis, um langsam Stickstoff raus zunehmen und dafür Kalium reinzubringen. Mit Bud Ignitor habe ich direkt 1 Tag vor Blüteumstellung mit 2 ml pro L begonnen und Bud Faktor X kam auch dazu, Voodoo Juice wieder mit ins Schema und B-52 raus. Außerdem habe ich noch die 2 Ts 1000 gegen 1 FC E 3000 gewechselt, da sie momentan frei war. Gleiche Leistung, gleiche LED, aber bessere Lichtverteilung. Die Temperaturen habe ich auf 27 Grad über Tag und 24 Grad in der Nacht gehoben um das Wachstum zu fördern. Der EC ist quasi gleich geblieben.
Likes
27
Share


@Pennello
Follow
Hi guys,
At the end of the story, I am very happy with the whole cycle and finally the outcome, I almost killed everything in there 😂
The Black D.O.G is a great Indica dominant strain, with a short flowering period. I did have problems throughout the cycle overfertilizing the plant, even though, this strain in particular is the one that recovered better and gave me a precious final product. Iinfact, I kept almost all the flowers, just the super baby pop-corn went for bubble hash.
I topped them, and then practiced LST training to help them growing wider. Probably if I wouldnt have messed up with the ferilizer I would have a much better final product, this time, talking about quantity and quality.
The whole plants were dried for 18 days after which they were finished in jars for another 6 weeks, if I dont fell sooner.
Really looking forward to grow this strain again Indoor, I'am amazed by the terpene profile and the amount of resin they produced, even under my terribles mistake! STRONG GENETIC!
I would like to thank Grow Diaries for this amazingly-organized community they have created, where we all can learn a lot, and share something we really love.
Thanks to everyone who stopped by and looked at the diary, squeezed the like button or comment the diary.
13/12 I'VE MADE MY FIRST RUN OF BUBBLE HASH!
Very very happy with the end result, did not weight anything yet because is still wet big time, I lightly squeezed it a bit, before let it drying on parchment on a cardboard. The smell it's just absolutely crazy. I can smell strong citrus notes in the 120µm but the 90µm and 73µm explodes with crazy-sweet note. While the 25µm (did not use the 43µm) where I did collect most of the hash, smell like good and sweet hash, nothing crazy like the previous ones but a very buttery like consistency that makes me want to eat it like this...dont ask me why...even though I know you all probably felt this way too...
Anyway, the paper sheet says it all about timing, washes and µm used for the extractions, but just in case I'll explain it down here.
I have done 3 wash with different timing.
1º wash: 5 min only to get the most brittle trichome heads
2º wash: 10 min stardard
3º wash: 30 min to stock up a bit 😅
I could have done an extra wash for sure and get more out, but I was running out of time so...I will update with the dry weight, it was not the only wash I've done, that were just too many grades to weight up..so I chose to do it once all dry!
See you really soon with on the nex run pals!


Likes
168
Share


@Still_Smoq
Follow
📆 Week 2, 13-19 May 2024
13-19 May - Observed and watched the seedling grow.
📑 Plant is strong and healthy. I see no problems in early development or the speed of growth.
🍶 13 May initial nutrient solution not changed, 1st change is week 3
🍽️ 13 May initial feeding schedule unchanged
💧 Using reverse osmosis water with EC/TDS at 0
🐉 Nutrient solution EC 1.0 at 72 degrees F
🔆 Light power at 50%, DLI 12-15 canopy coverage at 18hrs
😤 Using PYPABL, Air Pump, 400GPH
That is it for this week. Thanks for the look, read and stopping by.

Likes
48
Share


@xbrico
Follow
Day 36/Flower Day 8 - Starting to get them girle bits showing now. Stretch is still unreal but the smaller nodes that have crept up to the top are thickening their branches so that’s a good sign they'll hold something and if not, have a spare elasticated SCROG net for support, which will DEFINATELY be needed by the looks of things!!! The main branches are sitting near as thick as 1 of the stems of my last grow so these girls are definitely sturdy and strong growers! If only they didn't push for the roof!!! Apart from the one SCP (#2) that is staying squat in the back corner...sub nodes getting up there but the "tops" staying low and bushy!!!
When I start to see a few more flower sets/bud buttons proper actually forming, I'll start inching up the lights to 13/11 over the week...still tempted to start it now but thinking best to wait til the bloom nutes get upped drastically (which is next week - will be upping them by about 50-60% volume). Feared a bit right now that the extra light may fuel some stretch rather than fuel the flowers...but then again, having the plants acclimatise to 13/11 by the time the buttons are forming may not be bad...but then again, that 13/11 may slow down their formation!!! Choices and Choices!!! Was expecting the flower initiator would have knocked some time of the pre-flowers showing (can't think now if nodes were asymmetrical before flip...honestly couldnt have vegged any more though...or could I???) but nope, hopefully the buttons start to set quickly now though.
Apart from that, all going well so far. Been a bit of a drop in the temps outside and clearer nights so hopefully that helps bring day temps and night temps down a bit - bringing down humidity some too. Need to restart my CO2 Jug now for the flowers and keep on watching them grow!
Happy growing all! 💪
Likes
35
Share


@TheBudWhisperer
Follow
Week 5 of the reveg. And no more than 1 week left to launch!👍. They’ve all taken off over the last week with the boogie nights finally bursting into mature veg. Same goes for the Blueberry which has been the slowest to date. They’ll need the rest of the week for sure.
Funny thing is that it’s starting to look like this reveg. Run was unnecessary. The mothers have recovered from the light cycle disaster and are now looking like budding winners once more. I’m too far in to this run to pull the plug now which is frustrating. We’re anxious to get into a few reg. Seeds next cycle for another pollen collection so this has slowed the sched. Considerably. Despite such it’s been a great test for the dutchy system and our new nute line from Druid Nutrients.
I don’t shout out shit unless it’s truly doing something good and Druid is proving a remarkable component. No issues or deficiencies. Even with one particular strain (the Skywalker) where a calmag def. was expected to be a certainty. U folks keep up the good work👍.
Not long now y’all - think we’re gonna have some more untameable monsters🤟🤟🤟👌.
Background
This ones tied to part 2 of the pollen chuck. They were supposed to be a clone run for pollination but the mothers all reveg’d due to a timer incident and high stupidity. These will be the inaugural flowering run of the revamped dutchy system. Growing made easy😉. Shit ton of finagling and setup but once she’s ready - sit back, relax and watch em grow😍😎. Thanks for take’n a look.


Likes
6
Share

@GoodTimesOrganics
Follow
Hi liebe Community and Welcome Back! 💚
Nach der dritten Wachstumswochen entwickelt sich die Orange Bud solide. An den Blättern sind ein paar Macken feststellbar, jedoch nimmt das auf die Entwicklung aktuell keinen Einfluss.
Die neuen Blätter sehen sehr Gesund aus und insgesammt hat sich die Pflanze gut erholt.
Die Umgebungsgegebenheiten sind aktuell gut:
—————
🌞 Temp: 21
🌚 Temp: 18°C bis 19°C
💨 RH: 48%
VPD: 1,00 kPa
💡ppfd: 330 mpm
—————
Viele Grüße 👋

Likes
37
Share


@Cheeba_Inu
Follow
As of day 58 the grow is still going well! The buds are long, fragrant, and firming up. The blueberry aroma is getting stronger and stronger, and is just a fantastic terpene profile.
I have been dialing up my bloom nutrients, and added raw yucca as a wetting agent. The yucca will be essential for my auto feed setup next grow, so I want to use it a bit with my hand watering first.
The plant still has a ways to go, at least a few more weeks. But I have high hopes! Thanks for reading 👍
Likes
31
Share


@RFarm21
Follow
Olá growmies! Fiz um pequeno desfolhamento das folhas que tiveram contacto com o solo.
Likes
61
Share


@PEAKYPLANTERS
Follow
MY FIRST GROWBOX
MY FIRST SEED
MY FIRST GERMINATION
MY FIRST CULTIVATED PLANT
MY FIRST COLLECTION
WHAT A SATISFACTION ... REWARDING AS FEW THINGS IN LIFE .... I MADE IT !!!
AFTER A FEW DAYS OF DRYING I DON'T HIDE YOU HAVING PUT SOME FLOWER ON THE LED GRID .... BLEAAA A STRONG FLAVOR OF GRASS AND SOIL .... I WAS A LITTLE IMPATIENT I ADMIT IT .... BUT DO NOT IMAGINE HOW MUCH IT IS ... IT HAS BEEN HARD FOR ME TO FACE ALL THE DEFENSE GROWTH BY EATING MY NAILS ... I HAVE NEVER ATTENDED THE ENTIRE BLOOMING PROCESS AND I WAS UNKNOWLEDGE OF WHAT THE NEXT STEP WOULD BE EVERY TIME AND THEREFORE FOR THE WHOLE TIME I WOULD ASK YOU FROM A PAIR OF LEAVES TO BECOME LARGE AND JUICY GEMS ...... SPECTACULAR ... MAGNIFICENT ...
I REMEMBER HOW LONG IT WAS WAS TO PURCHASE GRASS HERE AND IT DID NOT BE UNDEFEATED IMMEDIATELY IN THIS MAGNIFICENT EXPERIENCE ... MY GRASS IS MY GRASS AND THIS I UNDERSTAND IT NOW
I HAD FANTASTIC SUPPORT FROM ALL OF YOU
THANK YOU ONE BY ONE FOR YOUR VERY PRICE TIPS ...
I CUT THE PLANTS AFTER THE TWO WEEKS FLUSH AND I HANGED THEM WITH ALL THE STEM
I PERFORMED A DRY TRIMM AFTER FIFTEEN DAYS OF DRYING
AFTER TAKING CARE OF MY GRASS I REALLY UNDERSTAND WHAT PASTA IS MADE OF
WAUUUUU
I HAS A LITTLE HASH ... BUT NOT HAVING GOOD FILTERS IT HAS NOT COME VERY PURE
WITH THE REST OF THE WASTE I AM TRYING TO EXTRACT OIL WITH PURE ALCOHOL ... ONCE I EXTRACT I WILL MIX IT WITH A TEN GRAMS OF FLOWER MAKING IT A SPLENDID SMOKE
GREETINGS TO ALL MY FRIENDS OF GROWERE
VERY HAPPY AND ABUNDANT COLLECTED TO ALL OF YOU


Likes
11
Share


@BudBeezy
Follow
Welcome to week 14 of my grow diary. What can I say? The plant is growing like weed. It's getting bigger and bushier from week to week. I can't complain about the weather except that I have to water her so much every day😂
See you next week ✌️