
Likes
Comments
Share


@GreenNimf
Follow
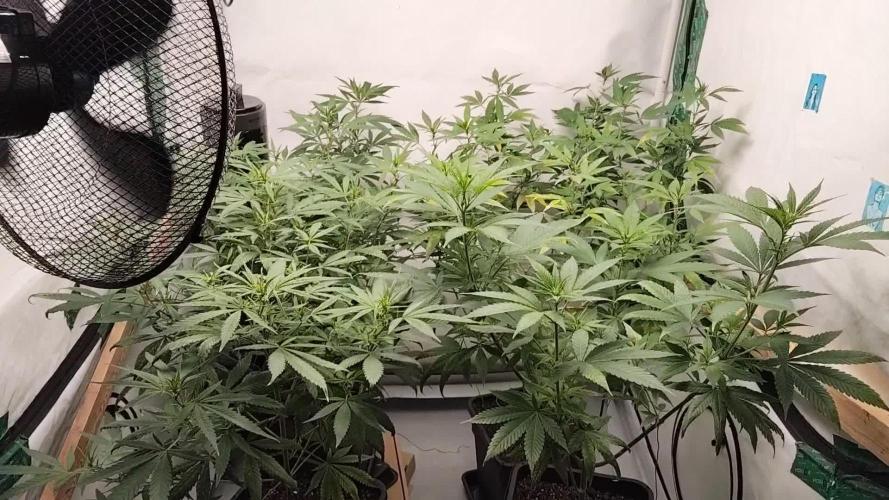
Did some defoilation, temp looks good.
Gave water with cinnamon. This would be a nature remedy against those flies.


Likes
9
Share


@BabaHase
Follow
Freu mich wenn das stinken ein Ende hat...
Habe inzwischen die ersten bernstein farbenden trichome entdeckt, denke das nächstes Wochenende die ernte ansteht 🤩
Likes
4
Share


@GrowSmith
Follow
So since last feed was at 3/4 I thought to give her the full dose. Found the temperature was dropping below 10 on a night so I bought a fan heater to go under the plant and circulate greenhouse.
After the first day of 28/27 degree heat some of the fan leaves started to change colour and dry up which I got advice on and found this is normal when coming to the end of your cycle also found I had spider mites
Found some of them and removed also sprayed plant down and flushed


Likes
12
Share


@DudeGrowsWeed
Follow
Performed some HST this week. Pics and video were taken 2 days after the bending. I bent the main stalk a little lower than 1/2 way down. She was getting a little closer to the HPS light than I liked (but no signs of light burn). I expect her to stand straight up again in a few days but with a new knuckle at the bend point. Then I'll probably bend her over again 👍

Likes
5
Share

@Mati_86
Follow
Das Problem bei recycelter Erde ist das man nicht weiß was noch drin ist nach dem spülen. Die Erde hatte microorganismen und Dünger vom letzten run, den ich soweit ausgespült habe. Danach hatte die Erde immer noch einen ec Wert über 1.2...
Aber woraus bestehen die 1.2 ec? Im Nachhinein sah ich das es wohl microorganismen waren die den ec hoch hielten...deshalb hatte ich erstmal nicht gedüngt nach dem umtopfen. Die Erde war auch noch relativ nass und musste trocknen. Dafür hab ich die Erde auf einer Folie ausgebreitet und 2..3 Tage liegen lassen...aber ihr kennt es , die Zeit läuft und das Zelt ist leer was ein nogo ist :)
Somit habe ich die Töpfe befüllt und micorrhyzza dazu gegeben. Wie ihr sehen könnt habe ich dann die Lampe auf 80 % gestellt und die blüte eingeleitet. Damit kamen bis auf die acp. Gold die lady's net ganz klar da die Nährstoffe fehlten. Ich versuche sie mineralisch wieder schnell fit zu bekommen und möchte dann mit Bio weiter düngen. Ich verwende verschiedene microorganismen die ich flüssig oder in Pulverform verabreiche. Heute 15.11. Bin ich am Ende der 1. Bt. Woche angelangt. Hab also noch was vor mir bis zur ernte.


Likes
8
Share

@Pyrrus_
Follow
Tag 15 meine lieben die Ladys entwickeln sich super bleibt dran um nichts zu verpassen 💚


Likes
11
Share


@Growing420Dreams
Follow
En esta semana he empezado a abonar con Ultimate PK según la tabla.
Likes
36
Share


@Cannabeast40
Follow
Once again, I welcome you back to my summer grow🙂💚
Still adding more bloom and PK boost to the nutrients mix and also bumping up the light a bit 😎🤙🏻
I started to add UV/IR for one hour a day, mainly before lights go out 🙂
Happy growing y’all 💚
-------------------------------------------------------------------------------------------------------
SpectrumX LED🔥 @medicgrow
880 Watt⚡️
2x UV/IR LED panels 💥
2.7 μmol/J🔥
Full Spectrum V1,F1,VS,FS🌈
Display with PPFD & Live spectrum
Light measurement: Apogee MQ-610 & Apogee DLI-600.
Fertiliser:
Organics Nutrients
https://www.organicsnutrients.com/en/
Green Buzz Nutrients
Discount Code: GD42025
Grants 25% with a minimum Order value at 75 Euro.
https://greenbuzzliquids.com/en/shop/

Likes
7
Share


@Ieiogrow94
Follow
Eccoci qui...
Siamo quasi alla fine del cultivo, odore, resina e colore ci sono. Attendiamo solo la maturazione delle cime che richiederà 1/2 settimane....
NON VEDO L'ORAAAA...
Seguiranno aggiornamenti, grazie a tutti per il supporto🔥🌲❤️

Likes
2
Share


@jojopfoh
Follow
The stretch is finally over and now she is starting to stack. The bud formation is beautiful and there are so many bud sites. The colas are ging to be huge


Likes
14
Share


@TeaTime
Follow
This hybrid is the result of crossing an automatic Critical Mass strain from Sweet Seeds´ R&D Department, chosen for its fast flowering and agreeable, intense aroma, with a selected strain of very fast flowering SWS25 (Speed Devil #2 Auto®️).


Likes
5
Share


@LittleBigTrees
Follow
One week of 12/12 and there stretching out nice
I've defoliated the central cola to allow the side branches to catch up.
Will start to feed soon

Processing
Likes
10
Share


@levensfiets
Follow
Starting to feel like autopilot. Running into some minor problems this week in terms of feeding.
Plant #3 had a runoff PPM of around 4000. Immediately decided to fllush her, but because of the medium's waterholding - the earth feels really heavy, even multiple days afterwards. She will be enjoying a two week flush and will then be chopped.


Likes
7
Share


@Staffedition
Follow
Всем привет друзья!
Очередная неделя с хвостиком. прошла успешно.
Жирок на шишках начинает активно набирать.
Куст мне очень нравится, с прекрасной генетикой.
Всем добра и мира!

Likes
16
Share


@Boomdrawfyah
Follow
98 dias de vida, vamos aumentando la cantidad de terravigor y terrateina, y el
producto estrella de terranabis el
Terpesyn que hace que los cogollos brillen de la resina que sacan. Estan floreciendo muy fuerte se esperan grandes resultados, aunque esta semana se predicen tormentas vamos a aguantar con todo lo que venga
Likes
22
Share


@MrsGreen_98
Follow
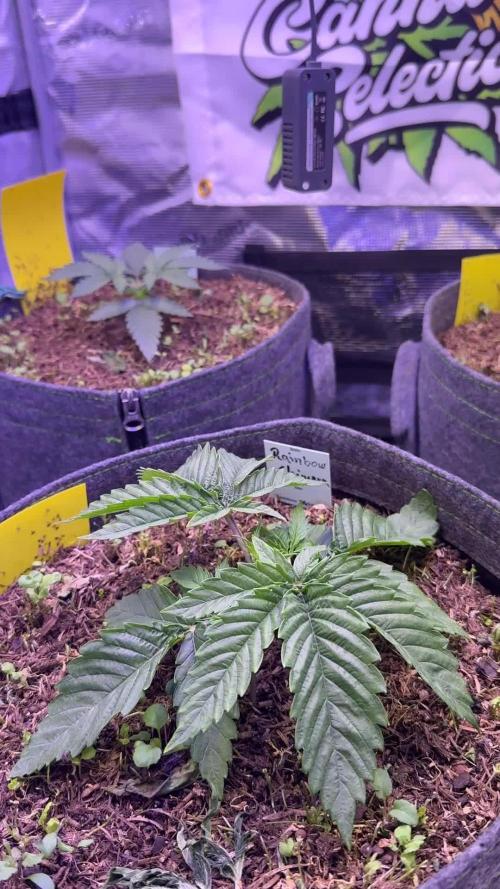
Monday 8th March - DAY 17
Leaves are curling slightly and I still have some yellow tips please can someone advise if this plant is healthy? Or what I can do better?
Tuesday 9th March - DAY 18
She’s looking more healthy today which I’m pleased about I’m just letting her soil dry a little before I up the nutrients. Happy Tuesday! 🍁
Wed 10th March - DAY 19
Soil was looking a little dry this morning so gave her some more water and nutrients (lowered the dose from last time as advised by a few people.)
Thur 11th March - DAY 20
She’s looking ok I think maybe a little on the short side but hopefully she’ll catch up over the next few weeks!!
Fri 12th March - DAY 21
She’s rather small I think for day 21 I’m putting it down to trauma from the light drop? I’m not too sure but i could just be impatient!!