
Likes
Comments
Share


@Ctrellis90
Follow
Week one after germination and these girls are growing about how I would expect.
Not much to report on in the early weeks but we have started the alfalfa Ferment so they will definitely be taking off!
They still have another week or two before we start the Athena blended but I'm pretty excited to see how well the Athena does....and these seeds of course.
Some of them have some wacky looking growth but I'm sure they'll grow out of it.
That's it for now, thanks for stopping by.

Processing
Likes
10
Share


@BodyByVio
Follow
After 21 days in turbo cloner I transplanted 4 Sweet seeds Green Poison into 1 gallon plastic pots filled with Cana coco. Few days later I transplanted another 4 clones into DWC!
Stay tuned!
Coco feed at 700ppm
Dwc feed at 480ppm

Likes
44
Share


@Jays_Not_Here_Man
Follow
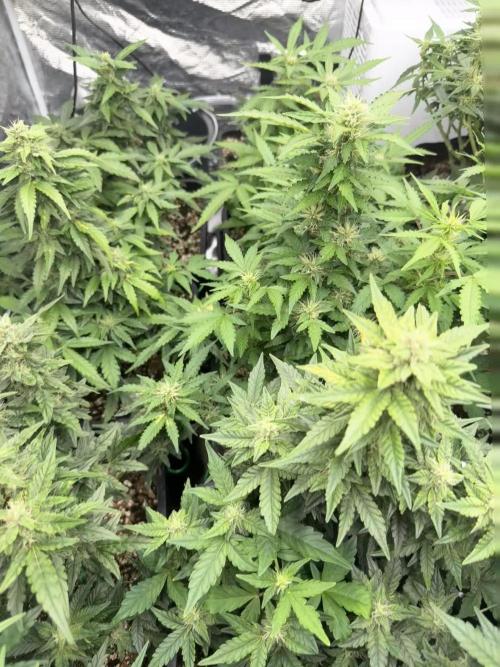
We have a stand out! There is one beautiful girl that is showing some beautiful colour, structure, frostiness, and fade ❤️ they are all very dense and frosty but this one girl has stolen the show. I cut their nutrients to almost nothing after running phd water for two waterings consecutively, still a few more weeks to go. I’ll be starting my routine soon if just phd water, but in a slightly higher volume to start breaking up any pockets or salts that may have been forming. Thanks for stopping by, won’t be long! 🇨🇦❤️👊

Likes
161
Share


@FrontRowAG_BrianG
Follow
START OF WEEK 7 DAY 42
⭐️Nutrients Used⭐️
Front Row AG Part A 4.2g per gallon
Front Row AG Part B 2.8g per gallon
Front Row AG Phoszyme .4g per gallon
Front Row AG Si .5ml per gallon
Front Row AG CleanUp .2g per gallon
This has been an awesome week. Plants have once again almost doubled in size…almost. I cannot stop them from growing out of control and they are suppose to at least double once flower is initiated. So, this week I will completely defoliate all the big fan leaves and after 7 days healing switch to flower.
I have never completely defoliated my plants, but I’m open to new things. Usually I defoliate and lollipop at the 3rd week of flower. Until then I leave them alone with little stress. All in all, I want a full net but also an easier time during harvest so I’m going to remove all the big fan leave’s multiple times this run.
Lights are still on 40% and will gradually get to 75% by week one of flower. All my co2 tanks will be filled this week. I want high temps/high humidity/lots of par/lots of co2. ⭐️THIS IS THE OBJECTIVE⭐️ for the first 6 weeks of flower 👇
1500 on par meter
80-85 degrees
60-65% humidity
1500ppm co2
This is how we get 💪 size colas!
Thanks for stopping by and see you next week.

Likes
9
Share


@Ninjim8
Follow
Week 5
Day 39
Tucked what i could and they've popped back up pretty quick some started stretching more. It's a 6 inch trellis which has way to much space per square. I wish i could've found a 3 inch square trellis that was plastic instead of rope. Going to look into making my own next run.
Feed liquid nutes twice a week

Likes
27
Share


@Dunk_Junk
Follow
Wow she's frosty!!!??!?!!
Did I mention that before? 😁 😂
Trichomes going cloudy now.

Likes
Comments
Share


Likes
Comments
Share


Likes
7
Share


@DibbyDab
Follow
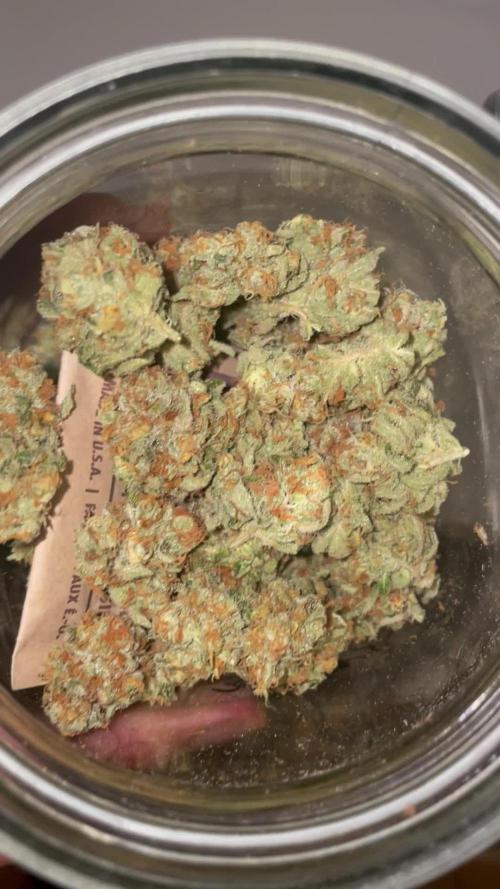
Chopped and hanging in the smaller tent, I’ll be back with edits for jarring and curing…
The Acapulco Gold smells like sour green apple WarH3ad candies 🍏 leaves my nose tingling.
The Laughing Buddha smells tropical, lot going on in its profile I’m not quite sure what kind of fruit cocktail it reminds me most of but it’s more sweet and creamy.
Next up, I moved 4x clones of the Laughing Buddha into the 4x4 tent, and setup drip irrigation. 💧I’ll start up that log soon. 🤘
I’m high.. HIGHLY recommend grabbing these strains from Barney’s Farm. 🏆


Likes
15
Share


@Chupus
Follow
I use these fertilizers not for the first time, the whole grove was successful, without any problems. the tree did not hurt, and there was no shortage of fertilizers. organic fertilizers are very good for the earth
Processing
Likes
47
Share


@CRiSPrGrow
Follow
FBT1 did not like being transplanted at all ! i guess being overwatered stressed her out some, good thing it's early in a way, hopefully she wont be permanently slower 🙏 lol , anyway she's basically healthy now, although last time i watered her it was tuesday last week and now it's friday, medium is still wet though, so no water for her until she dries out some more. Realised i hadnt been spraying my kelp carefully enough the week before so i'm spraying the soil with amino to try to keep pH basically fine until i can water with cal mag and hopefully some co2 enriched water. I pHed down the spray with 0.1g of GHE dry pH down powder to 6.0... rain water is pH 5.5 so i'm okay i think. anyway fbt1 in mrB's so easy i didnt even have to water this week lol. check out the videos, let me know ! 🚀
Likes
2
Share


@Elguacho420
Follow
Buenas a tod@s... Otra semanita más para las niñas, se supone q es la anteúltima semana pero siempre queda algún día más seguro... Está semana se quitaron y agregaron nutrientes nuevos para esta etapa de la floración, de momento todo en orden, este rmario salió muchísimo mejor a comparación a otros diarios, eso desde mi punto de vista. Tanbm le quité varias hojas, haciéndole hueco para que entre más luz x debajo, ya había aquitado pero tenía bastantes otra vez. De momento todo en orden... La semana q viene ya vemos q tal van... Un saludo y buenos humos para tod@s... 💨💨💨🙌🏻👍🏻
😎💀🇦🇷🤝🏻🇪🇦


Likes
5
Share


@ROY4L_GU4RD
Follow
7/29/24 week 8. Flipping is around the corner. I have to defoliate before the flip. I added recharge nutrient this week to help the ladies have a quick recovery. I'm only feeding recharge with a 3 gallon res fill. I usually fill up by at least 6 gallons. What are yalls experiences using recharge?


Likes
Comments
Share


@dwotTV
Follow
Trucking along into flower now, stretching well. Main stem is just packed with early buds!
Processing
Likes
12
Share


@GrowGuy97
Follow
Have seen a lot of good diary’s on these had to get some for myself to see how it goes! Hopefully we get some super purple buds! Stay tuned & happy growing friends!🤙🏼✌️🏼🌱
Day 1 - Finally got them planted & water with fox farm big bloom (6tsp per gal)
Day 2 - all 5 have sprouted & doing great!
Day 3 - 2 out of 5 seeds have fallen off but they are all still growing & looking good! Watered them a little more this morning👍🏼
Day 4 - Looking great🙏🏼
Day 5 - Grow babies Grow!!
Day 6 - Plain PH water 6.4