
Likes
Comments
Share


Likes
Comments
Share


@Ogchemst
Follow
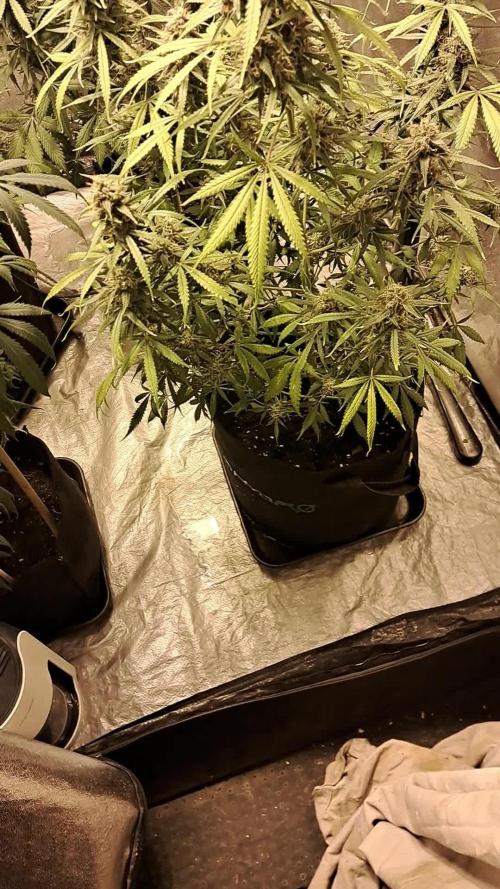
Day 1 of flo, description in OG Kush Diary, I'm really curious about this bush. I think I will taste great from what people told me it'd been really good for making some wax also, I like how I managed that canacopy I know I can do better but it's my first time trying this actually... I'm kinda beating myself up because I wanted a bit longer branching but next time I think I will try doing this with all 4 of my plants just because I like how it looks
Day 3: sorry to see that beautiful bushy structure having to come off, I enjoyed looking at it but time to give those bigger buds some space and give the plant some energy to the top so I'm removing all unnecessary small little branching to increase the airflow etc.. I enjoy working on my plants.
Day 4: flo so I managed to get rid of most of the bush and alot more of the plant has opened up, I removed mostly smaller branches and let the bigger ones stay just to see how I can further improve this In future and what to look for.
I could watch all the videos I want but without a 1st hand experience it's always just a theory , there's always room for improvement every grow in my opinion.
8 Feburary Update: I flushed all 3 with some water and fed 10ml of each a and b + additives they responded very well soon on day 7 I'm planning to start giving them more bloom nutrients after flushing the medium just a little once more so I can really push it and make sure my ppm is high enough without too much salt buildup, for that I will be using cal mag water followed up by final dose of grow a + B with some big bud I'm trying to avoid that saltbuildup at all costs here as this is my first grow in 7 Years here in Germany 🇩🇪😁, btw the water quality here is so much better than in Ireland...
I gotta be careful with pests alot living on the bottom floor, thing is a nightmare...

Processing
Likes
3
Share


@BossDean81
Follow
Day 22- She stopped putting on height due to one night of a dramatic temperature drop. It's a cooler fall this year plus a freeze came through the night before. That night, I was up doing some studying when I noticed the reading on the remote display. N o telling how long it had been in the very low 60's. The problem was fixed simply by adding a heater to the room. Now, the temp is only in the 68 degree range for the final 2 1/2 hrs. before the lights are cut back on.
Day 26- Her bud branches hav grown at least 2 -5 innches in length and have at least 2-4 bud sites already. Instead of Defoliation, I decided to actual two different types of LST. The first is simply bending to fan leaf branches under to expose the bud branches to more light. The main benefit is that you still keep the ability to absorb more of the light energy with them. I look at the fan leaves as your plant's " Personal Sun Panels". Since they store energy in the day and use that reserve to grow at night, why would you take something away for her that is meant to help her? Also, the second method I used is something I like to call" wind thickening". The technique is using wind resistance to train your plant's stem and branches to become more rigid by growing thicker to stablize itself. So, instead of a gentle breeze, I use a three speed box fan at varies distance. I started doing this on Day 22 and the results are definitely showing. The main stem went from 1/16 in. to a nice 3/8 in.
Likes
262
Share


@TheBudWhisperer
Follow
Method 📊📊📊
She trained incredibly well and recovered faster from topping than the NL did to a fim. This grow was a slightly different take on a traditional manifold leaving the top growth tips from each 2nd node (first topping) in place. This gave us 10 main colas as opposed to eight and we also left in a few extra shoots which proved to yield just that little bit extra.😉. If we had the space we would’ve stuck with 8 monster colas. Instead, we tried to squeeze usable bud out of every square inch. Maintenance was a bit of a bitch - had to defo numerous times to keep the light penetration optimal. Which brings us to the grow light - I won’t say it was ineffective cause that’s just not true. But, if this one had gotten much bigger we’d have seen some serious diminishing returns in bud quality. The tops and middles of each 10-12” cola were dense and chunky but the lower buds on the outer branches were like giant fluffy larf pillows. Thankfully there weren’t too many of these and I might’ve been able to solve this issue with some yo-yo’s if I wasn’t so damn lazy and “😜” when work’n on the garden. So, grow light review now that we’re through a few cycles - vipar spectra gets a 6/10 from me. It will grow solid, quality bud but certainly has its limitations. Their manual says it’s 450w should cover a space roughly twice the size of mine. I disagree and actual wattage draw is more like 200w. I’m gonna try to stick to photoperiod SCROGs with it in the future. Only real way to max out it’s effectiveness. Big plus - it’s about perfect for this particular space: 1:.
Medium 🎛️🎛️🎛️🎛️
Coco is now the go-to medium in lieu of soil when we grow indoors. I can’t specifically say that the growth time is sped up compared to soil because I’m always growing something different but - she did recover very quickly from her toppings and the drainage is wayyyyy better. The fact that it’s nute neutral allows us to dictate exactly what the plant receives at all times. IMO - more manageable and precise than soil. Include a regular diet of calmag and ur good to grow.: 1:
Yield🌴🌴🌴🌴🌴
Oh man what a gong show😎. The book on this one says that you’ll end up having to add support for her as bud weight becomes a serious issue in late flower. RQS is absolutely right, I had three smaller colas on the perimeter stretch for the last corner of light and they just got weighed down by the bud and pretty much fell over😂. We like this.
Now the numbers - i did the math twice (and while sober just to make sure😉), you don’t wanna do it, it sucked, so you’ll just have to trust me: 1:.
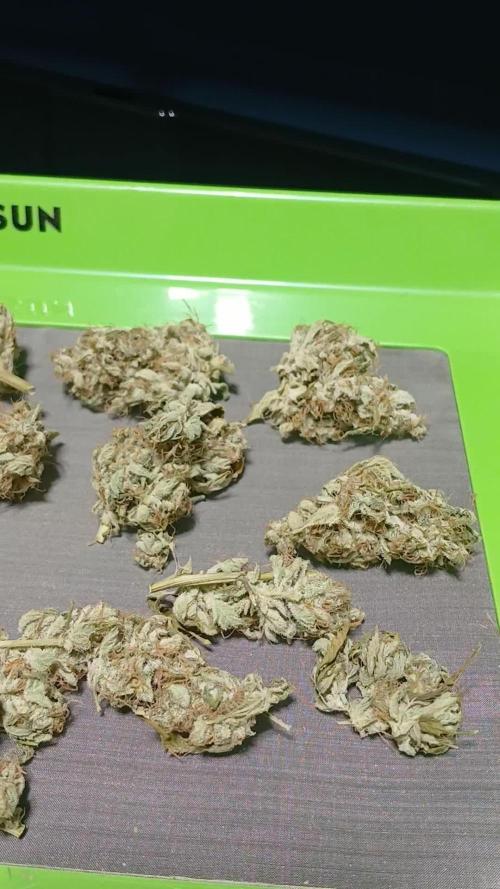
Total dried yield for the kush alone: 3.32oz. This crushes the single plant yield for any strain grown in this cabinet to date by well over an 1oz. : 1:😎.
Total harvest yield across both plants: 4.99oz. This also crushes the record yield per cycle in the cabinet by a full ounce!: 1:😎👌💪🤩.
The stats say an avg. of 500-550g/m2. Based on the rough size of my cabinet the avg. should be 131.25g/0.25m2.... our actual harvest across both strains - 140.6/0.28m2. That’s pretty damn good and spot on with the specs: 1:.😎
Props👊👊👊👊👊
A great many thanks to everyone who stopped in and cared to take some interest in this cycle. There’s simply too many to name drop all of you and we truly appreciate and enjoy the comments, likes, support and feedback. Every cycle is a new adventure and it’s always helpful hearing from the experience of others. At worst, we learned something new and at best, we had the opportunity to pay that knowledge forward. Can’t say enough good things about this community - cheers GD, keep rock’n the kasbah!😎👊.00

Likes
12
Share

@Melacola
Follow
Bien et bonnes graines 12 zaines de graines fractal et blak opium euphorias 60graines enfin heureuxde la participation au concours divine seed mercis a tout ces acteurs de la culture tous confondut petit et grand merci a growdiaries

Likes
8
Share


@HybridQueen
Follow
Nice big buds. At week 6 of flower I’m gonna stop feeding nutrients now just water from now

Likes
Comments
Share


@EchoEcho77
Follow
Day 21, looks like I may have 1 different pheno on the end, time will tell. Everyone looks healthy so it's time to srart training the canopy. I bench each plant over and tied it to the bag. Next watering will include a top dress.


Likes
30
Share


@datrobspeoria
Follow
Did well with how cold it was this winter and I am in a major flareup since August and have done a poor job with taking care of them like I would have liked to..
Overall I want to grow this one again someday as I know I can do much better however I am very pleased with the outcome and Awesome line Seedsman😎

Likes
1
Share

@BlunthumbMD
Follow
Puppy Love is appropriately named, I'm loving this gal. She grew like a turkey leg, I will top her next time %100. Day 79 she went in the tent for 48 hours of darkness, chopped day 81. I ultimately produced 34 grams of dried and cured dank, citrus, diesel goodness. The buds stacked hard and fast, the trim was easy. Easily the most dense flower I have grown so far. Extremely sticky, great nose, and bag appeal. Smells first of a different fuel, diesel gas. After the grind more floral and citrus notes are present. The smoke isn't as harsh as SYC, the citrus seemed to cut the gas significantly. The high has a pronounced productivity positivity vibe, has me feeling like a puppy. Thank you to Mephisto Genetics, super rad tester/freebie. 10/10
Likes
18
Share


@TheCannaProphet
Follow
~ DUTCH PASSION / SUPER SATIVA SEED CLUB FAST FLOWER 'TESTER' A and 'TESTER' B ~
Well cannafam, here we go again on another growing adventure together! This diary will be special to me for two reasons, one because I have the opportunity to cultivate some new and exciting strains from two of the TOP breeders in the industry! The second reason this will be special to me is that I will be growing these two strains in a brand new greenhouse that I put up! I'm super stoked to see how these two ladies turn out in this new setup.
On to the strains:
'Tester' Strain A info: Hybrid (I/S) | 6-7 weeks flowering | Fruity, Sweet, Candy
'Tester' Strain B info: Indica-Dominant (90%) | 7 weeks flowering | Fruity, Peppery, Sweet
I hope that you enjoy this run as much as I will... It's going to be fun and interesting for sure!
~GROW WHAT YOU LOVE, LOVE WHAT YOU GROW!~
____________________________________________________________________________________________________________________________________________________________________________________________________________________________________________________________________________________________________________________________
The Setup:
These beauties will be growing in a brand spanking new 10x14' greenhouse that I have equipped with automatic window openers, a complement of Hurricane fans and a de-humidifier/heater to help keep the environment as dialed in as possible.
I started both tester in glasses of tap water, where they soaked for 24hrs. After soaking, they were placed directly into whole eggshells with just their tops removed to make a natural seed starting pot that I filled with a 70/30 blend of Coco/Perlite which was pre-moistened with well water ph'd to 6.2, then placed under a 50w full spectrum LED on a 24hr light schedule.
Once, they both have their second set of leaves emerged, I plan on starting to put them in the greenhouse for 2-3 hour a day for a few days to help them acclimate and 'harden off' in the greenhouse. I'll be starting both off in 1qt pots, then transplanting them into to gradually larger pots until they're around 6 weeks old, then they will go into their final pots which are 25g fabric pots.
I mix my initial medium using 3 tbsp/g of Gaia Green Organics 4-4-4 along with 1 tbsp/g of Gaia Green Organics Glacial Rock Dust for the trace minerals it provides, 1 tbsp/g of Down To Earth Kelp Meal, 1 tbsp/g of Trichoderma/Mycorrhizae, and 1 cup/g of Wiggle Worm Castings. I hand mix my amendments to ensure an even distribution throughout the medium. I'll be watering with well water ph'd to 6.2-6.8 and providing bi-weekly compost tea's throughout the run.
____________________________________________________________________________________________________________________________________________________________________________________________________________________________________________________________________________________________________________________________
Weekly Updates:
6/9- Here we go into the eighth week of vegetation for the two 'Testers' from Dutch Passion/SSSC and they are both growing fast and the 'Tester B' is getting tall!
6/11- Daytime temperatures outside are now hitting 90℉, and the greenhouse temps are pushing 100℉. I have plenty of air circulating using 4 fans and I'm probably going to put a shade tarp over the greenhouse if the weather continues to get any warmer.
6/13- Daily waterings continue with 2g of well water that is ph'd to between 6.2-6.7 @ 72℉ along with weekly Compost Teas. Despite the excessive heat, both 'Testers' have shown absolutely ZERO signs of any stress whatsoever which is a testament to the superior genetics in both!
6/15- Eight weeks of veg are in the rear view mirror and I'm looking forward to the coming weeks to see how these gorgeous ladies begin to slowly transition into their 'pre-flower' stage. I can't say how impressed I am with both strains vigor and resilience to stress that they have exhibited!
Thank you for visiting my diary, I hope you will follow along and hope you enjoy what I do! Stay Blessed!😎💚
Likes
21
Share


@NG420
Follow
This week i made a plan for the plants feeding. For start gave a small portion of nutrients like 1/4 from the suggested to see the reaction of the plants.
Day 21: fim one plant (the plant referred as cotyledons now is going to be mentioned as fim).In a few days will top the other one.
Likes
77
Share


@Basementganja
Follow
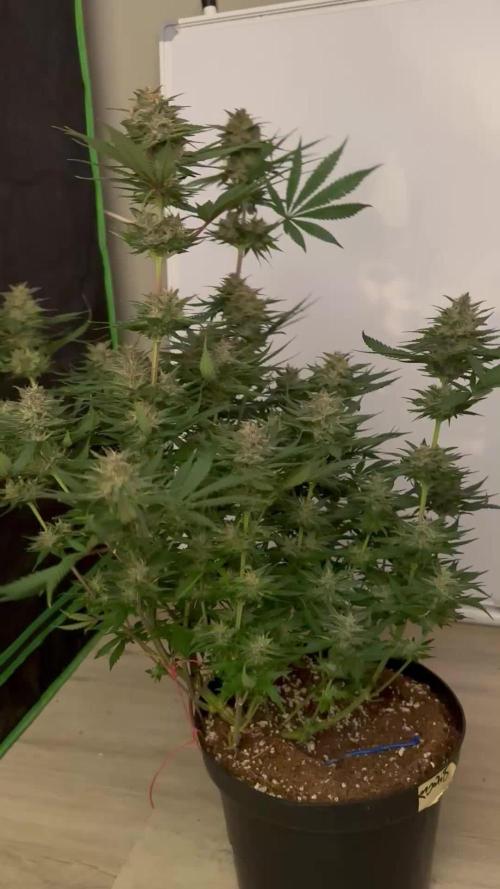
I love the sativa shaped nug-towers! When my plants grow big, I like to grow them until the very end of their cycle! That's why the extended flower period.
Video of Measurement of yield: T=Tops(92grams), M=Mids(59.1 grams), L=Lowers(58.6grams)
Total: 209.7 grams (1-2 grams worth, was taste-tested prior to scaling.)
Likes
42
Share


@Kitties_and_Colas
Follow
~_~_~_~_~_~_~_~_~_~_~_~_~_~_~_~_~_~_~_~_~_~_~_~_~_~_~_~_~_~_~_~_~_~_~_~_~_~_~_~_~_~_~_~_~_~_~_~_~_~_~_~_~_~_~_~_~_~_~_~_~_~_~_~_~_~_~_~_~_~_~_~_~_~_~_~_~_~_~_~_~_~_
❤️💡🌱😽💨
Week 2!! We did another round of defoliation to help with light penetation, its already a tight squeeze in the 5x5 and we havevanother week or more of stretch. We keep the bottom 1/3 of every plant stripped bare, this really seems to help airflow and minimize "popcorn" nugs..we read some great things about this strain on leafy and im dying to try it.. I hope we can pull everything at the 9week mark and have some processed in time for Christmas 🎄 🐱
~_~_~_~_~_~_~_~_~_~_~_~_~_~_~_~_~_~_~_~_~_~_~_~_~_~_~_~_~_~_~_~_~_~_~_~_~_~_~_~_~_~_~_~_~_~_~_~_~_~_~_~_~_~_~_~_~_~_~_~_~_~_~_~_~_~_~_~_~_~_~_~_~_~_~_~_~_~_~_~_~_~_

Likes
3
Share


@MicroHidroGrow
Follow
Día 01.
Arranco con un nuevo sistema. Esta vez no puse madre ya que conseguí los esquejes sueltos. Pero la idea es que la punta donde queda una planta sola vaya la madre de los 6 esquejes que saque.
Puse 4 esquejes de Tropicana al frente y en el lugar de la madre. Y puse 3 esquejes de Polaris en el caño de atrás del sistema. Los tiempos de floración son de aproximadamente 55 a 63 días en ambas variedades, así que me van a coincidir los momentos para ir poniendo los productos y cosechar.
Los esquejes tuvieron algunos problemas durante el enraizado, por eso están medio destruídos, pero en una semana a más tardar deberían estar reaccionando y empezando el crecimiento. Voy a ver cuantas semanas las hago crecer.
El sistema tiene algunas pérdidas de agua, pero son goteos que voy a soldar.
Likes
44
Share


@Roberts
Follow
Casey's Rollex OG is still making progress. I neem oil treated after last update. I did twice 4 days apart from one another. It should of killed or sterilized any critters. Time will tell if I got them. She is still making progress. Possibly a little stressed from neem oil. Hopefully the pest are gone. If not then I am gonna get a Insecticide soap. I need to have this resolved prior flower starting in a few weeks. Everything else is going well. Thank you DutchFem Seeds, and Spider Farmer. 🤜🏻🤛🏻🌱🌱🌱
Thank you grow diaries community for the 👇likes👇, follows, comments, and subscriptions on my YouTube channel👇.
❄️🌱🍻 Happy Growing 🌱🌱🌱
https://youtube.com/channel/UCAhN7yRzWLpcaRHhMIQ7X4g

Processing
Likes
26
Share


@eldruida_lamota
Follow
Que pasa familia, ya estamos de vuelta, estás skunk huelen una barbaridad 10/10. Ya entramos en la recta final, se ve bien en el color amarillo de las hojas, que la propia planta chupa el alimento.
Ph controlado temperatura y humedad están dentro de los parámetros, son una variedad con un porte Indico pero una floración algo más lenta, vaya puntas amigo, esas flores van a estar ricas.
La semana que viene os vemos fumetillas, y sobre todo buenos humos.


Processing
Likes
26
Share


@GrowGuy97
Follow
Day 14, Two of the Orange Sherbets are a little behind & the one I’m trying to pull back from nutrient burn.. So far the White Widow Autos by Seedsman have been doing the best!
Day 17 two of the Orange sherbet are a little behind the rest of the plants but overall I would say everything is going good! Seems like the orange sherbet that had the nutrient burn is starting to bounce back!
Day 19 They are all really starting to take off! Probably gonna do some LST tonight or tomorrow!

Processing
Likes
7
Share


@Kushizlez
Follow
Day 10F-17F
(Day 10F) Everything is looking on point. I’m going to soak in a gallon of lite compost tea diluted to 400ppms on each plant except for #5. I’m still a little worried I won’t make it through the stretch but at the same time I fear N toxicity just as much. I will give one more lite tea before the end of stretch, most likely at the end of this week.
(Day 12F) Ladies responded nicely to the tea except for BBB#1. It just isn’t looking as vigorous as it was last week. It’s the only one without an air hose so I guess it couldn’t hurt to grab one. The air hose does without a doubt prevent overwatering in soil and I’m surprised I don’t see more people using it. It’s cheap, effective and gives me similar results to growing in pure coco. I’m going to give one more light foliar spray of 3ml of calmag, 3ml of kelp and 2.5ml of insect frass.
(Day 14) Got the air hose hooked up to all 5 plants now.
I hate that I’ve been forced to defoliate so much in early flower and it is definitely reducing bud size. Last round my bbb’s had pistil clumps twice the size at this time and they were dealing with severe deficiencies. I’m hoping it’s just genetics or the fact they are larger plants.
(Day 15) I’m starting to see signs of N toxicity on the some of the new growth and overall growth on all plants except #1 has slowed. It was most likely caused by the foliar spray/tea combo. No more feeding anything for the next 12 days at least. Luckily it’s still pretty early in flower but I know that N tox can hit really hard after the stretch stops. I would be pretty upset if I vegged for 80 days only to get severe N tox in mid flower. Since it’s not breaking down in the soil, I should be fine. I’m going to defoliate some more of the large bottom fan leaves as they hold large reserves of extra nutes I don’t need. Hopefully these small defoliations aren’t stressing them at all. Next round I plan to do a big strip one week before flower, at transplant and a second big strip on day 21.
(Day 17) I think I was over-worrying about the seriousness of the N tox. I’ve seen it hit very hard in mid flower and can’t be too careful. It’s almost always caused by water soluble nitrogen so I’ll try to stay away from that unless I absolutely need it. My case does not look to alarming just yet. I noticed the stunting on #3 right after that last tea so I am going to stop giving the last liter of compost tea because of how unbalanced and separated at the bottom it is. It sure helped out the other 4 plants that didn’t get the granulars from the bottom of the bucket. I‘m planning to give a bloom tea around day 26 and a final top dress a few days later. #1 has now out stretched everything else in the tent. I honestly was not expecting that. If #3 didn’t get stunted this whole week I think it would be the taller/heavier plant.