
Likes
Comments
Share


@Budz_Bunny
Follow
Grow Report Week 16: Harvest Approaches
Hello dear grow friends,
We are approaching the long-awaited harvest time, and the plants are now revealing their true beauty. The scents are becoming more intense, and I can hardly wait to taste the results.
The Purple Surprise
In particular, the Gorilla Zkittlez had a little surprise for me: it turned purple! I’m exceptionally pleased with this color change. Thanks to the controller provided by TrolMaster, I was able to maintain a constant temperature of 24 degrees Celsius, which should positively impact the development.
Anticipation for the Coming Weeks
Although the next two weeks will determine my harvest, I am completely satisfied with the progress so far. I will continue with the fertilization schedule, as it did not adversely affect the taste in the last attempt.
I look forward to soon harvesting the fruits of my labor. See you soon, and thank you for being part of this journey! 😊


Likes
4
Share


@LSchnabel
Follow
Well I had to break down my tent this week. Long story but I took some clones to do these at a later date.
Minor setback but hopefully I will be back up and running again soon.
These are the pictures from right before I broke it down.

Likes
63
Share


@Wicked_Stix
Follow
All the plants are building buds. Gave them a little beastie bloomz. I cut them off the maxigro today since the leaf tips are burning. Other than that everything is going smooth.
Likes
7
Share


@Baboon_Grows
Follow
Weekly SST with kelp foliar, rest in 5l with 1.2l of super8 tea & sprinkle of potash through drip
No problem what so ever this grow,
Noticed after applying UV more frequently and for longer period it brings out purple in my plant , proof is after removing tie of a branch it was nice and green under while rest of the stem purple . Also purple on the tips of the leaves.
Probably running low on nitrogen so ordered blood , bone & fish meal , got 44-0-0 Prilled urea but that’s not organic so to say and only for emergency use
Likes
10
Share

@sellem
Follow
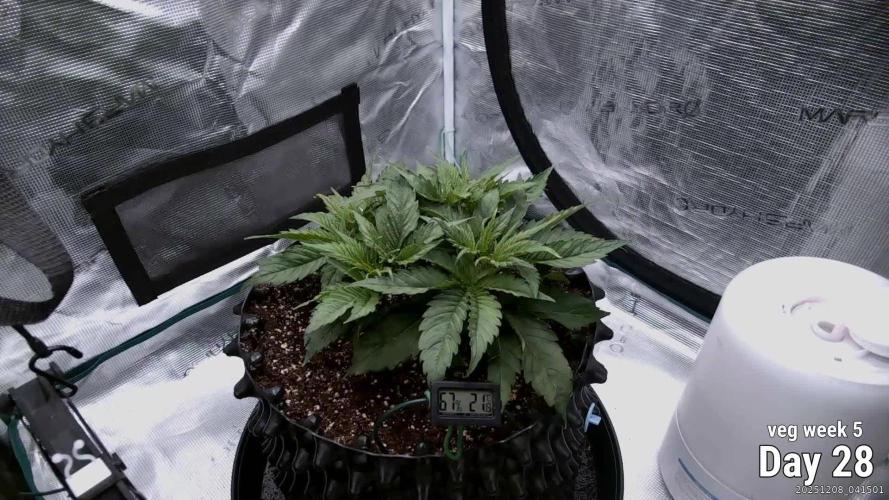
Week 5, nothing much, i actually let her chill for a bit.
Watered with 5L, 5.9 PH, 1ml/L PowerRoots and 3ml/L Terra Grow. She is doing great!
Some light defoliation of the crowded lower half, and some slight LST readjustments. Her cracks from the training week 3/4 are healing nicely!
Planning to flip to flower during late week 6 or beginning week 7.

Likes
11
Share


@Teezkiee
Follow
Fastest Flowering I have ever seen, some magic, quickly moved to Ripening


Likes
30
Share


@Naitik
Follow
The week went well, the plant is developing, but it seemed to me that slowly. In the middle of the week, before going to bed, it wilted, the next day it became cheerful again, now it always fades before turning off the lamp, is this normal ? The plant began to drink more, increased the amount of fertilizer, PM brought to 1010.I keep the PH from 6 to 6.5, I water 2.5 liters of water every 2 days, as the soil dries out.

Likes
13
Share


@NanoLeaf
Follow
Overall very solid strain from Ethos as I expected. They definitely pushing the boundaries.
This strain is extremely pungent and smells like a bag of Skittles when you just open it. Wish I could turn it into an air freshener and smell it all day long.
Smoke is off the charts and very uplifting.
LOVE Ethos Zweet Auto!


Likes
21
Share


@BlackDragon22
Follow
Sicuramente c'è stato un piccolo blocco settimana scorsa, ho visto una crescita un po rallentata, dovuta forse alla piccola carenza di calcio, secondo me..somministrato quindi cal mag per prevenire che vada oltre!
Likes
23
Share


@RazzleMatazzle
Follow
I'm slowly running into the problem that the RUNTZ is just getting too big. The buds could be developing a bit better. I was really unsure whether the seeds were just the feminized variety, but they are definitely automatics. It's really insane how well and massively the genetics grow. It's just crazy!
Likes
4
Share


@eldruida_lamota
Follow
Que pasa familia, vamos con la segunda semana de floración de estas Tropicana poison F1 de Sweetseeds.
Vamos al lío , las 3 plantas seleccionadas fueron trasplantadas a su maceta definitiva, ya superaron el shock por el trasplante, estas semanas las paremos todas a floración.
El ph se controla en 6.2 , la temperatura la tenemos entre 20/22 grados y la humedad ronda el 50%.
El ciclo de floración 12h de luz, el foco está al 100% de potencia.
Las jodidas estiraron demasiado, veremos como acaban, no me gustan tan altas.
Hasta aquí todo, Buenos humos 💨💨💨

Likes
24
Share


@Cariboo_OG
Follow
My choice to use soft touch stainless steel picture hanging wire as my LST ties is seeming to be a poor choice. the wire is not rigid enough making it make difficult to achieve the results I was looking for. Overall.. not super disappointed but I am working harder than I should be :p


Likes
13
Share


@ladyjane
Follow
8/17 - Fed the ladies with liquid nutrients today. Also did some selective defoliation. The soil looks really healthy. You can see how happy my worms are. The two are coming along nicely and just starting to bud.
8/19 - Top fed all the ladies today with Uprising Grow, Uprising Bloom, and Elemental.
8/21 - They are in bloom! They are beginning to flower and looking lovely. In between feedings I water with RO water and molasses. They seem to love it.
8/24 - Blooming along nicely! Watering just about every day now. Added some mulch to the tops that I made from the dried leaves I take during defoliation. Hoping to keep the tops a little more moist.

Likes
4
Share


@JoaKingAlfaro
Follow
Its 1/13/2023 10:30 pm and The White Og has been doing good this past week. She surfaced 4 days after being planted directly into soil and has stretched out quite a bit these past days. She stands a little above 3 inches at the moment. I have her under a 40 watt led light on the 18-6 schedule for her first two weeks as a seedling. Later on I will be moving her to her permanent home inside a grow box I created under the 400 w mh.

Likes
6
Share


@IamCy
Follow
She's starting to fatten up nicely! Terps still off the meter,and the roots are ridiculous. Definitely one of the best plants I've ever grown.
Likes
1
Share


@Reubenrubbish
Follow
Dry weight including airy lower buds from 6 plants is roughly about 16-17 oz.

Likes
27
Share


@RDWCGrowing
Follow
3/25/2023
Week 6- Day 1 of Veg (Day 52 overall)
Added my first between changes SILICA Top offs. Was worried that when you add it to pre mixed Nutes that it can make the whole thing turn into a gummy looking substance. I was ready to drain the system and start it over for the week if needed, but no issues adding it to the tank. the Silica going into the Res didn't gummy the system up, it did drop my PH by quit a bit causing me to have to bring it back in balance.
36 Gallons in the Tank
Silica
Add .5mil/Gal = 18Mil
I topped some that needed to be topped, I defoliated some that needs to be defoliated. Since I have moved into Week 6 I have increased the light intensity up to just over 500 maxing it out for Veg Cycle. Next increase will be Week 1 of Flower.
3/26/2023
Week 6- Day 2 of Veg (Day 53 overall)
All conditions looked great. Other than me not putting one of the humidifiers back right which means it didn't work last night so Humidity was lower than I like. But got the Humidifier back on it's stand correctly and it is now pumping away. With that I decided to give the plants a day off from any stresses, no topping, no FIMing, no Defoliation for today. Just some good old soaking up the light rays and the ability to get all the Nutes they would like..
3/27/2023
Week 6- Day 3 of Veg (Day 54 overall)
Looking kind of Bushy today, so I defoliated some, and topped some.
3/28/2023
Week 6- Day 4 of Veg (Day 55 overall)
PH was a little lower than I like 5.74 so I added a few Mil of PH UP and brought it back up to 5.94.
Not much else at this stage, just I topped a little and I defoliated a little.
3/29/2023
Week 6- Day 5 of Veg (Day 56 overall)
Topped a little, Defoliated a little Watched them grow!!
3/30/2023
Week 6- Day 6 of Veg (Day 57 Overall)
Main action today was breaking down my old tent and setting up a new tent and getting my second RDWC system setup and ready for clones. I Topped a little, I Defoliated some and started taking a good look at what I would like to take for clones in the coming days. I have a few bottom branches that look every promising for my clone material on each.
3/31/2023
Week 6- Day 7 of Veg (Day 58 overall)
#3 is at 16" Tall
#2 is at 13" Tall
