


Likes
Comments
Share


@84ruk
Follow
Primera semana en un sustrato malo del cual fue trasplantada la siguiente semana

Likes
422
Share


@Crashoverite
Follow
Hi all 😁
Hope everyone keeping well and having a wonderful week!
Thank you all for such amazing support on this bananas journey 💚💚💚
Will be updating this week journal daily so please remember to revisit to see full week content.
So far this grow it's going great. Girls are stretching by hour. Great health, nice green colours, more and more squares taken on the netting, flowering nicely progressing, I'm very happy 😁
Planning to apply more selective defoliation, especially to Xena. No changes to nutes except few extra drops of calmag just in case and will try to fill the net entirely.
Week 7
Nov 27- Dec 3
Nov 27
Selective defoliation applied on Xena. 8-10 mainly small fan leaves. She is still a bit shy to open as much as her sister. No rush my girl. You still doing great!
Nov 28
First watering for this week.
7ltr beetwen them both with 4h spread. Runoffs. Xena 300ml PH 6.1 Athena 250ml PH 6.4 😁. So far the largest amount of my magic mixture consumed by my 🍌💜👊 girls. Well done👏
Nov 29-30
Leaves tucking and joyful observation🤓
Dec 1
Selective defoliation and first stage of lolipopping on both girls. Decided to go a bit heavier as tomorrow heading for trip and wont see my girls until Tuesday! They will be all alone without any supervision so hopefully they will behave and I will be nicely surprised of their development on my return. Watered with 2tr mixture and sprayed with water and fish mix solution right after defoliation. Planning to feed them tomorrow as much possible 6-7ltr before heading off to our voyage to Amsterdam 😎 do anyone know ls if any of coffeeshops have Fastbuds strains available? Would love to try 🍌💜👊🤤😋
Dec 2
Girls watered as above and both PH 6.4 on runoffs.
Dec 3
Girls are unsupervised until December 5th.
Thank you all for such amazing support on this journey 😊 love you all!!, 💚💚💚
Stay tuned for upcoming week update right after my return.
Peace and love brothers and sisters ✌️💚

Likes
7
Share


@XoticGROW666
Follow
🍬 she finicky to dail in hope in the future I can really dail her in and get pheno a buds of the gushers cake lookin perfect pheno b of the gushers cake looks good tho

Likes
12
Share

@carlitospiratahaze
Follow
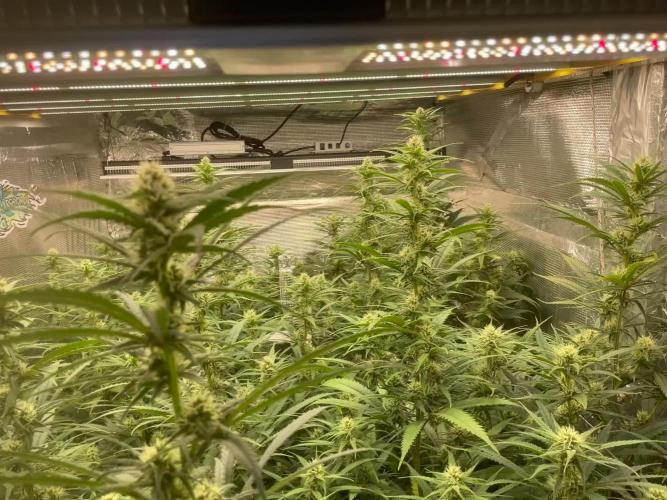
Hoy día 20/4/26 hemos añadido el primer riego de monsterbloom.
Tengo que decir que e metido dos riegos desde la última vez hasta ahora muy suaves con calmag y purezym rebajando con esto la ec ya que tenía muchos puntos salinos y algunas plantas quemaron sus hojas
Después de este riego en dos días intercaló 20l de calmag más purezym y a los otros dos días vuelvo a meter abonos así iré intercalando para no subir más la salinidad y preparando el terreno para el lavado de raíces.. tengo que añadir que el último riego con power roots y silick se acabó hoy.

Likes
Comments
Share


@Weedwithwes
Follow
Day 84 from seed
Each auto is in different flowering weeks
So post is sorta confusing as my first diary
Sorry!
Everything seems to be doing good.
Just been feeding water since last update.
I will have new lights soon 4800 evo from mars hydro 2024 version planning to harvest the GDP before switching the lights out.
Day 87 swapped the light to the mars hydro 4800 evo 2024 model running 40-50 percent 12-20 inch from cannopies adjusting them slowly to new light and much higher pffd than before
Likes
24
Share


@Finniegrow
Follow
NOTES:
Keeping pH at 5,8-5,9 through the entire Vegetation-phase. EC is now around 1,2 and i'm increasing it if needed. I'll be checking the levels regularly from this week since all of the hydroponic systems are now running. I'm going to add some ice cubes in to the nutrient tanks to cool nutrient solution a bit always when I remember to, even though temperatures haven't been an issue so far. Can't do any harm so why not I quess. I'm also adding a CO2-bag in to the tent above the plants.
Also I'll begin training my plants this week by topping them.
Day 22 (8.11.)
Lights are set to 70%, water pumps are now on for 24/7 (EBB's drain water is on lowest setting possible to avoid drowning the roots) and pH is 5,8-5,9 / EC 1,2-1,3 on every hydroponic system.
I topped all of my plants and cut off all of the lowest leafs with single tips and some of the small nodes starting from them.
Day 23 (9.11.)
pH-level keeps on raising so I'm gonna be measuring it pretty often. I'm correcting it by adding some pH- while filling up the nutrient tanks with small amounts of fresh nutrient solution at a time. Everything's going well and I can't wait to flower these!
Day 24 (10.11.)
Lights are now set to 80% power at 70-75cm height from the tops. I cut off the rest of the lowest nodes which I had left to some of the plants while topping them. I don't think they would get enough light when they are bigger.
Day 25 (11.11.)
Removed the lowest (three-pointed) leafs of each plant.
Day 26 (12.11.)
I moved the Led's a bit higher (now at ~90cm above plants) and set them up to full power. Plants are now around 11-14cm height and growing like crazy!
Day 27 (13.11.)
The growing has exploded and these plants are getting bigger and bigger. I'm going to defoliate them lightly and remove the lowest nodes so the plants have around 6 nodes each going forward, hopefully I'll get an even canopy.
Day 28 (14.11.)
I changed new nutrient solution in to the EBB-flood system which has the Ayahuasca's on it. I'm keeping the EC at around 1,3-1,4 and pH at 5,8-5,9 on every system. Also added small amount of Cal-Mag in to both NFTs.

Processing
Likes
7
Share


@Silverback_Guerilla
Follow
Another rough week...high temps and horribly arid conditions, and still the grasshoppers appear every damn day!
I'm beginning to think I have a root aphid problem. Mysterious Mg deficiencies for two grows. Also looking like phosphorous deficiency as well..no way...
She's popping pistils now...just a few so far..


Processing
Likes
38
Share

@Silverback_Guerilla
Follow
8/24:
No deficiencies, no pestilence, no major issues with heat or humidity....just SO MUCH EASIER than trying to grow outdoors in summertime...😁
8/25:
Was gonna feed today, but they aren't dry enough yet. Keeping it cooler in the closet has it's drawbacks...
I'll do a foliar feeding with Microlife Maximum Blooms tonight and probably feed them tomorrow.
8/26:
I fed them 8 gallons in total today, so that's a little under a half-gallon each. Hopefully they'll dry out a little quicker so I can get back to my normal routine.
8/27:
Rotated the edge plants
8/28:
Ogled them a bit...
8/29:
I sprayed them at "dusk" with Microlife Maximum Blooms and did a little rearranging after removing the 3 autos from the closet. Now, each of the 15 plants has a little over 1 sq ft to itself...
Likes
77
Share


@ScotlandDrGreen420
Follow
As we enter day 23 of flower, we now have Bud development, fingers crossed
Likes
6
Share

@k0nz1
Follow
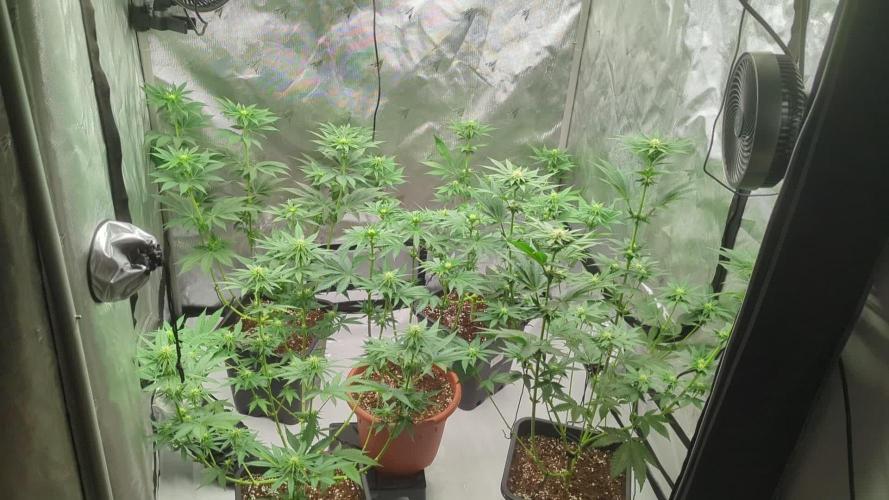
The tent ist getting really full rn. Big defoliation and lollipopping in the coming days .
The Lemon Orange stretching crazy. The Blueberry Pancakes are Bushmonsters with lots of Side branches. One of the BBP has little Nitrogen deficiency. Nothing serious.
All in all very healthy plants. Waiting for the first trichomes and aroma in the tent.
~55- 60 % rh
~ 21-26 celsius


Likes
2
Share


@Ninjabuds
Follow
My Skunk Apple Run plant is still a bit young, but I can see those buds starting to form. It's a bit of a slow starter, with buds popping up all over the place instead of a nice even line. We'll see if adjusting the light cycle or its food might help it along. I'll keep you posted on any changes.
The past few weeks have been so beautiful, watching the plants grow and change. It's amazing how something so small and fragile can turn into something so strong and vibrant. Now that they're getting ready to bloom, it feels a little bittersweet. I'm so excited to see the finished product, but I'll definitely miss having them around while they're growing.
Likes
19
Share


@eldruida_lamota
Follow
Vamos familia tercera cuarta de vida de estás apollo black cherry de SeedStockers.
Que ganas tengo de ver el progreso de esta variedad, las plántulas están sanas, se ven con buen color.
La cantidad de agua cada 48h entre riegos.
Esta primera semana ya añadimos nutrientes de la gama Agrobeta.
Tuve problemas de trips en un indoor y tengo todas plagadas pero ya las e tratado con aceite de neem y un insecticida genérico, también añadí tiras azules, trataré esta semana.( esta semana me llega el aceite de neem y el jabón potásico)
Trasplanté a maceta definitiva 7 litros.
Estas próximas semanas veremos cómo avanzan.
Mars hydro:
Code discount: EL420
https://www.mars-hydro.com/
Agrobeta:
https://www.agrobeta.com/agrobetatiendaonline/36-abonos-canamo
Hasta aquí todo, Buenos humos 💨💨.

Likes
19
Share


@Hashy
Follow
Notes.
Week 18 (week 11 flower)
Light settings
12/12 on at 9.00am off at 9.00pm
Viparspectra
Light power= 75% 165w
VPD aim 1.0-1.2
DLI aim 35
Extractor settings
temperature 23c with 0c steps
Humidity 30% with 0% steps
Max speed 10
Min speed 4
Monday 17/7/23 Day 120 (day 74 flower)
Looking good.
Tuesday 18/7/23 Day 121 (day 75 flower)
Defoliate
Wednesday 19/7/23 Day 122 (day 76 flower)
Harvest
#4 276g
Hung to dry.
Extractor settings
temperature 20c with 0c steps
Humidity 50% with 0% steps
Max speed 10
Min speed 2
Thursday 20/7/23 Day 123 (day 1 dry)
Removed some fan leaves.
Thursday 27/7/23 Day 131 (day 8 dry)
#4 runtz, dry 29g. Larf 2g. Rot 5g.
Saturday 29/7/23 Day 133 (day 1 cure)
Saturday 5/8/23 Day 140 (day 8 cure)
Put humidity packs in the jars.
Friday 11/8/23 Day 146 (day 14 cure)
Stop using auto burping system now and burp less frequently for a bit.
Saturday 12/8/23 Day 147 (day 15 cure)
Sunday 27/8/23 Day 162 (day 30 cure)
Sampled
Stats for the grow
#1 377g
#3 338g
#4 276g
#5 393g
#6 312g
Total wet weight =1696g
#1 FBPHP12, dry 40g. Larf 4g.
#3 FBPHP14, dry 38g. Larf 4g.
#4 runtz, dry 29g. Larf 2g. Rot 5g.
#5 Pink Rozay, dry 38g. Larf 6g.
#6 Candy Rain, dry 34g. Larf 0g.
Total dry weight. 179g
Total dry larf weight 16g
Loads of trim so going run some hash.


Likes
29
Share


@Roberts
Follow
I am dropping Deepforest Super auto. I am giving it another go. I believe my temps were a little too low on the first go. I will be keeping her by herself in a small tent, that I can keep warmer. I should be back in about a week. Thank you Doctor's Choice, and Spider Farmer. 🤜🏻🤛🏻🌱🌱🌱
Thank you grow diaries community for the 👇likes👇, follows, comments, and subscriptions on my YouTube channel👇.
❄️🌱🍻 Happy Growing 🌱🌱🌱
https://youtube.com/channel/UCAhN7yRzWLpcaRHhMIQ7X4g.


Likes
28
Share


@GodZilla_Owner
Follow
The plant is developing extremely well, was not impressed by the topping and is pushing well! It was topped after the 4th node and should fit so well in the tent.

Likes
17
Share


@Sergio_721
Follow
So far it seems to be fine even if the high humidity worries me even if the temperatures are still high then they have stopped growing and will finally focus on the flowers and slowly we recover these small deficiencies