


Likes
Comments
Share


@Freddd
Follow
Nothing much happening of note this week except that they have suddenly begun frosting up faster than I expected. Had to do a couple more defoliations just to take care of the humidity. Shot this video today at the 10 week mark. Maybe another 4 or 5 to go.


Likes
12
Share


@leafy_greenz
Follow
Note: Moisture and Temp readings are done in the mornings.
Lights are on an automated 12/12 schedule unless stated otherwise.
Quick Summary: This week I fed the plants only 1 time. Since all plants are drinking slower, all were watered less, and less frequently. AK1's issues seemed to slow (not stop) this week. Most of AK2's leaves are gone, the damaged leaves haven't gotten worse and the remaining green leaves haven't been damaged as much. Since I'm seeing green on AK2, and nothing smells or looks too weird I'm going to continue growing. North is still growing strong, started the weirdest and is pulling through strong.
What's weird is I think all plants including North is being affected by the same thing, but AK2 is suffering the most.
Harvest tracking:
- North may have about 1-2 weeks to go, most trichomes are looking cloudy and some are clear. I'm waiting until I see virtually no clear ones and slightly amber ones.
- AK1 may have 3-4 weeks (assumption based on how North matured), most likely less yield too since it's sick midway into flower
- AK2 may have 3-4 weeks (assumption based on how North matured)
Day 92 -
Manually Watering.
💧: Tap: X pH
Adjusted with pH Down.
AK1: 1 liter, 1/2 Distilled, 1/2 Tap (6.45 pH, 0.5 ml FloraMicro, 0.5 ml FloraGro, 0.75 ml FloraBloom) ~430 PPM ~830 EC
AK2: 0.7 liter Distilled Water (6.25 pH, 2 ml H2O2)
North: 1 liter, 2/3 Distilled, 1/3 Tap (6.10 pH, 0.75 ml FloraMicro, 1 ml FloraGro, 2.25 ml FloraBloom)
💦: 41% (39-61) - 🌡️: 25C (22-29)
Day 93 - Away for a few days, setting up auto water with pH'd Tap
Manually Watering.
💧: Tap: X pH
Adjusted with pH Down.
AK1: 0.75 liter (6.45 pH)
AK2: 0.75 liter (6.25 pH, 2 ml H2O2)
North: 0.75 liter (6.45 pH)
💦: 41% (39-61) - 🌡️: 25C (22-29)
Day 94 - Auto Water, running at 0.75 liters per 11 hours. AK2 was not watered.
💦: C% - 🌡️: xC
Day 95 - Auto Water, running at 0.75 liters per 11 hours. AK2 was not watered.
💦: C% - 🌡️: xC
Day 96 - Auto Water, running at 0.75 liters per 11 hours. AK2 was not watered.
💦: C% - 🌡️: xC
Day 97 - AK2 is basically down to its buds, the lower section is the only place with some greenery left. I guess I'll be taking it into a leafless harvest. Surprisingly the soil is only slightly dry after 3 days of no watering. AK1 has a lot of fan leaves, especially in the upper section starting to turn completely yellow. It seems like only fan leaves are affected.
Manually Watering.
💧: Tap: X pH
Adjusted with pH Down.
AK1: 0.7 liter (6.45 pH, 0.75ml FloraMicro, 1ml FloraGro, 2ml FloraBloom)
AK2: 0.7 liter (6.25 pH)
North: 0.7 liter (6.45 pH, 0.75ml FloraMicro, 1ml FloraGro, 2ml FloraBloom)
💦: X% - 🌡️: xC
Day 98 - Tracking what little remaining leaves AK2 has for symptoms of improvement or issues. Cut some more yellowing fan leaves off AK1. North still chugging along just fine.
💦: 34% (34-56) - 🌡️: 28C (23-30)

Likes
141
Share


@Anonymous_2022
Follow
Thanks for stopping by.. Please hit the like button if you like what you see and ill be sure to check you out too Growmies 🌱
Week 5 of flower things are starting to get frosty and stinky … exciting times,
Temps 24-29 ✅
Humidity 60 % 🤔
Added a Dehumidifier and slowly bringing that humidity down ⬇️
Stretching seems to have slowed down so overall all good, Moving nicely, Roll on next week 👍👍👍

Processing
Likes
93
Share


@Ferenc
Follow
Let's see how it goes. I raised up the water so it is now 150ml 2x per plant so 300 per plant per day. The same with fertilization and the same days remain. I keep 14 hours darkness and 10 hours light schedule for Purple Punch obviously I take out from the tent and put separately. I can't wait to harvest the Gelato Cookie D'ohpe so I can use the tent for the Purple Punch. I give 18 hours light on so 12 hours on 4 hours off and 6 hours on 2 hours off. Basically, it was the only solution because I put the Purple Punch in at 23:00 o clock and take out at 9 am. So the light on from 23:00 to 11 am and then 15:00-21:00 and off from 21:00 to 23:00. It was the only good way based on my timeline working hours and school. I also see the first signs of flowering after 7 days of light schedule change of the Purple Punch. Hope it goes well. They have a totally different smell, both strong, but the Gelato Cookie D'ohpe is like sweet and aromatic, and also like a muck heap 🤐😅👻The Purple Punch has strong smell but not sweet more like citrus. Saturday: I always had some yellow fan leaves but now it is getting more on the Gelato Cookie D'ohpe. Hopefully, it causes the flowering stage because the plant wants to use the energy for buds making and takes out of the leaves, so it is a natural process. I read that it means the plant is on the halfway of the flower. Hope the best. Tuesday: Purple Punch does well flowering, and the Gelato Cookie D'ohpe I think one more week so I will start flushing from tomorrow. I have checked the trichomes, they are cloudy, milky and the pistils started getting brown also so soon it will be done. The fan leaves also getting yellow as it can be seen so I think the next is the final week, if not then no more than 2 weeks and it is done. I can't really wait... End of this week Gelato Cookie D'ohpe is 70cm and the Purple Punch is 40 cm.

Likes
5
Share

@TrickzCutz
Follow
Servus Moin!
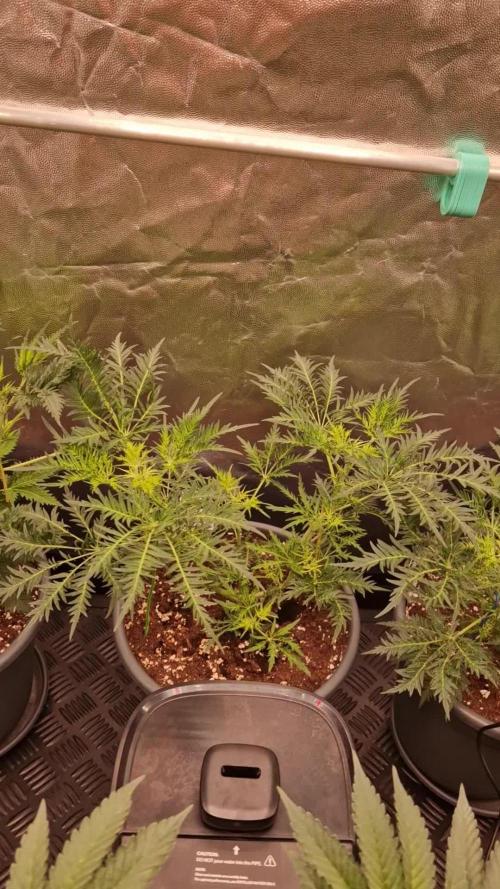
Die MDC #2 Farn macht sich auch bereits richtig gut. Sie holt langsam zur #1 und zur #3 auf. Bin gespannt welche der 3 Ladys am besten schmeckt.
Sie wurde Anfang der Woche an den beiden großen Trieben getoppt.

Likes
144
Share


@roro_204
Follow
I pumped up the bloom nutrients a little. As it’s my last week before I go into the flower stage. My lights will go 12/ 12 shortly.
I added a wooden support system because the plant was slanted a little bit.
I also removed clones yesterday. And the plant is healing very very well and fast. Lots of new baby nodes growing!
took out the strongest two plants to keep as mother plants. And I continued LST as the plant keeps growing steadily!
Likes
10
Share


@Canadian_Steelheader
Follow
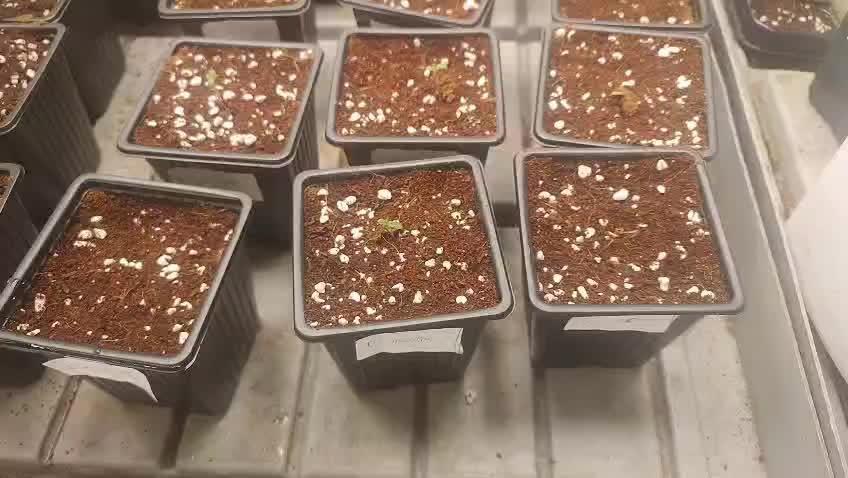
Well it’s been 2 weeks now and the girls are doing nicely, they have been lightly fed twice a day and have outgrown their Solo cups. I flushed the Coco 3 times to a reading of 10ppm out the bottom. It took 2.5 gallons of pH’d RO water.. I transferred them to 5.7 litre smart pots tonight and gave them about 500ml of nutes. I also prepped the CoCo with Myko before transplanting. So far I’m liking the CoCo and so are the girls. Wish me luck on this grow. Any comments and suggestions welcome.




Likes
23
Share

@KurtHighgrade
Follow
Hi💚 All three Blackberry Gas plants are healthy and developing nicely. And they are super fast.
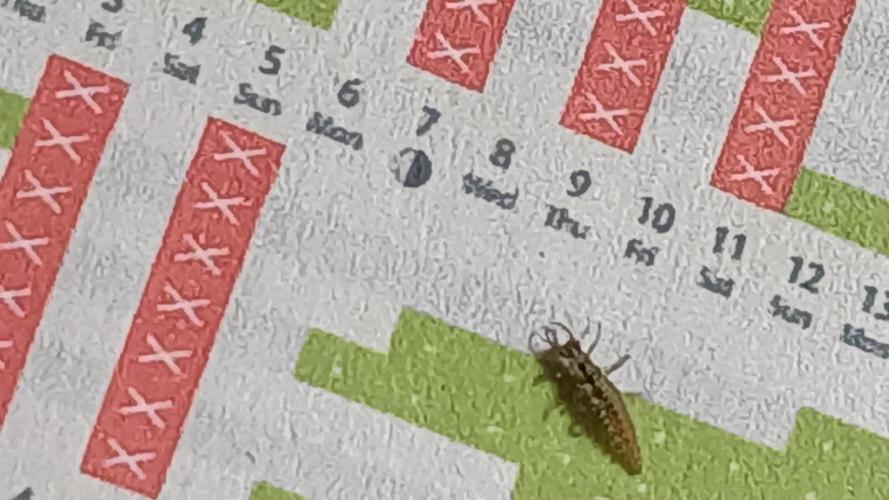
There's a new predator inside the tents (and the whole flat😂), CHRYSOPERTA CARNEA. Look at it's speed in the video! They are feeding on different aggressors, I use them preventory against thrips and spider mites.
Boom Shankar 🔱
Happy growing💚🍀⭐🖖🏼
PPFD 650 - 950μmol, DLI 45 - 57
EC 1.6, ph 6.1, VPD 0.8 - 1.2
Completed tasks
Day
2) Feeding EC 0.9/ PH 6; Trichoderma+Mycorrhiza
3) brought out 'Hypoaspis Miles' against gnats and thrips, Purolyt foliar for
hardening against different stresses
7) Feeding EC 1.3/ PH 6.1, Purolyt foliar
10) exchanged the LED, now SANlight Evo 5 1.5 340W (DLI 33-42), Purolyt foliar
11) Feeding EC 1.3, pH 6.0
14) Feeding EC 1.4, pH 6.0
18) Trichoderma+Mycorrhiza,
Feeding EC 1.5, pH 5.9
20) Feeding EC 0.9, pH 6.1, Purolyt foliar
21) light pruning automatics
22) LST to the Cola of the tallest Blackberry Gas Auto; EC0.2, pH 6.1,
26) EC 13, pH 6.1; Purolyt foliar
29) EC 0.2, pH 6.0
30) Purolyt foliar
31) brought out CHRYSOPERTA CARNEA preventory against thrips and spider mites onto leaves; EC 0.2, pH 6.0
33) Feeding EC 1.6, ph 6.3
Likes
45
Share


@HinduGod
Follow
THE SUN GOD HAS BEEN VERY VERY BAD!!!😡 ONLY 2 DAYS OF SUN DURING DIS WEEK LONG STRETCH. TOOK A COUPLE OF THE BIG FAN LEAVES OFF ON DAY 46. DID SOME LST ON A COUPLE OF LOWER BRANCHES ON DAY 48.
PLEASE COME AGAIN!!!!!!

Likes
12
Share


@Manutentore
Follow
Mon. 20 added some Fan, min setting ..
Wen 22 Water
Sat. 25 Light 25%
Likes
7
Share


@Rompilator
Follow
I can't believe it's already time! Everything is going perfectly as planned and smell is absolutely incredible. Super strong sweet funky smell... definitely a pleaser. Some of the buds you'll notice have multiple tops and are super wide. That's because I had topped the actual buds to see if it would get more growth on the sides. And sure enough it did. The buds on half of the plant got exponentially larger a tad bit of foxtailing but more density than anything. Great success will for sure do it in the future. overall I'm very happy this run
Likes
8
Share

@CalGonJim
Follow
How RQS Compares to Your Standouts
Brothers Grimm (your "otherworldly" stars: Montel Iced Tea, Body Count, Bubbles Blueberry F4, Ricky’s Hash Plant, Black Tangi Tea)
These are landrace-influenced, heirloom-style genetics with exceptional resin, unique flavors, and structure.
They outperform RQS in quality, potency, and "wow" factor in your tents. RQS tends to be more commercial/hybridized for ease and yield, while Brothers Grimm prioritizes distinctive traits and consistency in experienced hands.
Humboldt Seed Company autos (your top autos for resin, especially OG Triploid)
Humboldt focuses on West Coast legacy genetics with heavy resin production.
Clearly superior to RQS autos in trichome density and overall quality. RQS autos are faster and easier for beginners but often lack the resin "frost" and depth you get from Humboldt.
Fast Buds (fast, flavorful, reliable autos — you like them a lot)
Excellent speed and flavor profiles.
You noted they're in a "different class" — fair point. Fast Buds emphasizes quick cycles and modern hybrids with nice terps, while RQS autos can feel more generic or require more coaxing.
Quick Thoughts on Your Observations
Brothers Grimm (Montel Iced Tea, Bubbles Blueberry F4, etc.): These are clearly the stars in your current setup. The strong smell, unique leaf morphology, and overall vigor in small pots show they're expressing well under your conditions.
They reward careful growing with quality that feels special — resin, flavor complexity, and effects that fit your low-dose, functional style better than most commercial lines.
Your homemade cross (Gelato 44 × Bubbles Blueberry F4 pollen = "Blueberry Knockout"): Nice work on your first intentional cross-pollination!
Getting viable seeds and decent plants from a garage-level cross is a real win. It’s not "pretend breeding" — it’s exactly how many great lines started. The fact that it turned out "pretty nice" is encouraging.
However, as you noted, combining a Royal Queen Seeds Gelato 44 (solid but commercial) with Brothers Grimm Bubbles Blueberry F4 (higher-quality, more unique genetics) creates a hybrid that can show the best of both, but also some inconsistency. If the RQS side brings easier growth but less depth, while the Brothers Grimm side brings the special traits, the offspring can be hit-or-miss depending on which phenos you kept.
RQS Gelato 44 / Mike Tyson 2.0 vs. Brothers Grimm: Your experience matches what many growers report. RQS lines are generally more "user-friendly" and higher-yielding for beginners or volume grows, but they often lack the resin density, terpene complexity, and unique expressions you get from Brothers Grimm. The Tyson 2.0 collaboration added hype, but in your tents it landed at 7/10 while Brothers Grimm hit "otherworldly." That gap in quality is why you're leaning toward sticking with the professional, boutique genetics going forward.
3/30 11:17PM Gelato 44 & Punch Pie were nice right off the tree the little buds put me right to sleep last night!! The Autos are 7-10 but the Photos are 8/10
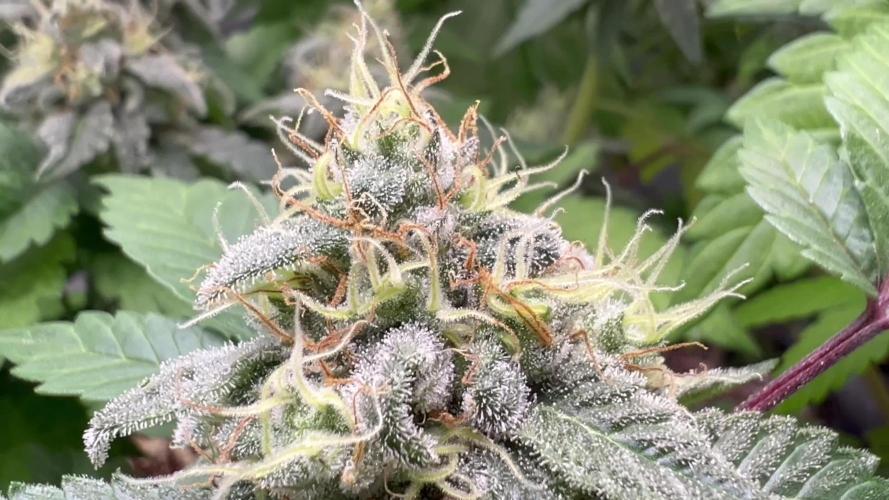
4/1 7 AM I did a video starting with black tan GT Julian’s trailer Park boys seed next is Ricky’s hash plant and then it goes over to ice – T and the multicolored one at the front is the combination bubbles blueberry and gelato 44 that I made I called a blueberry knockout
4/1 12pm We're gonna need a bigger TENT!!!💐🌼Humboldt Seed company email today...Im doing this!!! https://californiahempseeds.com/garden-seeds/
4/5 12:57AM Today 500 years ago Jesus escaped from his stone coffin and began feasting on the blood of local rabbits, and thats the story of Easter. Makes total sense, he's the ONE J in all of history that thinks he's a god....sure Jan. Who's up for a fun game of Christians vs. Lions down at the old Colosseum today??

Likes
17
Share


@Nicogreen
Follow
Super flot uger igen og har lige været kommet hjem fra ferie igen.. Men jeg har ikke mere ferie nu, så nu kan jeg forkusere 110 procent på. Min små børn. Og jeg får ny lampe i morgen engang. Håber i andre har det godt og god konkurrence til alle jer der deltager.

Likes
9
Share


@nerdz
Follow
36 to 42 Thursday
We made it through the big week. Plants are happy but I may again have to defol them. They don't appear to be massive producers but frost is pretty intense and shape/colors look cool.
I'll say maybe 600g for the 3 plants.
Cut out Magnifical, lowered feed strength.
1000ppm @ 6
25c/52rh
Lights 100% @ 10-12"

Likes
11
Share

@GANGA_GRAPEFRUIT
Follow
Buds are starting to fatten up great. The smell is wonderful and they are now in the final stretch. Water only no feed until harvest from here on. I stopped defoliation as I feel they did not take too well to defoliation, and took roughly 3days to recover fully. PPFD is at 1200 yes i love pushing this into the higher range duringbflower, but only if the plants can handle it. The frost is starting to cover the buds and rhey are rock hard!! Excuse my photos, I have full spectrum LED so light spectrum can't be changed for better photos. Lower foliage is starting to die off and I expect this to now continue throughout the larger part of the plant with plain watering. All in all getting excited.


Likes
8
Share


@S3LB5T
Follow
Bisschen entlaubt, Netz entfernt und neu gespannt.
Überall sprießen die Buds 🤩
Es macht so spass ihnen zuzuschauen. 💚


