
Likes
Comments
Share


@603grower
Follow
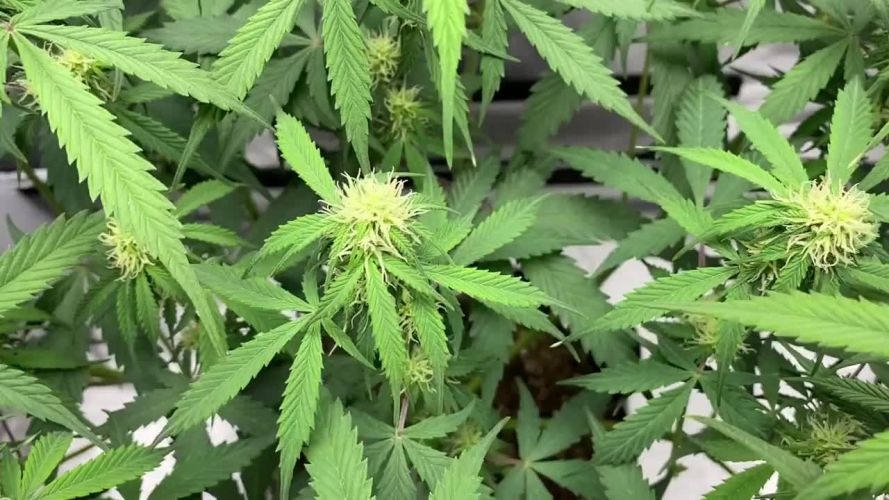
These girls didn’t give me any issues at all. They just screw themselves. I planted one seed and when I did the mainline, I cloned the top, which is how I ended up with two plants. I can’t believe how big the buds got all this girl trimming it was a nightmare. There was so many leaves, some of the buds are so big that I did a small amount rot in one of them It’s so happened to be the biggest bud. I was running the humidity kinda high about 60% the whole time. About this plant doesn’t have much of a nose on it but she looks great and Got over these two.

Likes
29
Share


@HillCountryHempCo
Follow
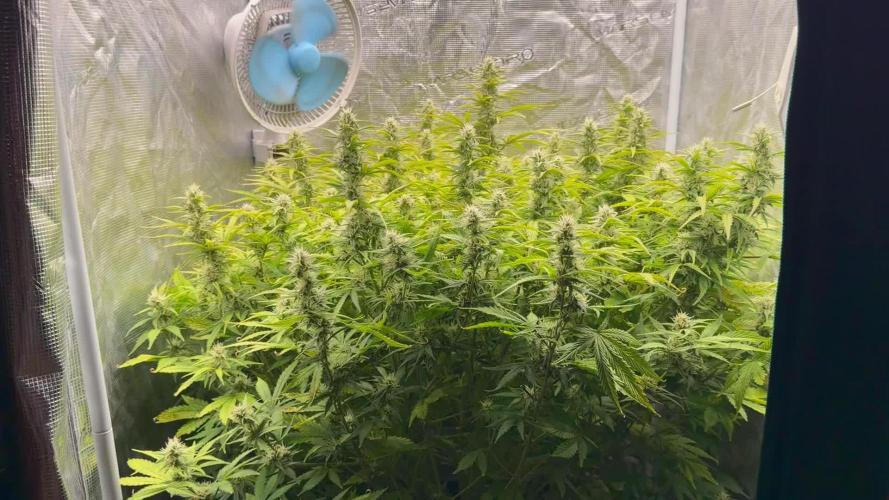
First full week of flowering and they are finally on AC Infiniti’s self watering bases. Switching to CRONK Nutrients.


Likes
20
Share


@JohnnyBlaz3
Follow
Noyce, ok so we on track now but still not see that truly vigorous growth. I'm doing my best to move her under the deck when it rains to not dilute the nutes too much with rain water but i feel something is off a little. the leaves seem a little dark and a like hmmmmm a little to rigid or thick, not that nice lime green the whole way throuhgout you like to see with rapid growth. maybe the ph or mayb a slight nitrogen toxicity or possibly the combination of the two. So today i have her less of the growth nute and upped the cal meg slightly with a higher ph around 6.35 to see if i see some postive effects from this. I'm wondering if anyone has anytips on watering and such for outdoor girls in pots? still optimistic i'll get enough flower to achieve my main goal. to get high affffff watching pineapple express while smoking it. which im sure everyone does hahahha i can see the lady parts just coming out now where as the ones in the tent are about a week into flower


Likes
21
Share


@Jays_Not_Here_Man
Follow
This week was fun, trimming my final product from my last grow was a pleasure, not a pain 🤓. It was very satisfying. Received my seeds early in the week and had to wait a few days to get everything cleaned and ready to go, again, didn’t seem like chores… I think I’m hooked!
Started germinating Nov 13/am, tap roots poking out 24 hours later! I’ll wait till they are a bit larger to plant. I’ll be planting directly into 5 gallon fabric pots, no transplanting.
**update**
Germination- seeds were planted after 48 hours. 2 sprouted, 36 hours later, so Day 1 would technically be Wednesday,November 16th…One went down because of the fiend pictured…He’s been hanging out with me more and more in the grow spot, I’ve also been giving him leaves while I trim, when the plants are vegging… I had the tent open, and he came in a little hard to sniff and pulled one sprout right out, and before I realized what was happening, he swallowed it up with a quick lick of his nose… 🤦 Started two more Wednesday PM, both seeds popped, they were planted Friday PM, no sprouts yet… 😌 sigh…. in the meantime, I received my 5 gallon fabric pots, so we’re now running 3 AK-47 from Crop King Seeds, withe the upgraded pots 😊👍

Likes
2
Share


@weedismalifebra
Follow
After some def. The buds started to grow like crazy the weather is not good but it’s still going 🏎️
Likes
Comments
Share


@GrowDiaries
Follow
Thanks to each stand for letting us be part of this incredible cannabis experience.
It’s rewarding to share this space with you. See you tomorrow again for more of this Spannabis in Barcelona!
Likes
4
Share


@Ninjabuds
Follow
I finally harvested all of my photo plants. So my 2 auto plants are getting an outage for the rest of their lives I have moved them both into my larger tent with more light and more room. I’m sure 100%h sure why both of these plants are alot light green. I think it’s I got a little behind on the nutrients but the green is slowly comeing back.
It’s been hot lately I have the lights running at night now
Likes
6
Share

@McChi
Follow
Solid week!! Fed her bloom nutrients on day 50. Responding nicely. I pulled down the main 8 to allow for better light and airflow throughout. Once I did that she really started to fill in again. This also seems to help stop the stretch, or maybe it was just timing and stretch was coming to an end anyways. Either way, glad it did as I am am running out of room to raise the lights and have no more options for setup. Bud sites are all starting to fill in good and fatten up a tiny bit. Looking forward to seeing how these shape up!!!
Likes
1
Share

@JibbyJack
Follow
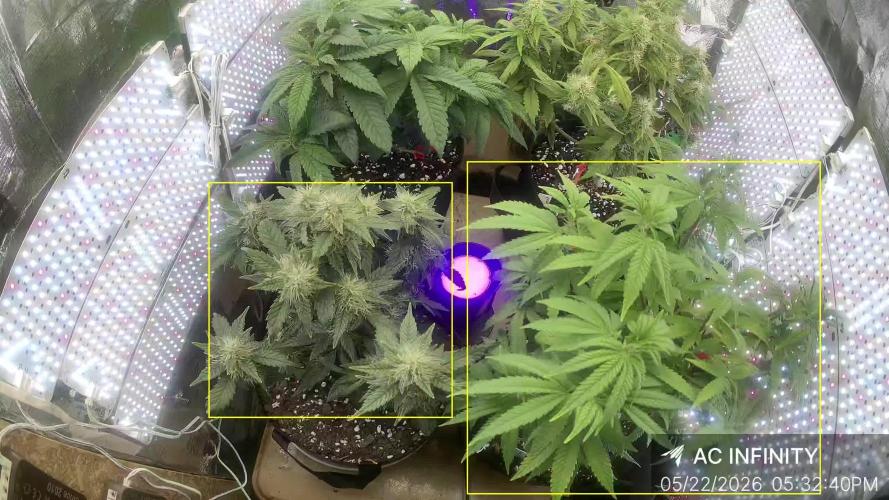
This week the girls are looking strong, I will continue exactly the same regime. The buds are developing well. They are very sticky. The 2 non budding plants are showing signs of pre bud. Growing different strains is challenging. The timelines are very different. The 2 budding strains are Anethesia Auto from FB420 and Purple Haze from Zamnesia. I installed the Infinity AC Spectrum 3 camera this week, so far it has been awesome.


Likes
51
Share

@DE_BW
Follow
After flushing, I let the pot dry out completely before harvest. The plant looks fully mature now, with excellent bud development and an extremely impressive yield. She finished covered in resin and exceeded my expectations in both quality and productivity.
Likes
14
Share


@nine666
Follow
These Autos have grown like crazy but i've made a rookie mistake!!!
I've been using Plant Magic Soil Supreme along with their Old Timers Organic Nutes and the recommened feeding chart.
Week 1 i just gave the plants water, on week 2 i gave them 2ml per liter of nutes and as recommended this week i have given them 3ml per liter.
The next day after watering with 3ml per liter i noticed slight nute burn marks on the FastBuds BlackBerry so i've flushed the pot with PH nuteral water and it has seemed to stopped the burning.
I've dropped the nutes back down to 2ml per liter and they seem much happier!
I've been planning on LSTing the plants next week but when i watered the plants today on day 19 i have noticed little pistills as shown in the photos above so i may LST sooner.
As ive said this is my first grow so does anyone have any advice when it comes to LSTing my plants?
Happy Growing!

Likes
36
Share


@Salokin
Follow
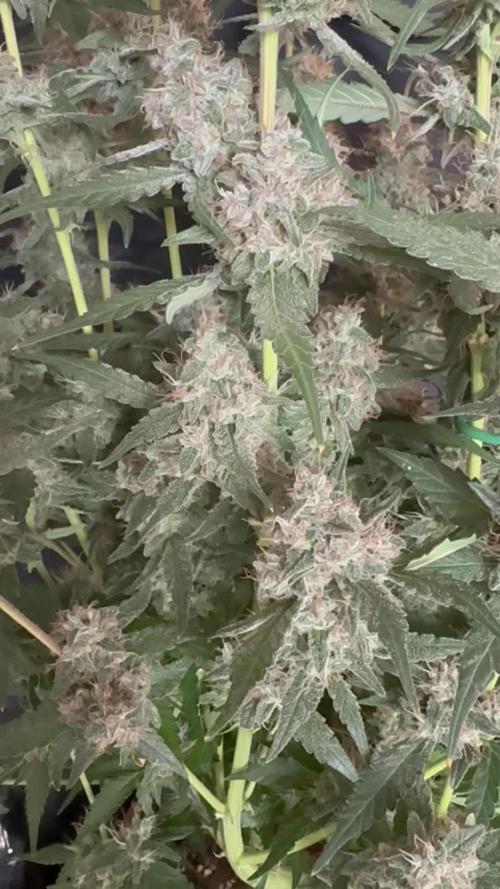
Week went again very uneventful, she is not very hungry anymore and had to constantly refill the reservoir with water to keep the ec in check. Trichomes are all cloudy and start to turn amber. She has developed that amazing purple hue and is sticky to the max, so definitely showing her glue heritable ;) I will continue to feed her until Wednesday this week and then start the flushing and darkness. Harvest will be next week end.

Likes
Comments
Share


Likes
5
Share


@Naujas
Follow
84 days!!!! I came back after a 12-day vacation, and immediately rushed to cross it:) it's a pity that I didn't see her last 12 days, I only got a few photos while I was away :) but that's the point:) The girl coped with nature's challenges really well, there were cold, rainy, windy days that she endured, but there were also very hot days +35° C during which she warmed herself on the northern balcony where the sun shines for a maximum of 5 hours under ideal conditions:) but the result makes me very satisfied and happy, a cool strain :) good luck to everyone, the update will be after the harvest dries out:).
Likes
27
Share


@Jungle_James_Grows
Follow
Chopped tonight so not weighed them yet will do tomorrow if I can.
Ended up with 290g for 5 plants
But 5 same seeds and 5 different pheno's.
Judging by the looks the heaviest weight is from the one I topped .
Already weighed one plant got 28g dry weight. Got 4 more babies chopped tonight
Likes
21
Share


@The_La
Follow
All going well so far, as this is the first run with GTH and a 10 week flwr grow, it seems that they take a few extra week so to show flowers,
Flowers are showing now .
I have been bending the tops down to allow the nodes to turn up to encourage more individual heads . MY canopy Is full now . I HAVE removed a lot of leaves to let the light penetrate through the canopy.
I am happy 😊
I will start giving some mills c4 that I have left , it is a gentle pk, next week I will give them monster bloom as it is a heavy pk, I am just building them up
Likes
41
Share


@FadedTotoro
Follow
Things are going pretty well. Running out of headroom so I may have to rig my light a bit higher before long. The buds are starting to fatten up and in seeing more trichromes each week.
