
Likes
Comments
Share


@420DeepGrow
Follow
Gracias al equipo de Seedsman y XpertNutrients sin ellos esto no sería posible.
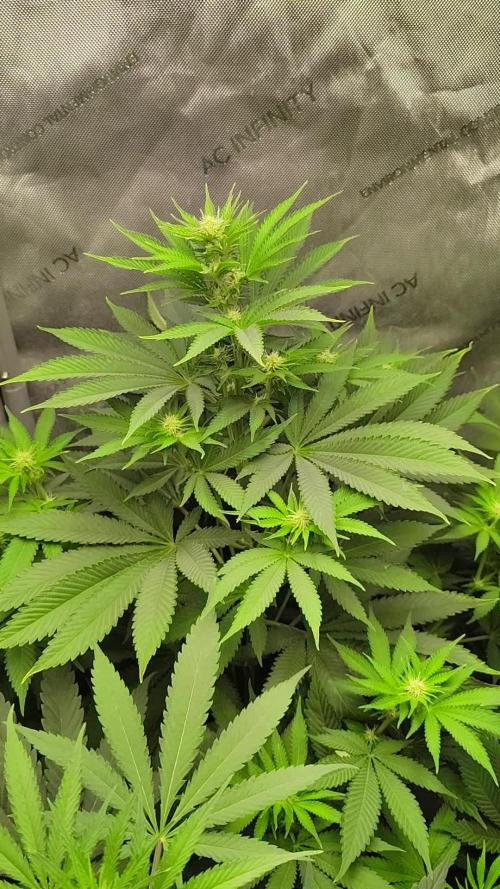
💐🍁 Alaskan Do-Si-Dos:
Alaskan Do-Si-Dos ha sido desarrollada por expertos como una versión mejorada de la siempre popular variedad Alaskan Purple de Seedsman. La introducción de la genética Do-Si-Dos en la Alaskan Purple ha creado un híbrido índica/sativa que aumenta la potencia y el rendimiento al mismo tiempo que mejora el perfil de sabor y sigue siendo versátil en lo que respecta al cultivo en exterior.
La Alaskan Do-Si-Dos está destinada principalmente al cultivo al aire libre y en invernaderos. Las plantas crecen altas y prosperan en climas fríos, templados, cálidos y secos, al mismo tiempo que se desempeñan bien en altitud. Esto no impide que se cultive en interior, pero estas plantas grandes necesitarán mucho espacio. Las plantas muestran una resistencia moderada al moho pero, si se cultivan en interiores, hay que tener en cuenta que son RUIDOSAS, por lo que se beneficiará del uso de filtros de aire de carbón. En exterior, en latitudes septentrionales, la cosecha está prevista para finales de septiembre, mientras que en interior las plantas tardarán entre 8 y 10 semanas en completar la floración. Los rendimientos en exterior son muy altos y pueden superar fácilmente los 750gr/planta, mientras que en interior los rendimientos son elevados, hasta 600gr/m2. Los cogollos maduros tienen una densidad media y mantienen un color verde medio.
🌻🚀 Consigue aqui tus semillas:
https://www.seedsman.com/eu-es/alaskan-do-si-dos-feminised-seeds-sman-aldsd-fem
🍣🍦🌴 Xpert Nutrients es una empresa especializada en la producción y comercialización de fertilizantes líquidos y tierras, que garantizan excelentes cosechas y un crecimiento activo para sus plantas durante todas las fases de cultivo.
Consigue aqui tus Nutrientes:
https://xpertnutrients.com/es/shop/
📆 Semana 4:
Aparecieron un monton de erizos esta semana, el temporal ha hecho algo de mella en la carpa al bajar las temperaturas aunque todo sigue correcto.
Continuamos con las dosis de nutrientes recomendadas por el fabricante.

Likes
27
Share


@adam_pawloski87
Follow
This week went really great! Plants are looking super healthy today at day 22 from seed!! Today they got a dose of just pure water phd at 6.5 ! Temperature an humidity has been staying pretty stable everyday, staying around 70-75 degrees and 58-61 % humidity!! Can’t wait to see what these girls do this week ! Hope you all enjoy , an had a great safe weekend! Peace love an positive vibes to y’all Cheers 😶🌫️💨💨💨If there’s any questions, please ask me 🙏🏻

Likes
7
Share


@Jays_Not_Here_Man
Follow
Another easy week, weather has been beautiful! Lot’s of ☀️. They have been very thirsty as a result, I was able to get three waterings in this week. Just keep bringing them in and out of their pop up greenhouse daily. Started to taper down some of the feeds, two plain oh waterings and one feed this week. I don’t really “flush” but I do taper down to just ph water for the last few feeds. Happy growing folks! 🇨🇦❤️🌱😎💨


Likes
4
Share


@Barcelona_Farmers710
Follow
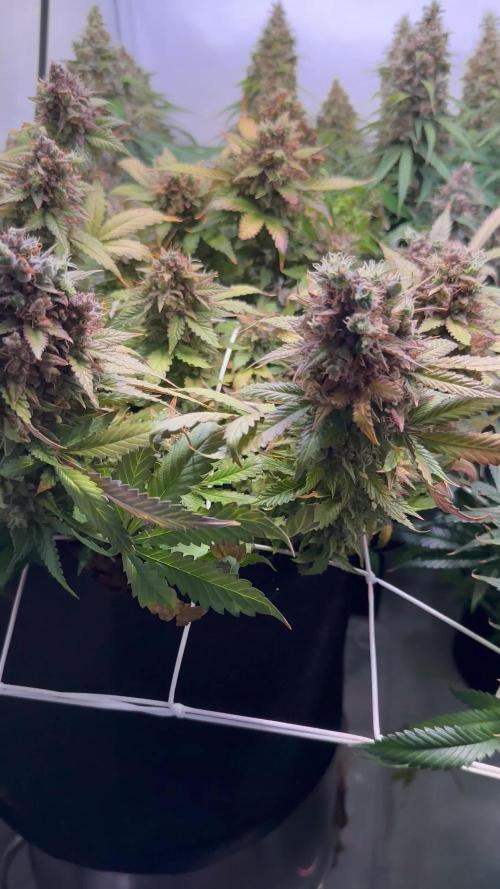
Explosión de resina!!! Una genética que no me deja de sorprender un olor brutal a cítricos y su olor a Haze un gustazo pra la vista y el paladar sin duda esperamos impacientemente el dia de degustar este manjar!! Espero que os guste Salut y força al canut Farmers!🍁


Likes
14
Share


@MG2009
Follow
03/20/2022
Biscotti Skunk looking lovely first four pictures.next up is lemon OG,followed by the three Grape Skunk girls middle one is my favorite so far (Middle in height)
I did a light feeding of fish and seaweed, a little extra something just incase they get hungry in final weeks.

Likes
6
Share


@Mr2toke
Follow
What an absolute experience growing this plant!!
She didn't get to be the biggest as I gave her unnecessary stress in her early week. I forgot that I treated the medium before planting, and I watered with normal values.
This causes nutrient lockout which took 2 weeks to correct, which then stunted her growth.
5L also battled deficiencies after flushing to correct the lockout. she was knocking on heaven's door for weeks, and she still produced some beautiful buds!
Once that was fixed, she flourished really well!! she showed beautiful colour on the buds. nice and dense. sweet herby scents coming from this plant!
She took big feeds, and tolerated high nutrients in flowering too.
10L plant will be cut down in 2 weeks!!
No mould, no pests, no mildew. what a plant!!!
I have 3 more of these beans, and i really want to run them again!!!
13/12/23
Dry weight is in. she managed to produce an ounce, 28g exact! plus all the tester nugs i've...tested.
14/12/23
10L strawberry pie has now also been cut down!! this plant was my sleeper!!! she grew so well, beautiful colas, thick nugs, full of resin!!! 331g wet weight.
I think this plant will yield as much as the three other plants combined!!! LST was a great plus on the 10L pot!
7 day dry should do the trick!!
Likes
21
Share


@gottagrowsometime
Follow
Welcome to my Runtz Auto Diary sponsored by Zamneisa and Spider-Farmer co2 ran for whole fattening period.
Days 1-21 early week 7 missing. HST"ed some of her.17th/may 7th/June Power Buds really helped build lots of tight stigmata.
Sorry about missing wk 7 and half of 8. Colas are getting big loving the light. Developing lovely fade around the leafs the past 2 weeks. Drinks like a fish. 2L a day easy on her last 10-14 days. Doing really well.
7th/June foxtailing is happening as you can see. She's very sticky and is still pushing. There's nothing I can do about the heat. Nothing. All I can do is lower the light intensity that now. Its been set at 90%.⁰
Am dealing with crazy temps like 35c on ave can go up to 39c. Am finding it hard to keep the stomata vents going. Seedlings are pushing through. I do see signs of stress. Possible foxtailing coming. Not much I can do with the temp. Stomatas are been kept open with fan power. I've 4 running nonstop. 1 full Osc one and 3 others that blow parts of the plant but its more designed to keep the co2 in the middle of the tent. It's taken me 2 weeks to find thy optimal way to manipulate co2 movement. If you don't have the fans right. You are just wasting money. I've seen s 50-30% increase in rate of just seedling growth that I prove. From 55ish strains that 95% ran from 9-10 Days the rare long one. But, I'm seen seedlings turn into vegging plants in an average of 6 days. Some as early as 4.5-7.5 days. Most are 6. And then they're flying through veg too.
HST & defoliation
HST was done early pre flower the nodes actually split and fell over. Mended itself up. Tbh, there is no real benefit to HST'in autos. I've done it many times now. The nodes that were HST"ed didn't vary much if at all. The whole plants buds are hard. Foxtailing like a bitch. But comes with the environment growing indoors in summer with co2 with 35c temp on average, power buds was used as soon as I seen stigmata and until pre fower ended.
SE5000 light used for co2 growing. Doing a great job. Helps to have a great sensor. This spectrum is great. Even with high temps that should have vents closed if using say 1 spectrum but, this light is able to keep the plants eating with high temps. Has gave all my plants great fade. Next wk. I'll higher the light and lower it and start focusing on the crop this light was issued for. But, its done a great job at finishing my crop.
Thanks to my sponsor from Zamneisa. Hopefully i can do your strains better justice next time if there is. I'm happy with the bud, as its an auto that spent a lot of her life under the SF-1000 before the SE5000 2 wks ago like to thank "Bella" for that upgrade. That allowed me to finish a few of my girls while setting my flying youngsters at a distance. I love everything about it.
Much appreciation to all who stopped by to view, like &/R comment. Look forward to seen your work.
COUPONS
Marshydro.eu/ww "ggs" 3%
Zamneisa "GROWITGD" 20% ww
Spiderfarmer.eu/ww "ggst" 3%

Likes
12
Share

@JolliGrowz27
Follow
Day 14 of Flower, start of Week 2. Nothing more than feeding them some Age Old Organics nutrients. 30 ml Bloom, 30 ml Fish and Seaweed. Gaia Green Power Bloom, All Purpose, and Glacier Rock Dust should still be working and dissolving into the soil. I add Real Growers Recharge with the feedings. I don't plan on doing a defoliation until the stretch slows down a lot. For now they're growing well and praying. Everything is back on track and thriving.
Likes
41
Share

@J4kpvp
Follow
Hello:) I finally harvested today. It all went well, they barely fit in the tent so I had to get a bit creative.
Sadly, I actually found mold in the bud that I was suspecting. The big main bud from the sangria in the back right…. I lost about 40g wet but I‘m still happy that I saw it now.
Now they have to dry for at least a week, so I‘ll be back with dry weight and stuff like that:)

Likes
101
Share


@Papablob
Follow
05/04 petit nettoyage du bas pour avoir des têtes durs. (Ci possible avec la grosse qui bouffe la place au soleil) 🙏
Processing
Likes
38
Share


@OutForReal
Follow
Song of the week : Eminem - Venom
-------
Day 31 - Not transplanted yet but she will be soon settle in a 7L pot like my Gorilla Girl. I decided to top her today And I made a short vid to show you how.

Processing
Likes
12
Share


@Silverback_Guerilla
Follow
5/18:
I did a little LST on her today and ordered another of the 200w lights and some panda film to line the interior of my tarped enclosure.
5/19:
WTF?!? I was seeing a few pre-flower pistils here and there, but today it's looking like she's trying to flower along with every other plant in the outdoor garden! All I can figure is that being vegged under 24/0 for a month and then being put outside at just the wrong time under 14/10, they think it's becoming winter. I sure hope she notices the days getting longer and goes back to vegging.🙏 I wanted to beast her all the way out and finish up in late summer, and it's still only fuckin Spring!
5/20 - 5/24:
She is really thriving. I did a little more LST on her before the rain started. It rained every day this week for at least a few hours, but I did manage to top-dress her pot with cavern culture and azomite between showers. I also did a foliar application with MicroLife Maximum Blooms that didn't get rainwashed off for about seven hours...
That's it for week #7-

Likes
31
Share


@The_Doctor_Green
Follow
Esta semana he regado solo con flora booster 2 ml x litro de agua.
La planta de la tierra, la sigo estirando hacia los costados.
Las de las macetas se ven sanas y bien, de a poco se van
Likes
28
Share


@Chubbs
Follow
420Fastbuds
FBT2307/Week11
What up everyone weekly update on these three beauties. All though they appear to be different in looks they all three are equally lovely. Really looking forward to the upcoming week as I'll start looking at the trichs to see if we got some amber showing up. All in all Happy Growing
Likes
10
Share


@pHilosophy420
Follow
She is growing pretty well, the buds is getting bigger and no issues so far 🤞🙂
Likes
10
Share


@InnerCityGardens
Follow
Week 6, slow growth but now finally starting to kick on properly and look like decent sized plants 💚
Likes
24
Share


@TheIceCreamParlour
Follow
Sorry for the poor quality photos this week. I will update it at some point when I can get some photos in the dark with the flash on. With the tent being so packed and the plants under a net it's very difficult to get any quality pictures.
Powering on and fattening up. They've had roughly 30 flowering days and I'm expecting mabey 20 more. Some of the biggest buds have foxtailed but I'm not too upset. They are so huge and I'm only expecting them to get thicker from here on out.
Updated photos with an A4 sheet of paper behind them to try and show how wide the buds are on these girls. They are a bit airy at the moment compared to the Pinapple Express next door but with 2-3 weeks left I'm expecting them to bulk out.
Processing
Likes
12
Share


@GrowGuy97
Follow
Day 7 - Everything seems to be going ok they are all growing about the same pace!
Day 8 - They are all growing pretty equal right now , extremely happy with how things are going!✌️🏼🌱
Day 11 - one plant has some twisted leaves hopefully it’s nothing serious😫 will be keeping a eye on her, other than that they all seem to be growing great! Thanks for following & happy growing friends!✌️🏼🌱
Day 13 - have a few with some weird leaves & growing a little slow, other 3 are growing pretty good! Hopefully they all do alright, fingers crossed! Happy growing friends!