
Likes
27
Share


@adam_pawloski87
Follow
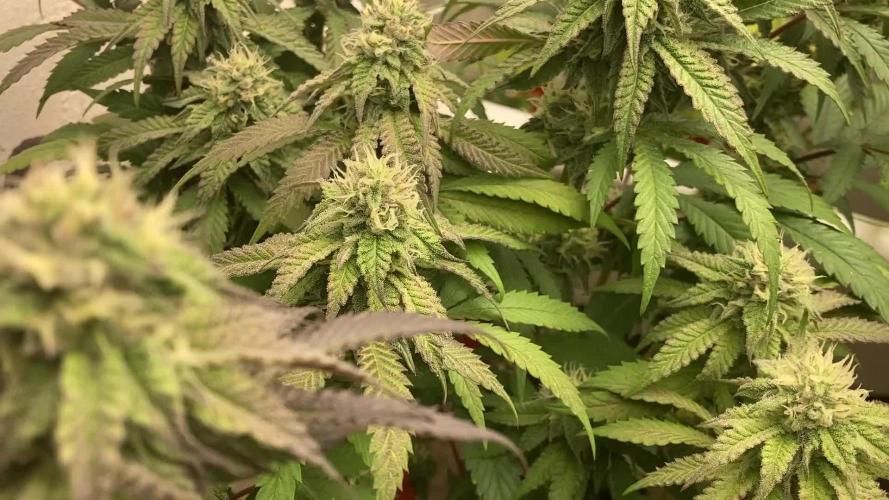
Let’s Go day 29!! This week went real nice ! Girls are staying very healthy and building up nicely and even started showing signs of female sex which is super great ! We started doing a little bit of leaf tuck training method on em , nothing to big as like I said I want these girls just to do there thang an grow more on naturally side! My Air temp and Humidity have been on point all week, staying from 70-75 degrees throughout the day and humidity staying around 58-61% humidity , my girls are loving that summer an 75 feeling !! Can’t wait to see what we do this week ! Hopefully you all enjoy, and are ready for another great productive week ! Peace love an positive vibes to y’all Cheers 😶🌫️💨💨💨💨🤙🏻Happy Grows✌️🏻Week 4 let’s get it !

Likes
30
Share


Processing
Likes
21
Share


@Daddylongleggz
Follow
Well well this week has been a week and im actually posting a day early. This have been good so since they are like ten inch tall and i know in flower that they will jump im height so i transferred them into 5Gallon fabric pots, took a few leaves off. Havent water them yet but i did flush before transferring. Plus the soil was kinda damp so ill water later on. Also i think im off a couple of week but since this is my first Grow recorded grow i am just getting the feel of growing again and work out the rust in my green fingers..
I am planning on getting another well two more led lights. Another 1000w and 300 watt cob light that should boost actual watts up to like 550 true watts. Things are looking good so far with the help of a few masters in here. So thanks again for all the help and love. If i get this grow RIGHT thw world will be at my feet so lets take over the world my friends
Any advance please please feel free to teach me, i am willing to learn
Likes
7
Share


@Staffedition
Follow
Хочу обратить особое внимание на качество семян и генетику!
У меня все кустики один в один.
Всем мира и добра а так хороших добрых всходов!
За качество семян 10 звёзд
За качество всходов 9 звёзд
За качество роста 10 звёзд
За устойчевость 10 звёзд
Не забудь поставить лайк❤️, если понравилась как прошла неделя
И читайте наш TELEGRAM: https://t.me/smail_seeds
#Smail_Seeds 😀


Likes
9
Share


@Krautbauern
Follow
The ladies are doing very well. They will soon start to bulk. We are very happy to be able to test the resinator from the rock nutrients, plus elan by crazyhillsnutrients and some calmag. we did a little bit of defoliation as well

Likes
9
Share


@Grower2021253
Follow
The pineapple auto flower was germinated at the same time as the blueberry. It took some time to catch up, I'm not sure what I did wrong but it's just now starting to show signs of future success. I had a couple other auto strains that all failed to sprout due to my negligence. Update on those, my last seeds seem to have taken when I opten to put them in my outdoor hydro setup for germination. The conditions must be better with the uv from the sun preventing over dampening from being a molds paradise. I don't have the time to watch these all day so this was my best shot.
I noticed some yellowing. Turns out my ph was off because I never calibrated my ph sensor. Fixed everything 10-Jul, hopefully she comes back to vitality soon or the yellow is just light green from the new leaves.. I diluted the nutrient solution down today but only to 1000 from being up to 1200. If nothing changes in a few days I will replace half the current reservoir supply with new ph adjusted water. I don't dechlorinate with a filter but I bubble the water for a day and hit it with uv just for good measure before adding new water.
Update, after researching, it appears this is iron deficiency. Hopefully correcting the ph is enough to prevent the yellowing from continuing. Fingers crossed. Else I need a supplement.
Update July 11, after calibrating my ph monitor and getting back in acceptable range yesterday [I have been shooting for 6.0 or just below] the leaves are becoming more dark green in color and the yellowish color is dissipating. You can see some of the lower leaves have some sort of burn. I am not sure if it is heat damage or caused by ph imbalance but I don't see this on the newer growth.

Likes
3
Share


@BoNz4i
Follow
So sativa.
Braucht n bisschen länger denke ich wie angegeben.
Hat jetzt endlich ihren verdienten Platz im Raum 😌


Likes
2
Share


@GRow_M8s
Follow
Leave's edges have turned yellow and it was fed with a good amount of 6.5 ph water to give her a break.
Watered for second time this week with just 6.5 ph water.

Likes
2
Share


@KeemBboomin
Follow
Everything is not as accurate as I would like to say, but I wanted you guys to see what I can do
Likes
20
Share


@eldruida_lamota
Follow
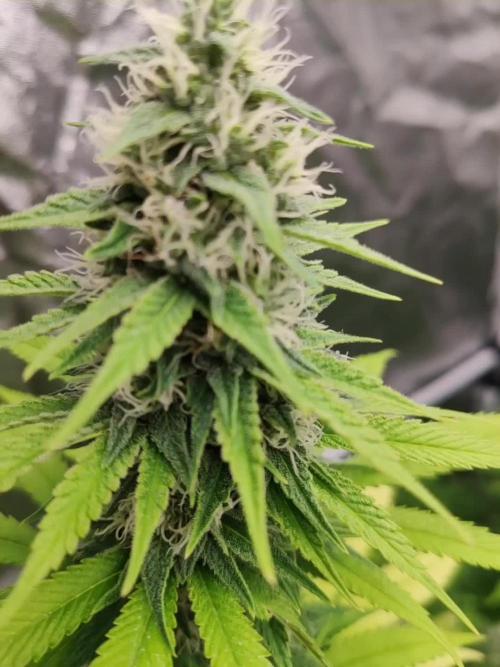
Que pasa familia, vamos a añadir la quinta semana de floración de estas Apple Fritter de RoyalQueenSeeds, empezamos con la temperatura que la tenemos entre los 21/25 grados, la humedad está entorno al 50%, el ph está en 6.2 , el foco actualmente lo tengo encendido 12 horas y la potencia es al 100% de lo que da el foco.
También añado la gama de nutrientes de Agrobeta, que no falla, sin duda de la mejor alimentación que hay para tus plantas.
Las flores empiezan a tricomar y a formarse bien, ya veremos como avanzan estas siguientes semanas.
Mars hydro:
Code discount: EL420
https://www.mars-hydro.com/
Agrobeta:
https://www.agrobeta.com/agrobetatiendaonline/36-abonos-canamo
Hasta aquí todo, Buenos humos 💨💨💨
Likes
50
Share


@Annakonda
Follow
Rinçage. Je coupe déjà la mimosa et la cereal milk aujourd'hui. Le reste à suivre.


Likes
3
Share

@BioGrowBayer
Follow
Die Pflanzen entwickeln sich gut, Buds werden dichter und zeigen erste Harzentwicklung. Stickstoffmangel erkennbar aber ich habe die Düngung leicht angepasst
Likes
22
Share


@BruWeed
Follow
☘️22/11 - Empieza su tercera semana en Etapa de Floración.
☘️Esta semana le estuve agregando solamente agua ya que las hojas están un poco amarillas, esto se debe por exceso de nutrientes, así que esta semana solo le agregaré agua.
☘️Crece muy rápido en altura de una semana a otra.
☘️Los cogollos ya se pueden apreciar mejor, tienen tonos lilas/violetas.
☘️Por el momento su desarrollo continua de forma correcta.
☘️En estos días seguiré subiendo más imágenes.

Processing
Likes
9
Share


@Kushizlez
Follow
Day 69 (March 6th)
Just gave everyone their last watering. I’m going to harvest and wash everything tomorrow night on day 70. I‘m not going to do that whole 48 hours of darkness thing because I didn’t see a difference last time I did it. In fact, it made my plant under watered before drying which caused it to dry too fast. Slurricane and cheese will be washed with h2o2 and the rest will just be rinsed off in warm RO water and hung up. Before and after washing I’m going to go over each branch with a flashlight and make sure there is no dog hair or debris in or on the buds. I will be drying in my spare bathroom (that no one uses!) from hangers. Aiming to keep it around 60-62F and 50-60 RH. Hoping for that 10-12 day dry. I wanted to do a full plant hang but the tent got pretty dirty and I would feel more comfortable just cutting and rinsing everything off branch by branch. I’m going to try my best to keep the full plant intact. Got my humidifier hooked up and running RO water because with tap water it deposits calcium and lime all over the buds and walls. For air flow I’m just indirectly running a small usb fan. I’m not worried about air flow in the bathroom honestly. It stays nice and breezy down there anyway.
Got the food grade peroxide and RO water to wash up the slurricane and cheese. Everything except for the cheese and garlic#1 is looking more than done. Trichomes all look pretty well done. Some of them have even burst open. Smells are all super ripe and mature too. Can’t wait to smell each individually in jars.
Next week I will recap what went wrong and what I will do differently next time to keep it from happening again.
(Day 70F) Just got everything chopped, washed and hanging. The vast majority of the PM was washed out but I can still see very small amounts. When they dry out I can shake the branches a bit to get the rest off. At very least it’s sterile now. There is no question I lost some potency while washing but the amount is negligible for a much cleaner product.
I could see lots of dirt and other debris float to the surface of the water after being washed. And no those are not trichomes, those sink to the bottom. I could put that nasty water through a bubble bag and wouldn’t get all that much. Although it probably does remove a lot of the actual trichomes heads. I’ll have to check with the microscope.
Everything is rigged up for a nice slow dry. Temp is sitting at 64 and RH is at a nice 60%.

Likes
34
Share

@Hempface86
Follow
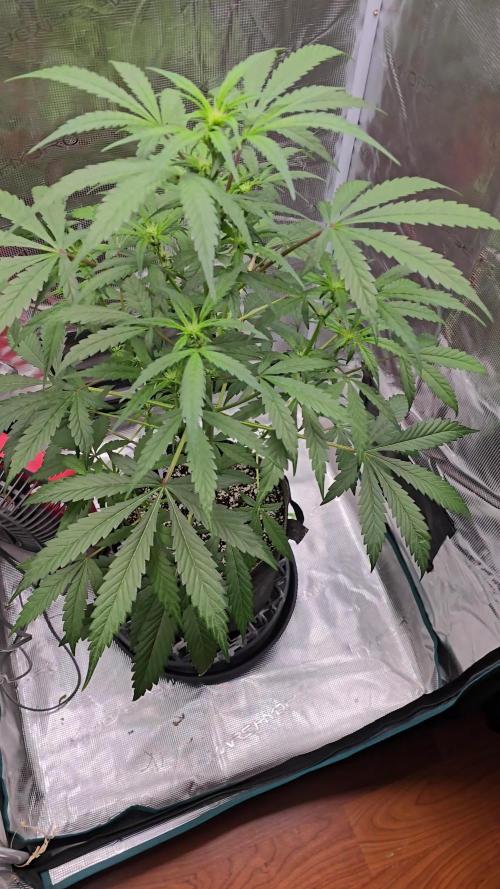
Ladies and gentlemen today is day 42 and this girl is thriving.. i ended up switching my plants around and giving her the smaller tent because my other plant is just too big for the tent .. she's growing fast at 27 in and as you can tell, she's still stretching, although I think she's almost done, and we can start producing some flowers .. Kannabia seeds thank you guys for the opportunity to showcase your genetics.This has been a very easy grow thus far.. Thank you to everybody that stops by says. Hi, drops a like it does mean a lot and it is appreciated.. I hope and pray everyone is doing well. Happy and healthy
God bless and and happy growing ✌️.
Also, wanna mention that I am using general hydroponics silica, as well as general hydroponics, maxibloom ... half tsp each .. maxibloom is the main nutrient I use It's really an all in one.. you can buy a three pound bag, for fifteen dollars.. And use that only and you will have massive plans, and that bag will last you a year.. j/s .. i don't see many or any one else in here using it which is crazy because it grows the biggest plants i've seen out of any other nutrient... i understand it's salt based. All you have to do is feed to run off, and it's like steroids for your plants. No lie.. have a great day guys God bless 🙌
