
Likes
Comments
Share


@1Prinz
Follow
Received the SF600 on Tuesday 28.05. First light since 29.05. The days before I brought the Plants outside my balcony and they revived the sunlight (as much as we got and only in the beginning of the day).
01.06 watering with 150 ml each.
03.06-04.06 (night) watering with 270 ml each. Added some soil because the plants started to grow a reached 7cm (frosted Guave) even more. So I added just enough, so the leave are not touching the ground and get more stabilized.
Trainwreck show signs of some stress. Guess I had the spot to close and burned some of the leaves.
The plants start to smell like cannabis.


Likes
12
Share


@StonedandSteady
Follow
AutoFlowers at 9 weeks of Bloom, Finishing out Great and Glorious as All get Out, 1st week of Veg Update for my #DivineSeeds #AutoBlueberry and these other Outstanding Genetics!
Everything looks Gorgeously Great and looking Beautifully Grown at their 9th Week of Flower! Veg Update on #DivineSeeds #AutoBlueberry #NukeHeads #PurpleBlueberryMuffinCherries-Fem #BubbaKush-Fem and #BlueberryDiesel-Fem breed by Broski #Soluna668 #NoGreedSeeds 5th Feed of #HumboldtCountysOwn
#AutoBlueberry
Origin:Afghani/Thai
Type:50% Indica/ 40% Sativa/ 10% Ruderalis
Flowering:56 days
THC:22%
Harvest:400-550 g/m2
Height:110-150 cm
#AutoWhiteRussian and #AutoMontreal *Fems* breed by Team #DivineSeeds #DivineSeedsSquad #DivineSeedsBreedingCompany Looking Magnificent and Amazingly Great in thier 9th week of Flowers! Thier Growing under the #Growatt600w and in my #TopoLite 24×24×48 Grow Tent! I'm also using #TNBNaturals #TheEnhancer Co2 Despersal Canister and using thier Ph⬆️⬇️ for my Decolinated Tap Water!
#AutoWhiteRussian breed by Outstandingly Awesome Team #DivineSeeds #DivineSeedsSquad #DivineSeedsBreedingCompany
Yo!!! This Lil Beauty popped open in under between 16-18 hours of Germination using this Wet Papertowel Method, this New Heat Mat, Baked potato ToGo Container and Regular Tap Water Helped Tremendously! Heck Yeah Growmies and Growmets!!! Let's Grow!!!
DivineSeeds:
#AutoWhiteRussian
Origin:Afghanistan
Type:Indica/ Sativa/ Ruderalis
Flowering:65 days
THC:24 %
Harvest:400-600 g/m2
Height:100-150 cm
#AutoMontreal breed by Top of The Line Team #DivineSeeds #DivineSeedsSquad #DivineSeedsBreedingCompany
Yo!!! This Lil Beautiful Bean Popped under between 20 hours of Germination using this Wet Papertowel Method, this New Heat Mat, Baked potato ToGo Container and Regular Tap Water Helped Tremendously! Heck Yeah Growmies and Growmets!!! Let's Grow!!!
DivineSeeds:
#AutoMontreal
Origin:Canada
Type:50% Indica/ 40% Sativa/ 10% Ruderalis
Flowering:65 Days
THC:23%
Harvest:550-750 g/m2
Height:120-160 cm
https://divineseeds.net/
https://instagram.com/divine.seeds?igshid=osxe2v7en33v
HumboldtCounty'sOwn:
Email: [email protected]
Phone: (707) 725-4119
Toll free: (866) 872-9434
Humboldt Bottling
Po Box 429 · Fortuna, CA 95540
HumboldtCounty'sOwn Website Link: https://humboldtcountysown.com/
HumboldtCounty'sOwn Instagram Link: https://instagram.com/humboldtcountysown?igshid=1qj809qkkwych
I love and Appreciate Everyone!!! Thanks Again Teams! Cheers Famz!!! Much Props and Much Topz!💯


Likes
3
Share


@Krack
Follow
Didn't realize that it's been 4 weeks since I was on here last. Not sure if I over watered, nute burn or a deficiency but I am having a problem with my leaves going yellow and crunchy. I just gave straight RO water for a flush.


Likes
4
Share


@Nookandplant42o
Follow
Alright Robust in the original shape of a Christmas tree, its thick leaves and well-resined flowers the pistil phase starts to turn orange the trichomes we can go further to have milky with amber, and enjoy its performance until the end its smell is very strong it is sweet .

Likes
17
Share


@Bendedknee
Follow
The buds are really starting to form now, I’m getting a lot of purple and some black sugar leaf this is gonna be a wicket show.
Oh my freaking sticky icky and I thought growing weed was tricky


Likes
29
Share


@GTools
Follow
I've been waiting for at least some trichomes to turn amber. I prefer to harvest when there are at least a few amber. I took the PL2 3 days before the PL1. Flushed them for a week only

Likes
18
Share


@Grower_Of_Persia
Follow
week intel:
its time to harvest some of plants the ones that is mature enough. indica dominant plants will done first always so we should harvest them first
because my base nutrients and one of boosters was salt based, i'll do flushing this week to get some relieve to plants in the last days
stresses :
flushing
Drought stress via watering only one time with flushing this week
feeding:
day 1 : i flushed them with Advanced Nutrients Flawless finish and adjusted ph
day 3 : no more feeding from now on
day 5 : no more feeding from now on
guide of the week :
i harvest in 2 parts : first i harvest top of the branches and will let the lower buds to ripe another week then ill harvest the second wave.
indica dominant plants will get done 1 or 2 weeks sooner than sativa dominant plants that will often takes more than 8 weeks so be aware to harvest them sooner.
my dry and cure style is this:
3 days of hanging upside down to get water activity lower to around 0.6 in 50% humidity and 26 C temp (i know its a little high but we are in a hot summer right now and i cant get it lower even with air conditioner) and then after 3 days of drying i remove leaves and stalks, trim buds and move them to jar for the rest of their life :D . and in the first 4 days of curing i open the jar door and let hem get some fresh air in the jar for about 5 minutes and close the jar door again, after 4 days of curing like that buds are smokable but they will get better as they getting cured about 1 month.
im happy as hell with this harvest :D.

Likes
3
Share


Likes
138
Share


@DogDoctorOfficial
Follow
So its time for a second run with the MARSHYDRO TSW-2000, for this run i will be running 2 clones from Gorilla Blue that came out out off a test seed i did and kind a love it so much that its time for round 2 out of it 😆 , i will be running APTUSHOLLAND nutrient line, something I'm doing for a couple of years now, but now with they're support, with for me was amazing since i already believe 101% on all of the APTUSHOLAND line 🙌🙌🙌🙏🙏🙏💚💚💚 shout out to AptusHolland 💚💚💚🙌🙌🙌🙏🙏🙏✊✊✊
I am reusing my soil from previous run since i take such good care of it with APTUSHOLLAND organic/mineral nutrients, i did add some magic to the soil ,this will help my girls and the living matter in it. I ad APTUSHOLLAND All in one pallets, MycorMix and Micromix and for the first waterings i will be adding all in one liquid all so, just until the solid amendments break down and from there on i will be giving them only water with some microbial help to keep my soil alive and in shape.
Thank you MARSHYDRO and APTUSHOLLAND for having faith in my love for growing , lets make magic together 🙏🙏🙏
Genetics - Gorilla Blue - Advanced seeds
Grow tent - MARSHYDRO 4x4
Ligth - MARSHYDRO TSW 2000 @ 100%
Food - HAPTUS HOLLAND
Filter - vanguard hydroponics Falcon Filters
Extraction - 2 x vanguard hydroponics 280m3h
Extraction control - SMSCOM Smart MK2
All i grow is medicine for myself, for me and for my best friend with is me 😆 nothing to sell, so don’t even ask 😅💚💚💚
All info and full product details can be find in can find @
https://www.mars-hydro.com/grow-tent
https://www.mars-hydro.com/led-grow-light/mars-ts-series-led-grow-light/mars-tsw-2000-led-full-spectrum-hydroponic-led-grow-light
https://marshydro.eu/ DISCOUNT CODE - DOGDOCTOR 💚💚💚🙏🙏🙏💚💚💚
https://marshydroau.com/
https://aptus-holland.com/
#marshydro #aptus #aptusplantteck #aptusgang #aptusfamily #aptustrueplantscience #inbalancewithnature #trueplantscience #growerslove
With true love comes happiness 💚🙏 Always believe in your self and always do things expecting nothing and with an open heart , be a giver and the universe will give back to you in ways you could not even imagine so 💚💚💚
More info and updates @
https://growdiaries.com/grower/dogdoctor
https://instagram.com/dogdoctorofficial
https://youtube.com/channel/UCR7ta4DKLFMg2xxTMr2cpIg
💚💚💚Growers love to you all 💚💚💚

Likes
11
Share


@DixTheReal
Follow
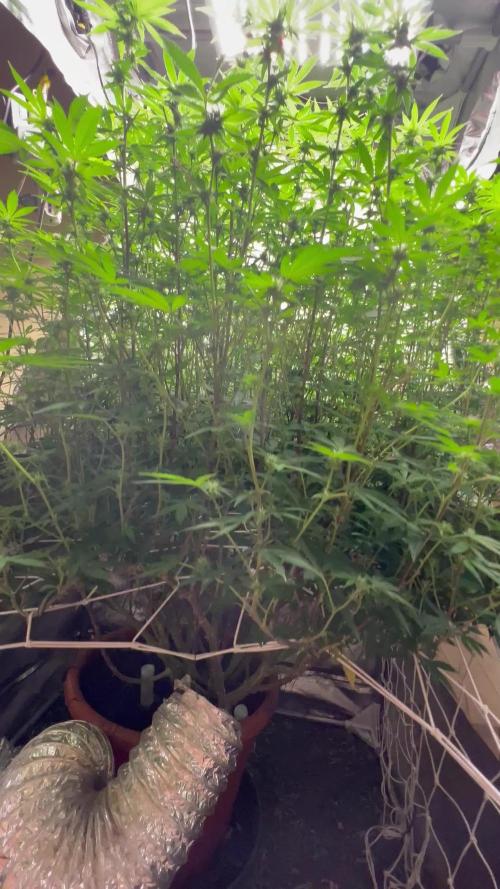
Ho sistemato LST giornalmente perché continuano a crearsi nuove ramificazioni e gemme ovunque. Sto irrigando con 0.5L di acqua ogni giorno, ma credo dovrò passare a 1lt perché l’assorbe subito.
Giorno 35 - l’apicale si é spezzato al 50% ho provveduto subito a mettergli del nastro di carta intorno e fargli un sostegno sotto per reggerlo nella sua posizione. Immagino che ora se dovesse sopravvivere avrà un blocco di qualche giorno.
*Giorno 35 h.20.30 dopo solamente 6 ore l’apicale ha iniziato ad alzarsi da solo staccandosi dal sostegno, assurdo!

Likes
5
Share


@killerjoint
Follow
10-24-2024
ALL THE STRAIN RECOMMEND FLOWERING TIME IS 7-8 WEEKS
TRY TO FINISH WEEK 8
STILL HAS 19 MORE DAYS...
LAST FEED WITH NUTS .BURNED SOME OF TOP FAN LEAVES ......
BUT CHECK OUT QUEEN,DR SLEEP , WULFF ,POWER... CRAZY FROST TOE TO HEAD
SMELLS .............NEED TO RUN FANS WITH HIGHER SPEED FOR SMELL...
NO MORE NUTS....JUST WATER .....STAY IN THE COURSE...
STAY GREEN ....
10-27-2024
-HIT THEM WITH HUMBOLDT COUNTY NUTS
G10 -5ML PER GAL
SNOW STORM -5ML PER GAL
PURPLE MAXX-7ML PER GAL
EVERY TWO DAY NEED TO WATER....


Likes
2
Share


@smoking_hills9
Follow
Fantastic grow. Very happy with all 3 strains, all just perfect. Super stinky, very frosty, and as always tones of buds . Now time to cut and dry.

Likes
2
Share


@Abreuvoir
Follow
4 September 2022
Flowering: 42 days - 6 weeks
Tip of foliage showing sign of maybe pH imbalance or too much fertilizer?
Did a small water flush.
The run off water was very acidic, added water until run off was 6 pH
Maybe time for water only now
10-15 more days till harvest??

Likes
3
Share


@KushManAdam420
Follow
These have surprised me , not even a spot on them.
Wall to wall now , maybe should have went with a total of 7 , but im not complaining .
Few of these are already dripping in thc .
The two largest ones were topped , I have done a defol on them , the smell is definitely there . I might need a filter in the next few weeks .
Likes
8
Share


@ohighoan
Follow
Absolutely satisfied with the germination rate 6/6. Had a few helmet heads that will hopefully resolve themselves. Excited for this run!


Likes
11
Share


@Bluemels
Follow
Tag 74: Ich bin immer noch ein wenig geschockt wie wenig von meiner Chocolate Haze übrig ist 😱
Likes
34
Share


@ElLocoDeLaHabitacion420
Follow
This week it looks like shes starting to explode! besides the fact that I had to pull some colas to the sides to have a better air flow nad reduce her height everything is running pretty smooth! I think this was the week where she started to fully concentrate in flower
