
Likes
Comments
Share


@Kagesan
Follow
Hello Grow friends.👋👋
➖➖➖➖➖➖➖➖➖➖➖➖➖➖➖➖
The little one is now in the flowering phase.
She is developing into a pretty little bush. I'm curious to see how much more height it will gain.
➖➖➖➖➖➖➖➖➖➖➖➖➖➖➖
💚💚

Likes
113
Share


@Skunky
Follow
Hi!
I'm actually growing some White Walker Kush from DNA Genetics but I didn't have that option when selecting the strain so I just chose Martian Kush. Sorry about that. It's a seed I found in the weed from my last grow and I wanted to see if I could get sth out of it. Still not sure if it's male or female so wish me luck on this one. Looking good so far :)
PS: Right now, I still have the plant in my living room, under a 50W plant bulb with uv, so no strong lights used right now to prevent it from growing too fast. I'll move it into the box and under the 400W as soon as my actual grow is done.
Potsize is 65L.
I kinda lost track of the weeks since I didn't really wanted to grow this plant so I'll just assume it's around week 9... but I may be so wrong... 👻


Likes
106
Share


@Natrona
Follow
Sponsored grow 👉WeedSeedsExpress👈
Harvest
Love Potion grew in my AC Infinity 4x4 with 4 other plants. I harvested her April 12, 90 days after germination. Love Potion demonstrated strong resistance to mold, bud rot and pests. Based on her appearance of burnt and curled leaves, she did not recover after overfeeding then flushing in mid growth cycle. I trained her hard by topping her twice and tie downs to all limbs. Even though Love Potion is an auto, she seemed to tolerate this stressful training.
Because of the mix of strains growing in the tent, no smell was discernable. Now as it hangs by herself, she smells fruity and sweet. Love Potion remained under 2 feet tall after topping. Even without topping, she would remain short. This would make Love Potion very good strain for small closet grows. Love Potion grew without difficulty or issues. Produced a nice outcome. Wet weight 358g.
Your likes and comments are appreciated. Thanks for stopping by.
Thank you @WeedSeedsExpress for this opportunity to grow your strains.
Growers love 💚🌿
💫Natrona💫

Processing
Likes
62
Share


@OwlGang_Uk
Follow
Week 2 - The Plants Are Loving Their Environment. I Think The Coco Soil Have The Gorilla Glu & Stardawg Thinking They’re Coconut Trees. Lol I’m Experimenting Trying To Create My Own Foliation Spray And Nutrient Additive To Go With A Base Nutrient And It Seems To Be Working. Overall The Girls Are Happy & Healthy And I’m Very Satisfied With Week 2. #OwlGang #AGrowingEmpire


Likes
2
Share


@Poohboomin
Follow
I need help on learning how to lollipop if i can get any comments please and thank you
Likes
8
Share


@Max1973
Follow
Day 63 - lookin good.... haha....
um, tanks stabilized, ph 5.8 - ppm 1200 .... she's feedin alot.....
buds are fillin and lotsa white furries....
listed the nutes and amounts etc.., but i'm kinda feeding her as she needs.... so every few days she is drinking
2 lts +- and i'm just mixing up a neut solution in a 2 lt bottle every day or 2 ..... sometimes she just wants abit of water......
Day 64
+vid....shows her deep green and gloss... abit of crystalic :)
Day 65 - vids pics.... trimmed her, and abit of bending....
Added blood and bone.... she's stretching alot, 60cm+ ........
Day 67 took all the early buds on all the stringy 0ff shoots....
Poor lighting vids, but don't want to mess with her flowering, :)
👍😎👊


Likes
24
Share


@Kountryboi90
Follow
Day 44 since flipping and this girl is getting close to finishing. No more feeding for her. Just some Cyco Supa Sticky today and next watering and water from there on out. Got about 75-80 percent cloudy. The sweet orange citrus smell is PHENOMENAL! Got about 2, maybe 3, weeks left and she'll be done. Had to tie up a couple branches because she's falling over from putting on weight! I love her!

Likes
5
Share


@pzwags420
Follow
I had to top Cantaloupe haze and White widow as they were too close to the lights and I didn't want to loose any ppfd on my lowers. My GSC seems perfect for not topping. next time I would top those strains at least once. I have been flushing the CH and getting run off around 1200ppm which seems like the max she can take the others like it stronger so I have been flushing them every 2-3 days. CH is tough to keep happy but will continue to monitor. All plants are in week 4 of flower 12/12 from seed.


Likes
14
Share


@Fullmeltalchemist
Follow
d43 - 9.26 - Recovering quite nicely. Was able do just about all the training and trimming I want to before I switch to flower around the end of week 8. My Fast White Widows are definitely more ground hugging, while the Black Sugars are reachers, but still manageable. They have all been trained to best fit the recovery of each individual plant, so my canopy definitely isn't going to be even 😅Nonetheless, grateful they have been resilient little buggers and happy for the chance to take them flower, regardless of whether I'll have the picture perfect tent. 🙏
D47 - 9.30 - I lied. I had to train a little more. One BS cola was really outgrowing the rest, and the opposite side of plant had taken for damage from bug treatment two weeks ago so i HST'd it back and spread the other. Still planning to flower them in 7-14 days!
Likes
14
Share


@Terpyboyz
Follow
Alrighty growmies 👌🏻 so I’ve had a bit of a week set back due to issues, but back on track, the heat wave has definitely given a few girls a bit of a hard time not being able to attend but none the less, lifted the light again, trying to get on top of this PH fluctuating I’m having again using these stupid PH drops as my PH pen also keep jumping. Besides that I’ve managed to make a new home for the clones and got them under a couple UFO LEDs so that will house them for a few more weeks and al bring out the 600w HPS for them, but these runtz since being repotted have not taking nicely to it at all even using dynomyco so again hopefully by Friday they should be past that stage if not on flowering either way going to be a bomb scare when these taller plants start to stretch might have to bring out the net for sure 🤣🤙🏻 if all goes wrong at least I have my clones for back ups, keep eyes open for the incoming fire thou 🔥


Processing
Likes
3
Share


@Dico29
Follow
Day 120
Smells good buds are fatter and looking better then I thought last week, I flushed but I think I may have caused nutrient burn or nitrogen since my stems have turned purple also along the buds and tips or ideas of what I should try thanks
Day 127 photos at the bottom


Likes
1
Share
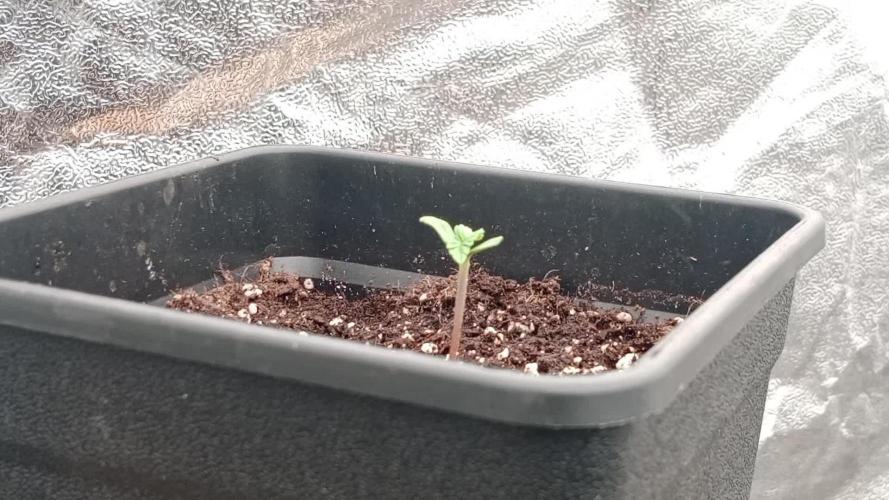

@pandrticka
Follow
This is my second time around. Out of nostalgia, I opted for Golden Sands by Humboldt Seeds. Twenty years ago, that strain got the whole housing estate high. For a while, it looked like only one of the five seeds would sprout. In the end, a second one decided to fight for life, too. At least they’ll have more room to themselves.


Likes
4
Share


@CannaIGrow
Follow
This plant plus one more started to wilt earlier on in the week, I figured it was probably time to transplant seeing as they had been in the solo cups for 2 weeks. After transplant plants seemed to be happy again. I introduced amino acids this week as well. They are getting the grease spray and drench program
Likes
22
Share


@Fatnastyz
Follow
9-9
Recharge 750 ml
Removed first leaves, bud site not ready.
9-11
Day 17
She was getting kinda tall, so over she bends!
She was stubborn, but resistance is futile!
Bent the day before water.
9-12
Big water, around 2-2.5 liters. Brought soil to where it should be. Will try to maintain 45-55% on eco witt.
9-14
This thing is growing great!
Little sad I had to remove a top leaf. Just no way around it. Pistols for 3-4 days. Starting flower tomorrow and top dressing!
Lets go!
Leafs up!


Likes
8
Share


@Bryankush
Follow
Giorno 1 bene le ragazze si sono riprese bene dal trapianto e stanno sviluppando bene le radici e iniziano a bere più acqua.
Giorno 2 LST e verrà già pulita con una leggera defogliazione e più che altro lollipopping( solamente 1 nodo in meno per ogni ramo e 2 nei più sviluppati) perché è già più grande della compagna e ha i rami troppo cespugliosi che rovinano il flusso di aria e il loro corretto sviluppo.
Giorno 3 annaffiata con 1L di acqua
Giorno 7 defogliazione e lollipopping
