
Likes
Comments
Share


@Bili_R
Follow
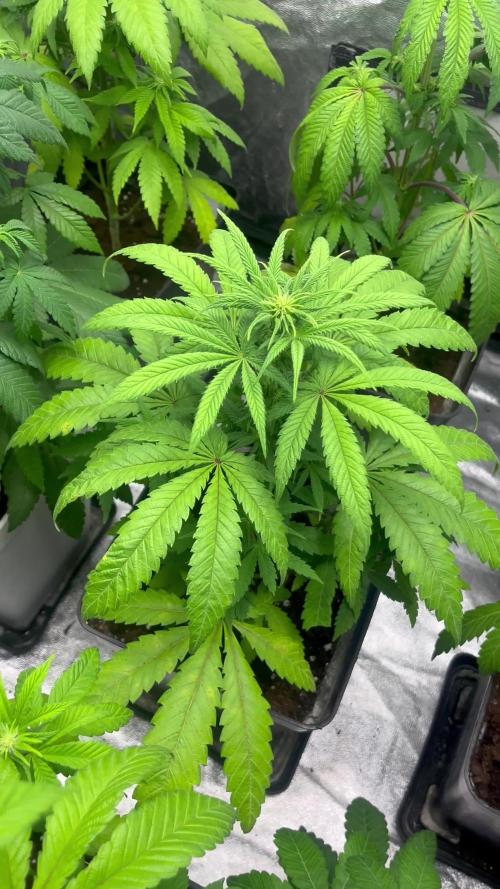
Yo community!
A friend of mine just started a Legal Grow in Germany with his roomate under my Supervision, as it is now Legal to grow in Germany.
So I thought about documenting this grow. I've been growing for long time now, but my buddy Bili is a complete newbee at this stuff.
I am positive that this "is gonna be huge".
We plan on growing 6 plants. Bili is gonna be growing 3 and his roomate also 3 plants. Of course Bili will only care for his own 3 plants and his rommate for the other 3 as it is regulated like that by law. It is Germany where everything has to be like this apparently. lol.
This grow will be 2-3 Weeks indoors 51w with low cost 3x17 Watts 4000 k LED Bulbs. (3€ each) Those produce 2500 lumens each, about 147 lm/W
1.45 l pots for the first few weeks indoors.
The plants will then go into 5l pots on the window sill until harvest. faced to the south.
So far the seeds have been placed into water over night. tomorrow we will put them into the soil.
They are all Automatics.
Day 2:
seeds soaked over night. about 16 hours. The Gelato are already opening their shells.. The others are still closed. All sinked to the bottom over night.
We are now planting them into the Soil.:)
We soaked 9 seeds. 3x O.B. 4x Kryptonite and 2x Gelato.
After cutting the dome off the lamps and counting the LED's (81) it looks like these are 0.21w SMD 31lm per LED (manufacturer says 147lm/w). for bulbs really good little LED's. looks like these are cree 2835 J series or similar types. there are cree 4000k J types that are exactly 31lm wich would be exactly what each LED should produce. (2500/81).
Plant in Soil Date was 05 june. 14:00
Today, 2 Days and 10 hours, (58 hours) after planting in soil The 2 Gelatos came to life:) and one Kryptonite
basically 3 full days including soaking time.
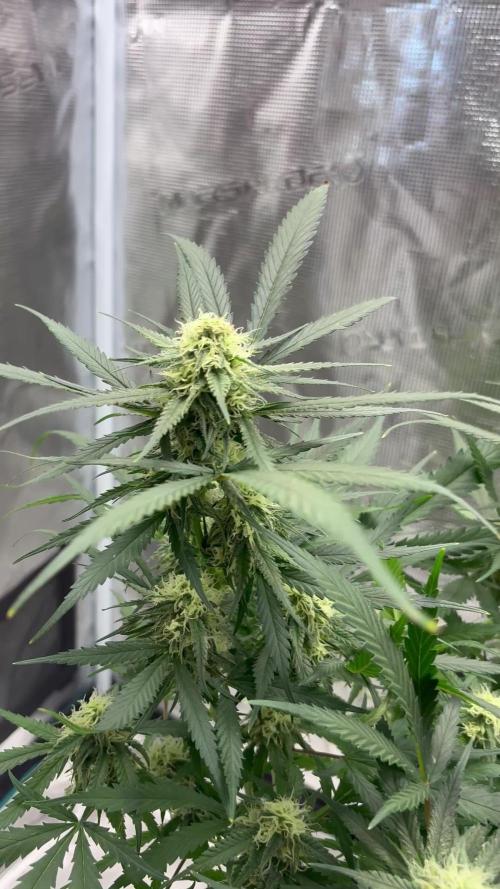
08.06 at 1:30 is the beginning of VEG Day one
We will give them 24 hours light.
day 5 after waterglass. Berries still no sign of life.
lamp is at 30 cm distance. no signs of stretching.
At Day 5 Veg we located the berry seeds and put them into paper towel, cracked them open and scraped the shell. we have enough plants now but nothing to choose from in case a plant has weak genes. So we hope a few berries will make it. probably old Seeds.


Likes
9
Share


@SgtDoofy
Follow
June 26
Getting bigger and bigger! Makes me wonder if I should flip her to flower here soon to control the size since she's not an autoflower which is usually smaller, genetically. She hasn't used up all of the nutrients in the bucket yet either.
June 27
Plant was a bit droopy, so a half gallon of PH'd water did the trick.
June 30
Some lower leaves are getting yellow and dying. I'm taking that as a sign that the soil is almost out of nutrients. Mixed up a 1/8th strength of General Organics GO Box nutrients (week 1 to avoid nute burn), but upped the CalMag to 1/4 strength. Fed one gallon at a PH of 6.7 to slight runoff.

Likes
8
Share


@Franz1234567
Follow
We are in week five. I was a little embarrassed because my girls reacted to the stress by shrinking. Now the situation is perhaps consolidated and we are gaining weight. They will be such tiny beauties, I really hope.
pH still unstable (5-6), EC of rainwater supplemented with a mix of organic fertilizers to a value of min. 1.2-1.6
The girls look healthy so I cuted some leafs but only so much, as the all tops have good position for light source.

Likes
11
Share

@eldruida_lamota
Follow
Que pasa familia, vamos con la segunda semana de floración de estas Gomu Gomu Mango feminizadas de HighBreed.
Vamos al lío ,se colocaron en macetas de 7 litros definitivamente.
El ph se controla en 6.0 , la temperatura la tenemos entre 24/20 grados y la humedad ronda el 50%.
El ciclo de Floración puse 12 horas de luz, el foco está al 50% de potencia.
De momento va creciendo, tiene buen color y va progresando.
Comentar que esto sufriendo estrés hídrico porque bajo par de grados por la noche y no chupo bien , pero esto al tanto, solo espero recuperarlas esta semana.
Gracias a Agrobeta por el kit para la temporada, unos jefes, siempre apoyando 💪.
- os dejo por aquí un CÓDIGO: Eldruida
Descuento para la tienda de MARS HYDRO.
https://www.mars-hydro.com
Hasta aquí todo, Buenos humos 💨💨💨
Likes
15
Share


@SouthernOnions
Follow
All is well here in week 10 although I'm starting to notice some possible nutrient burn or deficiency. Some of the foliage on plant 2 and 4 are looking a little rusty speckled. It's probably too late to correct the issue but if anyone has any advice on that I'd much appreciate it! Plant 1 is starting to do her thing, she's definitely stunted and may take an extra week or two to finish out guess we'll see! I've started late bloom feeding schedule which consists of 1.5 grams per gallon of B1&B2 as well as 3 grams per gallon of FullTilt from FloraFlex.

Likes
2
Share

@ProfessorWeed
Follow
Sie saugt das Wasser gut weg.
Alle 2 Tage gibt’s 1,5L Wasser PH angepasst.
Die Tribe wiegen schon ganz schön was.
Bisher wirklich sehr empfehlenswert der strain.
Mit einer besseren Erde hätte sie sicher noch mehr an Maße drauf packen können.


Likes
99
Share


@DevilsBud
Follow
Week 1 Blackberry moonrock
1 out 2 beans came out .
Still to small to give any info so grow fool 😜
So this run will be a 9 plant grow
With 6 different strains
23/9/21 transplant complete mix some Easy Boost Organic Nutrition with my Plagron batmix work great last time also made video
Happy growings Growmies


Likes
12
Share


@DeepRootsGrowTrees
Follow
MIMOSA by ROYAL QUEEN SEEDS
Week #10 overall
Week #9 Veg
She's about 19 inches tall and looking good it's hot🔥 outside but she's dealing with the heat. Stay Growing!!
Likes
10
Share


@Dirty_rich
Follow
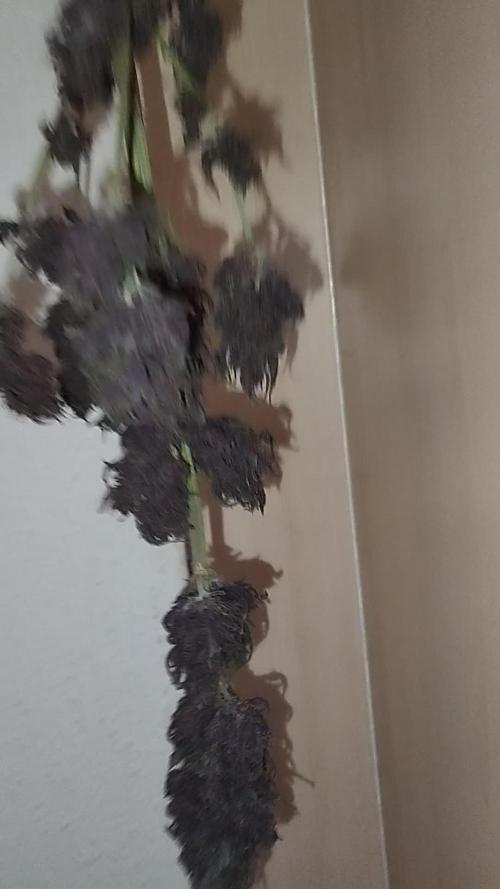
Etapa final de engorde, me está sorprendiendo el engorde final.
Olor muy tenue pero delicioso a limon dulce y un fondo a pino.
En 1 semanas más calculo estar cosechando

Likes
3
Share


@Earthsower
Follow
Not much water just a drizzle and she seems to be doing better this week. She is only about 10 cm but she looks like she’s co


Likes
13
Share


@Ilbuonvecchio_Jolly
Follow
Buone notizie: iniziano a fiorire, quella più indietro sta raggiungendo le dimensioni delle altre
Cattive notizie: mostrano segni di troppa acqua e non si stanno alzando molto, ho paura che vada ad influenzare il risultato se non risolvo il problema dell'acqua
Processing
Likes
13
Share


@ladyjane
Follow
7/11 - Top dressed all with Foundation Grow, Foundation Uprising, Oregonism XL, and Nitro Bat Guano. Watered w/ RO water & Extreme Serene. They are looking great.
7/12 - Fed with liquid nutrients today followed by some selective defoliation. Also adjusted the LST and added a little coco mulch.
7/14 - Watered with plain RO water and added Mosquito bits for pest prevention. Also did a foliar spray of Ancient Amber. They look very happy and healthy.

Likes
91
Share


@MrCOCO
Follow
The girls gain mass and mature ... 🍃🍃🍃Everything is going well, I think that day 60 will be over🍃🍃🍃 ... Now only the water...🍃🍃🍃Enjoying the view... 🍃🍃🍃


