The Grow Awards 2026 🏆 


Likes
Comments
Share
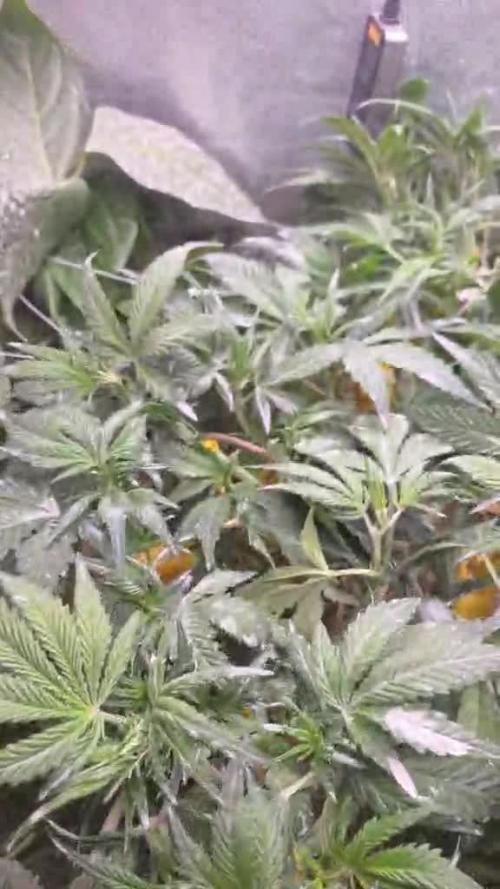
@terpproducer
Follow
👇 This week:
---
Watered again but this week i started using alga bloom instead of grow + Calmag
PPFD at canopy height approximately 450-600, VPD ~1.1 - 1.3
Last defo before flower + lollipopping
Running autopot reservoir with PH 5.5 (Cleaning once a week)
Feeding autopots inside the tray with 1L plagron alga 5ml/L + additives (once a week)
Testing Orange Creampop #2 on HLVd because she is much smaller than her sisters
---
Happy growing and thanks for checking out my report! I really appreciate you! 😁💪🙏


Likes
241
Share
@Tropicannibis_Todd
Follow
💩Holy Crap We Are Back At It And Loving It💩
Growmies we are at DAY 42 and she's just killing💀it👌
👉We are in full on flowering , gotta say the pink to redish hairs look amazing , not to mention the frost 👈 even the stems and branches are sticky icky 👈
OMG I LOVE THE PINK PISTOLS 👈
So Shit , I gave them just a tad to much nutes on the first few feeding 👈 But I have since fixed it
So I'm still doing some low stress training 🙃 and some defolation 😳
Lights being readjusted and chart updated .........👍rain water to be used entire growth👈
👉I used NutriNPK for nutrients for my grows and welcome anyone to give them a try .👈
👉 www.nutrinpk.com 👈
NutriNPK Cal MAG 14-0-14
NutriNPK Grow 28-14-14
NutriNPK Bloom 8-20-30
NutriNPK Bloom Booster 0-52-34
I GOT MULTIPLE DIARIES ON THE GO 😱 please check them out 😎
👉THANKS FOR TAKING THE TIME TO GO OVER MY DIARIES 👈
Processing
Likes
7
Share
@Smiffy
Follow
Flowering started, plant stretching, have defoliated to allow light to lower canopy, light smell in the tent, good smell on touch of stems. Very light purple colour in centre of leaf fan/top of fan leaf stem

Likes
12
Share
@kkkkkkkombo
Follow
Looking good. Moving forward with just water. She is definitely starting to stink up the tent.The buds have a classic og smell with a nice pine backer and are quite dense. February 10th is day 80 will see if I take it that long.

Likes
15
Share
@LittleBigTrees
Follow
Not much sun this week so things have been slow.
I took 4x dos si dos cuttings and 4x mimosa cuttings for my next indoor grow as I figured it would be better to grow from a mature plant cuttings over seed started plants.

Likes
Comments
Share
@Comfrey
Follow
Beim LST habe ich den Spitzentrieb versehentlich angebrochen. Sie wird es überstehen, hatte durch den Knacks allerdings ziemlich Stress.

Likes
8
Share
@JohnnyBarrel
Follow
Week 14 - July 30
Last vegetation weeks. On 4 plants: 2 healthy / 2 injured.
Royal Moby and GMOxZombieK were seriously contaminated with aphids. To stop the propagation I did many washes with black soap and neem oil but may be I treated at the wrong time: morning, even soon; is too late by a hot sunny summer day. I think the 2 plants are suffering from sunburn… and they still have aphids…
I stopped soap treatments and try another recipe which seems working very good against aphids and revitalizing all plants: spraying Garlic + Laurel
-I cooked separately during 1h garlic (5 cloves) and Lauren leaves (12) in approximately 1L of water
-filtered the preparations and wait 4 days
-for 1L of water to spray: 15cl garlic mixture + 5 cl laurel BEWARE: checking Ph… last year I burned plants with garlic + chili mixture: it was catastrophic.
Brake Pad Breath and Flash Back are beautiful and healthy. Aphids aren’t interested by this 2 plants.
I did preventive treatments Neem oil and soap but not so much. Good reaction to the Garlic+Laurel.
Plants are bushy, densely ramified. Deep green color, the female sexual signs are visible.
Ready for flowering.
Watering with a little bit of nutrients 1.5L/plants each 2 or 3 days
Defoliation
Now I quit the “garden” for 7 days…traveling to Amsterdam (NL) and Prague (CZ) for holidays.
I installed automatic watering systems (Blumat) and sticky traps, locked the veranda, programmed the Ventilation and crossed fingers.
I’m not afraid about heat or dry…. More about pests and diseases….and rubbery too cause I have 6 auto flowering quasi ready.
I’m writing this in Prague, returning in my country to the west side in 2 days.
After smoking lot of joints in Amsterdam (3 days)
Amnesia haze
Tangerine dream
Kush Mints
Super Lemon Haze
Dynamite cookie
Intergalactic toad
Super Silver Haze
In Prague Weed (THC) is prohibited. But I discovered that you can buy pre roll joints (100% pure hemp-Thc-sativa, hybrid etc…) in strange gifts shops for 6€. It’s really not the best weed but it’s Strong and easygoing.


Likes
2
Share
@Dameon0803
Follow
Day 29 - She's bushed out to the fullest. This is a controversial, but I think essential part of growing. Trust me, what i had removed would have been a waste. I gave all sites there chance to achieve my desired height. Those that didnt, got the chop.
Day 30 - Now that is a recovery! I will now focus on maintaining an even canopy. I will only pull down part of the plant that stretch faster.
Day 31 - Wettable sulfur and Cali Carb before bud production fully sets in. Wettable sulfur will help with some pest management, not that I have any, powdery mildew, also not an issue, and increases terpene production. Cal Carb is a perfect pair for this as its a readily available source of calcium and carbon dioxide. Calcium seems to be a common deficiency in flower, and the plant loves CO2 during flower. This seems like a no brainer! She also got a nice feeding with some top dresses and water soluble nutrients. Loving the evidental daily changes this plant can produce!
Day 32 - Continuing to pull branches down and move leaves for some of these lower sites. Can't help but to have the song, 'Let It Grow', from the Lorax, run through my head everytime I try to move leaves to help these lower sites get light, lol.
Day 33 - Opening up as much as I can and tried to keep it all above the net. Vigorous rapid growth in both the plant and cover crop.
Day 34 - Showing what it looks like before I take each days pic with the leaves tucked already. Getting hard to keep these leaves down! There's a few lowers I'll likely be snipping to help focus energy to better sites.
Day 35 - Let's just take a moment and enjoy these beautiful flowers this amazing Common Buckwheat cover crop is showing off. If you dont know what Common Buckwheat does when growing in your soil, it helps gather phosphorus, attract beneficials, and can be cut down to make compost. Is this even the same plant from the beginning of this week!? Can't wait to see these buds start to stack!
Likes
151
Share
@BioBuds
Follow
'Not all those who wander are lost'
What started out as an experiment, turned out to be an adventure of epic proportions. What hangs here behind me smells like the weed I knew in the 80's, skunky and full. But look at those buds. DAAAAANG....
These are the biggest buds Ive ever grown, I didn't know what darkness precisely did before.... now I know... My god after a few days they oooze cristal liquid from all its holes.
They are greasy and sticky, full of weight and I think well hit the 300 grams per plant with this one, taking our total to 600 grams what would be 2 grams per watt used.
If that's so, Ill never use another light again! Thank you Mars Hydro for letting us try it. And by god so should anyone wanting to up their growing game.
Well keep you posted with the dried results and smoke report!
For now thanks for checking us out again and see you soon
X
Bud and Sunshine!
Likes
14
Share
@Professor_Chaos
Follow
Beginning of week...
Well, I had to work late last night.. So, she wasn't watered for 24 hours.. I have been having to water/feed 2 to 3 times a day due to the media drying out.. The roots are insane in the cup.. Alot aLoT ALOT of fuckin roots.. This is my first cup grow that had this much roots.. So yeah, I could see her drinking like a mf.. Which she does.. She is happy and healthy... Besides the underwatering today.. I couldn't be more happy with the way this girl is growing. After 7 days of 12/12 and the tops are starting to form pistils.. Next week should be epic pistil growth by the way she's been growing so far.. Will update when she perks up from the underwatering..
Later that day..
Shit.. She perked up.. But not enough to show a full recovery pic.. I watered when I took the underwatered pic and before lights went out.. That was only about... 4 hours.. Usually the girlies perk up after about an hour or maybe 2.. I'm sure she will be fine in the AM.. Oh yeah I forgot to add in the veg cycle I was adding 1mL per L of water of Silica.. So that should have helped her build up a good immunity to my abuse.. This is the only hiccup so far in the grow.. No more stress! Will update on the issue in the AM with pics whether she fully recovered or not
24 hours after decovering she was underwatered...
She perked back up.. I forgot to mention that I have been bending the tops to help the lower branches stretch up some.. I remember reading somewhere that is another form of LST, I believe. I'm pretty much just bending the top 2 - 3 nodes to point straight down.. Which is just enough to not snap the top completely off.. When I release the top she stays pointed pretty much at 90° away from the center of the plant.. A few more side branches have almost caught up to their main tops. I read that it kinda like tricks the plant into thinking she's topped 'in a way'.. I feel like it just stresses the branch upward from where the most bending is at.. And the side branches are not being stressed at all so they keep growing/stretching at normal speed, if not a little faster, while the top above the bend has been stressed and slows down, if not stops completely. Just my 2 cents on the dealio.. Just bend the main tops downward 180° from the center of the plant, so that when you release the tops, they stay bent over at 90° (or tied like LST) and let the bottom branches get all the light.. After a couple hours, the tops will have probably already pointed back upward..😁
The capacitor on my home AC went out.. Temps in the tent got up to 90° F.. Leaves were pointing upward.. Praying.. But also canoeing.. Luckily I checked google and youtube on how to fix it.. I fixed it in under 15 mins.. Got the temps back down to normal and just made sure I kept her good and watered thru the heat stress. She is good now tho. The pics for today were 6 hours after seeing the heat stress.
When I say LST this week.. Its just bending the tops down as I stated earlier in the grow.. I even removed the ties that I did have.. I shouldn't have done that because the tops kinda bunched together.. Oh well.. Live and learn.. Shouldn't create any issues.. Its easier to water now.. i was using a 1 fl oz turkey baster that worked very well.. But also time consuming.. Now I can just pour straight out of the powerade bottle I use to mix and store nutes and water.. I never keep anything mixed for more than 2 or 3 days at the most.. I have just ordered a bunch of hydroponic stuff.. And organic stuff... I can't run both at the same time.. I don't know which to try first.. Im thinking try hydro first.. Then organics because I think organics MAY be where I end up but still wanna try hydro to see how it ends up.. Hmmm...
Went ahead and lollipopped her and bent the main tops down.. One branch kinda snapped so I think it was pretty much supercropped lol whoops.. Didnt break the skin tho.. I dont really care for defoliating alot.. But I always end up doing it anyway.. I need to stop lol

Likes
332
Share
@OrganicNature420
Follow
Germination date 🌰 03/03/2021
Day 36 🌱 11/04/2021
Strain 🍁
Purple Matcha, Humboldt seed bank
Nutrients 💉
Advanced nutrients
PH perfect sensi grow A+B (veg)
PH perfect sensi bloom A+b (flower)
B-52 (through veg until week2 of flower)
Voodoo juice (🖕🏻)
Tarantula (🖕🏻)
Piranha (🖕🏻)
Sensizym (all the way through)
Rhino skin (🖕🏻) add first leave for an hour
Big bud coco (week2+ of flower
Bud xfactor (🖕🏻)
Nirvana (🖕🏻)
Bud igniter (first 2weeks of flower)
Overdrive (last 2weeks of flower)
Flawless finish (flush week)
RockHoldings Rockresinator(week2+ of flower)
Vitalink calmag
Set Up
⛺ amazon special 1.2m x1.2m
💡 spiderfarmer sf4000
📤📥 AC infinity 6inch
💧 10lt dehumidifier
Notes🗒️✏️
Well impressed with this for my first ever coco grow 🌱👍🏻 shes looking so good. Humboldt producing some good quality seeds. I did pay a small fortune for them but looks well worth ever buck spent! Rising the ec up this week to 1.0 and will leave it there until I flip. Pretty sure I could go more but I just dont think it's worth it although I do have the best master grower at hand (PharmaZ) follow his account 👍🏻🌱
Cant really fault Advanced nutrients with this strain. I'm running 9 different nutrients of theirs and it's working out nicely no hic cups at all. Now I've seen online somewhere that you cant add bud factor x with other advanced nutrients when flowering? Is this true and genuine help would be grateful
Happy growing everyone 🌱🍁


Likes
2
Share
@HighOhioAn
Follow
Absolutely one of my favorite girls this year loving the fade. She is on her final flush. Cannot wait for smoke report.🙏🍻🔥💯
Likes
11
Share
@Ninjabuds
Follow
The Blackberry moonrocks plants are beasts. They're so thick and sturdy, and they're covered in buds. They're not stretching much, so it's gonna be a really tight bud on top. I'm excited to see how they turn out.
Well, it's Christmas again. This year feels a little different, though. Maybe it's the snow blanketing everything, or the way the tree lights up the whole living room. Either way, it's cozy and warm, even when it's freezing outside. I'm really looking forward to seeing what Santa brings. I hope I get that new video game I've been wanting. But most of all, I can't wait to spend time with my family. We always have so much fun
This past week was a good one for the plants. They started the first week of their stretch, and they've already grown a decent amount. I can really see them filling out. It's cool to watch them grow so fast. I can't wait to see how big they get by the end
I always get a little worried at this stage, like they're not gonna get as big as I want them to. But then I remember how they always end up surprising me. By the end, they're always perfect.


Likes
7
Share
@Ieiogrow94
Follow
Eccoci qui…
In questa settimana attendiamo la maturazione degli altri cloni che dovrebbe essere molto vicina!!!
Grazie a tutti per il supporto 💚🔥🌲
Likes
5
Share
@GREENPHOENIX6262
Follow
*Day 2 - 09/28 - Germination*
Seed is germinating inside a coco coir pellet, update will be given by the end of this week. Thus far all seems to be running accordingly.
*End of week 1 update*
Thus far this Critical+2.0 germinated amazingly.
Cracked shell in 2 days - Seeds germinated in a coco plug
Likes
11
Share
@sweetkaya
Follow
Day 105 - Next will be the last week of the lady. I'm planning 3 days of plain water and then other 3 days of darkness and no water to frosten up the buds 🤞🏼


Processing
Likes
8
Share
@taylordarling
Follow
I am so glad I decided to do some low stress training!! After that one feeding at the end of last week the plant truly bounced back and showed no more signs of deficiency problems.. 😅 Because I started some early LST I began to see the much smaller nodes develop over this week and it started to give me hope lmao. There was not only a difference in the vibrancy of the green leaves but there was also a difference in the texture of the leaves as well! The ones that were damaged were thicker and more rough, while the new healthy leaves were much softer! For now I will leave some of the damaged leaves on because I don't want to strip her too early but periodically over the next couple of weeks I am going to start pruning and training her more (especially since she's a keeper).
I also went ahead and started giving my girl a foliar spray feeding of diluted garlic & onion peel water which I plan on continuing with while in veg.
