The Grow Awards 2026 🏆 


Likes
Comments
Share
@WuTangVibez
Follow
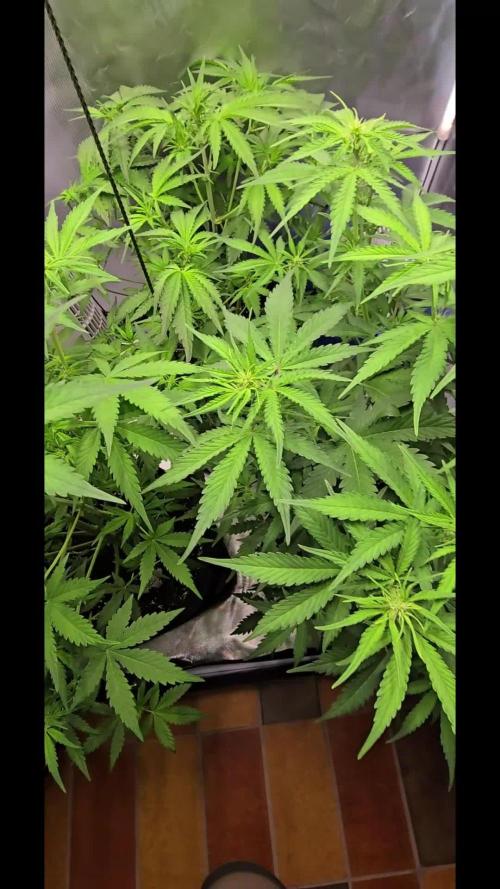
I am really Happy with this Strain, it's growing so beautiful, this week she Streched so much and started now to pack up as well. You can see even the first signs of frost coming up. I hope you Like my Grow. Im looking forward to some beautiful Buds in the near future !

Likes
5
Share
@Greens
Follow
Been growing for a while but I need to keep track of things better. One plant has some browning leaves so I’ll research that this week.
Week 6
They’re doing well for the most part. Pistols coming in. They love high ppm and drink plenty.
Likes
307
Share
@Ju_Bps
Follow
Hello growmies 👩🌾👨🌾🌲🌲,
👋 Burning look under control, so keep water only for this week, will use nutes next week.
💪 Start to be really times to defoliate, but I miss time this week, will be for next week!
💧 Give water each 2/3 day
2 l Water Only
PH @6
💡Mars Hydro - FC 3000
50% 28 cm
Mars Hydro Fan kit
Setting 8
Have a good week and see you next week 👋
Thanks community for follow, likes, comments, always a pleasure 👩🌾👨🌾❤️🌲
Mars Hydro - Smart FC3000 300W Samsung LM301B LED Grow Light💡💡
https://www.mars-hydro.com/fc-3000-samsung-lm301b-led-grow-light
Mars Hydro - 6 Inch Inline Fan And Carbon Filter Combo With Thermostat Controller 💨💨
https://www.mars-hydro.com/6-inch-inline-duct-fan-and-carbon-filter-combo-with-thermostat-controller
Anesia Seeds - High Mars 36% THC🌲🌲
https://anesiaseeds.com/product/high-mars/

Likes
10
Share
@extraterrestrial1
Follow
-------------------------------------------------
Day 22
Water: N/A
Humidifier: 45% (LOW-MIST)
Fan Speed: High
Light on @ 19:00 (26.4° celsius @ 48% RH)
Light off @ 13:00 (22.8° celsius @ 56% RH)
-------------------------------------------------
Day 23
Water: N/A
Humidifier: 45% (LOW-MIST)
Dehumidifier: On
Fan Speed: High
Light on @ 19:00 (27.6° celsius @ 46% RH)
Light off @ 13:00 (27.1° celsius @ 51% RH)
-------------------------------------------------
Day 24
Water: N/A
Humidifier: 45% (LOW-MIST)
Dehumidifier: On
Fan Speed: High
Light on @ 19:00 (26.2° celsius @ 51% RH)
Light off @ 13:00 (22.7° celsius @ 40% RH)
-------------------------------------------------
Day 25 (Feed day: 15 tbsp Worm castings + 5 tbsp 2-8-4 Gaia Green Power Bloom)
Water: 0.5 Gallon RO water + 5ml Remo VeloKelp
Humidifier: 50% (LOW-MIST)
Dehumidifier: On
Fan Speed: High
Light on @ 19:00 (27.1° celsius @ 48% RH)
Light off @ 13:00 (23.0° celsius @ 50% RH)
-------------------------------------------------
Day 26
**LST**
Water: N/A
Humidifier: 50% (LOW-MIST)
Dehumidifier: On
Fan Speed: High
Light on @ 19:00 (26.8° celsius @ 48% RH)
Light off @ 13:00 (23.5° celsius @ 50% RH)
-------------------------------------------------
Day 27
Water: N/A
Humidifier: 50% (LOW-MIST)
Dehumidifier: On
Fan Speed: High
Light on @ 19:00 (27.7° celsius @ 48% RH)
Light off @ 13:00 (23.4° celsius @ 50% RH)
-------------------------------------------------
Day 28
Water: N/A
Humidifier: 50% (LOW-MIST)
Dehumidifier: On
Fan Speed: High
Light on @ 19:00 (26.7° celsius @ 50% RH)
Light off @ 13:00 (23.2° celsius @ 50% RH)
-------------------------------------------------
Likes
16
Share
@Foggedaboudit
Follow
10 weeks total for the first phenos and a bit more than 11 for the last one! I could have easily gotten double the projected yield on these had I not neglected them but whatever I pulled is rock hard, dusted in sugar and smells absolutely stupendous! You did it again FastBuds!
Processing
Likes
32
Share
@Ganjagrandaddy
Follow
Day 43 : All of these girls are doing great now. They have been topped and quadlined and we have a few breaks to heal along the way but all in all doing good. #7 looks the most productive so far but they are very close to each other on vigour. They have been given MC to this point but once in their final pots , its water and teas for their full cycle only. I have finished the rebuild with better insulation and a lot more reflective surface for this run so let's see if I can squeeze another 41oz + from this run.
So far a very impressive tester batch. I am hoping to flip them in about 2 weeks time so let's see how they do.


Likes
43
Share
@biggreens420
Follow
Got some better shots without light and a little video my cam is a bit shit got a video of trichs also in there girls seem to be flushing well started flushing the quick one later than the others as wasn't as developed. Took the 2 tester buds of very bottom under the plants on the first day of flush to try estimate how long to flush for........last pic and vid before harvest next uploads will be harvest hopefully

Processing
Likes
13
Share
@GrowGuy97
Follow
Everything is going great, just waiting on flower tent to finish & these ladies will be going straight into flower😍✌️🏼🌱
Day 40 first day of flower, everything seems to be going ok so far!
Day 41 Can see they are starting to stretch!😍


Likes
2
Share
@MicroHidroGrow
Follow
18 litros.
Feeding hybrids..........................26g.
Roots (Miner)..............................90ml
Bud Candy (Advanced)...............40ml.
Esta semana no pude sacar fotos. Pero hice un video mostrando el estado de las flores.

Likes
38
Share
@Tropicannibis_Todd
Follow
👉Alrighty Then👈
👉Cherry Punch F1👈 week 4 of flower
We had some real nice growth this , had to do a little leaf management👈 We be in full flower mode .....
Everything is looking good 👍Having issues due to using my well water , it's hard so I'm having slight issues but I am on it .....
So ive up'd the nutrients to accommodate pre flower .....
Soil by Promix
Nutrients by Cronks
Lights by MarsHydro.ca FC4800 X UR45 X Adlite Deep Red And Blue
Tent 4x4x6.5 & Equipment by MarsHydro.ca
High reflectivity inner mylar
Thick Oxford fabric
Smooth heavy duty zipper
Sturdy metal frame
Zipper blackout cloth
Good anti light leakage performance
The 6in Inline kicks ass moves alot of air
●Blue Light Effect:
Blue light shortens internodes, resulting in shorter, stronger plants, ideal for supporting fruit development later. During vegetative growth, blue light promotes lateral branch development effectively.
Well this should be fun 🙃
Thanks to all my growmies out there for stopping by its much appreciated 👈
👉Happy Growing👈
Likes
4
Share
@NSABND
Follow
Welcome to Day 36 .... first Day of pre flowering 😍🙏👍
Day 37 .... massive leave cuttingto get space for the queens 😶🙏
Day 38 all strains forgive me the massive leave cutting 😃👌🙏
Day 39 everything seems to be ok 😍🙏👍
Likes
15
Share
@Waveform
Follow
Not much to say about this real first grow week’s start. Everything looks ok, steady growth at 40% light.
I had to restart the control app a few times, therefore the broken graphs.
At night times, the control software tries to attain optimum humidity rather than optimum VPD. That’s why VPD is dropping when the lights are out. CO2 is back to baseline – really wonder what the reliable values are …
I found I have to silence the blowers when a timelapse photo is being taken. The shaking you see at the beginning of the grow video should not appear, or to a much less degree, in the future.
Day 13 (July 30th) shows good, steady growth. Leaves are a bit spotty, although less then the processed images show. Something to be worried about? I would not currently …
All are developing their 3rd nodes now.
The controlling Raspberry Pi crashed last night when I tried to access it remotely … ;( – looks like the Connect software is in need of an update.
The leaf temperature sensor is now really aimed at lady-to-be nr. 1’s leaves.
Nothing to change that I see. I won’t cut the top yet, just watered the outer circle of the big pots slightly to encourage root growth.
Day 14: Nice growth. First plant is now at 11 cm, and at 12 cm on day 15. Nothing special to report so far, except for I had to move the internal camera a bit upwards to keep little lady #1 in focus.
Day 16 and last day of this week (Aug 2nd): The young ladies are now at about 14 cm tall. Growth looks very compact though. I think the two inside girls will lose their heads next week; I’d still prefer to have one or two more nodes available. Pictures of this day are taken at the end of the plants’ day. Notice their leaves are pointing upwards, which should be a sign that they want more light. I turned the lights up by another 20% for a total of 60 W now. Weather was pretty hot the last days so it wasn’t possible to stay in optimum VPD range but as long as growth is this satisfying I don’t mind.
I will water them slightly at their next day start. Outside plant’s soil humidity might still be at around 58% officially, but drying starts at around 40% with this measurement and the sensors are placed quite closely to the stems so outer soil is dryer. I am preparing the plant water with some additions and a frequency imprint suing some Solfeggio and Schumann frequencies.

Likes
26
Share
@Stash074
Follow
This week was good..the ladies are in better health overall. Did some defoliating throughout the week and also did a flush 3 days ago with florakleen.gave em a light feeding today.Just finished setting the timer. Will be flipping them into flower tomorrow at 8 am ..will keep yall updated in my next upload..Happy growing 😎
Likes
15
Share
@tokesly
Follow
Spent eternity trimming! So this is why people call it trim jail.
Yield:
TM1: 205g Dry | 61g trim - Best growth and color, 7.2 oz yielder!
TM2: 177.5g dry | 72.5g trim - Frosty and colorful fruity
TM3: 154g dry | 67.2g trim - Even frostier than TM2 but no color more gas
TM4: 71g dry | 33.6g trim - Super larfy, still decent taste
TM5: 65.3g dry | 19.3g trim - Best Flavor, super gas and sweet
Total: 672.8g dry (23.8 oz) | 253.6g trim (9 oz)
Flavor is a gassy guava candy with sweet cake after tones. Frost and color is up there, structure is lacking in cola formation. There's a lot more popcorn nugs than hoped for. Definitely due to poor defoliation, lack of scrog, and late PK. Also
Besides that, a 672.8g yield would be ~1g/watt - an ideal goal for any starting growers


Likes
Comments
Share
@Samsemilla
Follow
Letzte Woche vor der Ernte.
Es wird sehr bunt, leider etwas zu bunt.. die Fäulnis hat Opfer gefordert.
Aber das war natürlich absehbar aufgrund von Struktur der Blüten, geografische Lage, Jahreszeit, Wetterverhältnisse usw.
Gekeimt am 10.06.24 geerntet am 16.10.24
In Betracht aller Gegebenheiten und Faktoren bin ich mit dem grow relativ zufrieden.
Ein sehr schöner Strain, ich freue mich drauf ihn nochmal Indoor zu grown.
Zum Glück habe ich Stecklinge geschnitten. 💚
Likes
35
Share
@MadeInGermany
Follow
Info:
Unfortunately, I had to find out that my account is used for fake pages in social media.
I am only active here on growdiaries.
I am not on facebook instagram twitter etc All accounts except this one are fake.
Flowering day 1
since time change
to 12/12 h.
Hi guys :-) .
The time has finally come 👍
You have been switched to 12/12 hrs and are ready to flower.
Of course, cuttings were cut beforehand to keep the genetics.
For 4 days now she has also been getting Fast Buds from GreenBuzzLiquids.
They were also sprayed again with GBL Fast Plant spray.
She is very healthy and I am excited to see how she gets going again in bloom :-).
This week it was poured twice with 1.2 l each time (for nutrients, see nutrient table above).
Then I filled canisters with fresh osmosis water for the next few weeks 👍.
The tent was cleaned and every plant was checked for health.
At the moment I am tinkering with the ventilation because there are currently 4 fans with 4 activated carbon filters running, which I want to make more efficient by putting a hose through 2 tents.
These are the things about which you desperately at the beginning but learned from them in the end.
I wish you all a nice week.
Stay healthy 🙏🏻
You can buy this Nutrients at :
https://greenbuzzliquids.com/en/shop/
With the discount code: Made_in_Germany you get a discount of 15% on all products from an order value of 100 euros.
You can buy this Strain at :
https://greenhouseseeds.nl/
☝️🏼☝️🏼☝️🏼☝️🏼☝️🏼☝️🏼☝️🏼☝️🏼☝️🏼☝️🏼☝️🏼☝️🏼
Green House Seeds Company Cup Clone 🏆
Type:
Wonder Pie
☝️🏼
Genetics:
Wedding Cake x OG Kush
👍😍
Vega lamp: 2 x Todogrow Led
Quantum Board 100 W
💡
Flower Lamp : 2 x Todogrow Led
Cxb 3590 COB 3500 K 205 W
💡💡☝️🏼
Earth: Canna Coco Professional +
☝️🏼
Nutrients :
Green Buzz Liquids :
Organic Grow Liquid
Organic Bloom Liquid
Organic more PK
More Roots
Fast Buds
Humic Acid Plus
Growzyme Big Fruits
Clean Fruits
Cal / Mag
Organic Ph - Pulver
☝️🏼🌱
Water: Osmosis water mixed with normal water (24 hours stale that the chlorine evaporates) to 0.2 EC. Add Cal / Mag to 0.4 Ec Ph with Organic Ph - to 5.8
