The Grow Awards 2026 🏆 


Likes
14
Share
@Naujas
Follow
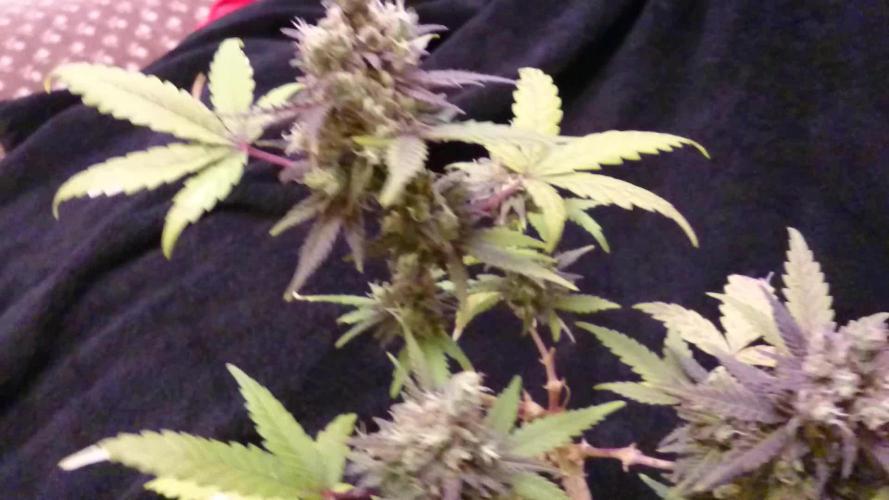
79 days!!!!! and the harvest is already harvested :) The whole growth until week 6 went very well, then the girl got a little worse, (I think it's my mistake, which I described in previous weeks), but besides all that she managed to ripen perfectly, matured stiff flowers, full of shiny sticky trichomes with a very, very sweet aroma ;) 210 gr of wet buds, I also collected a lot of sugar leaves from which I will make bubble hash :) I can't wait to taste it :) this is my first trip with Sweetseeds Looking at the flowers I understand that I will definitely repeat it :) I will leave more feedback after the smoke review:) good luck to everyone.

Processing
Likes
2
Share
@BigHorn
Follow
First week budding. Definitely starting showing signs of female the first 2 days you can see the hairs com in at the bot of the stocks. Looking forward to next week


Likes
8
Share
@Pirangueiro
Follow
they are amazing, I think that in 1 or 2 week they will be ready for harvest! 🙌🏻🙌🏻🙌🏻
Likes
10
Share
@PolezGardn
Follow
week three flower everything looks fine so far :D
eight days after defoliation
I water them with 1.5l every 48h
the light I use was set to 80% and it hangs 80cm away from the tops
gelato 1 threw some balls, but I removed them as soon as I saw them, I'll keep watching it!

Likes
11
Share


Likes
1
Share
@PatriciaGant
Follow
Dane, We all should help one another.
Human beings are like that.
We should live by each other’s happiness - not by each other’s misery.
We don’t want to hate and despise one another, share the Joint.
And mother earth is rich and can provide for everyone.
We can Grow enough Happiness, In this paradise, there is room for everyone.
We only exist to bring joy into the world and The way of life can be free and beautiful,
but we have lost the way.
Grow High and Give the world A smile.
At the end we own nothing more then all our memories, lets make them amazing for everyone,
nothing to lose only everything to win.
for those who come after, right.
A last kiss goodby, a second one, softer and long as a sign, that you are woth it.
That Everyone worth, who loved and given.
Enought Hippie Talk, now have a nice day and an even better grow, thx for watching by.
((From Clone 🌿
week report:

Likes
24
Share
@el_cultivito
Follow
Plants started getting real bushy a couple of days after topping.
Low Stress Trained all the plants at the end of the week by tying them down using rubber coated garden wire to spread out the newly grown tops.
Also spaced out each plant evenly on the tray and turned on the other 2 PB2000 LED lights I had ready to go.

Processing
Likes
8
Share
@MrAutogrow
Follow
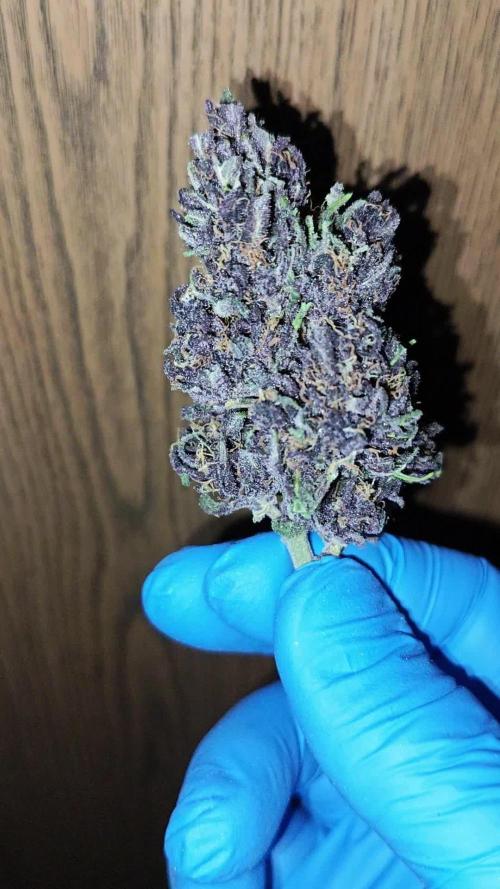
She is really packing on the weight. She smells strong like gas and cookie. I can also see hints of purple starting to come out. She is now getting a big dose of koolbloom as well as a co2 supplement thanks to TnB Naturals.

Likes
124
Share
@CBD_Sweden
Follow
2018-04-03. Week 22, day 3.
Remo Nr 1 is doing fantastic and she is a big and massive beauty.
The flowers/buds is growing bigger and bigger and smells strong of summer and earth.
I think she will yield a lot by the look of her right now.
Nr1 have grown 3 cm in height last week.
Nr 2 is still recovering and she is getting better but still dont look that good, but the flowers grows and you can start smelling her more and more.
I have faith in this girl and that she will produce some nice medicine.
Strain information.
Remo Chemo cannabis seeds by Dinafem Seeds belong to a feminised Indica-dominant marijuana plant born from a collaboration with the legendary Canadian cannabis grower Urban Remo, a real high-flyer within the international cannabis field. Remo Chemo, created by Urban Remo after crossing a UBC Chemo with a regular Bubba Kush male, is the genetics selected for developing this project. The results obtained when testing a cutting of such magnificent cross were so amazing that we backcrossed her to ensure the genetics was not diluted but remained pure and intact.
With this creation, we’ve managed to make Urban Remo’s favourite cannabis strain accessible to all: a potent and stable strain, with major therapeutic properties and high THC content.
One of the strains within this marijuana seed's genetic structure, UBC Chemo, is a really potent strain that, according to legend, was developed by some researchers from the University of British Columbia with the objective of alleviating the side effects of chemotherapy in cancer patients. Her extremely high THC levels not only make her a must for cannabis gourmets with a liking for mind-blowing genetics but they also confer a myriad of therapeutic properties on her. In fact, her effectiveness in relieving the back pain he is in contributes to her being Urban Remo’s favourite marijuana strain.
His YouTube channel has lots of subscribers and his strain reviews have become indispensable for most marijuana users. At Dinafem, we had long been itching to work with him. Therefore, we didn’t hesitate when the opportunity came up. When travelling to Europe, this world-renowned cannabis activist was surprised by the lack of Canadian cannabis genetics at international fairs. That’s why we decided to join forces with Remo and create a Canadian feminised strain that bears his name.
Morphology
Remo Chemo is a dense and sturdy Indica-dominant plant that must be evenly pruned, low branches included. At the end of the flowering, her dark-green leaves tend to acquire purplish hues which are sometimes so dark as to seem almost black. A real sight to behold.
Yielding capacity
Without her being particularly heavy-yielding, Remo Chemo’s crops are really potent, which balances the final outcome. Her buds are round, uniform and compact, noted for their remarkable density and amazing resin count. On top of that, the THC levels are high, easily exceeding the 20 %.
Cultivation
Remo Chemo thrives when grown in dry environments and provided with intense light. Thanks to the legacy of Bubba Kush, the lack of water is not a problem for her. However, if we want to boost her yielding properties, she’d better be well hydrated. As for the right amount of nutrients, we must ensure our plants are not overfed since this could be detrimental to the flavour’s intensity.
Aromas and flavours
The predominant scent is that of a classic Kush, i.e., strong and intense, lingering long in the palate and bringing to mind the typical classic Californian flavours. If we’re to be more precise, she also delivers hints of earth, petrol and black pepper. Her taste and aroma are simply delicious, almost instantly captivating those who smell her.
Results
Remo Chemo delivers a potent effect that, thanks to her high THC levels, helps alleviate the side effects of cancer treatment (vomiting and nausea), boosts the appetite and reduces pain. But Remo Chemo can be used for recreational purposes as well, with a really intense physical high. No doubt her effect being so amazingly psychoactive will delight THC-lovers.
1st prize −Indica category− at the 2017 Expogrow Cup.
1st prize −Indica category− at the 2017 Karma Cup (Canada).
Suitable for Indoors and outdoors
Sex Feminized
Genotype 35% Sativa/ 65% Indica
Cross Remo Chemo x Remo Chemo
Indoor flowering period 65-70 days
Outdoor harvest time Mid-October
Indoor yield 500 g/m2
Outdoor yield 1000 g/plant
Outdoor height Up to 250 cm
THC 24%
CBD 0.1%
-------------------------------------------------------------------------------------------------------------------------------------------
https://www.youtube.com/watch?v=Xc0tAt2nd3M
https://www.youtube.com/watch?v=Nrsq8_gK_Oo
https://www.youtube.com/watch?v=jmv8i106lZc
https://www.youtube.com/watch?v=IUiUIR_Wxqo
--------------------------------------------------------------------------------------

Likes
7
Share
@Gingobeaz
Follow
Und Ende!
75 Tage nach Einsetzen in die Erde ich die Banana Purple Punch fertig.
Die Terpene riechen sehr lecker. Wahnsinnig viel Ertrag kann ich nicht erwarten, um im Legalen Rahmen zu bleiben wirds trotzdem etwas zu viel sein. Insgesamt ein sehr schöner Strain den ich definitiv wieder anbauen würde!
Auch die Greenhouse Feeding Bio line hat mich absolut überzeugt.
Den nächsten Indoor grow werde ich allerdings auf Kokoserde mit Athena Pro line starten. Seid gespannt 🏼
______________________________________
And the end!
75 days after planting in the ground, the Banana Purple Punch is ready.
The terpenes smell very delicious. I can't expect an insanely high yield, but it will still be a bit too much to stay within the legal limits. All in all, a very nice strain that I would definitely grow again!
The Greenhouse Feeding Bio line has also absolutely convinced me.
However, I will start my next indoor grow on coco soil with Athena Pro line. Stay tuned 🏼
🍌💜🥊
Likes
7
Share
@FROZENGARDENER710
Follow
Without much to declare, organic runoff from the pots was at 200ppm, no nutrients were added in the last week, I increased air circulation, and harvested these plants on day 63 of flowering. I feel that if I wanted I could have left them longer, but one bud from one plant got infected with spider mites and I preferred to harvest everything to avoid infecting the others.


Likes
39
Share
@King_Green21
Follow
Everything looking good this week happy with the vegetative stage with the th Seeds original Bubblegum. Says they are an ibl strain so the genetics should be stable, which is less chance of 10 different phenos ( update me If I’m wrong here, still learning )
Day 54 - today I did the last defoliation and lst 2 days before swith to 12/12. Middle growth was insane so spread them out abit by screwing small screws in to the pot and using the as a tie down
Day 55 - all plants seemed to have bounced back the day after and look exactly how I planned so far so good
Day 56 - final day of vegetative growth all seems good, all females showing white hairs , have raised the lights and turned Intake to full to maintain humidity levels and switched lights to 12 / 12.


Likes
4
Share

Likes
12
Share
@bobtheblob
Follow
Meh, couldn't wait longer - most of the stigmas are orange, and the trichomes are mostly milky with a few amber ones. Good to go :-D
Likes
25
Share
@Unkraut
Follow
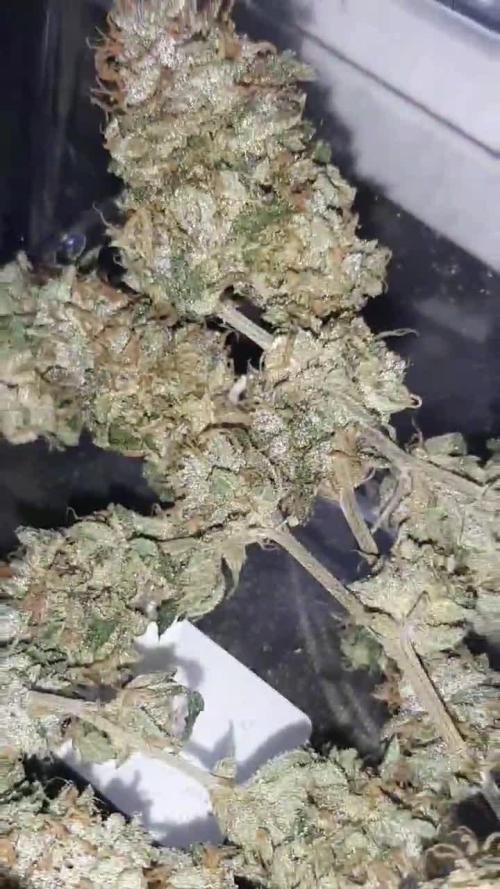
i accidently bought some unbuffered coco and mixed it with my ussual earth, had major calmag problems in mid-flower but i´m still pleased with the results...also had a little trouble with mold at the end due to bad weather and high humidity in the final weeks of the grow, had to remove a few buds and harvest early @ day 55 of flower....but there's still alot of great looking buds left for me to enjoy and all look mostly done...
Just harvested and hung them upside down, currently drying them at constant 19.5-20.5°C and 50-60% RH..will update as soon as they are dry


Processing
Likes
15
Share
@No_Clout
Follow
I think they have finished stretching as their starting to produce bud sites, so hopefully they stay around this size as it’s the sweet spot for me, not too small but not huge trees, their still just under 1m tall.