


Likes
Comments
Share


@NewbieLearner
Follow
Coming along very well. Will begin flushing a few of the strains soon. The gorilla skittlez and the wedding cake are looking super frosty! Started harvesting the gorilla glue but will only post the whole set of pics once it is dried and cured and ready to be smoked.


Likes
27
Share


@RDWCGrowing
Follow
1/20/2023- So much to do pre grow and over the next 16 days, absolute first order of business is that I have to take down my current Grow---TIMBER-- Then I have a list of things I have to get done in order to be ready to start this grow 1 Feb.
With that said
T - 2 days until start 48 hour Flush
T - 2 days until Start 48 hours of Light
T - 4 days until TIMBER!!!
Items that need to be done before 1 Feb 2023
1. I need to clean the tent out
2. I need to clean the equipment- Proper Sanitization between grows in Hydro is a must!!!
3. I need to get the hole in the ceiling above my tent repaired- For my last grow I had a deep sink installed in my grow room, to make Hydroponics a little bit easier and have a water source in the same room. The seals on the pipes they were installing broke and leaked through the ceiling causing some damage all the way across my grow room, I was already weeks into my grow and couldn't risk them working above my tent and it would have been very awkward positon for them to be working in as well, so have to get this done quickly between chop and germination.
4. I have to install my new light- I was using a Vivosun 4000 and for this grow I am switching up to a Spider-farmer SF 7000.
1/20/23- For this upcoming grow I am working with M/F photo seeds so I ordered 4 Sex determination kits. I recieved my my 4 Sex determination testing kits from Rimrock Analytics today. I will be using these to test my plants at week 2 of Veg so that when/if I take clones I know I am taking them off females. As well as I don't want to accidently pollinate my tent during this grow I am looking for big beautiful buds not seeded buds. :-)
1/24/2023- Harvest of current grow- Started at 2:00pm and finshed wet trim and firt batch into the freeze dryer.
1/25/2023- Next batch into the freeze dryer and cleaning all my equipment for this Grow.
T-1 Day until the workers are supposed to be here to fix the hole in the Grow Room.
T-3 days until I instll my new Gorilla Grow Tent and my New Light Spider Farmer SE-7000 for this grow.
T-7 Days until Start of Germination
1/26/2023- Harvest is done ran through the Freeze dryer and dry tim completed.
1/27/2023- Grow Room repairs completed. Hole is gone Letting the paint dry before I install the new tent.
T-2 days until Install the New Gorilla Grow tent and the new Light
T-3 days until I put the hydro equipment in the new tent
T-5 days until Germination
1/29/2023- Day 0- Final Pre Germination activities
Germination Start T-3 days
The paint on the ceiling was dry and it was time to finish prepping for Germination. I got the following items knocked off my list.
New 4X4 Gorilla Grow Tent is up and ready
New Spider Farmer SE-7000 Light is installed- Thanks Moony Grows for the suggestion and for the Code that got me some money off and free shipping (Moonygrows)!! I turned the lights all the way up to max and set the timer to 18/6 0600-0000. I will keep an eye on the temperature and humidity without my plants and see how hot it gets with the new light.
I put my Hydro system back together and put in 40 gallons of water into it, time to monitor for leaks the next few days.
I Setup my cloning machine for Germination Days 3-11
1/30/2023
let me break down the situation, ROOM in the TENT.. Enough said.. No really I tried putting my exhaust system up in the new tent with my new light, The light is so big corner to corner that it really didn't give me enough room for the lights be be raised, with the exahust hanging the buckets my plants are Starting in are 2 and 1/2 feet off the ground, great for plenty of room for roots but not so great for upwards space for the plant to grow. In a 6' 11 tent with the exauhst in side and hanging that only gave me a little over 4 feet of grow room to play with. My last grow if you saw my diary, anyone could tell I was struggling to keep the buds off the lights. No good, Since space was such an issue I was running my carbon filter inside on the ground but It really needed to be up sucking the heat out not shooting the cool out. With that setup I was sucking air through the filter and pushing it out the tent at a bottom exhaust hole cold out. Wasn't doing me any good for my heat. I was hitting temps of up to 85 degrees. I bought a portable AC unit and have been running it in the grow room to try and keep temps below 85 and I have had to lower the power on my lights during grow also not ideal.. With that said a friend of mine MoonyGrows (Check out his diary) took the time to look at my issue send me a picture of my grow tent setup with detailed instructions on how to suck the air out from the top but putting my filter and fan on top of my tent so no room issue and I am sucking the air out from the top where the heat is instead of pushing the air out from the bottom where the cool is... THANK YOU MoonyGrows For taking the time to help me get this straightened out.. Now I have room and I have the exhausts working right and now my temps with everything at 100% are topping out at 80 this dropped the temp by 5 + degrees at 100% max.
T-2 days until Start of Germination
Prepped my seed tray with humidity dome
Prepped my Rapid Rooter plugs. I Used RO water, and I added a few drops of Hydrogen peroxide to Oxygenate the water. I then PH balanced between 5.7-6.0 the same that they will be getting in the Cloning Machine and when they get to thier final grow pod. I perfere the 5.8x range and I hit 5.84 for these rapid rooters. If you want to see a complete video on the process HowWeedGrow has an amzing video that shows step by step how to do it and explains it better than I ever could including how to plant the seeds. Which I will cover when I get to that step on Wed. https://www.howweedgrow.com/how-germinate-weed-seeds-cannabis-rapid-rooters/
1/31/2023
T-1 day until Germination Start
All set and ready have my Rapid Rooter plugs ready to go have my seeds out.. Have my seed tray warming up tonight. Tomorrow morning right into the Rapid Rooter then strait into the tray. I will spray the dome to start the humidity in there.
2/1/2023
Germination Day!!
Let the games begin!
0600am Put the seeds into the Root Riots. And then put the seeded Root Riots into their first home the Seed tray. I have them under the light 24/7. Sprayed the dome
7:30pm Sprayed the Dome to keep humidity going on the dome.
2/2/2023
Day 1 of Germination
Sprayed the Dome in the morning
Sprayed the Dome in the evening
2/3/2023
Day 2 of Germination
Roots are starting to come out the bottom of the root riot plugs and the heads are slowly popping out of Number 4 just below the surface.
Afternoon- Number 4 has popped up
Evening- Number 3 has popped up as well. Happy Dance!!
2/4/2023
Day 3 - Germination
Surprise Surprise Surprise- all 4 have now poked their heads up.. Happy day!! 100% Germination succeeded.
Now major milestone to track is how many are female and how many are male.
I will take look at the roots this afternoon/evening and see if they have enough root to go into the cloning machine for the next 7 days before they go into their Hydro Pods.
Day 3 - Germination - Evening..
Roots looked good and they were tall enough to make it into the cloning machine.
Now that they are all in the cloning machine I have switched the lighting to veg state 18 on 6 off.
2/5/2023
Day 4 - Germination - Morning
All the Ladies (fingers crossed) looking great stretching nicely and look nice and green, Photo synthesis underway....
UPDATE!! After a very interesting POD cast on FSTS by Dr. Bruce Bugsbee from Utah University, I have shifted my lighting to 24 hours on through seedling and then I am going to shift to 20 hours on the rest of Veg.
2/6/2023
Day 5 - Germination
While Checking on my conditions inside the new tent last night, I found that the Humidity was down to 39 Percent. I added an AquaOasis Cool Mist Humidifier, the reason I selected this humidifier is that I needed one that could be turned on and off utilizing my Inkbird Humidity Controller IHC200 that I have my Pro Breeze Dehumidifier currently running with.
Root structures are starting to get there about 1/4 of an inch.
2/7/2023
Day 6 - Germination
Everything seems on track more roots poking out of each today. They are each getting a little taller as well.
Checked in the evening and number 3 was drooping the Root riot plug on the bottome was dry and the roots were not in the water yet. I raised the water just enough that the longest root that was sticking out is now hitting the water.
2/8/2023
Day 7 - Germination
Everything looked good while checking in on them this morning number 3 is now full up and no droop again.
2/9/2023
Day 8 - Germination
T-2 days until Plant into Forever Pods and we start week 1 of Veg .. :-)
Surprising thing to me is that number 1 and 2 were later in popping then 3 and 4 but the roots are growing longer in 1 and 2.
2/10/2023
Day 9 - Germination
Number 1 and Number 2 are definitely ready for transplant today.. Based on how they were yesterday and where they are today I am hoping by tomorrow 3 and 4 are ready. Today they look to me where 1 and 2 did yesterday.. I really hope 3 and 4 catch up by tomorrow since..
T-1 day until transplant to new/ final home for grow.
Need the roots long enough to have some clay down in the basket to keep the root riot out of the water and only roots in the water..
2/11/2023
Day 10 - Germination
Today they got placed in thier forever Home, 7 days from Sprout and 7 days until Week 1 Start.
PPM- 180 this is water out of the Tap
Temp Water: 70.7
Temp Tent: 77
Humidity: 40% I have a humidifier going 24/7 to try and bring this up.. I also have Humidity Domes on each plant.
2/12/2023
Day 11 - Germination
Sprayed the domes, all are looking good.. Nothing much to do at this phase but Keep monitoring the PH level in the system and making sure they have a comfortable home.
T-6 days until Week 1 start
2/13/2023
Day 12 - Germination
Sprayed the domes, They were looking a little yellow today so I moved the light down to assist. Nothing much to do at this phase but Keep monitoring the PH level in the system and making sure they have a comfortable home.
T-5 days until Week 1 start
2/14/2023
Day 13 - Germination
Sprayed the domes, They were looking a little Florissant yellow today, with what looks like slight burn on the tips, I talked with a fellow grower and we agreed that It was probably that I was drowning them, Yes you can drown you plants even in Hydro, but only early on.. :-) It usually happens with the water being too high, which soaks not only the roots but the medium (root Riot plug in this case). I lowered the water from touching the bottom of the pot to about 1" away. This will probably take 3-4 days to resolve. I will continue my daily monitoring.
T-4 days until Week 1 start
2/15/2023
Day 14 - Germination
Sprayed the domes, continue my daily monitoring they look a little darker green instead of lime green now that I lowered the water levels in the system, so I think that I might have resolved the issue but it will take a few days for recovery to happen.
T-3 days until Week 1 start
2/16/2023
Day 15 - Germination
I looked in on them this morning, 3 and 4 look like they are doing well and recovering nicely. Number 1 not so much it has brown spots on the leaves, this very well can still be a side effect of the overwatering but I decide to go ahead and add Nutes earlier than I was planning just incase. I was going to wait until Saturday but I think intervention is necessary now especially after drowning them early on.
I added 1/2 what I am planning on adding for week 1 start. I also think I am going to adjust my chart to add 1/2 2 days after plant from now on. I don't think it would hurt it to have some Nutes to pull from.
.25ml/Gal Calmag = 12.5ml
1ml/gal GH FloraMicro= 50ml
1ml/gal GH FloraGro = 50ml
1ml/gal GH FloraBloom = 50ml
T-2 days until Week 1 start = I will drain the system and start it over on Saturday with Week 1 Nutes.
2/17/2023
Day 16- Germination
I didn't even want to post today after looking in on them this morning, 3 of the 4 are now showing signs of dronwing.. Brown spots on the leaves, the water levels were still too high.. I drained about another inch out of the tanks.. Will see how quick they recover.. I start week 1 tomorrow and will have to ensure my water levels are at least 1" away from the basket on this round.

Likes
9
Share


@Grey_Wolf
Follow
Puggles Autos Ruby Dragon BX
19th November 2020
Well that's it ✊
I've officially pulled up the Male Ruby dragon BX as it has produced ample amounts of hopefully viable
and healthy pollen. I then used that pollen to cross with a Fastbuds Seeds Origanal Sour diesel Female that
should ( if I did it right) produce lots of nice Auto hybrids to play around with.
I would like to Thank you all for your weekly visits and likes for each update and Keep an eye out for the Diary
I'll make when I try out the seeds from the F1 cross 😀
Likes
17
Share


@Leonard_Lunte
Follow
Picture 1 - Day 15 - Seedling 1 is 17cm now and I just started to do some LST.
Picture 2 - Day 15 - Seedling 2.1 is about 7 days now and still growing good.
Picture 3 & 4 - Day 16 - Seedling 1 LST
Picture 5 - Day 16 - Seedling 2.1 first dose of nutrients, 1ml/L
Picture 6 - Day 17 - Seedling 1 seems to have a calcium deficiency so Ill be purchasing some CalMag soon, I hope its not a rust fungi! 😅🙏
Picture 7 - Day 17 - Seedling 2.1 looking healthy and growing very fast.
Picture 8 - Day 18 - Seedling 1 reacting very well to the LST, the calcium/magnesium deficiency seems to have stopped spreading. Bottom leaves still look kinda f'd up but I think it will stay like that forever now, new leaves look perfect tho.
Picture 9 - Day 18 - Seedling 2.1 looking good.
Picture 10 - Day 20 - Seedling 1 getting really big suddenly, I think flowering is right around the corner, so I will put away the humidifier now (its getting kinda nasty anyway lol). LST going really well.
Picture 11 - Day 20 - Started LST on Seedling 2.1 seems to work well.
Picture 12 - Day 21 - New Setup, 80x80x180cm. 100mm Carbon Filter.
Picture 13 - Day 21 - Seedling 1 still going strong, LST is getting kinda stressful since they grow so fast.
Picture 14 - Day 21 - Seedling 2.1, everything looking good! 😁

Likes
91
Share

@squalino
Follow
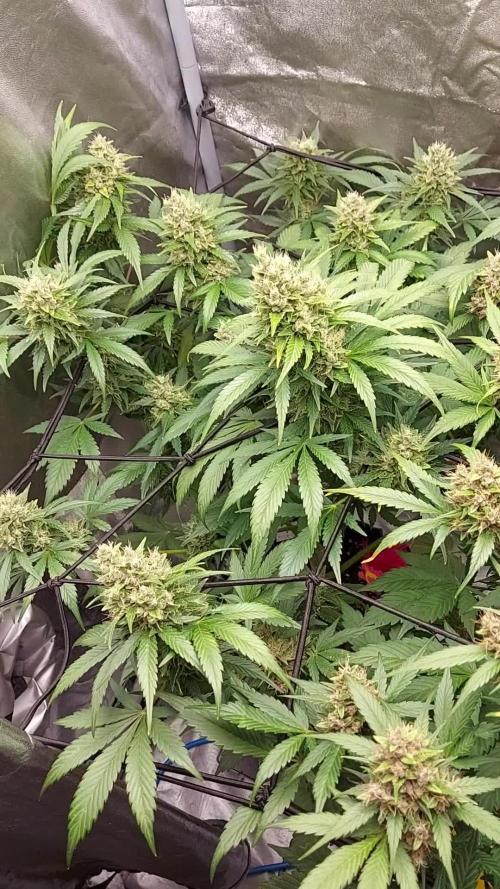
Journal de Culture : Frost 1 – "Dora" (Fin de Floraison & Passage au Rinçage)
Génétique : Frostbanger (F2 Perso) | Système : Autopot 20L
📣 Remerciements
Un immense merci à toutes les personnes qui suivent ce journal depuis le début ! Un merci tout particulier à @MIA_BIOTABS et à Mrs_Larimar pour leurs précieux conseils et leur accompagnement. Merci à tous pour votre soutien !
🛠️ Configuration Technique & Climat
Éclairage : Lumatek ATS 300W Pro (réglé à 100% depuis hier) ☀️ (Plein régime pour la phase finale !)
Distance lampe/canopée : 50 cm
Climat : Jour : 25°C / Nuit : 21°C
Humidité (HR) : Contrôlée via déshumidificateur
Tente : 1m80 de hauteur
📅Évolution & Entretien :
Trichomes laiteux, structure en épi de blé et top départ du rinçage
Morphologie et état des fleurs :
Hauteur :
Se maintient à 84 cm (la structure est définitivement figée, toute l'énergie va dans la maturation).
Aspect des têtes :
Les bourgeons sont gros, denses, bien verts et compacts. Ils promettent d'être très lourds sur la balance.
La structure des fleurs évolue de manière très esthétique en "épis de blé", les calices se gonflent et s'empilant les uns sur les autres.
Résine et trichomes :
Les trichomes sont désormais bien laiteux au microscope. Le givre de résine enveloppe superbement les bourgeons et les petites feuilles de sucre.
💦 Nutrition & Gestion de l'eau
Hier (Dernier repas) :
Application du tout dernier apport de Bio PK 5-8 (Biotabs). Dora a reçu son ultime boost de phosphore et de potassium pour verrouiller la fin du gonflement.
Aujourd'hui (Transition Rinçage) :
Coupure définitive de l'arrivée d'eau de l'Autopot.
Stratégie : Je passe effectivement en mode manuel pour un rinçage de 14 jours.
L'objectif est maintenant de pousser la plante à puiser dans ses dernières réserves, à consommer les nutriments stockés et à déclencher doucement sa sénescence à l'eau claire pour obtenir une herbe au goût le plus pur possible.
Le travail de maturation final
commence sous les 300W à 100%. Dora est parée pour ses deux dernières semaines de vie à l'eau claire !
À bientôt pour la suite et les prochaines étapes avant le cut !

Likes
30
Share


@gottagrowsometime
Follow
Welcome to my Runtz X Layer Cake Female Diary from Barneysfarm.
Wk 9 Days 58-63 (device was lost, and all picture,video days 57-69 were lost, so here's my account) just had finished pre flower and started to stack heavily on building top bud sites. Laded with thich compact trichomes. She has bright orange hairs. That give of a lovely musk of armoas that take over your senses. 2/3rds down the main bud sites, very healthy huge sugar leafs surround her, but, if hasn't taken away from below, as the sites are smaller, but have so much frost. And she had at least 14-20 more days.
Wk 10 days 64-70 As you can see. She has a beautiful shape. Some of the nicest looking bud I've yet grown. She took to LST really well. Had I lollipopped the heck out of her, and make for some pretty good solid top colas with some small dense bud sites that have 1/3 the trichomes to calyxs. The calyex to sugar leaf ratio is super low, but 2/3s down she has many large sugar leafs that have shaded out her canopy. But, by moving her around and adjusting LST and leaf tucking. I've literally done hardly any defoliation. Am going to squeeze some in this week. Not, that its needed. But, there is some still more growing to do down below. And if I leave her to mature without allowing light to hit her harder down further into the canopy I risk the chance of overcooking the hard earned Rock Hard half fist sized buds. Have a feeling this gonna be some of my best smoke to date. The plant is in tip top shape. No defiencies no toxicity. 1st time for me. Am just going to let her ride out the next 2 weeks on water. Should be enough in pot to finish her off.
Lots of pics to come over the next few weeks.
Thanks to my sponsors from MarsHydro+barneysfarm, (reps) for supplying me with great lights+strains.
COUPON FOR MARSHYDRO
Use code ggs at any marshydro site for a discount.
Be sure to drop a like or comment so I can visit your diaries. Either way, thanks for dropping by folks.
Likes
11
Share


@Buddyhighs
Follow
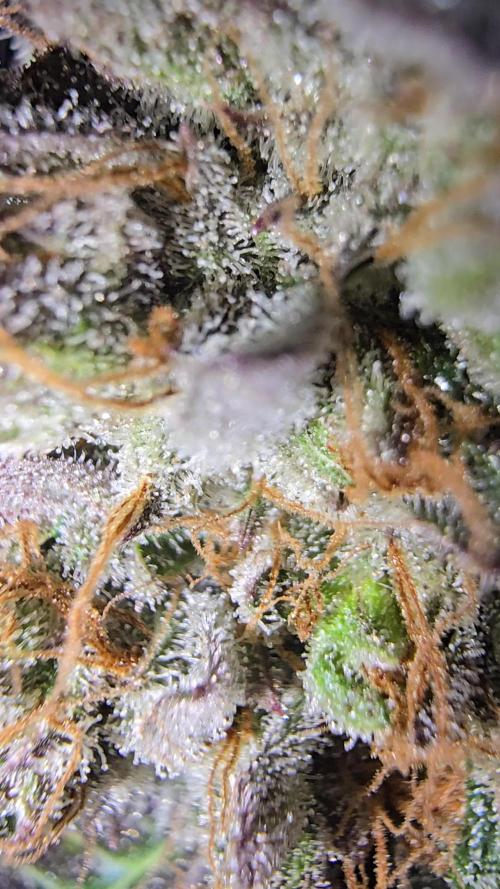
Another week down a whole week of 12/12 and I won’t say she’s stretching yet, I would have thought ild see son pistols by now but no.i know she’s healthy the cutting I took only took two days to fully root
A few new things to add to the list of nutrients, this week she’s had a heavy top dress. Reaper, soil candy, and barley to kick start bloom, grow plus to make sure she has enough to stretch properly and the knf. Which I’ve add fermented fruit juice to now for bloom,
Fermented fruit juice - I’ve gone hard to ferment this properly since using shop bought fruits,
Bananas for potassium, blackberries and blueberries because that’s how I imagine a moonberry would taste 😂 I know it’s no going to influence the terps but still
LAB for microbes and jsm ( leaf mould and potato in water to collect microbes in the water)
And finally molasses. This brew took about three weeks.
The light stayed the same high flipped to 12 hours and turned up to 75%. She will stay there until the plant reaches 30cm from the light.
I thinkkkkk that wraps this week up might be a bit boring from here on out work wise butttt will be exciting watching her blow up, till next week.
Let’s get it 💪🏽



Likes
9
Share


@Edles_Gas
Follow
First official week of flowering and I can’t be any more exited for these bad girls. I switched their nutrient intake for flowering aswell as their light cycle. One of the autos seems to be showing a minor deficiency hoping to fix it this week as for everyone happy growing😃.


Likes
12
Share


@DrGreenbutterThumb
Follow
At last I ha e seed popping out! Nice full sized seeds 2 hybrids of my own creation with more to come.not sure if the gelato cake pollen was still viable doesn't appear so however I have a monster cropped clone that will serve the purpose.
Likes
18
Share


@PakkaFarm
Follow
Defoliation day 33.🌿
Humidity variation 40-70%💧
Start with 1ml/L bio bloom and top max day 35
Likes
11
Share


@CottersChronic
Follow
Tied down few ecolas to all more light and took off a few big fan leaves


Likes
155
Share


@deFharo
Follow
Bienvenidos cultivadores de marihuana clandestinos y también a los que tienen la fortuna de no serlo!🖐️👨🌾👍
Este es un diario donde semanalmente explico algunas de mis técnicas de cultivo y preparados orgánicos, los cuales llevo experimentando dos años en cultivos de marihuana interior.
Esta semana: HIDROLIZADO POTÁSICO DE LEONARDITA CON FÓSFORO (Humato PK).
Este producto lo vengo usando en mis cultivos desde el comienzo, hasta el final de la floración y es una de mis fórmulas indispensables para el engorde de los cogollos.
La leonardita es un mineraloide derivado del lignito y compuesto en su mayor parte por materia orgánica que se encuentra en el proceso de convertirse en carbón, no es soluble en agua.
La leonardita es la mayor fuente existente de Ácidos Húmicos e Himatomelánicos, mejora la estructura del suelo haciéndolo más esponjoso, estimula el suministro de oxígeno a los microorganismos, incrementa el crecimiento, la división celular y la retención de agua y nutrientes, al tiempo, la fórmula aporta también fósforo y potasio solubilizados, con lo que consigo un fertilizante altamente soluble PK, con ácido húmico y materia orgánica líquida.
Para hacer soluble la leonardita uso un tipo de hidrólisis alcalina con Hidroxido de Potasio, en esta ocasión he añadido Roca Fosfórica (P) como fuente de fósforo inorgánico y lo he enriquecido un poco con Azomite (Si, Mg, K, Fe... + trazas de 70 minerales).
Como fuente de fósforo también he utilizado fosfitos orgánicos extraídos de la calcinación de huesos con cascarilla de arroz o cenizas de madera, pero en realidad la fórmula original sólo incluye la leonardita y el hidróxido de potasio (Humato K).
El proceso es simple:
- MATERIAL PARA 1 LITRO DE SOLUCIÓN:
Agua pura 1000ml. (Yo en este preparado he usado agua de manantial alcalino (PH: 9.2 EC: 0.85), esta agua está muy mineralizada (Ca. Si, Fe, Mg, Mn...) quiere decir que tiene hidrolizados esos minerales los cuales se añaden naturalmente al producto.)
Leonardita: 100g (10%)
Hidróxido de potasio: 30g (3%).
- MINERALES EXTRA 1%:
Roca fosfórica: 7g,
Azomite: 3g
PROCEDIMIENTO:
1) Moler la leonardita y mezclar con la roca fosfórica y el azomite.
2) Añadir el Hidróxido de potasio disuelto en 500ml de agua.
3) Esperar una hora y agitar de vez en cuando.
4) Añadir el resto del agua (500ml).
5) Mantener en el recipiente sin cierre hermético, para dejar paso al oxígeno, durante al menos tres días.
6) Remover o agitar al menos 2 veces al día, durante estos 3 primeros días. (Cuanto más o mejor se agite el resultado de la hidrolisis será mejor.)
7) A partir de los 3 días ya se puede usar... pero yo prefiero esperar una semana al menos.
8) El producto se puede almacenar a la sombra durante años, el paso del tiempo hace que la hidrólisis de los componentes sea mejor.
COSTO APROX. DEL PREPARADO: 3€.
MEZCLAS PARA RIEGO EN MACETAS: HASTA EL 2%., EN EXTERIOR HASTA EL 3%.
==========================
USOS:
- Deshidratado, lo uso como aporte a las mezclas de sustratos o como enmienda seca.
- Al ser un producto alcalino, en las mezclas para riego, lo uso siempre en conjunto con alguno de mis Bio fermentados con Microorganismos de Montaña Activados (MMA) que tienen un PH muy bajo, de esta manera regulo el PH final de la mezcla, además, pongo en contacto directo los microorganismos y la materia orgánica líquida del Humato, al que también añado melaza para dar energía a la microbiología, en definitiva es una simbiosis perfecta para el suelo: Materia orgánica solubilizada, alimento de fácil proceso para la Microbiología y ácidos húmicos, que completan la magia que se produce en el sustrato... los cogollos crecen y engordan sin freno!!
Hasta la próxima semana...
SALUDOS CULTIVADORES!!🖐️👨🌾💧💦🌞💡
=================================
Processing
Likes
20
Share


@Hawkbo
Follow
Day late on the update, pics/vids were taken on time tho just been a crazy week of harvests and trimming and keeping up with these. I linked up with Rain Science Grow Bags on Instagram and got them to offer all my followers and friends a discount of 10% off entire order from their site with the code ' bangdang ' so if anyone is in the market for a pot upgrade use that code. I got them in the mail 3 days after I ordered. Reason I went with Rain Science is because they offer identical air flow for rapid growth as the radicle bags, just using a different material and a tighter knit so water doesnt flood out the sides during feeds and when you pick these up when the coco is dry, it wont fly all over the tent like with the radicles. They're the optimal bag for autoflowers especially.
These are the 3 in the back they are growing perfectly so far
Likes
24
Share


@Homestickycannabis
Follow
Well it's dry and cureing in jars. I ended up with 78 grams of dry sticky buds. Growing this cultivar was a breeze! I mailined her for 8 main kola's and I would say that it was a success. I did however end up with more larf than I would have liked, but I'll be using that for fresh flower rosin in my Rosineer press. This particular pheno did not like her nutrients above a mild strength at all !!! I did flush her 3 times during her life and with good results. The first was to clean and build up of veg nutrients , primarily nitrogen. And the other two times were during flower. I wanted a good transition into flower. I've had a bad habit of thinking that a super dark green plant is what I want in flower. All in all she was a delight to grow. Not to finicky and a forgiving strain imo.
Likes
14
Share

@Aircoholic
Follow
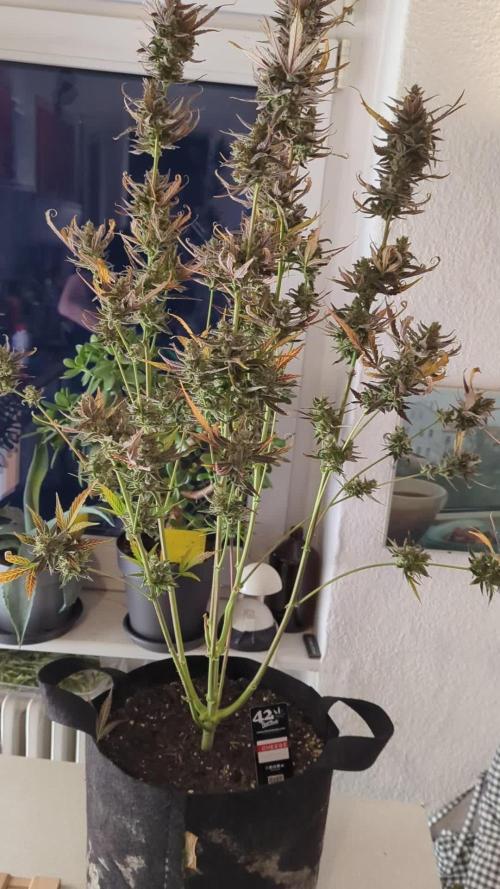
Okay, that's it, I couldn't watch her suffering like that anymore. Her trichomes could've gone a little longer, but her overall appearance clearly was over it. The lack of aroma and stickiness from the trichomes worries me, but I do know how much she struggled during flower and that the nutrient availability in the soil was off, so I'm not really surprised. I've downgraded my expectations for the end result quite a bit over the last couple of weeks to a more realistic level considering the circumstances.
For drying I'm trying something new - I've got a wine chiller, a poor man's Cannatrol, that I want to keep the temps low during drying in summer and for curing and storing in general. Curious to see what effect this has on the dried buds.
Likes
14
Share


@DaddyPrime
Follow
4/27 fed today. Shes growing good. Seems more focused on outward growth rather than vertical.

Likes
17
Share


@Kirsten
Follow
16.2.25:
I decided to check out the lower canopies of all plants to see if I need to get rid of any foliage.
I did get rid of a few small branches and leaves.
However, whilst I was doing this, I saw more garden pegs from my LST remaining.
There were about 6 or more in Pink Mist alone. Additionally, on Watermelon, there were some left in, too.
I'm so annoyed to see that because the plants are really stretching, and I could've potentially disrupted this by leaving the pegs in for all this time without realising it.
🤞 that I haven't compromised things too much. We'll see.
I watered today with 2ltrs of dechlorinated water PH'd to 6.3 containing the following nutrients;
♡ .8g Green Leaf Nutrients PK booster
♡ .5g Ecothrive Biosys
I ordered quite a few things for the garden. I got Greenleaf Nutrients Sea K(elp) and Mega Crop Parts A+B. To go with their PK Booster I got last month. I'm excited to try it all together. Next run, maybe just using these. We'll see how it goes.
18.2.25:
The plants are going crazy for water! Everything is getting used right up so fast!
Today, I decided to add some more Black Strap Molasses to add some carbs and other micronutrients. I'll add the jar with the label in the photos section above.
I watered a very small amount to each plant.
What I put in:
♡ Black strap molasses 150g
♡ 2g Sea K(elp) Greenleaf nutrients.
I dissolved everything in 4ltrs of dechlorinated water PH'd to 6.4.
19.2.25:
I received the majority of the garden purchases that I made. I'm still waiting for the Ecothrive Life Cycle. I wanted to top dress, but it's been delayed unfortunately.
I am using my Greenleaf nutrients products which I bought on Amazon. I got the Mega Crop 2 part system Part A and Part B. I have the Sea K(elp), and the bud explosion PK booster.
I really wanted to get some of their sweet candy asking read many positive reviews. Unfortunately, for me, this is unavailable to buy currently. So that's a little disappointing.
I needed to do a good watering so when my nutes were delivered today, I got excited 🤗
I watered 2ltrs of dechlorinated water per plant, PH'd to 6.4, containing the following nutrients:
♡ 1g Mega Crop Part A
♡ 1g Mega Crop Part B
♡ .5g Sea K(elp).
The plants drank this up within a few hours.
I'm going to try and hold off on watering in hopes that my Ecothrive Life Cycle will arrive so I can top dress and water it in then.
20.2.25:
My Ecothrive Life Cycle arrived yesterday, and the plants are ready for their top dress and a good watering in.
I have some Biobizz Light Mix, Canna Coco,and perlite. I'm going to use this as a base to mix my amendments in.
I'm going to fill my 5 gallon bucket with about 4.5 gallons of my top dress mix. I will distribute this across 6, 4-5 gallon pots. Then I will water in well with Greenleaf nutrients Mega Crop Parts A+B and Sea K(elp).
I've made a crude attempt to video mixing my top dress. Don't listen to the audio. lol, my YouTube didn't stop playing whilst I recorded this 😂
So anyway, I added the following amendments to the above base mix of 4.5 gallons;
♡ 3 TBSP Ecothrive Life Cycle
♡ 3 TBSP Vitalink Bat Guano
♡ 3 TBSP Ecothrive Charge
♡ 1 TBSP RHS Mycorrhizal Fungi granules
♡ 6 TBSP Ground Cinnamon.