
Likes
Comments
Share


@hyperborean
Follow
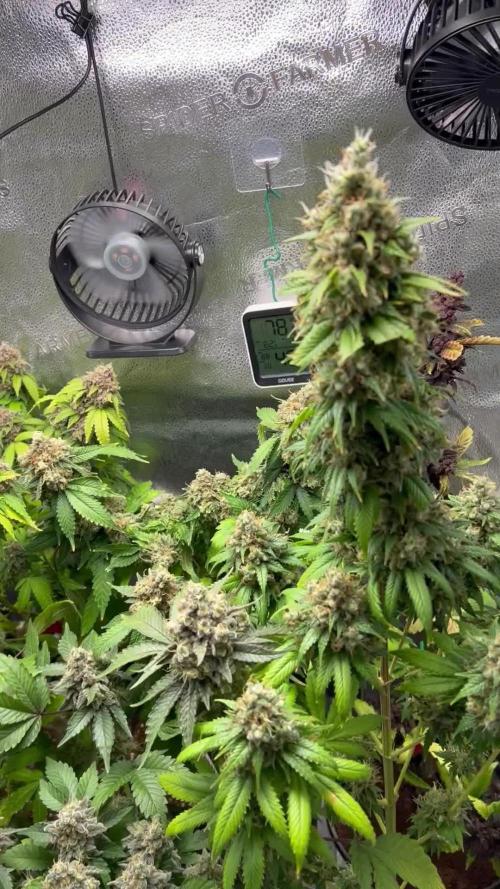
It looks like the powdery mildew wont go anywhere with the spray I am using. Maybe cause it's been raining a lot lately and quite cold weather also. Had to remove some flowers and leafs cause they were infected.
One of the plants seems to have some kind of deficiency as you can see from the picture. Is this potassium or is it a fungi, what do you guys think?

Likes
8
Share

@CalGonJim
Follow
4/13 11AM MONDAY RQS Gelatto 44 and Punch Pie Tyson 2.0 are Finished!!! I will let them go a couple weeks longer but they are good to go! 9/10 Srong, good in coco/ no problems at all!
MONTEL DREAM WIDOW 11/10 ANOTHER WINNER!! So much resin, AMAZING BUDS SHAPED LIKE SPIDERS...SO GREAT. My ICE t is a little small, I didnt have enough space so she stayed compact and perfect small. Bubbles, Julinan and Ricky are doing better than ever
4/14 4:09 AM I just had an idea flash for my next grow so I need to make some notes. I have a cutting I took from a gorilla gas F1 fast flower by seedsmen I did it last year. I took the cutting when she was in flower. I put her in an organic grow plug that I got from seats man as well and I tortured her and I forgot to water it and I left it in there and then I put her in 1 gallon and I haven’t tried to do anything but she survived everything so I’m gonna grow her out into a full-size plant. I’ll probably put it in a bigger pot and do a small smaller grow not so many plants next time I think she’ll really be something.
4/14 1;23pm I turned the light up to 114 W and I’m just under 120. I’m trying to feel the driver and keep it cool so it doesn’t heat the room up. I have some plants in there that I didn’t veg right so they’re kind of screwed up and I have too many of them. I’m gonna have to take some down. The extra plants are preventing the better plants from growing so my experiment making my own seeds, it actually worked, but it’s still not as good as getting it from the actual breeders. And I have a series of medical problems that disable me for several days at a time so plans not look good and then I get behind a little bit so that.


Likes
19
Share


@CanabisLoverHobbyGrower
Follow
Explosive growth this last week,.. especially gorilla cookies but all really,.. looking healthy,... roll on next week 👌


Likes
5
Share


@HegauHillsFarmers_D23
Follow
Die Pflanze hat sich in dieser Woche extrem gestreckt.🌱
Zudem sind vermehrt Stempel aufgetreten.👀
Sie benötigt jetzt auch mehr Dünger für die Blüte, deshalb habe ich den Blühstimulator von Advanced Nutriens nochmal erhöht.💪🏻
Vodoo Juice habe ich ab dieser Woche durch B-52 ersetzt und somit ihr mehr Vitamine und Aminosäuren gegeben für eine Stressfreie Blütenproduktion.🍁🌲

Likes
28
Share


@TheHighentist
Follow
Week 6 of to a good start!
They look happy and healthy. Time to flip to flower soon!
👽👉3/10
Climate is automated and working accordingly to my adjusted VPD settings.
Happy and healthy, actually surprised they've grown so much lately.
👽👉4/10 Waiting for their complete recovery, so they can be flipped to flower (Defoliation the 30/9, im giving them about a week)
👽👉5/10 Water day* Plain ph balanced water.
Need Runoff PH and EC down a little bit.
👽👉6/10 I applied the SCROG net.
👽👉7/10 Doing some minor tweaks to the setup + VPD settings(from 1.0 to 1.1). Approaching the flip to flower, so VPD
Did a bit of defoliation before the flip next week
👽👉8/10
Today, i learned from research on biobizz nutrients https://www.thcfarmer.com/threads/biobizz-nutrients-answers-from-biobizz.78899/ (Direct answer from biobizz)
With the answers, my view on feeding biobizz changed a bit, and i was luckily about to switch up the nutes. Good timing.
Waterday*
PH6.2
Introducing Biobizz CalMag(0.5ml/l) + BioBloom(0.25ml/l)+Topmax(0.25ml/l)+Rootjuice(0.25ml/l)
Still 2ml/L Fishmix+BioHeaven(Fishmix will be switched out with BioGrow)
👽👉 9/10 Last day of the week for my plants and last day in veg! They look fantastic and well recovered at lights on! (Look at the before/after lights vids/pics)
Raised VPD by 0.1: VPD settings(from 1.1 to 1.2)
Likes
5
Share


@RastaRick
Follow
Full on flowering. Gave first 10ml dose of bio pk 5-8 on day 37 with 1tsp bactrex in 1L water. Triton Biscotto Lime Auto is a bit behind but looks ok. All got massive defoliation and still tons of leaves... Natural form maybe was a mistake hahahah


Likes
20
Share


@DeepRootsGrowTrees
Follow
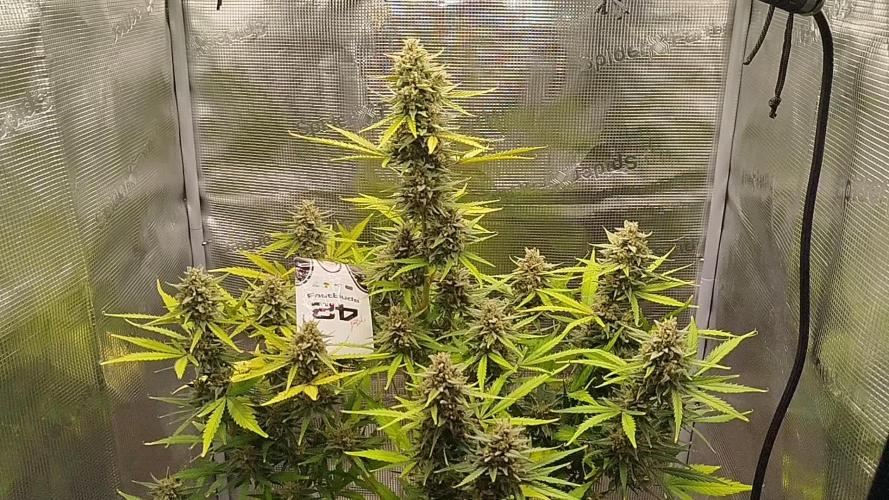
NORTHERN THUNDERFUCK AUTO / RQS
Week #13 OVERALL
WEEK #8 FLOWER
This she's about done buds are dense agreed for great trichome coverage she's got done purple hues going on with some of her buds leaves are yellowish she's got that nice aroma going on with her also!! She's on that water diet as harvest in coming shortly! Stay Growing!!!
Thank you for stopping by and taking a look it's always appreciated!!
Thank you ROYAL QUEEN SEEDS!!
NORTHERN THUNDERFUCK AUTO / RQS
Likes
21
Share

@GreenEldritchGardens
Follow
Amazing plant! Lovely terms even in 12/12!
Before the Heatwave blasted Germany I decided to cut her and hang, next week I'll post harvest results
Likes
26
Share


@Reyden
Follow
Devo dire che questa è stata super veloce, poco più di 8 settimane circa? Le altre, di cui 2 FF e una cbd automatica, sono molto più indietro mentre lei questa mattina all’alba è stata raccolta! Gli antociani sui boccioli hanno conferito questo colore così spettacolare che mi viene una gran voglia di conciare e assaggiare!!! Questa volta cercherò di seccare moolto bene 😌


Processing
Likes
13
Share


@Cheesefarmer420
Follow
Week #9 of flowering is done, great week this week, still inching closer and closer to harvest day, all of the ladies except for the largest will start their flush today, I’d like to push that out to atleast 10-14 days if possible, this will insure I get a beautiful fade into harvest as well as mouth watering tastes and aromas coming off this flower, however with using final phase I’ve learned I can execute a proper and tasty flush in just 7 days if needed. Everyday I feel the smells are getting more and more intense becoming a hassle for my 4” carbon filter to keep up. Hopefully we continue to finish strong this last week or two! It will be exciting 😍
Likes
10
Share


Likes
9
Share
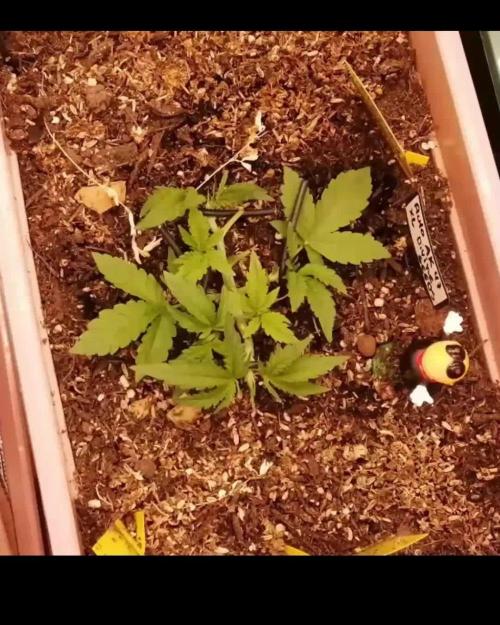

@All_our_small_plants
Follow
Bewässerung: 1000ml
pH-Wert: 5,8
EC-Wert: 0,6
Temperatur: 30ºC
Luftfeuchtigkeit 55%
Schädlingsbekämpfung:
PPFD: 200 µmol/m²/s
DLI:
Düngemittel:
Besonderheiten: Wurden direkt in die erde gepflanzt in einer Kokos-Quelltabletten.
-Tag 23 sie hat heute etwas Wasser mit Effektive Mikroorganismen bekommen und sie war beim Friseur 😍
-Tag 25 Sie hat sich gut vom LST erholt und Wächst weiter sehr schnell, so konnten wir heute schon wieder mit dem LST weiter machen.
Sie hat heute Wasser mit Dünger bekommen.
-Tag 27 Sie hat heute wieder etwas Dünger bekommen und war beim Friseur 😋

Likes
14
Share


@Mr_Dior21
Follow
This plant has been going strong for sometime now. I’m starting this grow diary so soon because I need to keep track of how much longer I have until it’s ready for harvest. I already forgot what day I switched to bloom lol. But I’ll be posting weekly. With better pictures.
Likes
42
Share


@MadeInGermany
Follow
Hey everyone 😃.
Due to the lack of space in the flower tent at the moment, I decided to use a delayed LST for the 2 women 🙂.
So I can let them grow again in the next 30 days until there is room in the flower tent 😄👍.
I'm curious to see how they will recover, and I think that growth will continue in the next 48 hours 👌.
I wish you a lot of fun with the update, stay healthy 🙏🏻 and let it grow ☘️🍀
You can buy this Strain at :
https://sweetseeds.es/de/cream-caramel/
Type:
Cream Caramel
☝️🏼
Genetics:
Blue Black
x
Maple Leaf Indica
x
White Rhino
👍
Vega lamp:
2 x Todogrow Led
Quantum Board 100 W
💡
Bloom Lamp :
2 x Todogrow Led
Cxb 3590 COB 3500 K 205W
💡💡☝️🏼
Soil :
Canna Coco Professional +
☝️🏼
Fertilizer:
Green House Powder Feeding
☝️🏼🌱
Water:
Osmosis water mixed with normal water (24 hours stale that the chlorine evaporates) to 0.2 EC. Add Cal / Mag to 0.4 Ec Ph with Organic Ph - to 5.5 - 5.8 .
Likes
23
Share


@Ashbash
Follow
Both plants are into the final maturing stage now I think.
#1 looking to be more dense, #2 longer and fluffier.
Very temperamental with the nutes, shows signs of burn and deficiency, I think I'll leave with just water from here on out.
Likes
5
Share


@Deltatigrou0169
Follow
Salut salut les Amis
Nous voilà déjà à la fin du mois, mes fifilles viennent de passer en pré-floraison depuis vendredi je suis trop content de mes fifilles.
J'ai commencé à leur mettre de l'engrais (PRO ORGANIC Grow et Bloom) pour la pré-floraison.
Je mettrai le (Bloom Booster) pour la floraison.
Je vous souhaite une bonne soirée à tous et à dans deux jours 😉🙃🙃

