


Likes
Comments
Share


@sevengreenfingers
Follow
Hello everyone! I promised to track this grow very closely this time and ufortunately life got in the way. Here is a quick sumup of the grow.
First of all- One of the sour stomper plants unfortunately didn't make it. It died at about week 4. The main stem somehow had rubbed/broken down. That's why it was falling down. It was almost like a mini beaver had chewed it off at the point where the stem touches the riot rooter. At first I thought nothing much of it, maybe it hasn't been rooted in quite well yet or something. And I was constantly touiching it when watering, that made it worse. Soo the leaves were dropping and the plant looked very weak. Then I decided cut thr rapid rooters top layer and found out the severity of the problem. Tried to tape it up and other things, but it was too late. At the end it appeared all good as the remaing plants got so big the I had some space issue so I wouldn't have been able to fit another plant in anyway.
At that time I finally made my self-draining saucers. I took me a while and a lot of effort, but finally they were ready and working well. I also installed the self watering system and flowering was starting. Pretty soon I started noticing weird leaf symtoms. Brown spots, different kind. Some plants had it more, some less. Sour Stomper looked pretty good throughout the grow. Mango smiles seemed sensitive and Strawberry Nuggs were pretty strong until the end.
The grow was basically me experimenting with the setup- changing watering schedules , changing ppm, ph and all that stuff to keep the leaves looking healthy and it was very hard I have to admit. Probably my hardest grow in that regard. But somehow, the bud leaves remained healthy and the buds really fattened up good. I got away with an amzing 700G dry bud harvest which was def a new record from one grow. And the bud quality is very good too!
Next time definetly no more than 4 plants as they got pretty big and I thought it was a little overcrowded. I was doing some good defoliation too. I should have defolited strawberry nugs more tho. Sour Stomper got some amazing bud development from top to bottom because it was was growing next to strawberry nuggets which were really small most of the grow. They actually took the most time to harvest even longer than Mango smile. Mango smiles were ready quite early. Sour Stomper was just in time!
I topped sour stomper and both Mangoi smiles, left SNs both normal. Looking back at it, the way I grow them, Should have topped SNs too. Would probably have more space in the middle and longer side branches. Probably wouldn't have been as bushy!
I followed the full Terra aquatica feed chart until the end. I was supplementing with CalMag a lot as I thought the symptoms could have been from a CalMag deficiency as this was my first grow with RO water.
Overall a very challenging but good grow at the end. First time no mold problems. A record breaking yield for me. Basically surpassed the upper limit for all plant probable harvest sizes. Got good smelling quality bud. Very happy overall and will continue experimenting with Mephisto beans in the future for sure! I guess what I like the most about Mephisto is how close to description the plant is, very stable genes in that regard.
Next time I will also have to start feeding plants higher PPM feed faster at the very start. and during flowering. But still not 100% sure what caused the leaf symptoms.



Likes
8
Share


@Skinnytalls420
Follow
Day 17-12/05/22 all looking good now giving biobizz grow and there flying!!!!
Day 20-15/05/22 all looking good!!!!

Likes
9
Share


@Dthebudguy
Follow
Pulled the plug on the small plants and putting effort into Pablo Escobar and Montreal auto .
Official grow diaries for each starting soon

Likes
4
Share


@Fingerblaster96
Follow
Starting to crystal up and smell strong, very lemony
hairs are starting to change to orange and its filling out a bit
i wish i veged it more but fair cop this is an experiment

Likes
55
Share


@XII_XII_EarlyRaver
Follow
They reacting perfectly oh the lst 🌞🙏🏻🙌🏻 So I gave them a little stress the past week and deflating them so the lower buds getting a lot more light so happy days my friend👌🏻🙌🏻🙏🏻So the Big women I made this the best plant in my opioin so I cloned here and she is flowering with the rest now

Likes
25
Share


@DC_MagicCheeseSocks
Follow
She’s so close! I am crazy excited for harvest. This is my first grow of anything, I’ve never harvested the fruits of my tedious labor. What an adventure this has been! The trim is what I’m really looking forward to, well all of it really. She’s not near as thirsty anymore I watered her four or five days ago (I work nights I don’t know what day it is lol) and she’s still heavy. So close! Peace friends

Likes
37
Share


@iGrowCulture
Follow
Conditions have remained stable...realized I forgot to drop the light after cleaning, so dropped her back down to 28.5”. She has reacted well to every slight adjustment made...
Likes
6
Share


@Haoss
Follow
New Plant New Adventure, let’s see together what kind of girl Amirani Auto will be 💚🌱

Likes
2
Share

@Bud_vista
Follow
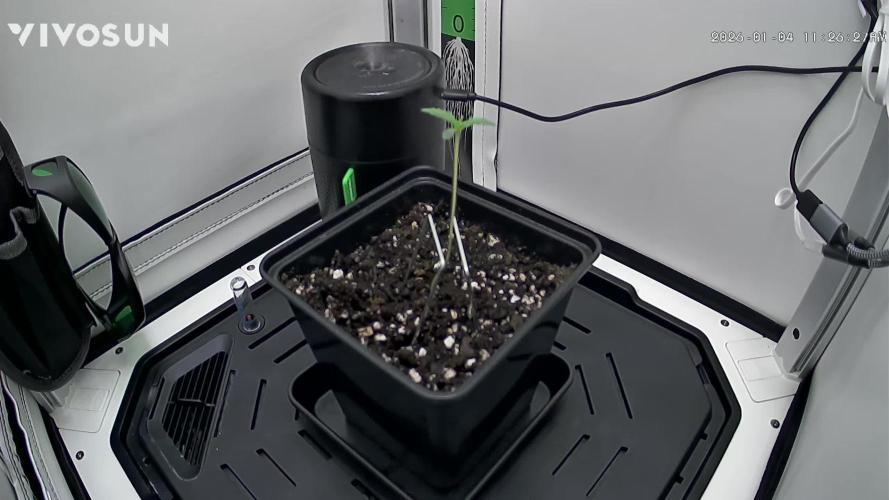
Welcome to week 3 of my White Truffle grow!
At the end of week 2 she’s been topped above the third node. She has needed a day of recovery but the day after she continued to grow visibly.
The main stem seems already strong, the branches are still flexible enough to start training the plant a little. In the next few days I will start to bend the side branches and trying to fill up the tent nicely.
One of the top branches snapped a little, which I will have an additional eye on. I’m also also trying to keep the first nodes and how they develop in the next weeks, otherwise I will cut them when I start to defoliate.
Likes
9
Share


@Staffedition
Follow
Привет друзья.
Наше знакомства продолжается с новым сортом автоцветущих растений от Smail_Seeds сорт ORIGINAL AUTO CHEMZKITTLEZ F1 reg.
Сегодня растению 58 дней.
Растение очень хорошо развивается, ни каких сбоев в генетике не наблюдается.
Шишки наливаются😀
Сорт выводим сами.
Смотри мой профиль, у нас всегда есть что то интересное.
Не забудь поставить лайк❤️, если понравилась как прошла неделя
И читайте наш TELEGRAM: https://t.me/smail_seeds
#Smail_Seeds 😀
Likes
46
Share


@SirSmokeALot333
Follow
Week 7
Day 47
Ladys bounced all back and enjoying the light now.
Also the first fadeing started at Orange Sherbet and Purple Punch, and alle other Ladys but just the leafes at the bottom. That's a good sign for me cause the soil was a bit to hot but that was not a big problem. They should get me some got dense buds again 🤤.
Lemon Kix smelling amazing fruity followed by Orange Sherbet with a nice Cream Hint again.
3 more Weeks and the first lady's should be rdy for harvest 😁
Updates coming

Likes
134
Share


@DogDoctorOfficial
Follow
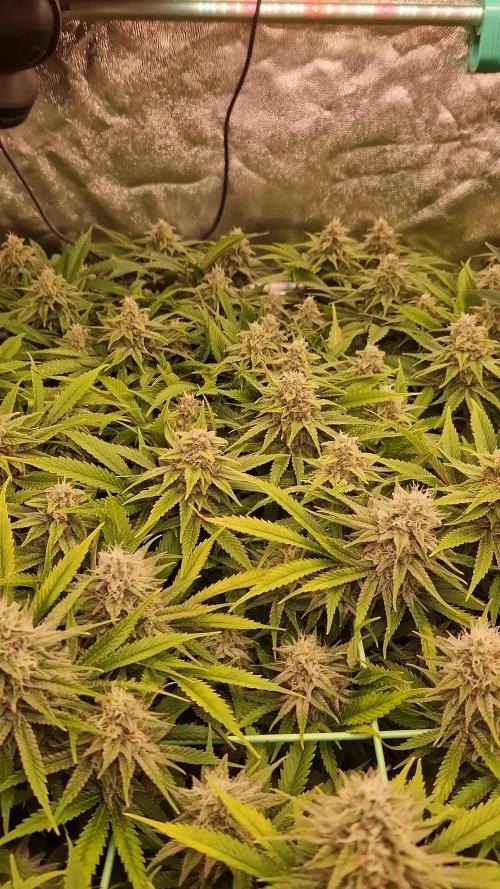
OMG OMG OMG finding hard to put on words all i am felling with this one, she was a delight to grow and without trying yet her medicine she wen strait to my top 3, i mean super strong Mama, strong to everything pests you name it, amazing structure her terpene profile is taking me back to the 90s with her almost like gasoline smell mixed with limes and pines OMG cant wait to try out this one much but much respect to DutchPassion on this creation of them she is so so so , like glue that you cant touch without getting it everywhere <3 <3 haded the last 3 weeks and harvest time-lapse i fell like this one could have gone more than the 71 days in flower that she did, but there is no time for that in this run but i will run her again thats for sure and a must for me.
Guys trust me on this one , she is a must , a real must in any garden <3 <3 <3
Thank you so much Dutch Passion for this blessing of an opportunity and for everything you guys do for the community much respect and appreciation <3<3<3
Everyone best of luck for the contest this was an amazing and fun one <3 <3 <3
As always thank you all for stoping by for the love and for it all, i truly appreciate and enjoy the ride so much more with you guys around <3 <3 <3 you guys make me fell super blessed <3 <3 <3
#aptus #aptusplanttech #aptusgang #aptusfamily #aptustrueplantscience #inbalancewithnature #trueplantscience #growerslove #dogdoctoofficial
With true love comes happiness <3 <3 <3 Always believe in your self and always do things expecting nothing in return and with an open heart , be a giver and the universe will give back to you in ways you could not even imagine so <3 <3 <3
More info and updates @
https://growdiaries.com/grower/dogdoctor
https://instagram.com/dogdoctorofficial
https://youtube.com/channel/UCR7ta4DKLFMg2xxTMr2cpIg
<3 <3 <3 Growers love to you all <3 <3 <3
I will post more photos from her dry trimmed bud report smoke etc asap <3 <3 <3 and need to clean space on my iPad so that i can upload the rest of them photos and videos , my apologies <3 <3
Done hehehe waiting on this beauties to dry now <3 <3 <3

Likes
21
Share

@Theia
Follow
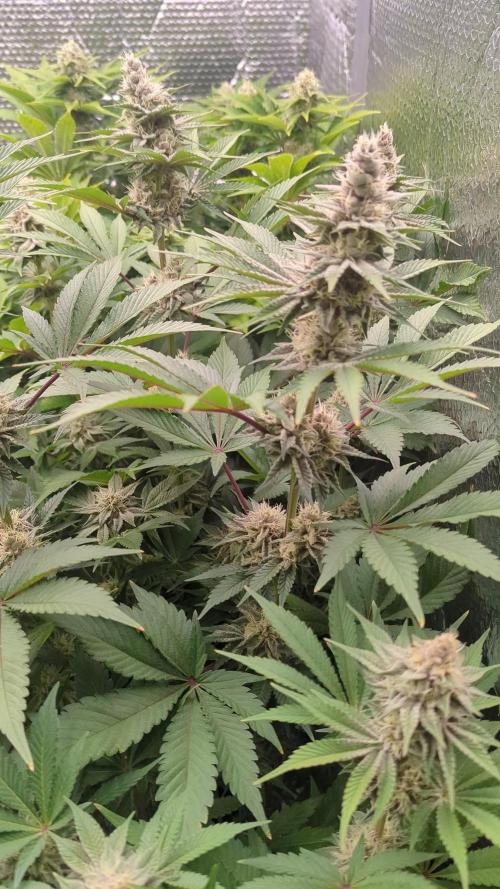
The Tropicana Cherry hasn’t suffered from any of the issues the three Triple Cheese in the room have. I’m guessing it’s something to do with those hybrid properties. It’s bred from Cookies, which was developed under high-power LEDs, while the Triple Cheese line is so old it might not be as stable under this kind of intensity. That’s my stoner thought, anyway. It’s also possible the Tropicana Cherry just has a more aggressive rhizosphere!
Who knows. You can see the anthocyanin influence deepening in the calyxes and sugar leaves and I think she looks stunning. The smell is sweet and fruity. This plant in particular is making some serious frost; I’ll never know if it’s the UVB unless I run two rooms with a control, but that’s not happening so I’ll just keep going with it. Beyond the protein stimulation, it’s also pretty good at killing bugs and pathogens.
The calyxes are swelling and starting to tower on top of each other. They look like they might burst—really chunky and still a way to go. o/
I’ve spent quite a lot on the environment this run. We’ve had horrid weather in the UK and high RH is a daily fight. I maintain a steady 1.1 kPa lights-off and ramp to a target of around 1.35 kPa for lights-on.
The main thing I learned this week is about immobile nutrients. Calcium being immobile is actually quite easy to spot when you’re watching for it. Since I have that Calcium Benchmark to look back on I have plans for the next run to make a source of CaSO4 available in the form of ground Gypsum mixed into my 40% amendments mix. Since I'm using the Biotabs water-only method having that slow-release Calcium should help prevent those rusty spots from showing up when I drive them hard.
There is more I’m sure but I can’t remember right now... lol
Grow well.

Likes
36
Share


@Roberts
Follow
Gorilla Glue has done 1 week at a 12/12 light schedule. She should start stretching a lot this week. I did some training today. I trimmed up bottom more, along with defoliation in canopy. The trimmings have a strong smell. Good sign at this point. I have not increased the light strength since last week on the Spider Farmer G3000 light. It is running at 50 percent right now. Everything is looking good and I will upload my weekly video here once I get it done for you tube. Thank you Spider Farmer, and Amsterdam Marijuana Seeds. 🤜🏻🤛🏻🌱🌱🌱
Www.amsterdammarijuanaseeds.com
Thank you grow diaries community for the 👇likes👇, follows, comments, and subscriptions on my YouTube channel👇. ❄️🌱🍻
Happy Growing 🌱🌱🌱
https://youtube.com/channel/UCAhN7yRzWLpcaRHhMIQ7X4g
Spider Farmer G300w: https://amzn.to/3S2zvsd
Spider Farmer 10X20 Heat Mat Kit - https://amz.fun/lsa0J
Spider Farmer Amazon Store: https://www.amazon.com/spiderfarmer
Spider Farmer Official Site: https://spider-farmer.com
Discount code: saveurcash

Likes
7
Share


@Ambz_1990
Follow
So day 50, 1st day of week 8, dragon force (kill feed week) then 2 week flush. This is before the

Likes
2
Share


@nenenedudu
Follow
Black cherry gushers got trashed because she had mold. i took a clone cutting tho i will do a diary just for her once i get her to root.
Gorilla cookies is making a great comeback!!

Likes
3
Share


@Krautbauern
Follow
The seeds germinated after 1-3 days, 1x runtz unfortunately did not germinate.
3 Days after the germination the plants were growing too quickly so I repot them them in deeper and increased the light intensity to 50% = 100 watts.
When repotting in biobizz light mix, the plants were also given a load of Mykorrizah from Great white premium.
Likes
4
Share


@AGrowerNotAShower
Follow
Week 10
Day 7 of flowering.
09/28: Well we are fully into flowering. Bethany is currently on her stretch. It seems to be slowing down. The gray spots ended up being some kind of deficiency. The spots ended up rusting, but as of late no new leaves have any damage caused by a deficiency. A few of the lower leaves where little light reaches have turned yellow. I gave her first feeding with Kool Bloom. Looking at mid-November for harvest. I can’t wait!
09/30: A little yellowing on the new leaves. EC levels in runoff were way too high. I waited a little too long before the last watering, so I’m sure we had some salt build up. Now that she’s bigger I’m going to water her more frequently. I also noticed some lower growth that was definitely not going to make it due to lack of light, so I decided to try out some cloning. I took two cuttings and placed them in plain bottled water to try and form some roots. Since she’s an autoflower and is currently in bloom, I’m not expecting much. But we’ll see.
Likes
1
Share

@CHRON1C_K1NG
Follow
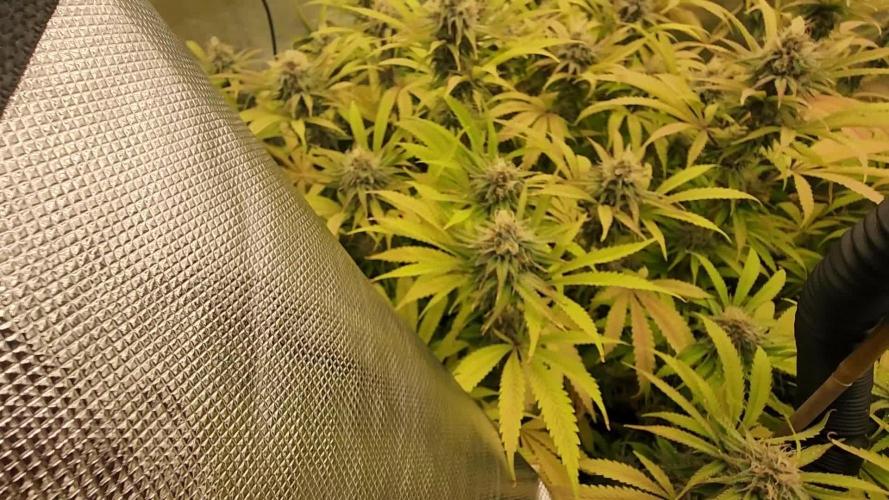
The first 30 days have come and gone. The stretch is finished, and my most favorite time of the flower process begins, where it actually starts looking like real buds instead of white hairs. The final few weeks are here only a few more to go.