
Likes
Comments
Share


@TechDCo
Follow
25/07/2024
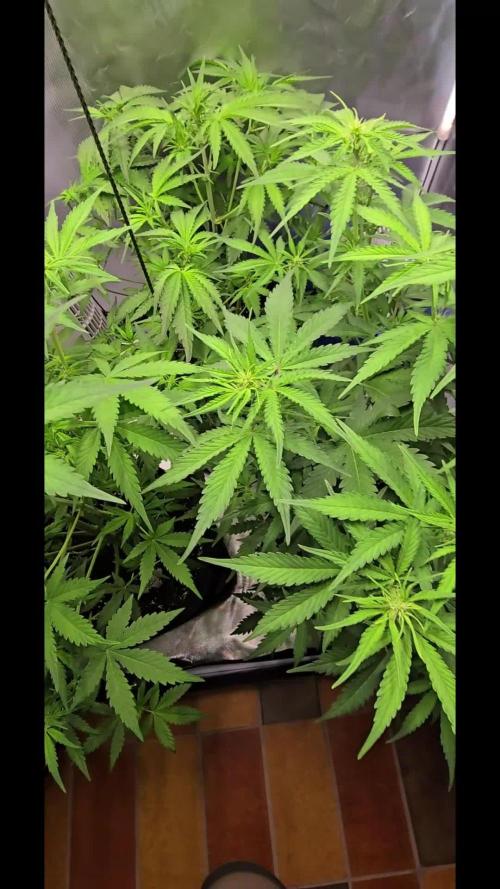
Lights On!
Light increased: 520watts.
Previously I mentioned the wind swept leaves, as well some are heat stress and slite toxicity from residue build up.
Next grow, I'll connect all 3 buckets together and setup a mini system with resviour; should of done it from the start. Never-mind
27/07/2024
Lights On!
3 x 15L Buckets installed!
Defolled and dimmed light to 420watts.
28/07/2024
Lights On!
Increased light: 530watts
Short Vid vid!
30/07/2024
Lights On!
Mid-day!
Lights Increased to 550watts
NEXT GROW GETTING READY!
(SCENE CHANGE!)
Yellow Green - The Future X DC Seeds
Yellow - Monkey Slapz X PreyBirds1
Red - Freaky Pablo X TerpyZ
31/07/2024
Lights On!


Likes
12
Share


@Jays_Not_Here_Man
Follow
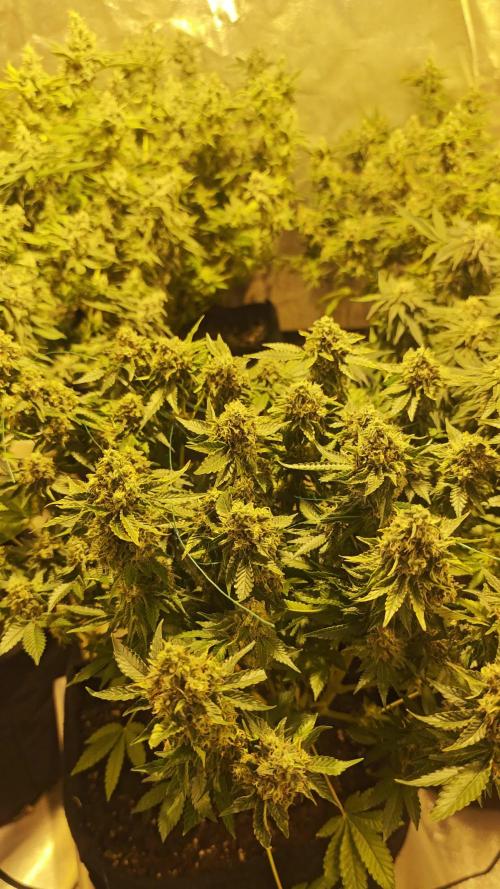
Another week has flown by! The girls are doing great, cruise control this week as I have just been monitoring RH and temps. Trying to keep them as low as possible, I’ve been getting as low as 74 during the day and 68 at night.
I finally took a look a look at the trichomes with my jewellers loop, lots of cloudy, and a few amber around the leaves and top colas, but still lot’s of clear trichomes. I’ve ordered myself a wireless/usb digital microscope to assist with the process, and looks like it will be here just in time to determine harvest day. 😎🎄
I started by eliminating the nutrients at the beginning of the week. I typically allow for 3-4 pure water feeds before I harvest, and at the rate they have been drinking, this should be enough to get through the 7-12 days they have before harvest. I don’t flush, but rather “rinse” with normal water amounts, allowing the plant to use up the remaining nutrients in the soil. This also allows me to recover most of the soil from my grows and reuse ♻️ with other soil mix.
There has been great debate and a great deal of bro science out there for many years, but the recent studies suggest there is no difference in end result when it comes to flushing or using nutrients right until the end, if a proper dry and cure is performed. What do you think? What do you prefer to do? Thanks for reading this far, leave me a comment with your preferred method 👊🇨🇦❤️

Likes
18
Share


@couplethatgrows420
Follow
This was the runt of the bunch from the beginning and started flowering a week before the others.
Seemed like in veg it didn't have enough nitrogen (yellow/green leaves) and in flower it had too much causing the bottom new leaves to grow kinda mutated and dark green.
Even with those issues she still packed on solid dense buds covered in trichomes.
pulled off 253 grams wet after trimming and 57 grams of trim
will update with dry weight when ready


Likes
Comments
Share


Likes
3
Share


@Krautbauern
Follow
unfortunately we noticed some budrod in the headbud. we cut it generously sb, unfortunately the papaya cookies still need something and the weather is now autumnal cold and rainy. We'll see in 7 days at the latest, but hopefully there won't be any more budrod by then... It's the most beautiful of all the outdoor plants so far.
Likes
2
Share


@HighOhioAn
Follow
Apple strudel what can I say checking all the boxes for me cannot wait to see her buds her she is a chunky girl. The video you guys have on YouTube of the plant is absolutely amazing. Had my mouth watering every second 🔥
Likes
7
Share


@Waisgrower
Follow
4ta semana de floración, muy buenos resultados hasta el momento obtenidos! Espero que les guste!

Likes
8
Share


@JohnnyBarrel
Follow
Week 18
Daylight 12h40 - ☀️7h40/20h20🌙
🌈Weather changed a lot during this 2 week, alternating sun and rain with medium temperature: low in the morning 8°C and 22/24°C the afternoon. Cold wind: Autumn is coming soon! 🍃
This is the middle of the flowering cycle for 2 plants and the beginning for the others; and it’s harder than I imagined. Interminable war against pests: caterpillars and leafminer flies (+ guest :aphids). However the environment is clean, there is some sticky traps, ventilation and preventives treatments (Neem Oil, Garlic/Laurel) but infestation are a recurring problem 😩.
Majors reasons of the proliferation are the hot temperatures in greenhouse, the quasi inexistants natural predators, humidity, plants proximity.
September is the reproduction period of the cabbage looper: a butterfly which lays eggs on plants giving some hungry caterpillars.
Some others pests are attracted by the nitrogen added in soil (batguano)
I did a serious defoliation, continue to check the plants morning and night to catch intruders, sprayed regularly with Neem oil.
For the moment the flowering continues.
-Brake Pad Breath: plant has definitely changed of physiognomy, branches are covered by a lots of resinous flowers with a pretty good smell. Indica dominance. Around 3 or 4 weeks till the harvest. It will be long: the plant is a victim of pests and caterpillars and lots of leaves are damaged.
-Flash Back#2: elegant plant, pretty good flowering since 3 weeks. Globally healthy despite of the pests aggression. Sativa dominance with long internodes distance and a vigorous stretch.
-GMO x Zombie Kush: same difficulties against predators, late flowering, just initiated the flowering process but in a good way.
-Royal Moby: the tallest one; around 170cm, not really adapted to dimensions of the growing space and not discrete. Plants was really shocked during the first wave of pests and after the sunburn. Late flowering, Sativa.
💦Watering : 2L/plants/48h
-grower Master Floraison + Enyme
-grower Master Floraison + pk 13/14
-grower Master Floraison + Cal/Mag


Likes
4
Share

@NSABND
Follow
Welcome to Day 36 .... first Day of pre flowering 😍🙏👍
Day 37 .... massive leave cuttingto get space for the queens 😶🙏
Day 38 all strains forgive me the massive leave cutting 😃👌🙏
Day 39 everything seems to be ok 😍🙏👍
Likes
61
Share


@MadeInGermany
Follow
Hi everyone 😎.
Everything is going great 🤗
You look very healthy and feel very comfortable.
This week I trimmed everything underneath and cleaned everything :-) All spare parts were replaced, as after a while from using the aero tool all the screw threads were bruised.
At the same time, the entire tank was emptied, cleaned, and freshly filled this time with flower fertilizer :-) this week the stretch will decrease and the energy will be put into the flower production.
I have with clean up take the chance right away, and take photos of the root carpet ich At the moment I am considering getting a CO2 system for the Aero tent, because I used to have one, but it had to be given when the boxes were not moving :-(
Otherwise I wish everyone a nice weekend, and health for you and your families in this scheis corona time 😷
Let it grow 😎


Likes
17
Share


@F1yboy420
Follow
This week I cut a lot of foliage off. This way the lights can get to more buds. Weed inspires creativity.

Likes
76
Share


@Roberts
Follow
Purple Ryder is growing great under the Medic Grow Mini Sun-2. She loves the Agrogardens nutrition as well. She has been eating and drinking a lot. She is due for a solution change very soon. Everything is looking really good at the moment. Just waiting on the bulking to begin. Thank you Doctors Choice, Medic Grow, and Agrogardens. 🤜🏻🤛🏻🌱💪🏼🌱
Thank you grow diaries community for the 👇likes👇, follows, comments, and subscriptions on my YouTube channel👇. ❄️🌱🍻
Happy Growing 🌱🌱🌱
https://youtube.com/channel/UCAhN7yRzWLpcaRHhMIQ7X4g

Likes
4
Share


@Masshysteria
Follow
Day 22 Update: LST rechecked and adjusted as necessary. All three got dechlorinated tap water, PPA1 and PPA2 each got nearly a L, and PPA3 got about 1/2-2/3rds.
Day 24 Update: LST rechecked and adjusted as necessary. All three got dechlorinated tap water; PPA1 and PPA2 each got nearly a L, while PPA3 received about 2/3rds. Pictures show decent foliage filling in over the past two days, so I adjusted again. One, maybe two more good adjustments and then I'll mostly let em grow. PPA3 seems to be recovering from the topping well, but I wouldn't know the difference yet anyways. Its fun to watch them grow regardless!
Day 25 Update: Just took a picture of each today.
Day 26 Update: Took a picture of each in the tent. They will likely all be getting water tonight. I think just regular water again tonight. The tip with 2 sets of stems broke off PPA2 so they’ve all been topped if inadvertently. I always had my doubts because of the soil PPA2 is in, but this will drastically affect the outcome.
Day 27 Update: I watered them with about a .75 L each tonight. Decholorinated tap. Maybe add some Tiger Bloom next time? Pretty sure the soil was still pretty hot at least with nitrogen from whatever I had growing before, so maybe just water again honestly. Updated pictures of each today. PPA2 is going to be severely limited. I looked through the pictures, you can see the break on PPA2 on day 24. I probably could have saved if I'd noticed, so I've learned to keep a better eye on the training and not force the main stalk so much. I don't know if I'll adjust the training anymore.
Day 28 Update: Just a new picture of each. There’s also a video showing off my whole tent. Light dose of Tiger Bloom tomorrow night is the plan.

Likes
8
Share


@Spliffing_Around
Follow
We continue to mix our own nutes, but I started also testing Nutra Hydro . One rack only for now. Next project is upcoming for organic beds or huge pots. STAT TUNED BROTHERS ANS SISTERS ! Grower love ❤️❤️❤️!!!!

Likes
469
Share


@love_2_grow
Follow
D64 - We're at the start of the fifth week of flower, and the girls are looking better day by day.
However, a few days I noticed very minor leaf damage on two leaves on the second girl that "might" be thrips damage.
It's not a huge deal since the girls will finish in two to three weeks, but I figured it would be prudent to be proactive before the next grow, so I ordered some Cucumeris predatory mites. They arrived today, and I hung a sachet with mites on each girl.
D68 - Today, I disconnected the Inkbird controller and humidifier that kept the humidity in the tent high. It is getting towards the end of flower, and I want to decrease the RH in the tent to avoid botrytis. I also set the exhaust fan to run constantly. I hope that will be enough as there isn't enough space in the tent to fit a dehumidifier. #tinytentproblems
D69 - The humidity in the tent is still too high for my liking so I had to get creative. I drilled a hole in my dehumidifier so that it can hang in the tent. It's only a small dehumidifier and not very powerful but the tent is tiny and the dehumidifier should be enough to drop the RH by around 10%.
D70 - We have reached the end of the fifth week of flower and the girls are rocking it in the tent and their buds are getting fatter as each day passes by. It's only a waiting game at this point although a game where I'm trying to avoid budrot. I adjusted the light schedule yesterday so that the hottest hours of the tent are during the coldest hours of the day. That should even out the temps a bit, and I also keep a flap open on the tent to further reduce the temperature and humidity. The girls are looking great and I would hate to get botrytis and lose part of the harvest.
Likes
Comments
Share


@Lynx_361
Follow
08.07.2025
Flowering day 9 and rooting day 9. Both, flowers and roots show up now.


Likes
15
Share


@Wenz004
Follow
So endlich freie Samen von RQS vom letzten Jahr eingepflazt...im Moment keine speziellen Dünger...nuf etwas Fishmix...Erde ist Biobizz Allmix...Pflanze scheint es zu mögen...Plan ist...so ab ca. Woche 6-7 in die freie Natur verpflanzen (guerrilla)
Likes
3
Share

@HiLlama
Follow
Remaining girls continue. Might plan harvest of white widow and Jack soon.

