


Processing
Likes
9
Share


@Luv2Grow
Follow
Day 64 - Started off week 10 with 2 gallons of water and nutes today. I’ll be chopping my Cherry Cookies in about 2 weeks so she’ll have a little more room in the tent to stretch and get some light. She’s fine right now but a little cramped. Had a few of the lower leaves that were died off and just hanging on so removed them as well.
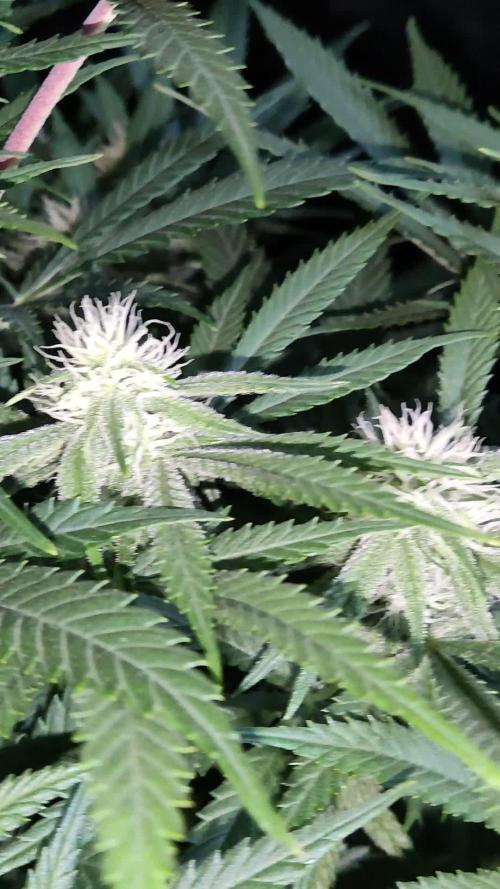
Day 66 - Nothing much new going on today. Removed a few more dying fan leaves again. Gave her a bit more water than I normally do so she should be good for another couple days. She’s definitely budding up nicely and just waiting for her to really start frosting up.
Day 67 - All looking good and coming along nicely. She’s budding up and just waiting for the frost to start. She’s gonna need some water and nutes tomorrow.
Day 68 - Gave her 2 gallons of water and nutes today and she’s doing really well. Buds are forming nicely but still not seeing any trich development yet but I’m sure that’ll come soon enough. She is putting off a little bit of a smell right now and it’s almost like straight lemon. Not sure if that’s how this strain is supposed to smell but I’m liking it. She’ll have a bit more room to stretch out next weekend when I chop my Cherry Cookies.
Day 69 - She’s still budding up nicely and hopefully this coming weekend she’ll be less constricted when I chop the Cherry Cookies. She’s drinking quite a bit and will probably need water and nutes again on Tuesday. Still not seeing much trich development so not sure what’s causing that but we’ll see what happens in the end.
Day 70 - The end of week 10 today and looking through my jewelers loupe, I finally see some trichs starting to develop. So hopefully in the next week or so, I’ll be able to get a good smell coming from her. She’s going to be needing some water and nutes tomorrow.
Likes
4
Share

@AestheticGenetix
Follow
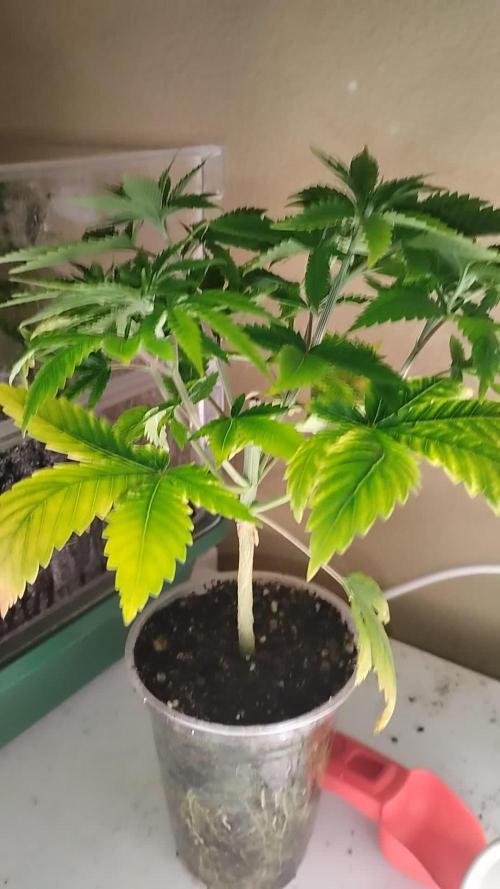
2/22/26
This genetic has great structure. she's short and slimy
Transplanted into 1 gallon pots and put into the flower tent

Likes
60
Share

@Natrona
Follow
FBA2502
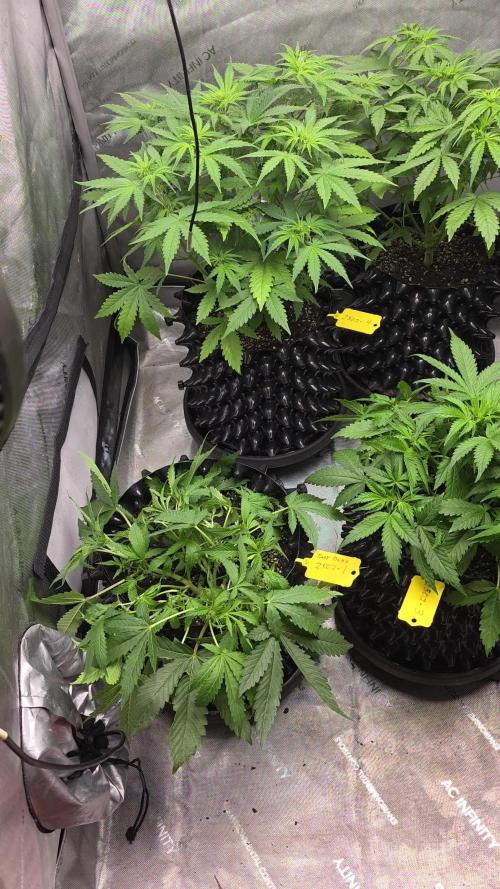
Week 4 April 20-26 Veg 4
Highlights of this week:
I defoliated the large fan leaves from the main stems. After defoliating, I saw that plant #3 has a short, tight node structure like plant #1, so I pinned her down before she goes into flowering. Plants 2, 4, 5, and 6 are taller than plants 1 and 3. The larger plants 2, 4, 5, 6 show pre flowers with thinner new growth and hairs at the nodes. The leaves are wide and thick. Some have a slight blue tinge. This makes me think I’m over feeding. Apparently, the blended soil has enough nutrients for the autos, so I don’t need to feed right now. At the end of the week, I watered with ph 6.5 water with cal mag and recharge. Lights are 20” from tops of tall plants and 30 from 1& 3.
My general thought for the future grows is to wait until the plant is bigger and see its structure before starting training. #1 has many branches coming into the middle. By beginning with pinning and keeping it at the ground, she will not achieve the stretch around the pot.
I pinned #3 to push out the bud sites from being up against the main stem. It is easier to LST when there is more space between the nodes, so a bit of growth or stretch is required. Training to open the top is needed when the plant is short and tight.
If you want to follow what's happening with my other two FBA2502s see my friend's @Susquihanna diary.
4/20 Hairs on 2, 4, 5, 6 and feeding
Micro ½ tsp/gal
Gro ½ tsp/gal
Bloom ½ tsp/gal
CalMag 1 tsp/gal at full strength
4/21 pics & video
4/22 water only ph6.5. I watered with plain water, it looks like over feeding and they are in are transitioning to flower.
4/24 Water with recharge ½ tsp/g & CalMag 1 tsp/g ph 6.5
pics & vid see blue tinges in leaves.
Plants shot up, doubling in height again this week.
#1 6”, # 2 10”, #3 7”, 1 14 “ 5 14” 6 13”
Your likes and comments are appreciated. Thanks for stopping by.
Growers love 💚🌿
💫Natrona💫
Likes
92
Share


@DogDoctorOfficial
Follow
🌱 Week 1: The Journey Begins! 🌟
Hey Grow Fam! 🙌 We’re off to an epic start with our TrolMaster adventure, and I’m already feeling the love for the setup, the seeds, and the growth happening in the room! So, let’s dive right in and get into the details of this exciting week!
🌿 Germination Update:
Our first Gorilla Melon seed from Fast Buds didn’t sprout, but no worries—round two was a success! 🦍🍈 The second seed has germinated and is looking full of potential. I’m throwing in a Sweet Seeds Papaya Zoap into the germination station too, so we’re keeping this exciting lineup going strong! Germination is such a key part of the journey, and having a healthy start is what it’s all about.
🔧 Room Build & TrolMaster Setup:
The build is coming along beautifully, and I gotta say, the TrolMaster system is blowing my mind! Everything’s under control like magic 🎩✨, and the TM+ app? Wow, just wow. I mean, I can literally be in the bathroom and still keep an eye on the plants—check all the metrics, adjust settings, and fine-tune what I need, all from my phone! 😂💧 This level of control is next level. I’m loving how smooth and seamless it makes managing the room. The gear is just unreal, and seeing it all come together is truly something special.
🌱 Nutrition Talk:
As for feeding, we’re starting light but smart! I’ve begun with 0.15ml of Regulator and 0.25ml of Startbooster per liter for now. I always believe in starting easy and ramping up as the plants develop. These early stages are crucial—balance is everything. For the time being, I feel this is more than enough to keep the babies happy and healthy. 🌿💧 The Regulator is working wonders in maintaining plant structure and health, while the Startbooster is fueling the early root and vegetative growth, laying down a solid foundation for the weeks to come. It’s about getting it right from the start—too much too early can be a killer. Keeping it steady with precision, that’s the goal!
Big Shout-Outs:
To the amazing team at @TrolMaster, @Fast_Buds, @Sweet_Seeds, @AptusHolland, and all the incredible sponsors—I’m beyond grateful for the support! 💚 And to my GrowDiaries fam and followers, you guys make this journey what it is—thank you for the love, and I’m so honored to have you along for this ride. 🙏
We’re just getting started, and I can’t wait to show you what’s next. Stay tuned for more updates, epic builds, gear reviews, and plenty of insight. Don’t forget to follow me on GrowDiaries, YouTube, and IG for exclusive content, and let’s make this grow the best one yet! 🌿🔥
Growers Love to All 💚💚💚
P.S.- A deep dive into the Full Spectrum Quantum Sensor (MBS-PAR):
The Full Spectrum Quantum Sensor (MBS-PAR) is an essential tool for any serious grower looking to optimize their light environment. This sensor measures photosynthetically active radiation (PAR), which refers to the spectrum of light that plants actually use for photosynthesis—typically between 400 and 700 nanometers and more depending .
What makes the MBS-PAR sensor special is its full spectrum capability, meaning it accurately detects not just visible light but also far-red and UV light—which are crucial for maximizing plant growth, development, and flowering. With this tool, I can monitor the exact intensity of light my plants are receiving, making sure they’re getting the optimal levels for every stage of growth.
By using this sensor in my grow room, I’ll be able to ensure that the light distribution is uniform across the canopy. Plus, it allows me to fine-tune the light output from my ThinkGrow LED setup, ensuring my plants are thriving under the best conditions. Whether it’s increasing light during the vegetative phase or fine-tuning it for flowering, the MBS-PAR sensor helps me keep everything on point. And the best part? I can monitor it all through the TrolMaster app, ensuring I can make adjustments whenever needed—even if I’m not in the grow room!
This level of precision means healthier plants, better yields, and maximum efficiency. It’s a game-changer for taking the guesswork out of lighting and getting closer to growing perfection! 🌱💡
Growers Love to All 💚💚💚


Likes
7
Share

Likes
146
Share


@biggreens420
Follow
So she was a breeze to grow took to training like a champ fimd her early and did bowl training on her till around 2nd week in flower then removed the ties she would have been even better without the issues I had fed her daily on the wwf regime aiming for 30% runoff this seems to work really well on autos and get big yields of them trimming her was easy did wet trim then hung to dry for 6days at 65/60 with a small fan circulating the air then in a tub for 3 days burping buds are nice and tight loaded with thc and smelling awesome really happy with how things turned out thanks to all my followers and friends grow share learn what were all about happy growing guys
Likes
40
Share


@Hempface86
Follow
Another week and thease girls are starting to build their buds nicely now..Grease Gun seems to be the farthest along followed by Froot by the foot then Cream and Gummiebears .. Gummiebears starting flowering almost 2 weeks after the other 3 girls but she is catching up fast.. she gonna be a MONSTER .. As you can see i raises the lightup as much as possible, we are running out of space..the tent is 63 inches tall. Grease Gun is so frosty and so pretty 😍 so is FBTF...I'm looking forward to this harvest! Till next week everyone be safe ! Happy growing ✌️


Likes
13
Share


@CanarianGrow92
Follow
Week 2 flowering for the girls!
We already see the streching, some plants are a little smaller but i will put a support under the pot if they continue smaller, we want to have a quite even canopy.
We also removed some lower branches.
Likes
23
Share

@Kirsten
Follow
The plant has been given some nore room, due to one plant being harvested. After that plant was gone, I rearranged the tent to try and give her a bit more space from the intensity of the light.
17.8.25:
I watered with 3L of dechlorinated water PH'd to 6.0 with;
💜 2ml Trace
PH: 6.0
PPM: 391.
Thanks for stopping by 😁💚✌️🍃🙏

Likes
39
Share


@Roberts
Follow
Bubba OG Gum autoflower has been growing great. Just keeping up on her training and letting her spread out. She is due for a solution change soon. Everything has been going well for her. Thank you Spider Farmer, Athena, and Ganja Farmer. 🤜🏻🤛🏻🌱🌱🌱
Thank you grow diaries community for the 👇likes👇, follows, comments, and subscriptions on my YouTube channel👇. ❄️🌱🍻
Happy Growing 🌱🌱🌱
https://youtube.com/channel/UCAhN7yRzWLpcaRHhMIQ7X4g

Likes
81
Share


@LockDownGrow
Follow
Ok so this week I did a defoliation and a tigh down too the netting , I really was not planning on doing such a big defoliation but the leafs became thick and dense and there was almost no light penitration down too the lower branches of the plant , so she is opened right up now and the humidity and temperature has dropped loads and the air is moving alot better around the leaves and branches , I will not take anything more off her now , I have also added Cal mag too the nutrients for this week only ,
I am very happy with them so far and being new too all this it's all very exciting ,
Thanks for looking :)
Likes
6
Share


@TherealNICOGREEN
Follow
Blir flyttet ud fra solen er oppe og indtil ved 21 tiden og ud igen ( indtil nattefrosten er over) jeg har VIRKELIG SET FREM TIL AT LAVE DISSE Dagbøger og VIDEOER OG EN MASSE ANDRE GODE FRØ FRA KANNABIA 🖤🧡🖤🧡💚☮️🖤💚🖤🧡🖤🧡.


Likes
29
Share


Likes
1
Share


@MaryStrix
Follow
Woche 9
und auf einmal waren es nur noch 3 Pflanzen.
Viel zu spät haben wir erkannt wo das Problem der einen Weddingcheesecake lag, durch den extremen Stress und der massiven Überdüngung (volles BioBizz Light Schema) hat die Pflanze sich zum Hemaphodite entwickelt...
RIP Holy
Likes
26
Share


@Earthy_Greens
Follow
🌱✨ Here are our girls in their seventh week! 🎉🍀🌿 These beauties are thriving, and their growth has been incredible! 🌟 I defoliate them every three days ✂️✨ because they grow leaves super fast 🍃⚡, often covering the stems.As we’ve mentioned before, we’re growing them horizontally 🌿🔄 to prepare for the scrog , ensuring we cover the entire perimeter perfectly. This method helps maximize light exposure ☀️🌟 and promotes even growth. They’re absolutely loving it! 💚
As I’ve said, this is the power of soil 🌍💎 and the right fertilizer 🍴🌿—the perfect combo for happy, healthy plants. 🌟✨ Follow our diaries 📔👀 and be part of this journey—you’re going to see some really cool changes in the cannabis culture! 🚀🌸🔥
Stay tuned, friends! 👊💚✨

Likes
20
Share


@Cultiuherba
Follow
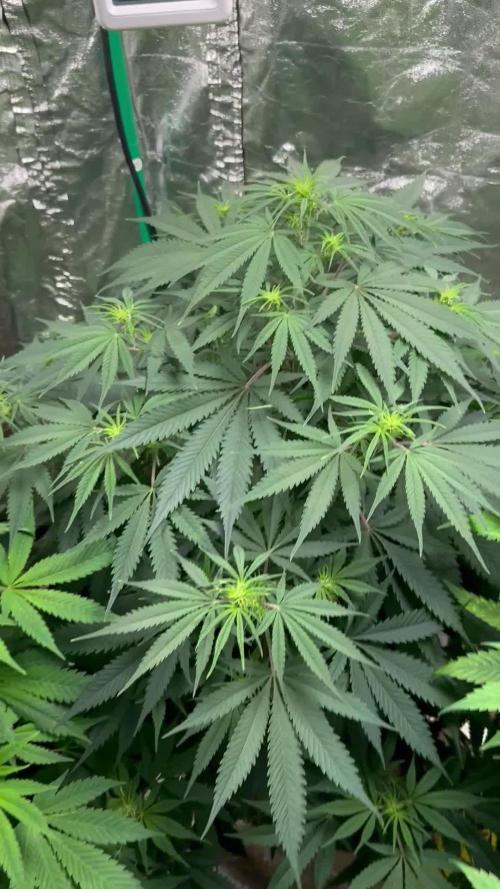
Crecen muy bien, una genética muy firme. Las plantas se desarrollan piramidalmente. Tienen mucha fuerza, parece que van a producir bastante.mantengo ec en 1.2.

Likes
7
Share


@HookahCli
Follow
d14
Se las ve más pobladas, parece que no les ha causado mucho estrés por lo que han continuado creciendo y lo que yo quería, ahora las ramas laterales, reciben mejor la luz y están creciendo bien.
Tienen buena estructura la mayoría, son bastante simétricas.
Semillas a granel y ya veis la calidad que tienen, no son super estables porque no se parecen tanto entre ellas, pero no son malos ejemplares, en cuanto a estructura.
Tenemos las plantas del fondo, la zona donde está dando el ventilador, y me he dado cuenta que esas plantas tienen algunas hojas medio amarillas y blanditas, parece ser que se han creado alguna bolsa de humedad, necesitaré un ventilador más para que no pasen estas cosas.
También he mirado un poco algunas plantas y tienen lo que viene a ser la primera rama satélite, pues es muy fina y no ha crecido en altura para poder recibir luz, por lo tanto se cortarán estas ramas.ç
PD: Si se ve una semilla germinada en una maceta, es una 1024 que se quedo en la tierra y parece que le cuesta mucho, pero que nunca se rinde.
d15
Algunas tienen un callo bastante gordo en la unión de las ramas satélite.
Se han cortado las ramas de abajo del todo, primeras satélite de algunas plantas ya que no les da la luz y no nos van a hacer falta.