The Grow Awards 2026 🏆 


Likes
18
Share
@KurbinTurbin
Follow
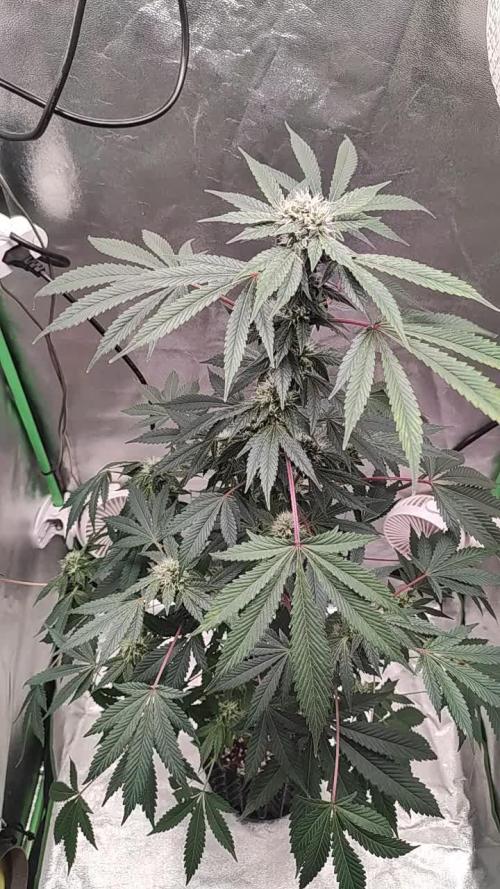
This strain was easy to grow, short and very bushy. The smell when drying has an incredibly strong earthy/chocolate aroma which is very pleasant🤤.

Likes
8
Share
@Stayvu
Follow
Les filles ce sont pas mal sortie de cette canicule, certaine ont souffert d'autre pas du tout.C'est partie pour la Flo.


Likes
30
Share
@Roberts
Follow
Watermelon Autoflower is growing good under the Medic Grow Mini Sun-2 in the Gen1:11 nutrition. She is doing a lot of stretching. I lollipopped the plant and defoliated her some. She also got a solution change a few days ago. Everything is looking good. Thank you Medic Grow, Gen1:11, and Royal Queen Seeds. 🤜🏻🤛🏻🌱🌱🌱
Thank you grow diaries community for the 👇likes👇, follows, comments, and subscriptions on my YouTube channel👇. ❄️🌱🍻
Happy Growing 🌱🌱🌱
https://youtube.com/channel/UCAhN7yRzWLpcaRHhMIQ7X4g

Likes
17
Share
@RoyColt
Follow
-Day85 watering 4 liter with calmag 1ml/L - Dry KoolBloom 0,39gr/L Total 300 ppm Ph 6,3
-Day87 watering 5 liter with calmag 2ml/L - Total 400 ppm Ph 6,3 (Drain 1,1 Liter 550 ppm)
-Day89 watering 5 liter with organic bloom 2ml/L - Finalpart 4ml/L - Nirvana 4ml/L- Total 1150 ppm Ph 6,3 (Drain 0,9 Liter 600 ppm)

Likes
24
Share
@RastaGrow
Follow
It’s finally here. The last week..! All of my hard work and commitment to these ladies is about to reward me with some super sticky flowers! And lots and lots of them by the looks of it...
These buds look unreal, it looks like amazing quality flowers all over these girls. It’s dense buds that are coated in trichomes and resin.
The flowers came out a bit more dense on this grow compared to my previous soil/HPS run, which I find surprising. This could be due to a variety of improvements within the garden but I’m going to attribute most of it to my increasing horticulture skills.


Likes
41
Share
@Mrs_Larimar
Follow
2024-07-28
2 Opium Plants remain in my Outdoor Garden.
One sits in a 75l container, and stands near the house
the other Plant sits into 30 l container , in a corner in my Garden
Die Outdoor Girls are starting to flower, still in stretchmode
the Plant in the 75l container looks super impressive
the 30l girl gas a good spot to go on
lets see.
for any reason the system dont let me do another updates, so iam forced to do all updates at once in one week
2024-08-16
The Plants are stretching and building sweet flowers
Temperatures became perfect, with lots of Sun and warm weather.
2024-08-23
The Weather continues to stay very warm and sunny,
the Girls drink up to 10 liters daily, and they get some feedings with
organic more PK, because they need the Energy
2024-08-30
Both Girls doing fine,
the Plant in the 75l Growbag, is very thirsty and develops sweet Floweringsites.
the Girl in the 30l pot, has grown into the open Ground.
she was sticking her roots out of the holes from the growpot
i was wondering why she looks so fresh and green without getting nutrients, now i know why, she is sucking all good stuff out of open ground
clever, clever.
2024-09-07
In the meantime we had some heavy rain and Wind, i had to stabilize both Plants
the Girl in the 30 l Container was stretching so massively , she was growing one meter!! in short time
but she was blown the most, i had to tie her and she is leaning onto a bigger treee
i kinda forgot to save her from winds. but anyway, shes safe and goes on
The Girl in the 75l is safe for the moment
she shows already massive buds, next week i have to take pictures from above her
2024-09-13
Weather truned for summerly and hot, to autumn and raniy and cold
so i have to watch her closely, and hope for more warm / dry days, for her to finish up.
It weather continues to stay rainy- and she starts to mold, we will harvest
instantly.

Likes
1
Share
@captaincondor
Follow
Well its been a good run with this pheno , she's the biggest plant i've grown so far and has excelled in bud production litterally everywhere. The shogun nutrients seem to have worked really well with no deficiencies throughout the grow . I've stop using dragon force now and am just feeding ph'd water for these final few days. I am looking forward to sampleing soon my gelato has also done really well with some nice dense buds


Likes
17
Share
@Elpicor
Follow
D47
Flowering Week n° 2 started, I will pump up nutrition.
I was saying this is the last time I removed big leaves and those that hinder buds, that was five times ago, I honestly didn't think I would get this size.
D48
Strawberry pie survive to -4 c° last night, to day air temperature will be 12 degrees...
In the Freedom Pic you are seeing a marijuana leaf and behind it a magnificent mountain panorama but you do not see what is in between which is the most important as often happens in life what is important you do not see ... what is it ? it's the clean fresh mountain air.


Likes
25
Share
@Kakui
Follow
Comenzando un nuevo cultivo de 12 semillas Jamaican Dream de Eva Seeds.
Sustrato 50% turba, 50% vermiculita con un pH de 4.0, por lo cual tuve que agregar dolomita para subir el pH del suelo a 5.5.
1.-Germinando directo en sustrato.
2.-al indoor para aprovechar la temperatura que genera el led, los días están algo helados y debo mantener la temperatura sobre los 20 grados Celsius, aproveche de espolvorear algo de great white sobre el sustrato y agregar más agua.
3.-aun nada, ansiedad x1000 😰, espero que al menos germinen 9 de las 12.
4.- Día 1, Por fin germinaron!!!!, 12 de 12, la ultima está asomando, ya les saque el plastico y les di el primer riego de agua 6.0pH con voodoo juice, tarantula y piranha, 1ml por litro de cada uno. Feliz!! 😁
5.- Día 2, ya están mostrando las primeras hojas de un solo dedo, 2~4cm de altura.
Ahora a esperar que salgan las primeras hojas verdaderas para empezar a contar como primera semana de vegetación.

Likes
4
Share
@805homegrown
Follow
July 7 start of week 9 first week of transition to flowering.
July 8th I sprayed some (FSW) fermented sea water with (FPJ) fermented plant juice and (LABS)lactic acid bacteria as a foliage spray. Sprayed 2 hours before the lights came on.
July 9th the girls loved the spray I made for them on the 8th
July 12th I sprayed with WS-CAPO water soluble calcium potassium
Foliage spray.
Likes
7
Share
@CannabisAprendiz
Follow
Esta cosecha fue muy buena con excelentes resultados de flores muy compactas y demasiado resinosas , la genética en sí es muy resinosa con olor muy característico , con sabores terrosos muy marcados .


Likes
29
Share
@Reaper
Follow
buds fatten up now,
The hydro plant is destroying the soil completely, the buds are 3x as big lol.
i started this grow during the cold winter temperatures, thats why everything got slowed down a few weeks. i expect to harvest withing 2-3weeks from here.
Processing
Likes
2
Share
@MO_Gardens
Follow
Like my other auto I'm growing, I've learned these are much different from photo plants. They don't like heavy feedings or lots of light. My other photo plants enjoy both.
I've feed some liquid seaweed and molasses over the past week, and have continued the LST. So far so good.
Likes
8
Share
@Huntress007
Follow
I had a lot of fun with this grow and can’t wait to taste the final product after dry and cure!