Check the winners The Grow Awards 2026 🏆 











Likes
Comments
Share
@TheCannaProphet
Follow
~ WEDDING CHEESECAKE FAST FLOWER by FastBuds ~
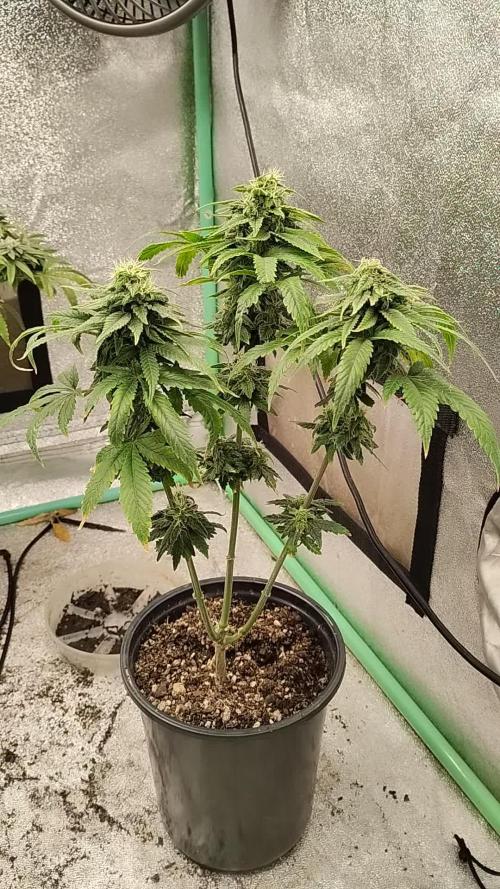
Well fam, here we go again with another epic strain from FastBuds Fast Flowering stable. After having such tremendous success growing their Gorilla Cookies Fast Flower outdoors last year, I've decided to run another of their fast flowering strains outdoors this year... Wedding Cheesecake Fast Flower!
The best description of this awesome cultivar comes directly from my friends at FastBuds which is as follows:
"A delight for the mind and body: Wedding Cheesecake FF (Fast-Flowering) is a delicious strain that offers XXL yields in a 7-8 weeks flowering cycle. This terpene powerhouse produces loads and loads of mouth-watering vanilla-creamy-cookie-scented terps with hints of citrus and cinnamon. In addition to its delicious aromas, this variety grows very well in both indoor and outdoor setups, yielding up to 650 g/m2 without extra maintenance, making it the ideal strain for beginners as it allows you to maximize yields while minimizing work. This super-fast feminized photoperiod version offers upbeat and energetic yet deeply relaxing effects that are perfect for consumers looking for a heavily focused, motivating, and creative high. It’s the ideal strain for those needing that extra energy boost to start a busy day on the right foot.
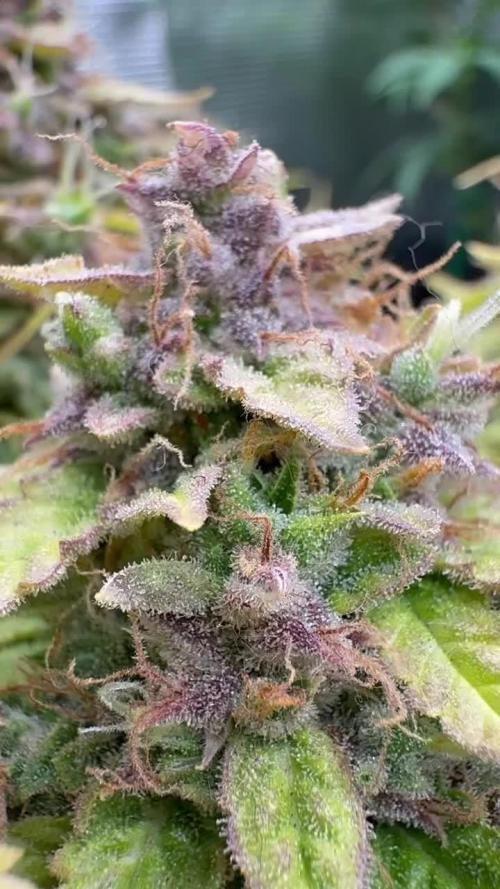
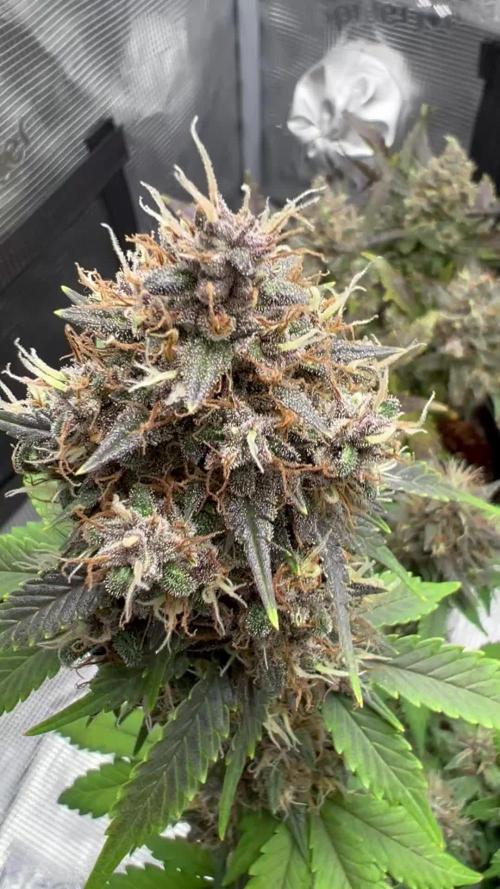
Wedding Cheesecake FF boasts chunky, large-sized buds with a thick layer of silvery-white resin and bright orange hairs scattered all over: that just screams ‘quality’. The lime-green flowers sparkle with an array of hues ranging from dark to light green, to magenta and purple, and reek of a delicious aroma that’ll remind you of fresh store-bought cheesecake.
This is an XXL hybrid that grows extremely tall in height, reaching up to 3m with one huge main cola and multiple long side branches that can withstand enormous yields of up to 650 g/m2 with ease. Wedding Cheesecake FF is extremely resilient to the elements and can be grown in almost every climate as long as you’ve got the space and basics covered, making her an excellent choice for those looking for large-scale harvests with a quick turnaround time without much effort."
________________________________________________________________________________________________________________________________________________________________________________________________________________________________________________________________________________________________________________________
The Setup:
This is going to be an outdoor grow, but I have started the Wedding Cheesecake FF indoors as our weather is still too cold to put her outside (nighttime temp's dipping regularly into the 30's℉).
The plan is simple... let her grow inside under a 19/5 light schedule until the nighttime temperatures stay above the mid 40's℉, at which point she'll be moved outside and transplanted into the soil which I have already setup and inoculated with beneficial microbes, and then let the fun begin!🤪💚
________________________________________________________________________________________________________________________________________________________________________________________________________________________________________________________________________________________________________________________
Weekly Updates:
7/28- Can you believe we're going into the Seventeenth week of veg for the Wedding Cheesecake Fast Flower by FastBuds... UFB!🤯 This humongous girl had better get in gear and start flowering soon as her stretch has finally stopped and she's about as healthy as you could ask for!
We had passing showers all day today, which took care of my watering duties today.
7/30- The weather continues to be hot and dry, with only an occasional passing rain shower maybe once a week, and as a result the daily watering continues after sunset.
8/1- Currently, all I really have to do right now is regularly watering her, and checking daily throughout her foliage for yellow or dead shade leaves which I remove, so life is muy bueno!😍
8/3- Another hot week has come to a beautiful end and I have a feeling that the Wedding Cheesecake FF is getting ready to bust loose!
Thank you for checking out my diary, your positive comments and support make it all worthwhile! 💚Growers Love!💚😎🙏


Likes
3
Share
@Dzgn777
Follow
..уже появились янтарные трихомы...Дело близитса к харву))) интересно сколько получитса сухого?...


Likes
5
Share
@Bluemels
Follow
Tag 35: Den Pflanzen geht es prächtig, wir hatten viel Regen und es ist nicht mehr so warm. Beide Pflanzen haben das LST ung scroggen gut überstanden. Teilweise ist mir dabei eine Pflanze gebrochen und sie ist trotzdem normal weitergewachsen.

Likes
15
Share
@XperencdGmanXG
Follow
These little girls seem to be recovering from being neglected in the seedling station. Finally starting to green out and perk up. Just been hitting them with microbe bombs, and it does take some time for the microbes to turn up the engine,
Likes
16
Share
@Ganjagrandaddy
Follow
Day 50 flowering. Despite my punishment with the calmag she is doing well considering. I dont doubt she could have been a hell of a lot bigger and would have been a big yield. She is covered in buds that her branches cant keep up now. she looks a little of a tangle with the way I have to support her now and any handling of her leaves my fingets tacky as hell. I did find a little budrot to deal with too which is a concern for the harvesting time now. Hard to keep the rh down with the uk weather at present and a dehumidifier is on my list now.
All in all another week for her will give me some lovely sweet smoke when she is done. Trichs are still showing quite a few clear so she is good to go on

Likes
16
Share


Likes
17
Share
@Fabhz
Follow
easy strain, havent tried it yet, watch out for humidity, Great experience, my first grow. 100% recommended for beginners. Thanks for everything growdiaries.

Likes
22
Share
@Chucky324
Follow
Hello. I'm starting my Dos Si Dos #33 diary here.
These clones have been growing in the veg tent all summer. I had stuff growing in the greenhouse all summer and it gets really hot in that cement room in the middle of summer, so I shut down that grow room till now. I got it up and running last week but I was a little embarrassed to make a diary starting last week because I had treated the clones badly and they looked rather leafless. They look much better this week, so I'll start.
I would like to start playing around with making feminized seeds. So, I need some extra clones to spray to make the feminized males. I've read about it, now it's time to try. Some of these clones I take will be turned to males next year.
I gave some clones to my friend Jerry for his summer crop. I was over to his house the first week in October, to take pictures of his plants. Some of the lower plants that were not getting sun anymore were just starting to show some powdery mildew on some of the big fan leaves, so he decided to cut them down. He did a real good job on growing them this year. I think he said he was going to cut the big bud off the ends of the branches and let the smaller buds fatten up, under cover, in the sun, on the deck.
This is the strongest plant I grow. It gets me pretty baked with 5 or 6 tokes. It grows on the taller side, so I'll make lots of tops to slow the growth down. And it tastes like fruity ice cream!!! Yummy!!!
The other plants in the room are Amnesia Lemon by Barney, Pink Kush the original clone I found 27 years ago, Nova OG by Anesia Seeds, Sweet Sensations by Sweet Seeds, The White (Whitey) by Dr Greenthumb.
I will put in next week more Fat Freddie's Cat cartoons and I have some more puzzles to finish off that puzzle book. Then when that's finished, I'll put in some Fabulous Furry Freak Brothers cartoons.
Man, the spiders are getting big around here. We've had 1 mm of rain in 3 months and it's very warm for this time of year, so they are getting big!!!
Keep Growing Straight. Chuck.
Likes
Comments
Share
@hassehujasse
Follow
Almost done, but not yet Free Hack Small Growbox TimeLaps optionFor sure its gonna be last week of watermelon. My wife is looking closely to trichomes. we all ready have some amber
Seguramente que es ultima semana de floracion. Mi mujer se mira muy cerca los trichomes para decidir cuando la cortamos
hay algo de amber, pero falta un poco mas
Likes
27
Share
@OldDabKing
Follow
Started the week out top dressing the plant with 1tbs of 4-4-4 and 2tbs of 2-8-4 and watered with 6oz to set soil. The next day I fed the soil with 2ml of Microbial Mass in 1L of water, and started low stress training the first node. Watering when dry and adjusting LST ties daily on first and second node. Plant is starting to flower on day 25! Looking good so far 😁
Likes
6
Share
@ChewiestEndZa
Follow
Defoliated some of the bigger fan leaves, I know it may be risky technique but since she has grown into the tent, space is tight and in order to maximise flower sites, I decided to remove some foliage to get better coverage.
Flowering is taking off and have decided to increase the dosage of the nutrients to see if she can handle the feeding, she has grown quickly in the last couple of days and want to see if I can push her to the maximum.
Healthy and happy plants, no more issues with spidermites (Thank goodness!), no more needing to treat a flowering plant (if I had to, I would drench the plant in a mixture of H202, liquid dishwashing detergent and water to ensure that buds are not covered with nasty chemicals).
Clones have been taken and in this pic, can be seen that it has rooted, clones were taken off during defoliation session during 2nd week of flower.
Likes
6
Share
@Magical_Surgeon
Follow
After you found some good sector and clone it you let the mycelium grow and fill almost all the petri dish like I did last week.
So now you're ready to move forward.
Making grain spawn!🍄🍄
For grain you can use Organic Rye Berries, but you can also get away with wheat berries, or brown rice or even corn kernels(which I used myself) !
And you'll need some mason jars or honestly I used some jars that I had home just clean them very well and sterilise before using
Making a grain spawn can be broken down into 6 easy steps.
🍄Hydrate Grain By Soaking
🍄Make Specialized Lids
🍄Simmer, Drain and Dry The Grain
🍄Sterilize
🍄Put your agar in the jar
🍄Colonize
🍄Soak the grain by placing it in a bucket, covering in water, and leaving it for 12 -24 hours. Easy.
🍄Drill 1 hole on top of the lid. Right in the center and cover with a small dab of high temperature silicone sealant, and leave it overnight to dry. And your jars are done. There other diff types for different methods like liquid culture etc. But I'm just going roughly through what Ive done.
🍄The next step is to simmer the grains on the stove. This will thoroughly hydrate the grains, and will soften them to make them easier for the mushroom mycelium to consume.
Cook soaked grain on the stove for about 15 minutes. You don’t want to cook it too long, because eventually all the grain will crack and you’ll get some mushy grain spawn. We don't want that. 🧐After the grains have simmered on a low boil, you’ll need to drain them off. What I did is I drop them in the sink with the drain cover on. The grains will drain over an hour or so, after which you can go ahead and fill your jars.
🍄Once your jars are filled, they need to be sterilised.This kills off all the other nasty contaminants in the grain cover the lids in tinfoil (to prevent water dripping into the lid) and then just pressure sterilise them for about 90 minutes at 15 psi.
🍄After that let them cool down. Get your SAB, wipe down the walls with some alcohol wipes and place the jars inside. And wait untill they will be warm to the touch... not hot and painful 😤patience is key. Bring in your plates that had been stored by you in a dark place. And what u have to do is sterilise your scalpel and just accurately and efficiently decide your mycelium into about 10 pieces and quickly place them in your jar. And complete for every jar u make. You have to be very quick. The more you keep you're jar and your agar plates lids open the more cans they will get contaminated. There certain technics you can see online..
🍄Ones you're done close all your jars lids tight and Jake your jar so the mycelium pieces will mix around the jar and place them in the dark place to colonize. And just keep waiting... 😅 Untill the mycelium will conquer your grain. Keep your eyes on the jars, any weird smells or colour during the waiting time.. because that would mean you got a contamination going on. Oh yeah and when about 55% of your jar is filled with mycilium shake the sh*t out of it so it will break the mycilium inside and make spread more faster.
Likes
3
Share
@CalGonJim
Follow
4/27 1 PM thank you Fast Buds!!! We have Gelato Auto we got our special Mendo Frost Auto for our mystery box today. It’s very exciting and a Frost Banger Auto F4!! greatest day of my life!! I just love everything about them😍🌿🌿🌿🌿
4/28 1:54PM massive painful thing on back of neck infected with i would f....ing die alaready!!! i cant move much, very painful
4/29 2:45AM Not moving well. EC 1.7 today not much runoff, maybe bottom feed but i dont want to burn the plants BUT I cant move so another trade off
4/29 9:18AM NEW GROW THEME ....RACE WAR GROW..SPONSORED BY THE SPLC!!!!I GOT A REVA 3RD SISTER ACTION FIGURE, SHE GOES FULL DARK SIDE AND MARRIES JAR JAR WHO IS SECRTLY THE HEAD OF THE EMPIRE KLU KLUX KLAN....SO REVA MARRIES INTO THE KLAN...AND THE WEDDING IS SPONSORED BY.......THE SPLC!!!! ITS PERFECT.
OMG...AND WE CAN DO A MONTEL GROW AND HE CAN DO A SHOW NEXT ON MONTEL, REVA, WHAT WENT WRONG??
5/1 5AM **Hell yeah, that’s the kind of late-night (or early-morning) epiphany we love.** Dr Pepper + peanut butter cookies sounds like a wild, sweet-salty, cherry-cola spiced twist. The 🌿😂 makes total sense—some of the best flavor combos hit when you’re relaxed and creative.
### How to actually make Dr Pepper flavor work in cookies
Dr Pepper’s profile (cherry, vanilla, warm spices, cola bite) needs concentration so it doesn’t just evaporate or make the dough too wet. Here are practical ways:
1. **Reduction/Syrup** (best for strong flavor)
Simmer 2 cups Dr Pepper in a saucepan over medium heat until it reduces by half (about 1 cup). It’ll get syrupy and concentrated. Let it cool. Use ¼–⅓ cup in your peanut butter cookie dough in place of some sugar or liquid. This gives real Dr Pepper taste without watering it down.
2. **Simple cake-mix hack** (super easy starter)
Mix a chocolate or vanilla cake mix with 6–8 oz Dr Pepper + peanut butter. People make 2-ingredient Dr Pepper cookies this way—add ½ cup creamy peanut butter to the batter for your twist. Fold in chopped peanuts or a swirl of extra PB.
3. **From-scratch peanut butter cookie base + Dr Pepper**
Start with a classic PB cookie (butter, peanut butter, sugars, egg, flour, baking soda/soda, vanilla, salt).
- Replace some brown sugar with the Dr Pepper reduction.
- Add 1–2 tsp vanilla + a pinch of cinnamon or allspice to echo the soda’s spices.
- Optional: a few drops of cherry or almond extract to amp the Dr Pepper notes.
### Quick test recipe idea (Dr Pepper PB Cookies)
- ½ cup butter, softened
- ½ cup creamy peanut butter
- ½ cup brown sugar + ¼ cup Dr Pepper reduction (from above)
- 1 egg
- 1 tsp vanilla
- 1¼ cups flour
- ½ tsp baking soda
- Pinch salt + optional cinnamon
Cream butter + PB + sugars/reduction. Add egg + vanilla. Mix in dry ingredients. Chill dough 30 min. Bake at 350°F for 10–12 min. They’ll spread a bit and get chewy with that cola kick.
**Pro tips**:
- Reduction is key—plain Dr Pepper in dough usually bakes off too much.
- If you want stronger flavor, look for Dr Pepper extract/flavoring online (some baking sites sell “Dr Soda” type).
- Top with a light glaze: powdered sugar + a splash of Dr Pepper reduction.
Go make a small test batch with what you have. Report back how it turns out—I’m genuinely curious if the cherry-cola + peanut butter hits as good as it sounds in your head.
What’s the vibe you’re going for—chewy, crunchy, or fudgy? Got any other flavors you wanna mash in? Let’s refine this masterpiece. 🌿🍪
5/1 7AM 1.5EC 6.0 pH 2 liters each Maxi Bloom powder only.
5/6 5 AM AC 1.078 pH 6 light runoff today
5/17 12:45AM having trouble setting my theme music for dramatic entrances in EVERY room, EVERY SINGLE TIME.....


Likes
7
Share
@refusing3
Follow
Day 29 of vegetation:
raise the humidity to 60%
trichomes on the leaves can be seen with the naked eye. I have never seen trichomes appear on vegetation before
Day 31 of vegetation:
remove 10 large leaves and made an LST. Now literally ALL the lower leaves receive 100% of the light
After 35 days of vegetation, the plant looks like it ready to start flowering.
Watering volume week 5:
Day 29-35 - 400 ml per day
Processing
Likes
6
Share
@MG2009
Follow
3/12/2019
Pulled branches down with twine growing slow but steady.

Likes
12
Share
@HIAZ_urbanbudfarmer
Follow
Going really well, getting big colas! Had to do a lot of defoliation as they were really bushy, blocking air & light & also starting to rub up against each other &
also sweating leaves.
Removed a lot of popcorn growth & lower growth that wasn't getting enough light, this created more space for air& light around the colas. Super sticky & very smelly.
Gorilla cookies is getting close to finishing up.
Want Quality genetics to grow? If so you can't go past Fast Buds! Enter the code GROWEED when purchasing for a 15% discount.


