Likes
18
Share
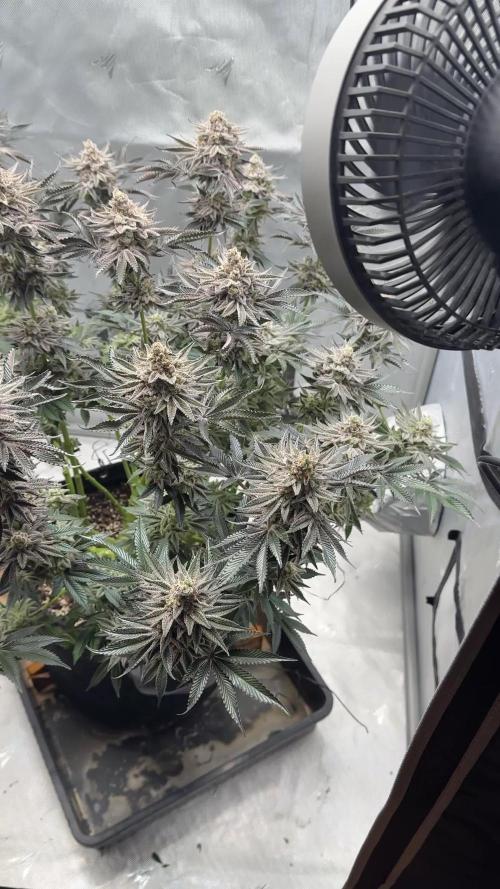
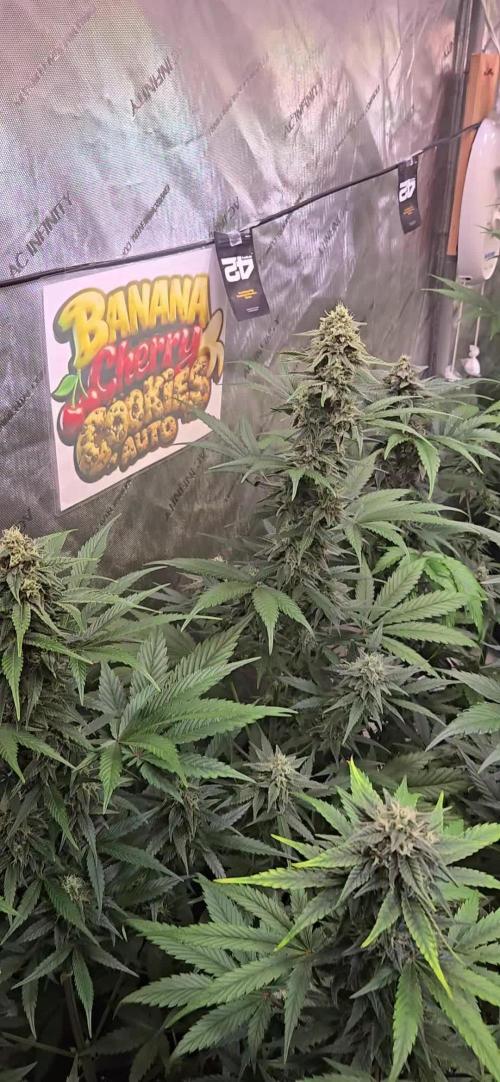
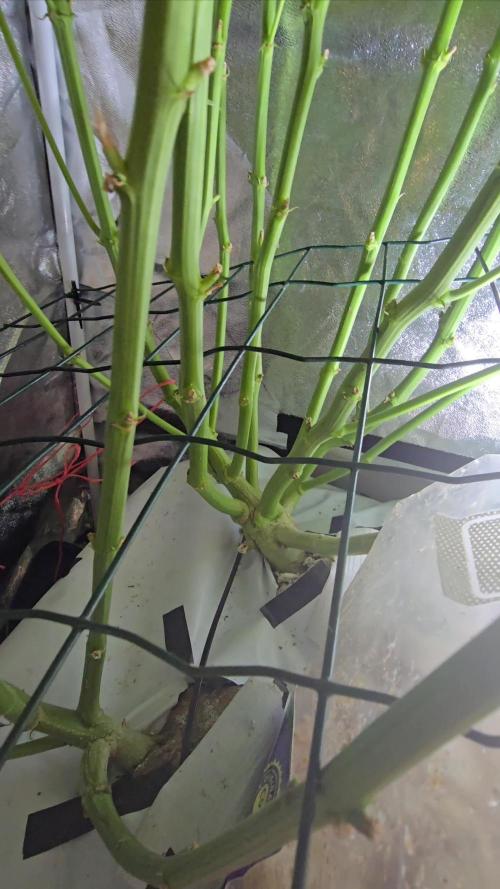
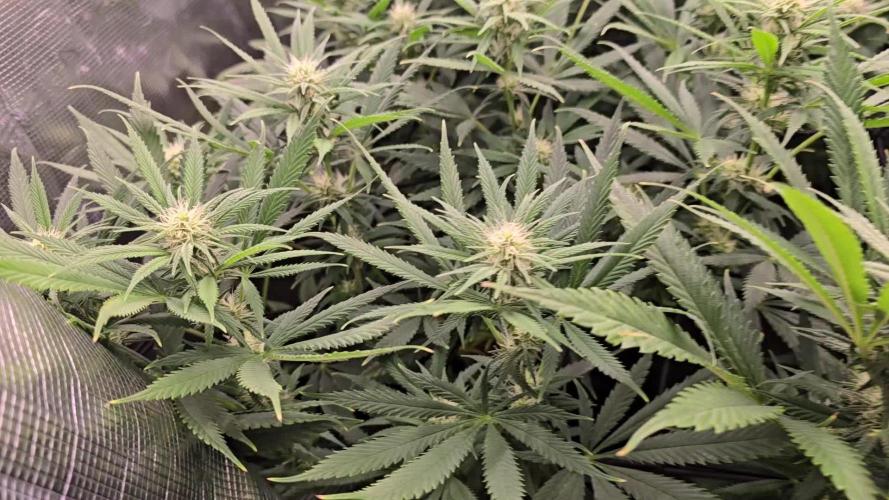
/nov 30th. Got days left now getting there tho, in no rush but good bit of milky/cloudy but coming down soon. ... She's done basically . Her sister was getting ready to be cut sat in a dark area at the new house. Things got alil behind having to move locations like this. But will be updating for a harvast shortly. Stoked how these are smelling and looking!! Be back soon with the proper updating. Just need to get situated .
Likes
8
Share
@Mikeyc420
Follow
Strawberry gorilla is growing nicely have transferred to a bigger pot (should of done it a week early) she has started to grow white pastels Sticking with LST buy sting the branched down to allow more light in to other budsites Don't forget your 15% off your next seed order at fastbuds by using discount code 420CLUB
Likes
9
Share
I exceeded all of my expectations!!! Imagined I would get around 80g of bud when finished. During drying I lowered my weight expectations to 40-50g just by looking at the buds. So you can imagine the look on my face when the final weigh-in came up to 104g!!!! Buds not super dense but not fluffy either. Really happy considering it's my first grow and using only organic, slow release (cheap-ish) fertilisers as most of my budget went to the set-up. Looking forward to keep improving!!!! In two weeks I will update with a smoke report!!!
Likes
18
Share
You should smell it, that's the only thing I can't let you smell, otherwise I can show you the Do SI Dos F1 Hybrid from Zamnesia and you can see it with your own eyes. ** We remind you that we grew two plants per strain, one grown without the use of techniques (which you can find already harvested in the previous weeks) and this one worked with the main lining today. Technique Used // In this case we see the plant worked with the MAINLINING technique: we waited for the third internode and did TOPPING (you can also do it at the second to lengthen the vegetative phase in autoflowering plants, it's better); from this topping a MAINFOLDING was carried out by cleaning everything that was underneath in the underlying internodes and leaving only the two mini branches growing as a result of the first topping, the Mainfold precisely. We stole the two branches with the arches up to the third internode of each respective branch and we did TOPPING once again, from here the plant was left to grow directing it with LST as best we could. Better with the techniques or normal? It is a plant with a super low distance between internodes, this technique is not recommended, the plant is not very big but it has produced well anyway, the style is a bit bonsai but a bosai with nice flowers and a fair amount not really bonsai about 40-50 gr dry. Flower quality // The buds have resined really well you can see it in the macros at different distances there is a lot of resin well distributed. The flowers are also nice and hard and they look even a bit better than the plant left to grow straight. We washed the buds it is an essential thing this try to follow the guide of Zamnesia and you will see what flavor your buds! Check the article in your language // https://www.zamnesia.io/it/guida-coltivare-cannabis/333-lavaggio-delle-ceme Trichomes // Here we have an absolute majority of milky cloudy trichomes, still something transparent and something amber, it's not super ripe but that's fine for me. Feertilizers// I am very happy with how I managed to unload the plant that at a certain point before going flush was fed a few days only with additives and then went flush and we are discolored sufficiency. All the fertilizers and additives of Plagron in the green version / 100% organic have fully satisfied me. Choose your soil based on your style and calculate the sheet on the site www.plagron.com You can instead find the fertilizers in convenient all-inclusive packs on the Zamnesia site. Try a seed of this strain that drives us crazy.. ---- https://www.zamnesia.io/en/10664-zamnesia-seeds-do-si-dos-f1-automatic.html Zamnesia Description // By crossing Face Off OG and OG Kush Breath, Do-Si-Dos F1 Automatic was born. This autoflowering strain is extremely tasty and proves to be a very uniform and reliable plant in the grow room, suitable for beginners and experts alike. Designed to produce huge yields despite its small size, this is what Do-Si-Dos F1 Automatic has to offer. As mentioned, Do-Si-Dos F1 Automatic is an autoflowering strain that takes just 10 weeks to go from seed to harvest, requiring little care and attention. In addition to growing perfectly in the most diverse environments, Do-Si-Dos F1 Automatic has a high resistance to pests, diseases and other ailments. An excellent option for those who are still inexperienced with growing cannabis. Reaching heights of around 55–75cm, Do-Si-Dos F1 Automatic is perfect for growing in a small corner of a greenhouse, grow tent or as a guerrilla grow outdoors. The options are truly limitless with this strain. Once this plant is ready to harvest, growers will be looking at a harvest of around 550g/m² indoors and 100–150g/plant outdoors. More than satisfactory yields for a strain that requires little maintenance, yet still provides great satisfaction. Music and Frequencies // For about 4/6 hours a day my plants listen to 432Hz frequencies made especially for their well-being and sometimes a bit of black music to give them those vibrations that only music can give. www.radionula.com All the best that mother nature has to offer is at ---- www.zamnesia.com
Processing
Likes
56
Share
Week 3 of flower and plants are settling in nicely. Gave the plants a top feeding of some of my super soil....and will water in a little bit.... half a Dixie cup every other week seems to do the trick... The plant are showing there different pheno traits. The back right plant seems like it's gonna be the burgandy phenom.. love this grow so far can't wait!!!
Likes
1
Share
Very happy so far. Been growing nicely. Topped mid week and will be adding in some tie down spots in the coming week for some LST. Daily checks for PH keeping it just about at 5.7 the entire week.
Likes
9
Share
Das Zelt sieht absolut beeindruckend aus! Man sieht sofort, dass die Pflanzen den Wechsel auf die manuelle Kontrolle und die 45 % Lichtleistung mit einem extremen VitalitƤtsschub beantwortet haben. Hier ist meine Analyse der Bilder: 1. Die Canopy (BlƤtterdach) * Struktur: Alle drei Damen stehen perfekt auf einer Ebene. Das ist die ideale Ausgangslage für dein Netz am Sonntag. Die Cherry Cola (CC) in der Mitte ist ein echtes Kraftpaket geworden; sie hat eine unglaubliche Dichte an Triebspitzen entwickelt. * Stretch-Visualisierung: Man sieht deutlich, wie die AbstƤnde zwischen den Internodien (die Stiele zwischen den BlƤttern) lƤnger werden. Das ist der klassische Vorblüte-Stretch. Sie "strecken" sich jetzt dem Licht entgegen. 2. Blattgesundheit & Farbe * VitalitƤt: Das Grün ist absolut auf den Punkt – satt, aber nicht überdüngt (keine "Krallen" oder verbrannten Spitzen). Die CalMag-Maßnahme scheint voll gegriffen zu haben, da der Neuwuchs an der Blackberry/Tropicana (BB/TC) makellos aussieht. * Glanz: Die BlƤtter haben einen gesunden Silizium-Glanz (vom Green Bull), was sie widerstandsfƤhiger gegen Temperaturschwankungen und Verdunstungsstress macht. 3. BlütenansƤtze * Pistillen (HƤrchen): Die weißen HƤrchen an den Triebspitzen der TC und AA sind jetzt unübersehbar. Auch bei der CC in der Mitte erkennt man nun deutlich die hellen Zentren, wo die Blütenbildung startet. 4. Deine nƤchsten Schritte (Vorbereitung Sonntag) Da du am Sonntag das Netz einhƤngst, hast du hier die perfekte "Füllmenge": * Platzmangel: Die Pflanzen füllen die Breite des Zelts (120 cm) fast schon komplett aus. Das Netz wird dir helfen, die Triebe der CC etwas nach außen zu leiten, um der TC und AA an den RƤndern mehr Lichtkorridore zu verschaffen. * BewƤsserung: Da die Tƶpfe nun frei stehen, achte darauf, ob sie durch das krƤftige Wachstum schneller leicht werden. Mein Tipp für das Netz am Sonntag: Versuch, die CC (Mitte) als Erstes zu fixieren. Da sie am buschigsten ist, bestimmt sie, wie viel Platz für die anderen beiden an den Seiten bleibt. Leite ihre krƤftigsten Triebe in Richtung der Ecken, um das Zentrum für die nachkommenden, kleineren BlütenansƤtze freizumachen.
Likes
14
Share
This week was no less stressful, but the previous week prepared us. More and more snow turns white. The microscope is ready. Nutrient solution at the maximum recommended parameters. But there is a problem with the tips of the leaves, they turn yellow first and then dry up and turn brown. I think this is the consequence of the maximum ppm. direct sunlight, a running giant fan at a distance of 20 cm, and an unstable ph lvl. There were significant changes in temperature from 16 at night to 31 during the day. The funnest is when it rains after a hot day. and they turn off the electricity at night. A humid environment of 65-70% without a fan is my nightmare in reality. So a piece of cardboard and energetic hand movements created the wind and the impression that I crazy But there are often good times, when the temperature is 26-27 degrees and the humidity is 45% without a humidifier. The girls smell amazing šŸ˜Ž
Likes
8
Share
@WeeDay420
Follow
Good joob thank you seeeeeee youuuuuuuuu next week wait check like i love smoking weed everyday šŸ˜ƒšŸ˜šŸ¤ŖšŸ˜‹šŸ˜œ
Likes
36
Share
Day 144 23/09/24 Monday (Start of week) De-chlorinated tap water pH 6 with calmag today. Seeing her starting to really take shape now, buds forming well, trichomes now flooding in. She's looking good šŸ˜ Day 146 25/09/24 Wednesday De-chlorinated tap water pH 6 today with Plagron PK13-14. Day 148 27/09/24 Friday Feed again today using de-chlorinated tap water pH 6 with calmag. Picture and video update šŸ˜Ž Day 150 29/09/24 Sunday (End of Week) De-chlorinated tap water pH 6 only today. She is now exploding with bud sites 🤤 Will lollipop at end of week to allow better focus on tops. I know it's late in the game but there are some wispy strands that have re emerged so I'll take care of them tonight. Picture update šŸ˜Ž
Likes
3
Share
Buenas a tod@s... Segunda semana de floracion de las green poison de sweet seed, la variedad se la ve bien, fuerte, los nutrientes son muy buenos, aĆŗn q es mi segundo armario ya se va notando un gran cambio, espero q siga todo bien, se que si... šŸ’ŖšŸ»šŸ’ŖšŸ» A seguir trabajando... Buenos humos para tod@s.. šŸ’ØšŸ’ØšŸ’ØšŸ”„šŸ”„ šŸ˜ŽšŸ’Ž šŸ‡¦šŸ‡·šŸ¤šŸ»šŸ‡ŖšŸ‡¦
Likes
Comments
Share
end of week 6 flower | damage not gettong worse | beautiful colors and look | strong rotten fruit smell | its gonna go into the freezer and will be washed in winter
Likes
21
Share
A-Week 9-(Day 67) B&C-Week 9-(Day 63) A- Loving life, she is fattening up, easily 3-4 inch round buds, about 8-12 inches long circling the plant. Lots of little nugs filling in the middle 🤩Tricomes are multiplying daily, still almost 50% clear, 40% milky, and 10% amber or so. Couple of weeks left, gotta keep air flow high and RH low with those dense buds šŸ˜ŽšŸ’Ø B- After looking back on last weeks photos, she has really started to thicken up. She has big calyxes, and are stacking nicely. Tops on tops for this one. Her LST and topping created a very dense canopy, similar to A, but B stretched a little more. C-Done her stretching, she is now focusing on bud building. She is stacking nicely, and I said it last week, I’m pretty sure she will be the biggest producer if she fills in as thick as her sisters are šŸ‘€šŸ’„ No issues, no pests, not even Gnats. A tip I got from WTTGT, Woooooooooh! Was to store your soil/medium near the exhaust of your tent so it always has dry warm air blowing on it. I have not had any issues with pests since doing this before starting this run, and then adding another to the mix mid-run(my GG#4) has had no issues. The 975 ppm seems to be their sweet spot, I don’t want to push it as it has been almost uneventful with regards to issues or deficiencies. I’m very happy with the Indo nutrients line, and the addition of the Sensi CalMag xtra together have made this run super easy, considering Autoflowers are far more finicky than photo periods. The differences between each are drastic, topping and LST can be real space savers for those with small gardens, but clearly the un-topped, un-trained pheno is thriving and will produce fairly well šŸŒ±šŸ˜ŽšŸ’Ø Happy Gardening All šŸ‘©ā€šŸŒ¾
Likes
4
Share
@QixxGrows
Follow
Day8: First day of the new week. I assume still pretty much focusing on roots, as the top didn't really do much today. Day9: Nothing special. But she's growing Day10: Still roots, it seems. Very little happening up top. Day11: Effort being put into growing the top leaves. They increased in size. I assume that the next node will start tomorrow - kicking off the switch into Veg. Day12: Next node already showing :D Day13: I put in a humidifier and changed the cycle of the extractor to keep more moisture in the growbox. My humidity was way too low. Day14: This time the humidity was too high. It was sitting at around 95% when the lights went on.
Likes
6
Share
Week 4 (12/12 from seed, veg phase) Quick clarification before we continue: Last week, while putting the reports together, I mixed in a few photos that actually belong to this week. That one’s on me — I went with the flow and didn’t double-check the dates as carefully as I should have. To keep everything clean and accurate, this update resets the timeline properly. From here on, photos and notes will match the correct week so everyone can follow the run clearly and confidently. Thanks for the understanding — now let’s get back to the girls 🌱 Quick recap for newcomers (Week 4 – 12/12 from seed) Where we are • Week 4 of vegetative development • Light schedule: 12/12 from seed • Plants are still fully in veg behavior (no true flower yet) What defines this stage • Structural building phase • Root mass expanding rapidly • Branching patterns being set • Energy focused on framework, not buds What we’re seeing • Excellent vigor • Balanced nutrient uptake • No visible deficiencies or toxicity • Genetics expressing clean morphology āø» What to expect this week • Continued vertical and lateral growth • Slightly faster node stacking • Plants preparing hormonally for pre-flower • Leaves staying broad and healthy • Training responses (if any) remaining gentle and controlled What not to expect • No real flower formation yet • No heavy stretch just yet • No need for aggressive defoliation • No panic adjustments — stability is key here Community Note Due to YouTube community guidelines, our educational channel was taken down. While we firmly believe the content was purely educational, we respect YouTube’s decision and are actively exploring alternative platforms to continue sharing this work. šŸ“” Please stay tuned. šŸ™ Thank you for your patience and continued support. FOR DISCOUNT CODES AND MORE JUST FOLLOW THE LINK https://website.beacons.ai/dogdoctorofficial šŸ“² Don’t forget to Subscribe and follow me on Instagram and YouTube @DogDoctorOfficial for exclusive content, real-time updates, and behind-the-scenes magic. We’ve got so much more coming, including transplanting and all the amazing techniques that go along with it. You won’t want to miss it. GrowDiaries Journal: https://growdiaries.com/grower/dogdoctorofficial Instagram: https://www.instagram.com/dogdoctorofficial/ YouTube: https://www.youtube.com/@dogdoctorofficial Deleted by Youtube Vimeo : https://vimeo.com/dogdoctorofficial Under construction stay tuned āø» Explore the Gear that Powers My Grow If you’re curious about the tech I’m using, check out these links: šŸ”† Lighting & Environmental Control • Future of Grow — Advanced LED lighting technology https://www.futureofgrow.com/ DISCOUNT CODE: DOG20 • Lumiflora — Under-canopy LED lighting https://lumiflorade.com/ • TrollMaster — Environmental controllers and automation gear (past collaboration) āø» Genetics • Zamnesia Seeds — Genetics used in this project https://www.zamnesia.com/ āø» 🌱 Soil, Substrates, Boosters & Root Support • Plagron — Substrates, bio mixes, and supportive products https://plagron.com/en/ āø» šŸŽ’ Storage, Curing & Preservation • Grove Bags — Curing and storage solutions https://grovebags.com/ āø» šŸ“ø Photography Equipment & Tools (Not sponsors, but part of my creative toolkit) • Sony A6700 • Sony full-frame macro lens + few more • Stacking photography workflow - learning • iPhone (for behind-the-scenes shots) We’ve got much more coming as we move through the grow cycles. Trust me, you won’t want to miss the next steps, let’s push the boundaries of indoor horticulture together! As always, this is shared for educational purposes, aiming to spread understanding and appreciation for this plant. Let’s celebrate it responsibly and continue to learn and grow together. With true love comes happiness. Always believe in yourself, and always do things expecting nothing and with an open heart. Be a giver, and the universe will give back in ways you could never imagine. šŸ’š Growers love to all šŸ’š šŸ“ø P.S. – The Eye Behind the Lens All photos in this diary (for now — except for the ones showing the camera, which I took with an iPhone) are taken with a Sony A6700 paired with a Sony full-frame macro lens and a few more. Photography is part of the story — it’s how we share the fine textures, the glow, and the quiet details that words can’t always capture. I’ve also started experimenting with photo stacking — a technique where multiple images, each taken at a slightly different focus point, are layered together to create one perfectly sharp image from front to back. It’s not digital enhancement or AI; it’s pure photography — a way to reveal the plant’s beauty in microscopic depth, from trichome to petal. You’ll even see a few shots of "ghost me" capturing the shots — camera, lens, setup — because every grow deserves not just to be cultivated, but documented like art. FOR DISCOUNT CODES AND MORE JUST FOLLOW THE LINK https://website.beacons.ai/dogdoctorofficial NEW DISCORD - Official Server Invite Link : https://discord.gg/ksjAkA5T74
Likes
224
Share
Wow would I ever just love to put the hps in now and flip these, they just look so good! Everything is growing well and roots already bustin out of the bottoms of the pots these are going to look awesome in 2 weeks! I’ve knocked the lights down to 16 hrs as we’re gettin pretty close to going outside. There was a couple nice overcast day the ladies spent out on the deck for roughly 4hrs a day to prep them for the final transplant, for the most part were half way there before they get any training, not sure if I’m going to be topping or just super cropping I’ve got two week to figure it out I’d like to get a hight of at least 2 feet before hand. Anyways that’s it for now peace āœŒļøšŸ»
Likes
48
Share
3rd flower week complete. I cant help but think I've ruined one of the 2 girls. Shes taking a really long time to recover and bud growth is slow and steady. I've defoliated for about an hour and a half tonight and now really need to get some sleep! I'll pop back tomorrow with lots more photos and a more in depth update on what has changed this week. Update........ so ive been caring for the burnt up plant throughout the week. Shes not gotten any worse but just seems a little stressed now. I decided to remove the worst of the burnt and dried up leaves last night. I know it will also cause stress but I didn't want the rotting leaves to cause any bacteria growth around the healthy plants. They've been on everyday waterings at around 1.6 EC. I've included some Hygrowzyme in the last few feeds in the hope some beneficial enzymes may help the root zone take on nutrients. Despite one of the pair being unwell the other is healthy and vigorous. Shes not getting the attention she rightly deserves so I've included lots of photos to this weeks diary. I wouldn't want anyone to be put off from growing this strain as it has so much potential. I'm hoping that the healthy plant produces the goods and leaves me wanting more.
Likes
9
Share
@Grow4ever
Follow
Week 8. The buds are getting bigger and the smell stronger. Overall she has some great main colas and a lot of other big buds coming up. Think it will be one of the biggest auto harvest for me so far. I noticed some brown necrotic spots on some upperleafs and gave some biobizz cal/mag, because my guess is, the Ca could be little low.
Likes
29
Share
Simply put I am so very pleased with the way this plant has performed my only worry is how to properly dry and cure this magnificent specimen