


Likes
Comments
Share


Likes
10
Share


@extraterrestrial1
Follow
-------------------------------------------------
Day 43
Water: 0.75 Gallon TT Water w/ 0.75 TBSP Blkstrp Mlsses 6.5 pH
Humidifier: 50% (LOW-MIST)
Dehumidifier: On
Fan Speed: High
Light on @ 19:00 (27.2° celsius @ 49% RH)
Light off @ 13:00 (23.2° celsius @ 47% RH)
-------------------------------------------------
Day 44
Water: N/A
Humidifier: 50% (LOW-MIST)
Dehumidifier: On
Fan Speed: High
Light on @ 19:00 (27.8° celsius @ 45% RH)
Light off @ 13:00 (23.2° celsius @ 44% RH)
-------------------------------------------------
Day 45
Water: N/A
Humidifier: 50% (LOW-MIST)
Dehumidifier: On
Fan Speed: High
Light on @ 19:00 (28.4° celsius @ 44% RH)
Light off @ 13:00 (22.5° celsius @ 48% RH)
-------------------------------------------------
Day 46
Water: N/A
Humidifier: 50% (LOW-MIST)
Dehumidifier: On
Fan Speed: High
Light on @ 19:00 (28.2° celsius @ 47% RH)
Light off @ 13:00 (23.3° celsius @ 49% RH)
-------------------------------------------------
Day 47
Water: N/A
Humidifier: 50% (LOW-MIST)
Dehumidifier: On
Fan Speed: High
Light on @ 19:00 (28.4° celsius @ 42% RH)
Light off @ 13:00 (22.8° celsius @ 49% RH)
-------------------------------------------------
Day 48
Water: N/A
Humidifier: 50% (LOW-MIST)
Dehumidifier: On
Fan Speed: High
Light on @ 19:00 (28.4° celsius @ 42% RH)
Light off @ 13:00 (22.8° celsius @ 49% RH)
-------------------------------------------------
Day 49
Water: 1 Gallon TT Water w/ 1 TBSP Blkstrp Mlsses + 0.75ml/L Alaska Morbloom 5.7 pH
Humidifier: 50% (LOW-MIST)
Dehumidifier: On
Fan Speed: High
Light on @ 19:00 (28.6° celsius @ 49% RH)
Light off @ 13:00 (22.7° celsius @ 49% RH)
-------------------------------------------------
Likes
3
Share


@CalGonJim
Follow
She lived through the worst soil and the worst bug infestation I ever had. The insect soap I mixed up had a pH of 10, which burned but I was able to recover. The colors are Beautiful. It smell like a heavy Kush!


Likes
9
Share


@41310a
Follow
Essa semana elas continuam crescendo bem e eu cortei a alimentação.
estão tomando muita agua tambem.


Likes
Comments
Share


Processing
Likes
2
Share


@Purplekushkat
Follow
This week we dropped 4 testers in a mix of Posidesine(Oregon's Only) and water for 24hr. All 4 seeds went into paper towel that was placed in clkne dome with a temp of 86.5 and humidity of 99%.
Pot prep as follows for all 4 seeds
3gal using Fox Farms Light Warrior Natural Seed Starter× Roots Organic Formula 707 by Aurora Innovations×Wiggleworm Soil Builder(wormcastings 3cups)
DOWN TO EARTH dry amendments as follows
BIOLIVE 9TBSPS
AZOMITE 3TBSPS
KELP MEAL 3 TBSPS
ALFALFA MEAL 5TBSPS
OYSTERSHELL 5TBSPS
HUMIC ACID 1TBSPS
All 4 seeds germinated and where potted on 11-3-19
All 4 broke soil on 11-5-19 and were watered with Recharge and Athenas Aminas
Day 1 was recorded on 11-6-19
Day 2 was recorded on 11-7-19 and all plants were watered with Cytoplus, Azos, Mykos, and Mammoth P
Day 4 was recorded on 11-9-19 and this strain #09 Pheno #1 was watered with Athenas Aminas


Likes
14
Share
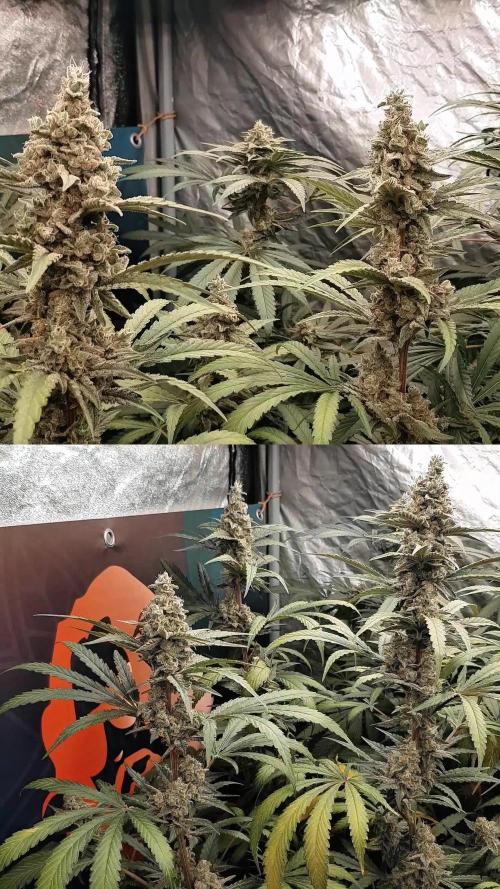

@GERGrowDesigns
Follow
-fast Diarie Finish up sorry ( allready Harvested )-
[Be Back soon !]
Likes
13
Share


@StickyFingah420
Follow
Día 48 y van tomando mucho más volumen las flores, el LST ayudó a un fuerte y vigoroso desarrollo de la estructura de la planta, los cogollos están repletos de tricomas brillantes que huelen genial, sin duda una planta muy bella que cualquiera quisiera tener en su jardín, ya entrando en recta final 💯✨
Likes
2
Share


@Vellaman
Follow
SO this is my second grow of this strain, this plant shared a 120x120 tent with another Magic Melon and 2 Gorilla Cookies from Fast Buds (Amazing Strain)
Very happy with large feedings, and now that she is alone in the tent, I can publish some good information about this strain as other diaries for this strain do not seem to do it justice.
From previous grow, which was summer here so 40 degree C days, was growing at around 33C and obviously feeding it around 2.5 litres a day - but she did it and the smoke was great, this time around since the temps are in the normal ranges, Im hoping for less terpene loss and a much better smoke, great strain from HUMBOLDT - Im guessing this harvest will be in the 150 g Dry Weight Range, the previous 2 I grew in Summer at those very high temps yielded 220g between them.

Likes
76
Share


@Canna96
Follow
This week went very well, I was finally able to get the second toppings done today on day 35. I am hoping to get the final 4 toppings done in about a week or a week and a half, and then Give her a couple more weeks in Veg before I flip the lights. She is definitely not growing super-fast, but she seems to be growing nice and thick and sturdy with tight internodal spacing, which is exactly what I am looking for. Thanks for stopping by and checking out my grow, if you have any tips or advice feel free to hit me up. Stay safe and Blaze On!


Likes
11
Share


@RadDad
Follow
Everything is going well this week. Although two of the seedlings had trouble getting out of their seeds. One did manage to get out on its own but I had to help another one. Because of this two plants are a little bit behind.
Just feeding with a good dose of rain water I've upped the amount to about half a liter per day per plant.

Likes
5
Share


@LAShugars
Follow
Had bend her main cola over again!! She was growing into the light. She just keeps spreading out too! Wish I had a bigger tent for her. The buds are starting to fatten a bit.
I defoliated her again. Trying to get some better light penetration and air flow.
Likes
3
Share


@SpliffDoc
Follow
Well, the autopot is working. Who knew life could be this simple hahaha. This week the plant has just exploded, they usually do around day 21 but jeeez, in the space of 3 days shes grown a fair pair of shoulders 🤣
Going to change the res and up the nutrients slightly tonight so hopefully she goes from strength to strength. Let's go 👌🏻👌🏻 Fast buds are easily the most fun Autos to grow.


Likes
18
Share


@VI_Cannabis
Follow
July 5 - The girls are still doing awesome. temps are between 21-26. Humidity is 40-50. Still feeding every 24-36 hours with 3L per plant.
July 6 - They are doing good. Showing lots of flower sites now. Unfortunately I did not get any pictures today.
July 7 - Tons of progress since last week. I don't see any signs of any problems, and still no pests! The smell is getting A lot stronger as it starts to flower more
July 8 - Still doing there thing, no problems, temps and humidity is fine. Have been feeding every 24 hours now as they seem to be really thirsty
July 9 - Super happy with how they are doing. No issues yet. Smell is heavier, and tons of bud sites showing up. Only issue is they are growing pretty uneven.
July 10 - Time to get a even canopy! First time doing some HST. I also did some defoliation. One of the stems split open a bit but it seems to be doing just fine. I did he HST and defoliation in the morning, i then took pictures of 12 hours later and everything seems just fine!
July 11 - Everything seems to be a lot more even and the broken stem doesn't seem to affect the growth.
Likes
19
Share


@JeyGanesha
Follow
Undicesima settimana.siamo arrivati quasi al traguardo.la vendemmia si prepara... .il profumo invade tutta la mia stanza.. delizioso,😂😉🤣🤤🤤🕉️