The Grow Awards 2026 🏆 


Likes
Comments
Share
@TheCannaProphet
Follow
~ GG4 SHERBET FAST FLOWER by FastBuds ~
Well fam, here we go again with another epic strain from FastBuds Fast Flowering stable. After having such tremendous success growing their Gorilla Cookies Fast Flower outdoors last year, I've decided to run another of their fast flowering strains outdoors this year... GG4 Sherbet Fast Flower!
The best description of this awesome cultivar comes directly from my friends at FastBuds which is as follows:
"Bred from extremely potent and flavorful Gorilla Glue and Orange Sherbet genetics, GG4 Sherbet FF (Fast-Flowering) takes all the best traits to the next level, offering a high-yielding strain that can produce up to 600 g/m2 in a 7-week flowering time. This super resilient Indica-leaning hybrid thrives indoors and outdoors, and in all types of climates while producing mouth-watering sweet, fruity, spicy and earthy terps that translate into a delicious sugary hazelnut aroma. Expect an extremely relaxing and overall happy effect that’ll leave you with a huge smile from ear to ear. It’s the perfect strain for growers of all levels of experience seeking low-maintenance yet highly productive photoperiod varieties that deliver quality and quantity without extra effort.
GG4 Sherbet FF grows chunky buds with long dark orange hairs and spade-shaped calyxes that get encrusted with trichomes by harvest time, giving them a gorgeous silvery-white appearance. This medium-sized photoperiod can reach up to 200 cm in height and yields up to 650 g/m2 while developing that typical hybrid structure. GG4 Sherbet FF grows with a stocky, bushy appearance, developing one sturdy main cola and fat side branches that support huge yields without much effort. This super-fast variety produces distinctive light-green buds with a high bud-to-leaf ratio, making your trimming sessions a breeze. It’s a top-notch resin producer that doesn’t need much maintenance and will thrive in almost every climate, rewarding growers of all levels with extremely flavorful resin that makes for outstanding hash end extracts."
________________________________________________________________________________________________________________________________________________________________________________________________________________________________________________________________________________________________________________________
The Setup:
This is going to be an outdoor grow, but I have started the GG4 Sherbet Fast Flower indoors as our weather is still too cold to put her outside (nighttime temp's dipping regularly into the 30's℉).
The plan is simple... let her grow inside under a 19/5 light schedule until the nighttime temperatures stay above the mid 40's℉, at which point she'll be moved outside and transplanted into the soil which I have already setup and inoculated with beneficial microbes, and then let the fun begin!🤪💚
________________________________________________________________________________________________________________________________________________________________________________________________________________________________________________________________________________________________________________________
Weekly Updates:
8/10- Wow! Here we go into Week 4 of flower for the GG4 Sherbet Fast Flower by FastBuds and this lady is on a mission! The GG4 Sherbet FF has large cola's forming all over her and they are rapidly stacking up. Her flowers are continuing to develop and are beginning to get a thick layer of trichomes on them!
8/12- Today, the daily watering routine continues at sunset with around 5g of well water from the hose. I also went into the canopy and removed a bunch of dead and/or completely yellowed leaves to keep the foliage clear of debris which can cause insect and fungal issues if allowed to get out of hand.
8/14- I am continuing to water the FastBuds GG4 Sherbet Fast Flower daily with 5-8 gallons of well water from the garden hose.
Yesterday, I top dressed the FastBuds GG4 Sherbet FF with 3 cups of Gaia Green 2-8-4 Power Bloom which I watered in with well water from the hose. I then applied 1/2 gallon of a nutrient mix I made up in 2 1/2g of well water consisting of: 1/4 cup Neptune's Harvest Seaweed(kelp) plant food and 2 1/2 tsp. of Plantonics Amino Bliss.
8/16- We have rain in the forecast over the next three days. There were a couple of passing light rain showers today which didn't provide a lot of rain so I went ahead and watered the GG4 Sherbet FF with approximately 5g of well water just to make sure that she didn't get thirsty.
There's a month in flower for this beautiful fast flowering cultivar from the experts at FastBuds and all I can say is WOW! I can't say enough positive things about this strain and will, for sure, be running it again! See you next week!😎✌️
Thank you for checking out my diary, your positive comments and support make it all worthwhile! 💚Growers Love!💚😎🙏

Likes
6
Share
@Floryx
Follow
-getting really tight now
-will install scrog-web to use the space fully
-some leafs still have yellow and brown spots
-think i will fetilize twice a week from now on
-getting a lil cold in the night but therefore humidity is now almost perfect
Thankful for any comment :)

Likes
26
Share
@PedroAndHisPlants
Follow
Day 36:
"Hey everyone!
Just a quick update: I removed a few more leaves here and there and did one last round of LST (low stress training). 🌿 The plants are looking great, and I'm going to let them recover now before sending them into the flowering stage. I'm really excited to see them start blooming in 2-3 weeks!
Also, a quick update on our temperature issue: today, the temperature stayed below 26.8°C, which is great news! However, we still need to find a solution to keep the humidity levels up. Our 360 m³/h exhaust system isn't able to maintain the required humidity level. I've calculated that we need a humidifier that can evaporate 1800ml/h to maintain 60-70% humidity, which would help manage the temperature better.
Does anyone have tips for a good humidifier or other methods to control the humidity and temperature? Any advice would be greatly appreciated!
Day 37:
Hey everyone!
Tomorrow, we're planning to buy some Cal-Mag because we suspect the yellowing leaves might be due to a calcium-magnesium deficiency. We're also going to get a pH test kit to make sure everything is balanced properly.
Do you think this is a good idea? Any tips or suggestions would be greatly appreciated!
Day 38:
Hey everyone!
Quick update: it turns out the yellowing leaves were due to a nitrogen deficiency. We increased the fertilizer dosage today, so the plants should start looking better in 4 to 5 days. 🌿
Thanks for all the support and suggestions
Day 39:
Hey everyone!
Another quick update: after increasing the fertilizer yesterday to address the nitrogen deficiency, it should take about 4 to 5 days for the yellow leaves to turn green again. 🌿
We're already seeing improvements! The plants have grown significantly and are developing a dense canopy once more. It's great to see them bouncing back so quickly!
Day 41:
"Hey everyone!
Quick update: we've removed the bands we were using for LST (low stress training) and are now letting the plants grow freely. 🌿 We plan to keep them in the vegetative phase for about one more week before transitioning them to the flowering phase.
Excited to see how they continue to develop!"

Likes
18
Share


Likes
32
Share
@Appoldro420
Follow
14-10-2021: Actually I have to start a next week by tomorrow but I have changed so much today I decided to start a new week today.It is still not easy to maintain a VPD of 0.7..... Well it is only an indication in my case because unfortunately I still do not measure the leaf temperature. Temperature was a bit on the high side last night because the temperature sensor of the PK125 has now ended up under the foliage. Of course it is a lot cooler there so it kept running at 10%
I have adjusted that, so tomorrow I expect a completely different temperature trend. Also completely emptied the system today and replaced the Hy-Pro with Ata Awa MAX. I have exchanged the Calmag with the Green Sensation, so this will also be dosed (1 ml/L) from now on. I will add Calmag from now on with a pipette. Let's see how the PH is going, as the packaging of the ATA states that it is self-regulating. If that is the case I will put CALMAG in the reservoir of the PH- and reprogram the system.
I have chosen not to scrog today. I drilled a hole in the middle and the container to the right of it and killed quite a few roots (unfortunately the drill went through) and that seems, in combination with other nutrition, a suddenly somewhat lower temperature and the torture between the leaves to to get the sensor in place is enough stress for 1 day to me. So they can now go to sleep and tonight we'll see if there is damage. I'm guessing it's not that bad because previous experiences have told me that they can take quite a bit.
17-10-2021: Flowers are starting to form.
18-10-2021: 2 hours of bondage ;) 139 tie-wraps. Damn.. this is a lot of work on a daily basis
20-10-2021: Finally some white hairs on them.. Damn... never took this long. Will it be because of the high temperature?


Likes
245
Share
@Roberts
Follow
Thc bomb is coming towards the end soon. Trichromes are starting to turn, but still early. The bud is still putting on weight so likely will feed this week and reassess thru the week. Experiencing a few minor sign from giving a low dose of nitrogen. That is ok the plant has a lot of stored energy. Plus it is close to done. If anyone is interested in purchasing a SF-1000 please follow the link below
US:https://amzn.to/396hXXb
CA:https://amzn.to/3ol4oK4
DE:https://amzn.to/3q15SJT
UK:https://amzn.to/2L7NVKN
AU:https://amzn.to/3pZD6ZQ
FR:https://amzn.to/2Xkomsi
IT:https://amzn.to/3nk7A7h
ES:https://amzn.to/2XhtGwB
Thank you again bomb seeds🌱🔥💣💥
Thank you grow diaries community for the likes, follows, comments, and a big thanks to my YouTube subscribers. Happy growing everyone, and be safe out there 🌱🌱🌱

Likes
46
Share
@eldruida_lamota
Follow
Que hay familia, vamos con la séptima semana de vida de estas Candy Rain de Zamnesia, para el concurso POWER BUDS Plagron x Zamnesia CONTEST.
Vaya color verde que se están marcando, se ven bien sanas, ya se aprecia.
Las flores van formándose y produciendo pelitos.
Esta vez regué con una aplicación de Sugar Royal, 0.8 ml x litro de agua, Alga Bloom 2 ml x litro y Power Bud 0.5 ml x litro, Green Sensation 0.5 x litro, por supuesto controlando siempre el Ph, que ahora mismo lo dejamos en 6.
Tragan alrededor de 1 litro por planta cada 48 horas.(3 riegos semanales).
La temperatura máxima está en 23.5 grados y la humedad está entorno al 55%.
Hasta aquí es todo, vamos viendo estas semanas como se forman y progresan nuestras flores.
Os comento que tengo un descuento y para que compréis en la web de Zamnesia de un 20%, el código es ZAMMIGD2023
The discount 20% and the code is ZAMMIGD2023
https://www.zamnesia.com/
Hasta aquí todo, buenos humos 💨💨💨

Likes
37
Share
@MrJones
Follow
OSS Ghost Train Power
🔹⊱╮🔹╰⊰🔹 GROW Started 03.10.24 INFORMATION 🔹╰⊰´🔹⊱╮🔹
🌞Environment - Maintaining 80F and 65%Humidity
🌾Training - Nothing this week just letting the seedlings veg out.
⚱️2-Gallon 📊6.2 PH
💧 Feeding - Using Horti Grow 8-11-21, Bloom 5-15-26, Late Bloom 0-24-26, Cal 12-0-0
🌞Medic Grow Smart 8 760 Watts
🕷️ IPM - CannControl from Mammoth and Mosquito Bits as needed
🔹⊱╮🔹╰⊰🔹 PLANT UPDATES 🔹╰⊰´🔹⊱╮🔹
📝 Notes - These girls have completely transformed into their new buckets and have started to drink up, increasing the amount of fertigation, (Nutrients and H20), and defoliation to expose the lower growth.
🗓️03.29.24 Maintaining Temps and Humidity - Plants are Looking Great!
🗓️03.30.24 Today fed with Hort-Grow @ 3.3 GRMS Per Gal, and Horti-Cal @ 2.5 GRMS Per Gal. I defoliated the plants to water them better and the middle growth could get more light and develop.
🗓️03.31.24 Maintaining Temps and Humidity
🗓️04.01.24 Today fed with Hort-Grow @ 3.3 GRMS Per Gal, and Horti-Cal @ 2.5 GRMS Per Gal. Check out the amazing growth and recovery after the defoliation!
🗓️04.02.24 Maintaining Temps and Humidity, watching these ladies are just nailing the veg phase.
🗓️04.03.24 Today fed with Hort-Grow @ 3.3 GRMS Per Gal, and Horti-Cal @ 2.5 GRMS Per Gal
🗓️04.04.24 Maintaining Temps and Humidity, closing out week 2 of veg and these ladies will need to be defoliated again, this new nutrient line from Greenpnaet is killing it, and so easy to use!
╰⊰🔹╰⊰´🔹⊱╮🔹╰⊰🔹╰⊰🔹STRAIN INFORMATION🔹⊱╮🔹╰⊰🔹╰⊰🔹╰⊰🔹⊱╮
Powerful West Coast genetics Ghost Train Haze x Pellezino combine to create this exceptional Cali weed strain Ghost Train Power. This exceptional strain exhibits dominant terpenes like Limonene, Linalool, and Terpinolene that produce a tempting citrus, herbal, floral scent with a fruity taste that is a flavor sensation.
Ghost Train Power comes from powerhouse parentage and produces extreme levels of THC up to and in excess of 30% and when you consider her substantial production this strain is unprecedented. The potent effects are surreal and intoxicating and the harvests are a treat. Indoors this beauty will reward you with a generous 650 gr m2 of tantalizing frosted bud and outdoors she can produce more than 1 kilo per plant. Ghost Train Power is USA genetics that will live up to its acclaimed reputation and have you coming back for more over and over again.

Likes
3
Share
@Olduffybastard88
Follow
Red mandy in around 16 weeks veg while the tropicanna next door is around 6 weeks flowering
Likes
11
Share
@ChefSpliff
Follow
Iam sooooo ampedddd lol. First week of flower is done and i cant see white hairs all over it obviously next week it will be visible for yall. Im still giving them a transition feed and next week will be switching to a full bloom feed. plant is sooo strong and healthy im estimating minimum 2-3 oz for this plant. small compact and bushy the stretch will add another 6 inches probably .

Likes
25
Share
@pifflestikkz
Follow
Day 106
14/10/24 Monday
Her colours are really coming through now 🤩
Nearing her end now, possibly another week after this ✌️💚
Picture and video update 📸💚
Day 108
16/10/24 Wednesday
Light watering, she isn't drinking anything, trichomes only just starting to turn amber. I'll leave her now till I chop
Day 109
17/10/24 Thursday
She is starting to dry from 1" now.
Putting her in 24hrs dark 🌑 now.
Will harvest Tomorrow


Likes
56
Share
@nonick123
Follow
Día 29 (18/11) Subo a DLI 45
CBD Auto 20:1 #1 sigue sin mostrar las preflores... ¿será una auto tardía o será una fotoperiódica?
Cada planta empieza a tomar su ritmo de riego personalizado, así que allá vamos:
CBD Auto 20:1 #1 1000 ml
CBD Auto 20:1 #2 0 ml
LSD-25 Auto 750 ml
OG Kush Auto 750 ml
He observado que regar 1 litro de golpe provoca escorrentía (llevándose nutrientes del Super Soil), de modo que riego primero 750 ml, y a los 5-10 minutos añado 250 ml adicionales y el sustrato es capaz de absorberlo todo😁
Día 30 (19/11) CBD Auto 20:1 #1 sigue sin mostrar las preflores...
Debido a que no para de crecer CBD Auto 20:1 #1, decido hacerle una buena defoliación y algo de Lollipopping. A ver como reacciona!
Riego H2O RO
CBD Auto 20:1 #1 750 ml
CBD Auto 20:1 #2 750 ml
LSD-25 Auto 500 ml
OG Kush Auto 500 ml
Día 31 (20/11) Por fin CBD 20:1 Auto #1 muestra las preflores (femeninas)! 😍 Parece que va a ser una Late Bloomer!
OG Kush Auto están empezando a estirarse, parece que va a ser un monstruo!
Riego H2O RO
CBD Auto 20:1 #1 750 ml
Día 32 (21/11) CBD Auto 20:1 #1 se muestra imparable en su crecimiento a pesar de la defoliación y el Lollipopping de hace dos días
De modo que me decido a hacerle Supercropping!
Dicen que NO se debe hacer Supercropping a las Autos, pero siempre me gusta experimentar y ver que ocurre. Come on!
Un día muy divertido! 😁
Riego H2O RO
CBD Auto 20:1 #1 750 ml
CBD Auto 20:1 #2 500 ml
LSD-25 Auto 750 ml
OG Kush Auto 750 ml
Día 33 (22/11) CBD Auto 20:1 #1 se ha recuperado estupendamente! No deja de crecer y estirar cada una de sus ramas!
OG Kush Auto está estirándose muchísimo (4 cm / día), de modo que decido hacer LST a la cola principal para buscar una nivelación de la canopia
Riego H2O RO
CBD Auto 20:1 #1 750 ml
CBD Auto 20:1 #2 0 ml
LSD-25 Auto 0 ml
OG Kush Auto 0 ml
Día 34 (23/11) OG Kush Auto se ha recuperado muy bien del LST! 😍 La rama principal ya está apuntando hacia arriba y creciendo!
El resto de ramas de OG Kush Auto empiezan a estirarse igualando la canopia
Le aplico un ligero LST para espaciar y distribuir las ramas
Riego H2O RO
CBD Auto 20:1 #1 1000 ml
CBD Auto 20:1 #2 750 ml
LSD-25 Auto 750 ml
OG Kush Auto 750 ml
Día 35 (24/11) Lollipopping & Defoliation day! 😍💥💨😁
CBD Auto 20:1 #1 Lollipopping de todos los nodos y hojas quedan por debajo del plano "virtual" que marca el supercropping
CBD Auto 20:1 #2 Defoliación de algunas hojas de abanico que tapan a cogollos inferiores
LSD-25 Auto Defoliación de algunas hojas de abanico que tapan a cogollos inferiores & Lollipopping de una par de nodos de las 2 ramas inferiores
OG Kush Auto Eliminación de las ramas del 1er nudo (eran enanas y débiles) y defoliación de algunas hojas de abanico que tapan a cogollos inferiores.
Riego H2O RO
CBD Auto 20:1 #1 1000 ml
CBD Auto 20:1 #2 0 ml
LSD-25 Auto 0 ml
OG Kush Auto 0 ml
💦Nutrients by Bio Tabs - www.biotabs.nl/en/
🌱Substrate PRO-MIX HP BACILLUS + MYCORRHIZAE - www.pthorticulture.com/en-us/products/pro-mix-hp-biofungicide-plus-mycorrhizae
"GDBT420" 15% DISCOUNT code for the BIOTABS Webshop https://biotabs.nl/en/shop/
Likes
16
Share
@HowtoBubatz
Follow
I defoliated the Plant for the first time and adjusted the LST to the growth of the plant.
I found the first white pistils shooting out from the plant which shows me she is ready to go into flower.
Until now i am very happy with the progress, still no issues :)


Likes
17
Share
@RDWCGrowing
Follow
Week 1 Day 1 9/23/2023
I decided to go ahead and flip her to flower today, she had a stem past the net and high enough to super crop. Humidity was a little high so I added both Dehumidifiers to the tent and attached them to the InkBird.
Added:
36 gallons of Water
CALMag- .75mil/Gal
GH FLoraMicro-5.2mil/Gal
GH FlroaGro-4.3mil/Gal
GH FLroaBloom-5.2Mil/Gal
TPS SIGNAL- 1mil/Gal
ORCA-.5mil/Gal
Flipped the lighting to Flower 0800-2000, I filled with Week 1 flower Nutes, and I Super Cropped One of the Tops down.
Week 1 Day 2 9/24/2023
I cleaned my canopy today, by trying to look straight down and opening up as many Tops sites as I could see blocked by leaves directly above. This will be my life for the rest of Flower cleaning and clearing as well as ensuring no sucker buds.
Week 1 Day 3 9/25/2023
Today was one of those days where you can just sit back and look and enjoy some of the work you have put in. Today I just let her be..
Week1 Day 4 9/26/2023
I took the fan leaves that were blocking those beautiful bud sites from light.. Such will be my life every time I enter the tent for the rest of the grow. The clones all have roots coming from the rapid rooter, I am feeling really good that by Sunday they will be ready for selection and planting.
Week1 Day 5 9/27/2023
I did some extreme defoliation today I opened the tent and she was just sooo full.
Week1 Day 6 9/28/2023
I took a little from the inside and a few smaller inner stems.. I hate to take stems until after week 3 of growth to give each a chance to shoot up and hit the canopy.
Week1 Day 7 9/29/2023
Took a look from the underside to see how much light was penetrating the canopy and removed some leaves and stems that were blockers. Tomorrow will add 10 gallons and the Nutes.. that will be my last in between week fill before I start having to change weekly for the rest of the grow.
Likes
6
Share
@MonstaMurph
Follow
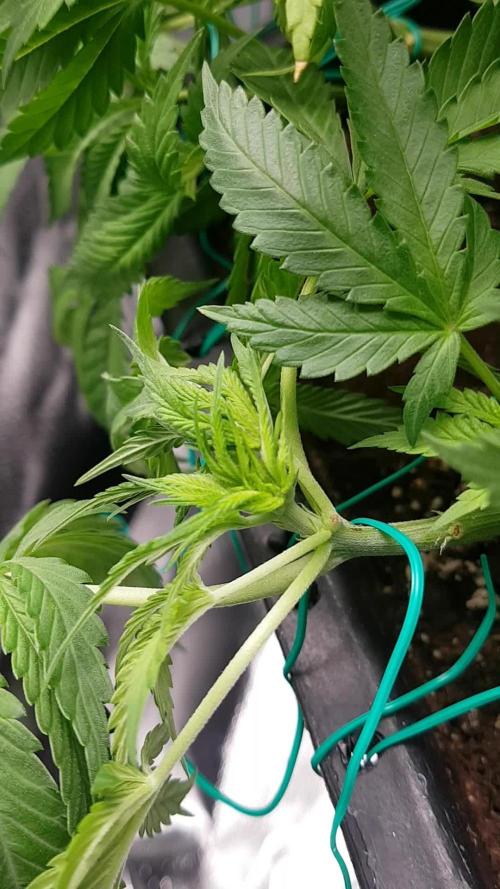
Nach dem erfolgreichen Topping in der Vorwoche hat die GMO Rootbeer ohne Pause weitergemacht. Da keinerlei Stressanzeichen sichtbar waren, wurde das LST direkt fortgesetzt. Die jungen Spitzen und Seitentriebe ließen sich problemlos weiter in Position bringen, sodass die Pflanze zunehmend eine breite, offene Form annimmt – perfekt für gleichmäßige Lichtverteilung und kräftigen späteren Blütenansatz.
Parallel dazu gab es regelmäßige, sanfte Entlaubung. Nur große Fächerblätter, die Licht blockierten oder das LST behinderten, wurden entfernt. Die Pflanze hat auf diese Maßnahmen durchgehend positiv reagiert: keine Hänger, keine hellen Blätter, kein Wachstumsstillstand. Im Gegenteil – sie wirkt extrem vital, treibt schnell nach und zeigt eine kompakte, kräftige Struktur.
Ein wichtiger Fokus dieser Woche lag auf der Umgebung: stabile Temperaturen, kontrollierte Luftfeuchtigkeit und keine extremen Schwankungen. Auch die Lichtstärke wurde eng überwacht, um jeglichen Stress oder Bleaching zu vermeiden. Die GMO Rootbeer scheint die Bedingungen optimal aufzunehmen; die Blätter stehen zu jeder Tageszeit sauber nach oben und zeigen dieses typische „Happy-Plant“-Bild.
Die Gesamtstruktur ist jetzt breit, flach und sehr gleichmäßig. Genau das, was man vor dem Übergang in die Stretch-Phase erreichen möchte. Sie baut derzeit eine perfekte Grundlage für mehrere gleich starke Tops auf.
Woche 5 war insgesamt sehr clean, sehr kontrolliert und extrem effizient – alle Trainingsschritte sitzen, und die Pflanze macht voll mit.
Likes
9
Share
@Thaoneandonly
Follow
Missed a week posting. I feel like the buds are forming slow. I have a lot of leaves that are blocking bud sites but am hesitant to cut too much.
Likes
Comments
Share
@FarmZOG
Follow
Day 75 to the big one, the other one nobody knows
we got to keep vegging til my room ready FFS
Beautiful root
Likes
47
Share
@MadeInGermany
Follow
Info:
Unfortunately, I had to find out that my account is used for fake pages in social media.
I am only active here on growdiaries.
I am not on facebook instagram twitter etc All accounts except this one are fake.
Have fun with the update.
Hey everyone :-).
This week the baby saw the light :).
She came out 2 days ago.
It is sprayed into the main area every day so that the humidity stays at the upper level :-).
Until the main comes down next week, it does not have to be poured but only sprayed :-).
I am very curious how it will develop in the coming week and until then I wish you a lot of fun with the update 😊.
Stay healthy 🙏🏻 and let it grow 🍀👍
You can buy this Strain at :
https://www.exoticseed.eu/
Type:
Herz Og
☝️🏼
Genetics:
Larry OG X Kosher Kush
Indica 60 % / Sativa 40 %
👍
Vega lamp:
2 x Todogrow Led
Quantum Board 100 W
💡
Bloom Lamp :
2 x Todogrow Led
Cxb 3590 COB 3500 K 205W
💡💡☝️🏼
Soil :
Canna Coco Professional +
☝️🏼
Fertilizer:
Green House Powder Feeding
☝️🏼🌱
Water:
Osmosis water mixed with normal water (24 hours stale that the chlorine evaporates) to 0.2 EC. Add Cal / Mag to 0.4 Ec Ph with Organic Ph - to 5.5 - 5.8 .
