The Grow Awards 2026 🏆 


Likes
Comments
Share
@danwho
Follow
8/21/2024
Added two fresh gallons with week 4 nutrients to bring the reservoir up to 750ppm. Will plan to do a more substantial water change in the next few days. Both plants are booming! Added the trellis netting to begin training the plants to fill the tent! This week should be interesting.
8/24/2024
Both plants are looking good up to this point. Have continued to add fresh nutrient water as they are drinking much more now. I have a second trellis net on hand as I believe it will be required for an aditional layer of support as they stretch into pre-flower. Looking like a 4.5 or 5 week veg before flipping.
8/25/2024
Noticed Plant B water level was only a few inches in the bottom of the bucket. Had a pump flow rate issue with most of the feed from the reservoir diverting to the closer bucket. Working to rectify the issue, but Plant B is definitely stunted, unfortunately.
8/27/2024
The water level issue was remedied by putting a separate pump and feed line in place for each plant. Continuing to defoliate as I prepare to take clones. I will likely run this week of veg a few extra days to allow Plant B to recover a bit from the water issues. Additionally, after taking clones I will give 1-2 days of recovery for the plants before switching to 12-12 and starting pre-flower!
8/29/2024
Raised the lights to drop DLI to about 30. Continuing to monitor water level issues.
8/30/2024
Did a final pruning on both plants before flipping to flower tomorrow. Started topping reservoir with bloom nutrient blend. Shortened light cycle by 2 hours to not shock the plants into flower. Added a second layer of trellis netting. Plant A (larger of the two) is absolutely thriving, plant B (smaller of the two) is bouncing back from the water level issues earlier this week! Both plants are looking ready for flower.

Likes
13
Share
@smokeycropping
Follow
Última semana días 75 y se le dio corte y fin al cultivo
De @royalqueenseeds
Hermosa la green gelato deliciosa y aromática. Hermoso fenotipo púrpura en sus última semana increíble y muy terpenosa. Unos cogollos densos duros como roca unas hojas como lija.. Uffff de calidad la green gelato


Likes
17
Share
@BB_US
Follow
She is doing amazing!! Topped her 4 days ago with no stress at all. Trying LST on her too.


Likes
8
Share
@Kawannabic
Follow
Esta ha sido una semana de intenso trabajo para las plantas a las que realicé poda apical y lst con un espacio de tiempo corto para la recuperación, pero respondieron genial. Parece que a esta variedad le puedes hacer cualquier cosa. Ni excesos ni carencias de nutrientes

Likes
3
Share
@OldskoolHed
Follow
Good week. Putting on a nice coat of frost and stinks like skunky sweet candy. Doing really well for a 2 gallon in a small tent.
Likes
4
Share
@AustinRon
Follow
El Diablo Week 13 - Harvest
[Twenty20Mendocino]
(X-Factor X Whiskey Zulu)
Overview -
- We’ve lowered Lighting to 75%, in an attempt to to lower overall temperature through end of grow.
- Full Watering every 3 - 4 days
Objective
- Trained Plant - @3Nodes - Bend apical meristem to Node 1 Height, 7 STEMS . . .
Week 13 : [ Fri
Apr 11, 2025, ED 1Q25 1:H:0:1]
[ Thu Apr 17, 2025, ED 1Q25 7:H:0:7]
24/0 @ Germination through 24 Hour Open Cotyledons (then 18/6)
Germination: 25 Jan 2025
Harvest Date: Thu Apr 23 2025
__
Wed Apr 23, 2025
ED 1Q25 1:H:0:1
- [x] Remove Cabinet Lights
- [x] Replace Fan (Clean)
- [x] Clean Cabinet
- [x] Wash Replace Cabinet Filters
- [x] Drop Pot/Photograph Root Ball
Taken Down and HUNG TODAY
Whole Plant Weight (Wet): [ 458, g]
Estimate 90 grams Dry, approximately 3 oz.


Likes
12
Share
@DeepWaterCulture
Follow
Happy with the last few weeks not much eventful happened and forgot to take photos… but yeah apart from mixed the res nutes for the wrong amount of water due to just changing a different size res just before this one, causing plant to droop the next morning but corrected with a complete res change and bounced back in two days as i clocked what I had done quite early
on :) slogan of the week ‘if in doubt swap
It out’ 😂
Likes
13
Share
@DaisyNabis
Follow
cada dia mas glotonas mis bellas, estoy aplicando riego casi día por medio, solo una vez a la semana las abono, el resto solo con agua. hice algunos amarres a los tutores ya que están en pleno crecimiento


Likes
62
Share
@Wolfgreensmoke
Follow
Las plantas siguen creciendo y formando flores. A la mitad les e aplicado una defoliacion selectiva de hojas primarias para abrir paso a las ramas bajas y agrupar la planta de esta forma consigues plantas mas compactas al no tener que alejarse tanto las ramas del tallo para recibir luz. La otra mitad no lo a necesitado al ser un fenotipo mas xativo y corto. El aporte de co2 las hace trabajar bastante y aguantar la dosis de nutrientes diaria. Solo se riega una vez a la semana con sensizym. La distancia internodal de algunas plantas es espectacularmente corta. Llos cogollos ya estan unidos y apenas han comenzado a salir. Muy ansioso por ver como continua esta variedad de barneys farm. En el ultimo video podeis ver el plano general y la diferencia que hay entre el fenotipo mas xativo y el fenotipo indico a pesar de ser todas dos si dos 33 y estar bajo las mismas condiciones.
Likes
5
Share
@Mr_nugs_lover_David
Follow
Very terpy smell, strong and very citric like a pure lemon, very lemony smell basically, nothing crazy but it's very nice, she's producing a lot of resin, you can see she's a good autoflower, not the bets I've grown but it's nice to have something to Harvey's fast. 100% organic grown


Likes
5
Share
@Ninjabuds
Follow
This weather's been crazy! We've been stuck in this deep freeze for over a week now. The temperature hasn't climbed above freezing for like 10 days – it's brutal out there. And to make things worse, with all this cold, the humidity's been acting weird. It's really hard on the plants, especially without the sun to help them dry out a little.
"My Gas Tax x Obama Runtz plant is totally killing it right now! After a rough patch, it's finally starting to thrive. The leaves are this super bright green, and I can't believe how many flower buds I'm seeing. It's so rewarding to watch it bounce back."
I can also make it sound a little more scientific if you want.
Processing
Likes
63
Share
@AsNoriu
Follow
Day 65. Girls are okish, calmag mini def is still after me, now even Gorillas show off some reddish leaves stems, hope they just cant keep up with speed and amount...
In flowering its bad to have unhealthy plants, so CalMag today and full bloom tommorrow eve. Girls started to drink really fast.
Control garden is my joy now, Outside Cookie is a pity tho....
We shall see....
In plans to raise lights back to 60 cm from canopy, girls stretched a bit, need to adjust and i just cant wait couple more weeks till first round of defoliation :))) hope to do it on day 18 of flower latest.. Canopy is too packed, need better air and light.
Thinking to get heavy artillery out, epsom salt dresing :)) thats my last hope to fight that reddish-violet and make it green again. It takes two weeks to kick inn, but works always for me...
Day 66. Girls are happy, hungry and in full blast. Control garden has such healthy green its hard to describe...
Cookies on other hand streched as f@%k, will have to lolitop them really high, so no proper grow and small harvest, taste is the only thing that can save them... Worthless for now....
All girls streched like 5 cm in one day, they loved CalMag. Lights been raised like 7 cm. Lets see...
Day 68. Changed plans a bit, girls got silica acid with plain water and they loved it!
They are happy campers and grow really fast, now only to have patience till defoliation. Girls are super packed, will have to care about them 2x more than avarage, thinking to plug in conditioner, but its still coldish weather outside, so hope to last two more weeks without that beast, no tv or orher aplaincies while this beast runs :))))
Day 68, evening.
First time checked my girls after light switch to flower and i am lost, will they make it? Canopy height is like 30-35 cm, they had small lolitopings on lower levels during vegetation ( see week 8 first video just mute it, they where striped like this on week 5 as well) in video its even hard to see, but its jungles!!!!
Have one fresh air fan, double fan set with carbon out, inside two standing fans and powerful conditioner, will i make it with only defoliation or should i clear them hard aswell?
Never growed such low and dence plants before.
Please advice or show diary to read.
Plus a 30 days old Incredible Bulk, almost no feed, no germination or transplanting, straight to soil and no direct light above. Hope you will see this same strain grower :) Peace.

Likes
5
Share
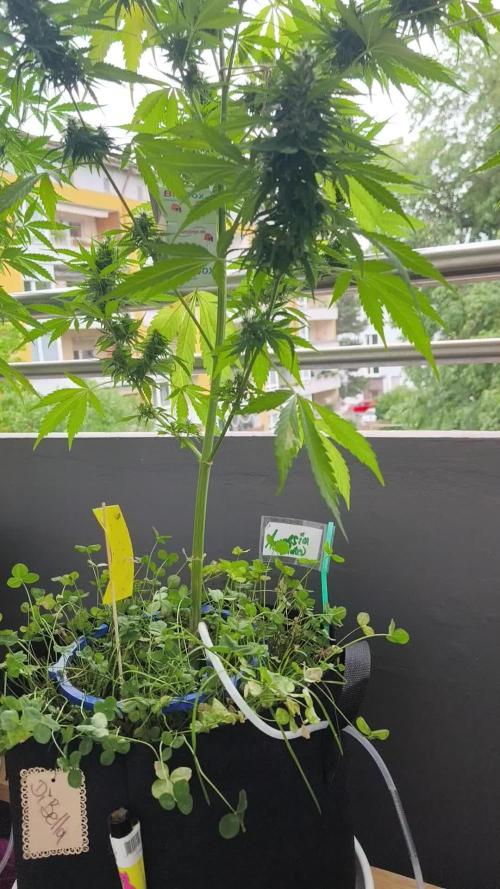
@BalconyBoy
Follow
28.07.25 the remaining Auto Amnesia is getting bigger buds by the week and dropping fan leaves. Happy growing!

Likes
18
Share
@eldruida_lamota
Follow
Buena germinación 3/3
Grtminadas en grilletes humedad dentro de un tipper y en 2 dias puesta sobre en tierra.

Likes
142
Share
@Hologram
Follow
ACOP does not care about all those caterpillers and spiders (and other slimy mofos)...
She is just getting some highlights in her hair(and a perm!) .. to get ready for the harvest party soon!!👊
happy growing for all
✊
Likes
27
Share
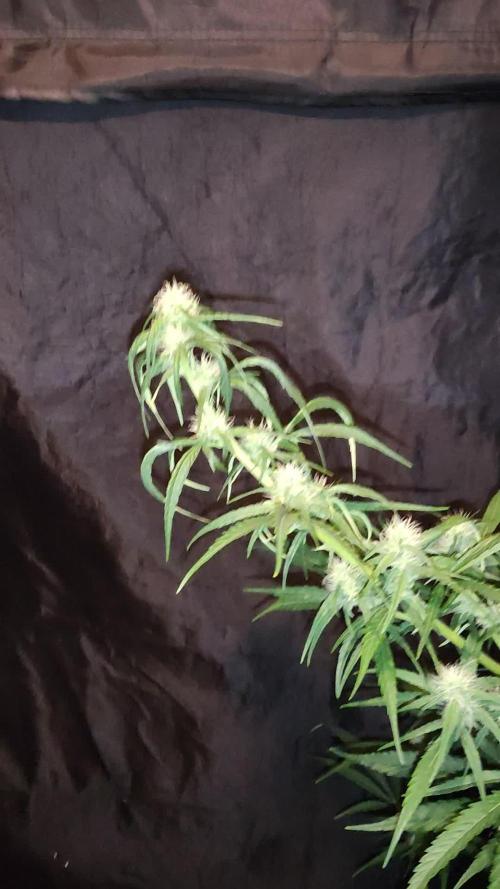
@Salokin
Follow
Hi Growmies,
She is becoming a monster. This plant is only 18 cm tall and basically consists of stems an buds, by now she has overtaken her mother in terms of bud production, quality and bud volume. I like to believe that the one feeding of pk 13/14 stimulated it even more. As of now the feeding will get less end less, preparing her for ripening. I am a super proud of this little project and it’s outcome and looking forward to cut this beauty down in roughly 3 weeks. Not much more to do but wait.