


Likes
18
Share


@Silverback_Guerilla
Follow
11/9:
I fed them today. Started tapering off the One. Stopped giving Beastie Bloomz and started them on Cha Ching, plus the normal doses of silica, signal, and sweet & sticky.


Likes
12
Share

@DerEkstaseHase
Follow
Was für einen Reise!
Die zweite Ernte, 1 Samen - 7 Pflanzen!
Die 6 Stecklinge sind nach 72 Tage Blüte erntereif, zwei wurden mit Rootball, die anderen 4 am Stamm abgeschnitten und kopfüber aufgehängt.
Eine meiner 6 Pflanzen habe ich beim LST etwas zu aggressiv behandelt. Durch das Drehen der Äste und das schlechte Lst ist die Wurzel - Stamm Verbindung verletzt worden, wodurch die Pflanze kaum noch Flüssigkeit in die oberen Bereiche der Pflanze transportieren könnte und nur sehr geringen Ertrag gebracht hat.
Pflanze 1: 43,5 - in Gramm
Pflanze 2: 101
Pflanze 3: 73,6
Pflanze 4: 57,6
Pflanze 5: 88,9
Pflanze 6: 62,1 +
----------------------------
426,7 Gramm
Mutterpflanze : 161,8 Gramm
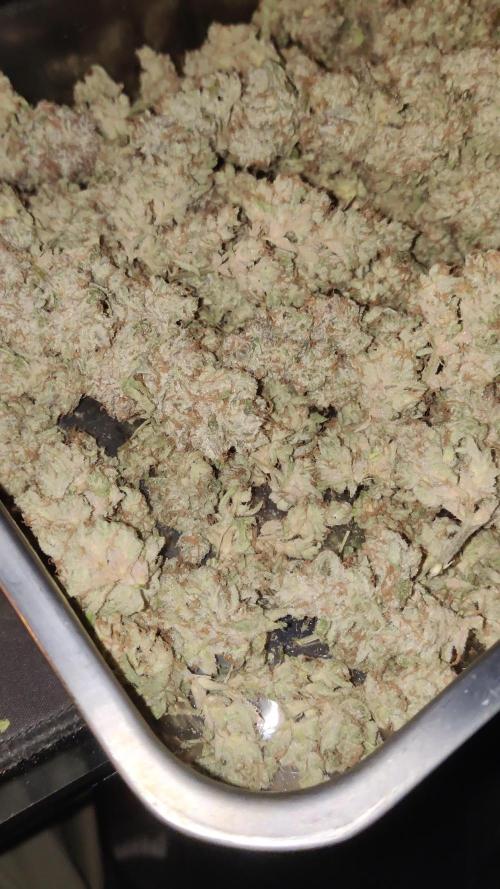
Total : 588,5 Gramm Trockengewicht :)
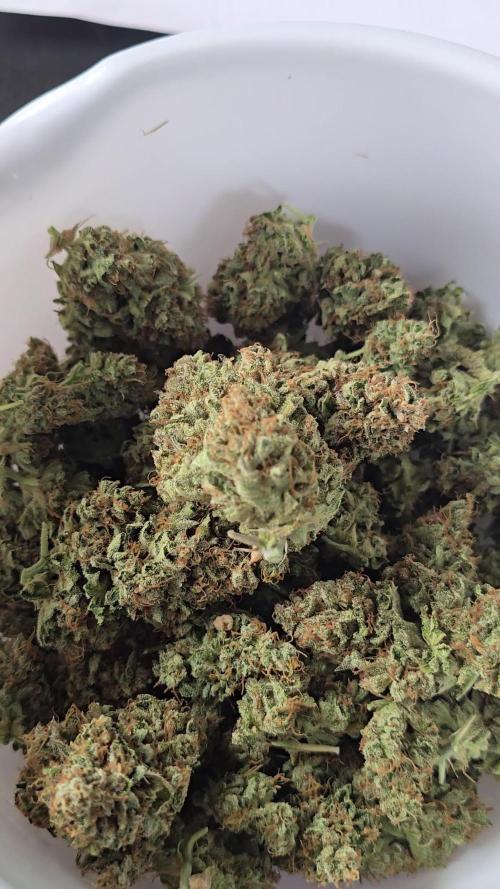
Fertige Blüte:
Der Geruch war wirklich sehr stark aber angenehm. Beim öffnen des Beutels ist mir sofort eine klare Zitronennote aufgefallen.
Der Geschmack ist absolut empfehlenswert für alle die zitronige Noten bevorzugen!
Die Wirkung ist stark und euphorisierend, gut geeignet für den Tag.
Ich empfehle außerdem schäfstens (!!!), hängt die Pflanze mit Wurzeln auf und gebt ihr 13-14 Tage zum Trocknen. Eine vollständige Seneszenz hat einen unglaublich Einfluss auf Geschmack und Raucbarkeit. Durch das Rootballdrying ist selbst beim Konsum in der Bong kein Kratzen im Hals zurückgeblieben!
10/10 Empfehlung! Rootball Drying!!!!!!

Likes
36
Share


@TheGreenLeopard
Follow
had a bit of a nightmare. bit much on over water and may have had a nutrient lockout. took one sweet cherry pie out and replaced with seedsman northern lights auto. also added a few more of those in the tent 5th dec. was unfortunate as this week was for topping. went ahead and did it. will be very careful next week. Purple berry Kush came on strong this week. took the nutrients fine. less damage from over water.


Likes
17
Share

@Naujas
Follow
Harvest day has finally arrived for my Frostbanger Auto, and I’m very happy with how this run turned out.
She finished at 69 days from seed and impressed me from start to finish. Throughout flowering she developed a strong, sweet aroma that became richer and more noticeable every week. By harvest time, opening the tent released an amazing smell that filled the entire room.
The buds developed beautifully, with excellent frost coverage and plenty of sparkling trichomes covering the flowers and sugar leaves. Visually, she became one of the prettiest plants I’ve grown, showing great structure and dense, resin-coated buds.
Final wet weight came in at 230g, which I’m very pleased with. The plant stayed healthy, responded well throughout the grow, and rewarded me with a solid harvest and outstanding bag appeal.
Overall, Frostbanger Auto was a pleasure to grow. Great aroma, heavy trichome production, beautiful buds, and a satisfying yield. Now it's time for drying and curing, and I can't wait to see how the final quality develops over the next few weeks.
Final stats:
🌱 Strain: Frostbanger Auto
📅 Harvested: Day 69
⚖️ Wet Weight: 230g
❄️ Trichome Production: Excellent
👃 Aroma: Sweet, strong, and very pleasant
🌿 Overall Impression: Beautiful plant with great resin production and a rewarding harvest
⭐⭐⭐⭐⭐ Very enjoyable grow from start to finish

Likes
14
Share


@GoldenWeedGrower
Follow
D78/F34 - 17/06/23 - I changed light schedule hoping she's going better. (6 only red ligh and 7 red-white)
D79/F35 - 18/06/23 - New lights schedule is running
D80/F36 - 19/06/23 - Added water and integrators EC 1.0 and pH 6.4
D81/F37 - 20/06/23 - Nothing to report
D82/F38 - 21/06/23 - Added water and nutes EC 1.0 and pH 5.7
D83/F39 - 22/06/23 - Temp is too high for both water and environment. I see signals of suffering on the flowers (foxtailing)
D84/F40 - 23/06/23 - I'm trying to keep the Tremp under control but isn't easy. To lowering water temp (that now is about 26 °C) I'm adding some ice to the water
Processing
Likes
10
Share


@TrimQueen
Follow
This is the beggining of the fourth flowering week. Not hurry at all. Just moved out from my not so private apartment and this is the first 5 days of her inside of a wardrobe, which is fantastic showing those results. I have much time to wait and Im not hurry at all. Expecting to have at least 6 weeks more blooming.
07/04 - Total of 88 days old. Fed her today with 1/3 of 4-14-8 fert. She's showing good Healthy, like she wants more of everything (Light, fert, water, CO2). Intending to let her blooming 60 days more. (8 weeks).


Likes
14
Share


@Macc420
Follow
So weiter geht's :D
Alles klar sie sind geschlüpft
Sogar der 5 Jahre alte Zamnesia seed hats geschafft
Nun in Plagron Seeding and Cutting soil
Bei der hinten links passiert nichts - bisschen wurzel is da und der Anfang vom Stiel aber sonst nix mehr ... Hab jezz noch schnell eine Sweet ZZ in Papier Tücher gepackt damit es wieder 6 sind.


Likes
20
Share


@420DeepGrow
Follow
Ha sido un grow muy divertido, me ha gustado como ha quedado finalmente, una planta bajita, con muchas colas, algo finas pero bien prensadas y con mucha resina.
Ha sido una de las plantas que mejor ha consumido los nutrientes durante todas las fases de cultivo.
El aroma es bestial, tonos cítricos y a hachis .
Pronto actualizo con notas de humo.

Likes
7
Share


@FlavoursUk
Follow
So far so good. pH levels are stable and plants seem off to a good start. I gave them an extra boost of fluvic and humic acids for better nutrient uptake at the roots along with other benefits.
Although it will of only been 6 days tomorrow since the last water change, i plan on doing it tomorrow at day 6. For the reason of keeping the system clean and sterile ill be doing a change every 7-10 Days.
Day 12.. had to top up the nutrients as she was showing calcium and magnesium deficiency or the start of, but we will see. Other than that things are going well. Only issue is water temp as i dont yet have a chiller. Stay tuned

Likes
14
Share


@Terpyboyz
Follow
So this grow came to a finshed but I had a. Few issues that’s held me up from finishing up the diary, but in due time I will reupload it all in order soon. But over all I will also update with a final weigh in of each strain produced so stay tuned 🤙🏻🔥


Likes
27
Share


@adam_pawloski87
Follow
Over all was an amazing grow, super sticky dense nugs with smell of berries, highly recommended for everyone!!
Likes
11
Share


@DeepRootsGrowTrees
Follow
FORBIDDEN 🚫 RUNTZ by FASTBUDS
Week #4 Overall June 22nd-29th
Week #3 Veg
She's looking good this week she's a busy plant with side growth no issues this week. Stay Growing!!
Fastbuds FORBIDDEN 🚫 RUNTZ
Likes
42
Share


@DrLaggis
Follow
🌱 Day 36 - Start of Second Week Flowering 🌱
Hello growing friends! 🌿 Today marks the beginning of the second week of the flowering phase, and I’m very happy with how the buds are developing so far. 🌸✨
Since this is my first grow, I’m truly amazed by how fascinating these plants are. It’s an exciting journey! 🌱🤩😎
Last week, I struggled with yellow leaves and a calcium & magnesium deficiency. Fortunately, with the help of BioBizz Calmag, things are slowly improving. 🍃💪
Currently, I’ve set the humidity to 45%—according to my research, this is ideal for minimizing the risk of mold. 💧🚫🌿
🌱 Day 42 - Last Day of the Second Flowering Week 🌱
Hello everyone! 🌿 Today marks the last day of the second week of flowering, and I’ve made some updates to my routine. I’ve increased the nutrients to BioBizz Grow (3ml), BioBizz Bloom (2ml), and BioBizz TopMax (1.5ml). The plants are growing well and have recovered from the calcium deficiency. 🍃💪 I’m continuing to add a bit of BioBizz CalMag to prevent any future deficiencies. 🌱✨
This week, I also added some soil to the pots, as the soil level had flattened out quite a bit. I topped up each pot with about 1.5 liters of soil.
Likes
64
Share


@Enollam
Follow
Servus zusammen 🏽
Eine Woche wird die kleine noch im Zelt verbringen
Danach geht es in einen 25 Liter Stofftopf mit living soil und dann raus auf den Balkon
Likes
8
Share


@eldruida_lamota
Follow
Vamos familia, actualizamos la primera semana de floración de estas Lemon Cherry Runtz de FastBuds.
La temperatura que estuvo entre los 24-26 grados y humedad dentro de los rangos correctos.
Cambiamos esta semana el fotoperiodo a 12 horas luz, 12 oscuridad, estiraron bien y ensancharon bastante también, el color es verde sano.
Se nota que los nutrientes de la marca Agrobeta hacen sus funciones.
También realicé una poda de bajos que yo si las veo necesarias para explotar después la flor.
- os dejo por aquí un CÓDIGO: Eldruida
Descuento para la tienda de MARS HYDRO.
https://www.mars-hydro.com
Hasta aquí todo, Buenos humos 💨💨💨
Processing
Likes
2
Share


Likes
23
Share


@ILoVeThiSpLaNt
Follow
Giorno 63
Tempo fa avevo letto un diario qua su Growdiares di un coltivatore esperto (Hawkbo se non sbaglio) in cui era davvero stupito dalla qualità dei fiori di questa Grape Rolex V2. E io quella Grape Rolex V2 ce l'avevo in casa presa da un amico in un'asta su istagram 😊
Tempo di finire alcuni pacchettini che avevo in frigor ed eccola qui in tutto il suo splendore.
Pianta alta 120 cm e fiori che sembrano di una pianta femmina a tutti gli effetti.Sono al giorno 63 e mostra un 5% di tricomi ambrati 80% latte e 10% trasparenti. Sta prendendo acqua ed enzimi da 3 giorni e così sarà per altri 10/12.
Le 5 Crystal Candy che dire? Belle cazzute come sempre anche senza aria in entrata e con temperature sui 29/30° (al limite). Due saranno pronte in 7/10gg le altre verranno raccolte intorno al giorno 75/80 da seme.
Le rifarò per la terza volta di fila quindi se ti interessa il ceppo resta sintonizzato e la rivedrai ancora!!!
Finirò gli ultimi semi di Sweet Seeds che ho in casa e nel frattempo cercherò di comprare rifornimento per 1/2 anni di autofiorenti RocBudInc.
Penso non ci sia altro da aggiungere.
Passo e chiudo 😂