


Likes
17
Share

@Naujas
Follow
116 dienų!!! Tiek laiko praleidau su šia gražuole, kol ji atskleidė visą savo grožį :) Jos aromatas toks, lyg būčiau apsupta citrinmedžių, niekada nejaučiau tokio stipraus citrinos aromato, Visa mergina gavo @Plagron maistinių medžiagų, kurios jai labai patiko :) Už tai gavau 338 gramus šlapių, tvirtų žiedų, ir daug labai saldžių lapų, iš kurių gaminsiu burbulinį maišelį :) Neabejoju, kad ji bus tikrai skani ir stipri :) bet teks dar šiek tiek palaukti, kol ją paragausiu!!!! Jos žiedai labai pilni lipnių, kvapnių trichomų :) Rekomenduoju išbandyti – nenusivilsite :) Sėkmės visoms, o mano spintoje jau išdygo naujos merginos, tad iki pasimatymo kituose tinklaraščiuose :).

Likes
48
Share


@Aleks555
Follow
Hello everyone. The week went well, our girl is growing, enjoying a diet of 2000 ppm. On December 17.12. 2023, we'll switch the light to 12/12, it's time to start flowering.
We took clones from our girl on December 10.12, 2023. The clones look healthy, but I haven't seen any roots yet, so I'm not sure whether to switch our girl to flowering or wait a bit longer. You'll find out about my decision next week. Don't forget to leave comments and ratings. Thanks, everyone.

Processing
Likes
1
Share


@Dunk_Junk
Follow
Not much vertical height change this week, 15cm. Flowering stretch slowing down. That's bad news for me after her first 3 weeks being very slow growing. I missed the window for good veg growth by (I think...) low temps in the tent. As a very small plant cold roots stunts growth. Being an auto you cannot extend the veg period so I'm stuck with her being a very small plant.
Nutrients as above added to 10L water along with 5g of 20-20-20 powdered fertiliser.
Still... if we're always learning nothing is lost. Just data in the memory bank.

Likes
18
Share


@Luca90
Follow
Today 23/07/22 We are two days into week 5, never talked about nutrient or water’ problems I had some leaves with few yellow marks but very small one beside that I always saw my plants green and happy, here you can see the scrog I set up yesterday not sure if this will work better but I think will help the branches grow further from the others increasing the light they riceve! I made it myself I will order one for the next grown when I will get my grow box! The watermelon is already flowering but the northern light no so today I started feeding the plants with different preparations.. I kept on giving the grow booster with a bit of bloom booster and viceversa for the watermelon! If you have any tips anything you think I’m doing wrong or you see it’s not ok let me know I don’t grow in a box I grow between the curtains and my window so the environment wasn’t always the perfect one


Likes
23
Share


@SkunkyDog420
Follow
Hallo zusammen 🤙.
Sie wächst sehr schön und macht keine Probleme.
Rabattcode für den BIOTABS-Webshop https://biotabs.nl/en/shop/ GDBT420, damit erhalten Sie 15 Prozent


Likes
6
Share

@CadillacGreen_420
Follow
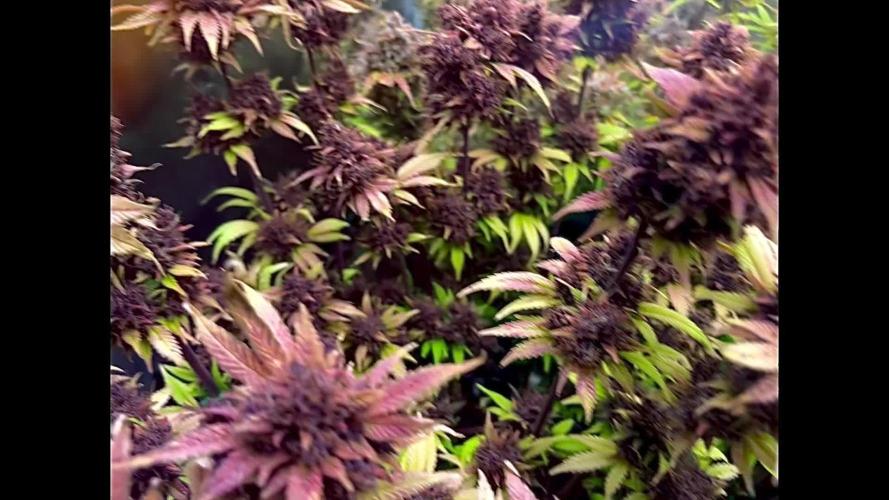
Week 13 – Ripening is now progressing slowly, as I had expected, due to my choice to provide a light stimulus that isn’t too intense but rather gentler. From flowering until now I’ve maintained 30 DLI and a steady 470 PAR.
In this run, the goal has been to keep the resin thick and sticky. Humidity has been kept between 57–62% max. My lamp is an Omega Pro 300W, which I’m currently running 37% (111 W).
This strategy seems to be working well: resin production has been abundant, and on this point—and not only this one—I’ve completely fallen in love with Gorilla Cookies.
The aroma is exquisite, and the resin… the flowers are covered in ointment-like resin.
The macro shots of the trichomes still don’t show any amber heads, so I believe harvest is probably about 10–15 days away. 🍮🤤
I think I’ll grow only Gorilla in the next run! 🦍👀
P.SThe leaf discoloration happened very quickly! The previous photos are from yesterday when it was still green — today it looks like this. Really interesting
Likes
Comments
Share

@GrahamTheGrower
Follow
It's all happening right now. Instead of putting energy into roots, vegetation, and foliage, the plant is driving everything straight into the flowers. The acceleration in growth is absolutely astounding.I dialed up the Bloombastic to 1.5 ml/L, turned the lights down, opened the doors and windows, and let the fresh air flow through. Now I'm just letting nature do her thing.


Processing
Likes
58
Share


@DailyDabs
Follow
Had some camera issues this week so I didn't have any pictures or videos so heres the time lapse of the whole grow


Likes
2
Share


@Albanymedicinalgarden
Follow
Skywalker came down mid week with mostly cloudy trichomes. Probably could’ve pulled it longer but it looked ready to me and I’m expecting kush effects anyway.
Blueberry has a beautiful fade that would probably have scared me my first grow. She has definitely had calcium issues which is causing some leaves to burn crispy. That can all be cut away after drying so im not too concerned. Arguably i could’ve chopped her this week but i think she has more to do before her time is up
Glueberry OG just now getting some yellowing of leaves. Hard to tell if it’s a deficiency or fade to my eye but i top dressed a small amount of NLS concentrate before it gets much further along. This might be a mistake this far along but I’m willing to learn from it if it is


Likes
45
Share


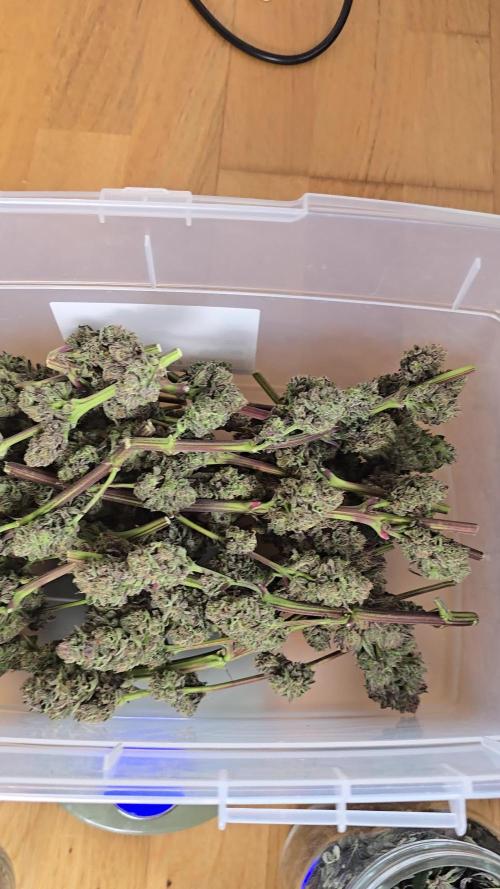
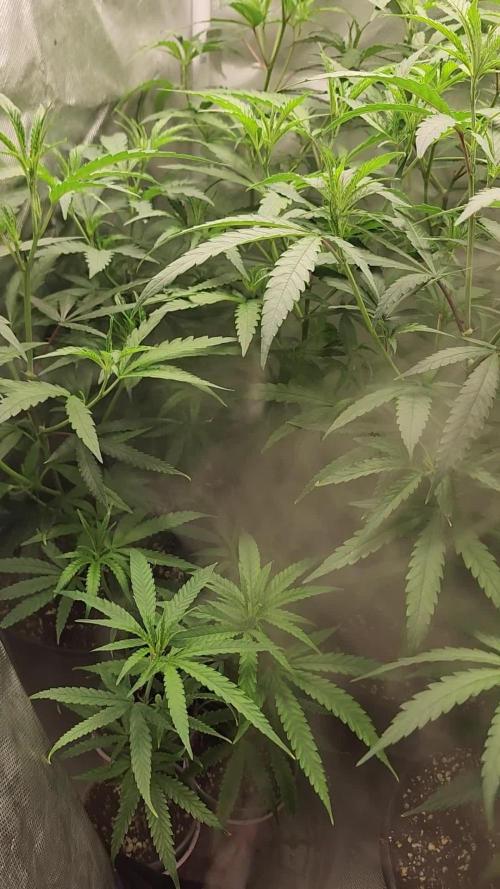
@AsNoriu
Follow
Day 151. Girl is harvested, sticky, stinky, oily, a bit too leafy and kind of light, cant see even 100 of her .. ( 8.5 is already choped, the brushed by wall branch ).
She stinks like skunk with some aftertaste ( tried scissors hash already).
Now it looks like she had to go couple weeks more, trich mostly milky and leaves after darkness are green, looks like she was beging me to leave her and put makeup to look younger ;)))))
We shall see ..
Day 157. Boy oh boy ... how i love to be wrong ...;))))
Girl is a record braker. 141 from one plant, my new pure indoors record.
Long journey , desent result, she could make in 6 weeks earlier, but she had a crazy life, lets hope it will be crazy smoke ;)))
Report to come ....


Likes
21
Share

@Michijardinero
Follow
Muy buenas familia aqui estamos una semana más con mis niñas más gorditas 😁😁😁en este último riego sólo le he puesto atazyme le medi el pH y la EC todo está en su punto en el próximo riego le pondré de todo ahora ya tengo trabajando al 100% el foco en ventilador lo subí al 2 la temperatura ahora que el foco está el 100% ha subido a 25.5 26 grados lo tengo a 30 más o menos de las puntas ya saben familia si ven algún fallo algo en lo que pueda mejorar para que salgan al 100 los escucho un abrazo muy fuerte nos vemos en 7 días paz

Likes
4
Share


@Rial420
Follow
Por el momento todo bien con el cultivo esta es mi segunda cosecha en indor

Likes
17
Share


@CanarianGrow92
Follow
Week 8 for the Kongs krush from greenhouse seeds 👌
This week we only gave sugars and sticky fingers from xpert nutrients. Amazing results so far 🤯
Some of the buds have a nice purple touch, looks awesome 😎 the smell is incredible
For the rest we have water every 2 days.
The plants will be harvest in some days

Likes
8
Share


@dank604
Follow
So far so good. Lowering the light was a bit of a mistake as the main cola started to show light stress. The main cola is 7" higher than the rest which is a bit of a PITA. I'll be much more aggressive with the LST next time around - comments on how to prevent such a taller main cola are welcome :)
I've trimmed about a dozen or so leaves to get more airflow and I moved the LED strips up to support the middle section of the plant, seems to have helped (I think).


Likes
4
Share

@GREENPHOENIX6262
Follow
10/7 - Mother is thriving in the flower tent - this weeks update is on the clones - currently running 14 healthy cuttings in 1 gallon pots - medium charged with Worm Castings + Dry myco+ - currently running in a 2xw with a 150W light at 95% intensity - VPD 1%.
