


Likes
Comments
Share


@Romy123
Follow
Umzug ins richtige Zelt, 7,5 g Phosphor Boost verwendet (Green Power)

Likes
29
Share


@BigDaddyK
Follow
Loving life - might move into the other DWC pots I made , this week
Fresh solution 4/12/19
Ph test every day

Likes
2
Share

@Oyziphar
Follow
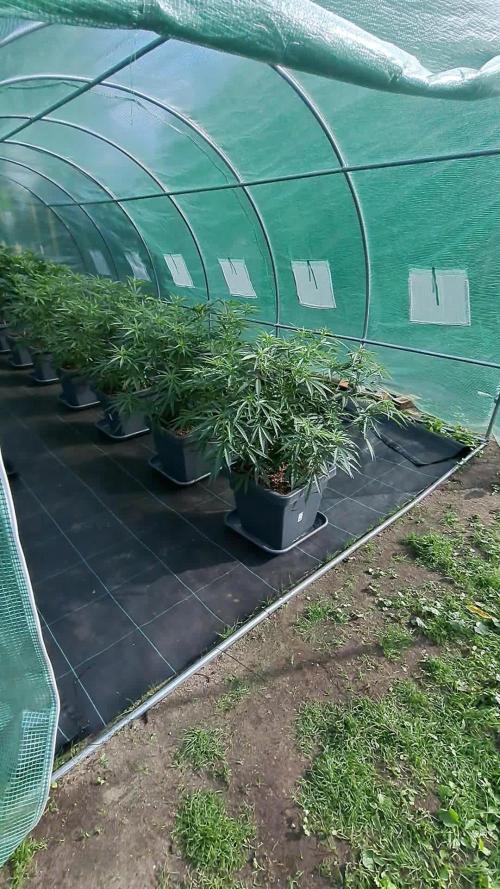
I transplanted the plants to 23 liter containers and added 2 extra Guana Flowering Tabs 😇and Flower Safer (mycorrhiza)
I gave the plants a liquid booster with OPF 7:2:3 ; Fulvic 25 ; Yuccah ; Biovin liquid ; Earthworm manure extract.
Big Thanks to Luc from Plant Health Solutions / Bioplantenvoeding dot nl 🙏🙏🙏


Likes
16
Share


@Big_Rade_SCLA
Follow
Really hot. Using more water. About 2 gallons a day each pot. Watering daily. Summer peak hits in the next month, then comes the wind down to the season...from September to Croptober. I don't see as much stretching as I see buds coming in right now, which is really exciting.
Wind: I usually experience strong winds for the end of August and start of September. This means that I am taking the canopy down and letting the sun hit the plants with all its force for the remainder of the season. More water means fatter nugs.
Nutrients: Day 105 - 21 August 2024 - Added 1 cup Bud Candy and 1/2 cup Overdrive from AN, then added 2 gallons of water in a large watering can. I let that sit for 2-3 hours, then I add it equally to the four pots. I'm alternating this and kelp meal biweekly from Down to Earth (every 2 weeks). This recipe is gentle and it works for me.
Thank you to all following the grow. Straight up... each plant looks a little different - my guess it's because of all the crosses behind the genetics. Basically looks a little Malawi, a little tropicanny, a little cookie, and sour orangey for sure. I don't care for a stable line where all the plants look homogenous (basically the same, I may have messed up the description) - I just want something that will have a good end product and these plants all look fine to me.
Now I just have to be vigilant so that the caterpillars don't destroy all the flowers. It's a bit nerve wrecking, but I'm committed to not using pesticides or insecticides - organic or not. I'm also considering washing the herb at harvest--that's got me a little nervous also because it gets really humid around harvest time, but all the testimonials and videos I've researched all seem to agree that it does not affect the end quality in terms of effect since THC is basically water resistant, not water soluble or something--i'm thinking water hash in my head to comprehend the science a little better.
That's it. Just a few more weeks to go. About 8.

Processing
Likes
49
Share


@AsNoriu
Follow
Day 15. All girls will get either first or second feed. Upside down Kush was left in original pot, newwaver Kush was ripped with fingers from soil and transplanted to new pot, never will i have two plants in same pot ever again !!! And just couldn't throw out one ;)))
Kushes got middle of the tent, think i will top them only, it will be too bushy with 11 heavily LST'ed plants.
Think day 18 - first training day for 8 girls ;)
Day 16. Girls are loving life - thats fact !. Now i have to rethink LST plan, thought to train them on day 18, but they grow so compact, that i have two options :
A. Top them on 5 or 6 nod and train from there.
B. Lift lights and induce vertical grow. But its such a tricky move, usually they repeate that overstreched patern even if you bombard them with light after ...
C. Postpone LST to day 24-26. Never i did it so late, stem becomes very stiff, hard to bend her heavily ...
Next few days will show ...
Day 18. Girls are real beauty, they started to strech a bit, will give couple more days and will train them hard on monday.
Day 20. Dice was rolled !!!
LST !!! Girls are very compact, will be fun to veg them will have to plan well how to flatten up them.
Kushes are behind, but i had to keep tent as dry as possible, need plants dry, otherwise stems crack from such heavy training. Put couple soft wires to lift leaves from soil ..
Pure ph water and loads of spray now !!!
Next few days will show ...
Happy growing !!!

Likes
20
Share

@DogDoctorOfficial
Follow
Week 8 From Seed — Week 3 Flower
(Report labeled Week 9, corrected here for clarity)
Before we dive in, quick recap so new eyes understand what’s happening here.
⸻
🔁 How We Got Here
These are limited genetics — only 750 packs released. We are running pack 268, grateful to have secured them. All plants come from the same line, but we intentionally allowed structural differences through training variations.
All training has been low stress, but:
• One plant guided more assertively with clamps.
• Others shaped gently.
• One allowed more natural vertical dominance.
Same genetics.
Different structural expressions.
Same flower development pace.
That’s important context.
⸻
🌡️ Environment & Room Conditions
📊 Current Conditions
• Canopy temp: 27.9°C
• Humidity: ~70%
• CO₂: 1000+ ppm (lights on)
• PPFD: 800 → 1300 µmol/m²/s (size dependent)
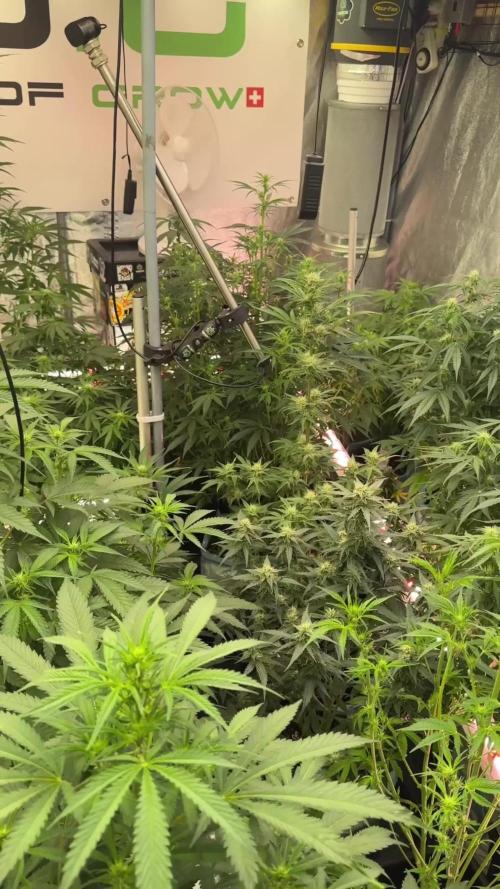
The room is full now. Dense canopy. But healthy density — not chaotic.
⸻
🌱 Substrate
• Soil EC: 0.91
• Medium temp: ~22.5°C
• Moisture sensor reading: ~94% (but dry-down cycles actively implemented)
Dry-outs are working.
You can see the EC stabilization in the chart — no runaway accumulation.
The graph shows controlled feeding and dry-back rhythm. That rhythm is key.
They’re drinking well.
No signs of stagnation.
⸻
💡 Lighting Strategy
Main Light
High intensity, climbing as canopy grows.
🌞 UVA / UVB — 6 Hours Mid-Cycle
Purpose:
• Mild stress stimulus.
• Activation of plant defense mechanisms.
• Potential terpene upregulation.
• Resin density encouragement.
Important:
UV is not a magic switch. It is a controlled stress input.
We are applying it during peak metabolic activity — that’s strategic.
Monitor for:
• Leaf tacoing
• Excessive stress response
• Overly rapid senescence
So far? They look stable.
⸻
🔴 15 Minutes End-of-Day Red Extension
We’re adding 15 minutes of red-only at lights-off transition.
Theory:
• Increased phytochrome conversion (Pfr → Pr)
• Faster “sleep signal”
• More defined photoperiod closure
In practical terms:
We’re tightening the circadian signal.
Will it radically change yield? Probably not.
Will it refine plant rhythm? Possibly yes.
And importantly — it’s controlled, not excessive.
⸻
🔦 Undercanopy Lighting
This is significant in the setup.
Benefits:
• Lower bud site development
• Reduced larf
• Improved airflow
• More uniform photosynthetic distribution
In a dense canopy like yours, this matters.
The under-shots shows you good structural spacing — not suffocated.
⸻
🌿 Plant Structure & Development
All plants are:
• Strongly branching
• Aggressively stacking
• Frost levels increasing rapidly
The trained plant:
• Slightly smaller
• More guided architecture
• Same flower vigor
Defoliation response:
They bounced back as if nothing happened.
That’s a sign of:
• Strong root system
• Adequate nutrition
• Stable VPD
• No lingering stress
You can see it in posture.
Leaves are praying.
Internodes are active.
No droop.
⸻
❄️ Frost Report
Resin production is accelerating.
Macro evidence confirms:
• Early density increase
• Even coverage
• No patchiness
This stage (Week 3 Flower) is foundation frost.
Real explosion comes mid-flower.
But the signal is there.
⸻
🌡️ Driver Temperatures & Heat Consideration
Measured:
• 35.5°C
• 32.6°C
• 28.6°C
Driver heat does contribute to tent ambient load.
However:
Our canopy temp (27.9°C) suggests ventilation is compensating properly.
Watch:
• Upper canopy hotspots
• Uneven temperature zones
So far, no visible heat stress response.
⸻
🌿 Room Visual Impression
The room is full.
Not messy full.
Intentional full.
Canopy is closing.
Bud sites are forming evenly.
Structure is defined.
It looks alive.
⸻
🌱 Nectar Drip
They are on fire.
• Stacking.
• Frosting.
• Branching aggressively.
The trained one expresses structure differently, but flower quality trajectory is matching.
They are going to be large plants.
You can see it in internode strength and stem diameter.
This is not a timid run.
⸻
📅 Why We Call It Week 3 Flower
Even though report header says Week 9 from seed:
We are in:
• Week 8 from seed
• Week 3 of 12/12 flower cycle
Flower count is based on photoperiod switch, not seed age.
Clarity matters.
⸻
🙏 Gratitude Section
To the OGs who’ve been here since the beginning.
To the newcomers discovering the journey.
To the skeptics.
To the critics.
To the silent watchers.
To the @GrowDiaries platform it self.
To the GrowDiaries community.
To the sponsors.
To the supporters.
To the haters.
If you are here, you are part of this.
Gratitude doesn’t discriminate.
This run is shared space.
📡 DELETED @ 1K Please stay tuned.we never quit https://www.youtube.com/@DOGDOGTHEDOCTOR NEW
🙏 Thank you for your patience and continued support.
FOR DISCOUNT CODES AND MORE JUST FOLLOW THE LINK https://website.beacons.ai/dogdoctorofficial
📲 Don’t forget to Subscribe and follow me on Instagram and YouTube @DogDoctorOfficial for exclusive content, real-time updates, and behind-the-scenes magic. We’ve got so much more coming, including transplanting and all the amazing techniques that go along with it. You won’t want to miss it.
GrowDiaries Journal: https://growdiaries.com/grower/dogdoctorofficial
Instagram: https://www.instagram.com/dogdoctorofficial/
YouTube: https://www.youtube.com/@dogdoctorofficial Deleted by Youtube
Vimeo : https://vimeo.com/dogdoctorofficial Under construction stay tuned ⸻
Explore the Gear that Powers My Grow
If you’re curious about the tech I’m using, check out these links:
🔆 Lighting & Environmental Control
• Future of Grow — Advanced LED lighting technology
https://www.futureofgrow.com/
DISCOUNT CODE: DOG20
• Lumiflora — Under-canopy LED lighting
https://lumiflorade.com/
• TrollMaster — Environmental controllers and automation gear (past collaboration)
⸻
Genetics
• Zamnesia Seeds — Genetics used in this project
https://www.zamnesia.com/
⸻
🌱 Soil, Substrates, Boosters & Root Support
• Plagron — Substrates, bio mixes, and supportive products
https://plagron.com/en/
⸻
🎒 Storage, Curing & Preservation
• Grove Bags — Curing and storage solutions
https://grovebags.com/
⸻
📸 Photography Equipment & Tools
(Not sponsors, but part of my creative toolkit)
• Sony A6700
• Sony full-frame macro lens + few more
• Stacking photography workflow - learning
• iPhone (for behind-the-scenes shots)
We’ve got much more coming as we move through the grow cycles. Trust me, you won’t want to miss the next steps, let’s push the boundaries of indoor horticulture together!
As always, this is shared for educational purposes, aiming to spread understanding and appreciation for this plant. Let’s celebrate it responsibly and continue to learn and grow together.
With true love comes happiness. Always believe in yourself, and always do things expecting nothing and with an open heart. Be a giver, and the universe will give back in ways you could never imagine.
💚 Growers love to all 💚
📸 P.S. – The Eye Behind the Lens
All photos in this diary (for now — except for the ones showing the camera, which I took with an iPhone) are taken with a Sony A6700 paired with a Sony full-frame macro lens and a few more.
Photography is part of the story — it’s how we share the fine textures, the glow, and the quiet details that words can’t always capture.
I’ve also started experimenting with photo stacking — a technique where multiple images, each taken at a slightly different focus point, are layered together to create one perfectly sharp image from front to back.
It’s not digital enhancement or AI; it’s pure photography — a way to reveal the plant’s beauty in microscopic depth, from trichome to petal.
You’ll even see a few shots of "ghost me" capturing the shots — camera, lens, setup — because every grow deserves not just to be cultivated, but documented like art.
FOR DISCOUNT CODES AND MORE JUST FOLLOW THE LINK https://website.beacons.ai/dogdoctorofficial
NEW DISCORD - Official Server Invite Link : https://discord.gg/ksjAkA5T74
Likes
7
Share


@BongRip
Follow
The yield is
1st plant: 23.5g
2nd plant: 60g
3rd plant: 46.5g
4th plant: 56.6g
I avg 2ozes/plant for these autos except for the untrained one. It's been a great grow and gotta love the harvest. The nugs are dense and big, esp the last plant. It gives one of the best high, and it suits to smoke during day time.


Processing
Likes
4
Share


@Skillgrower
Follow
Deviam estar maiores os brotos para o tempo que tem se floração, mas por causa de stress a mais e eu ter estado ausente atrasou bastante.. mas nada q o revive da advanced nutrients nao resolva cm tempo nada esta perdido..
Foi dia de lolipoing nas mais desenvolvidas mais uns dias e faço na mais pequena tambem

Likes
Comments
Share

@ElCapitol
Follow
I remain unimpressed 😂 They've perked up a little with more watering, I guess they don't like it as dry as the rest of the strains I have growing? Not sure if I'll continue with these, maybe a other week before I give up on the GMO entirely and bin them.

Likes
17
Share


@Naujas
Follow
She is much prettier than she was a week ago :) I remembered that I have my first grow light, which is more compact and it will give me more space, so I changed my light, now the girl's side branches get light too:) I add a lot of video memes, because I really want to win Iphone16 pro ;) and those who don't take risks don't drink champagne:) good luck to everyone.


Likes
8
Share

@Jardineiro_Br
Follow
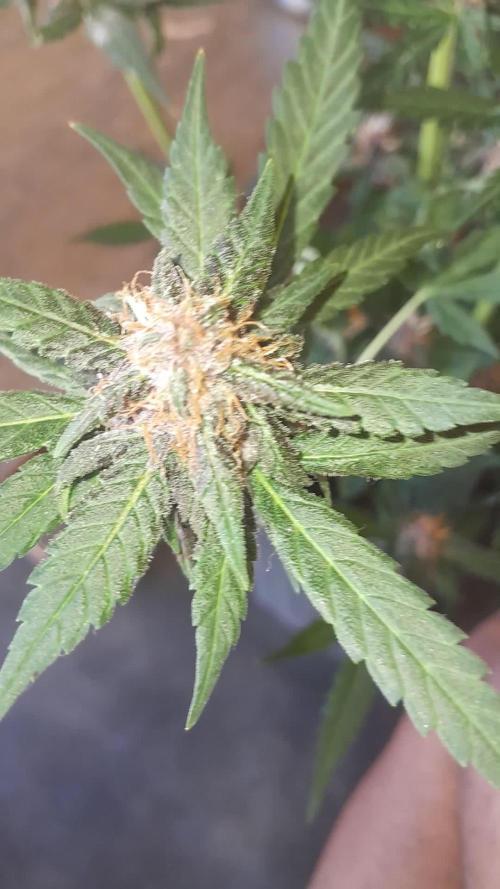
Planta com botões bem densos e devido a umidade percebi uns pontos de fungos por isso viu colocar ela no ambiente externo por uns dias e vou colher.
Ja perdi plantas com um floração linda para esse fungo que ataca o botões mais densos.
Likes
20
Share

@India_Calcoen
Follow
5-10-2025
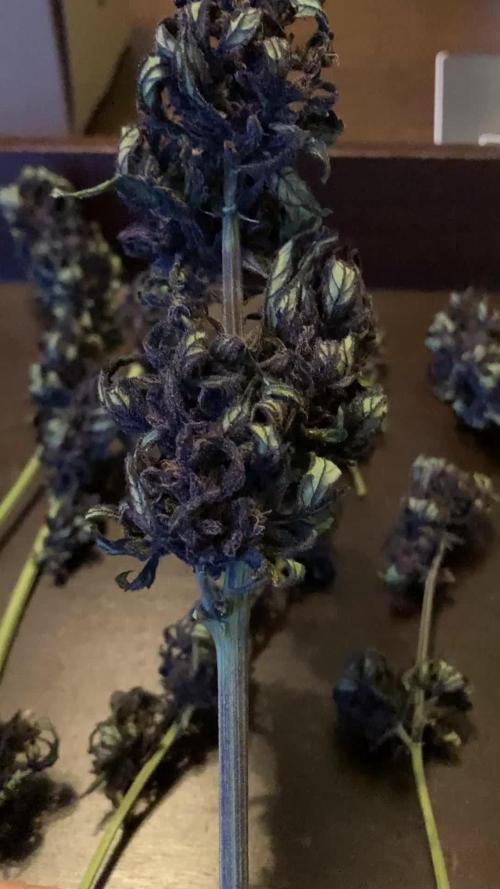
I harvested my Purplematic CBD and washed the buds with a mixture of baking soda and lemon juice. Some caterpillars 🐛 came out of the buds 😱!! I hung the branches up to dry in a spare dark room with a ventilator. After 10 days of drying the branches still wouldn’t snip. I think the room was too cold and too humid. Next time I’m using a dehumidifier.
Likes
24
Share


@MadeInGermany
Follow
Flowering day 15
since time change
to 12 / 12 h
Hey guys :-)
This week the ladies developed beautifully 👍.
The stretch has started very strongly :-) .
Watering was done twice this week with 1.2 l (see table above for nutrients).
The heating mat does exactly what it is supposed to do, you can see that the ladies are doing perfectly again 😃.
Fresh osmosis water was mixed with tap water in a 100 liter tank so that I would have enough stale water for the coming week 👍.
Otherwise everything was cleaned and checked.
During the check, I noticed that after spraying neem oil 3 times, there were still a few damn trips to see.
I have ordered nematodes for leaf and substrate against tripse.
Then they should finally be gone again 🙏🏻
have fun and stay healthy 💚
👇🏼👇🏼👇🏼👇🏼👇🏼👇🏼👇🏼👇🏼👇🏼👇🏼👇🏼👇🏼
You can buy this Nutrients at :
https://greenbuzzliquids.com/en/shop/
With the discount code: Made_in_Germany you get a discount of 15% on all products from an order value of 100 euros.
👇🏼👇🏼👇🏼👇🏼👇🏼👇🏼👇🏼👇🏼👇🏼👇🏼👇🏼👇🏼
You can buy this strain at :
Clearwater Seeds
Water 💧 💧💧
Osmosis water mixed with normal water (24 hours stale that the chlorine evaporates) to 0.2 EC. Add Cal / Mag to 0.4 Ec Ph with Organic Ph - to 5.8 - 6.5
MadeInGermany

Likes
62
Share


@masterofsmeagol
Follow
7/19 Rained all last night. Weather report says it will be rainy for several days. I "suited up" did some slight defoliation and fed two gallons to the garden. Still need to apply BT and get inside and prune with clippers. I'm hesitant due to this huge rash but I need to find a way to do this. Plants look good just need to be cleaned up.
7/20 No water as it's been pretty rainy. Thunderstorms tonight and rain tomorrow. I'll have to wait to apply either Spinosid or BT (as a preventative). I took down the tarps on the back. The wind isn't bad. Usually it's like a wind tunnel but I think this was the right decision. They are still attached at the bottom so the cam go back up quick if high winds come. Considering top dressing with cow manure. It's what I have on hand. I also need to find time to defoliate inside the plants. I'll have to do it when it's wet I guess to avoid the moths. I saw nests at my girlfriend's house on a bunch of apple trees so maybe I got this rash there. I hope so.
7/21 I watered despite some of the soil being damp. It MIGHT rain today but even if it does it wouldn't REALLY give my plants the water they are used to. I also cut some branches inside the plants. I have a lot more to do though. I found a brown-tail moth caterpillar crawling on the soil of one of those buckets outside my cage. Leaving his little poisonous hairs behind. I killed it with fire. I'll update after I spray and/or prune. Humidity is 98% today 70 degrees at 9am. "I'm going to need a bigger boat."
7/22 I put the tarps back up after finding the tall unsupported plant looked all blown over. I removed it from the cage. It's a 30 gallon tote so it opened up my area a little more. I watered this morning as it's supposed to be a nice sunny hot day. Later I plan to LST that seedling that I just left in the 30 gallon tote and kinda neglected. At least I didn't show it the love I had the clones. It's in reveg as well (the only one) and I'm questioning whether it might have a better home elsewhere. I'll check it out when I go for my evening inspection. Looks like possible thunderstorms tonight so I don't know if spraying is feasible. Thank you to all who have been following and helping me on this journey. Much cooler than it has been 65 degrees at 10:30am.
7/23 Watered this morning. I also did some defoliation and pruned lower limbs. I need a night without rain so I can continue with my IPM. I see pillar damage so it will probably be BT that I use. I weed Wacked around the cage this morning and was planning to feed but I ran out of time. The girls will have to wait until tomorrow to eat. The garden looks very healthy as a whole. Slight issues here and there but nothing an outdoor grower wouldn't expect. It's been a great year for growing cannabis thus far! I'll do another video once I get the cage weed Wacked.
7/24 Watered slightly before I Fed two gallons to the garden. Still have leaves turning yellow and falling off but I think its normal. At least the same thing happened the last two years right around this time. Plants have EXPLODED in growth and look great. The stretch is real. I took a minute video that might or might not upload. Took a few pictures too. Internet is pretty slow so I'll probably have to upload pics tomm. Reached the 80s today. Nice and sunny. Oh and walking down to the garden is like getting punched in the face by a skunk lol. The smell is incredible.
7/25 No water as it is supposed to rain today and they drank pretty good yesterday. Still need to defoliate a bit. A few of the seedlings are reveging. That's ok though. I hate seeing leaves die but looking at my previous diary (and the paper one before that) it seems to happen the same time of year right when the stretch starts. For the most part the garden is in preflower so I may start the next week as flower. I also STILL need to spray preventative. I don't really have a problem (besides slight pm and a few random critters but hey it's outdoors) but I need to keep up with the IPM. Im super happy with progress this far.


Likes
8
Share

@Bncgrower
Follow
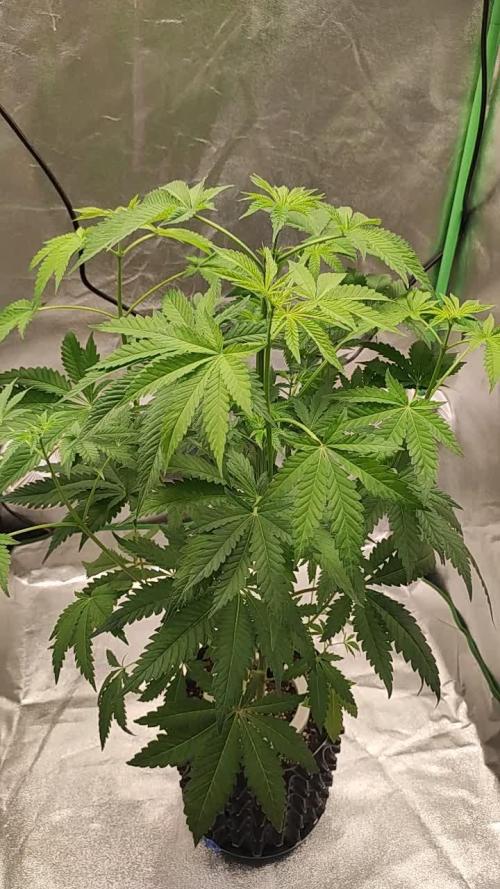
Second week of flora is complete, a few days ago she decided to show herself as a beautiful girl 💅🏻💅🏻💅🏻. Good development, very good structure and looking forward to the next few weeks.. 🏻💪🏻
Likes
Comments
Share


@snootdogg71
Follow
This was a great weed to grow very robust would recommend any strains from barnys farm they are one off the best still got alot off learning on to nxt grow my trimming has got alot to answer but it's going in a bong or vape

Processing
Likes
1
Share


@CityFarmer
Follow
Hello everyone,
These girls are going good, had to get rid of a couple that ended up male, but they started to flower, they should get bigger, lets see how it goes...
See you guys next week🤘🤘👊👍👊
Likes
29
Share

@Canna-Lytiker
Follow
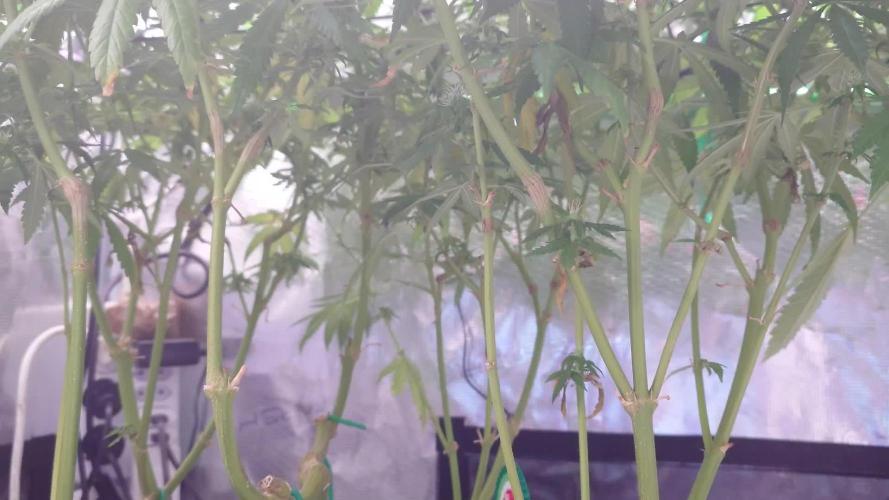
Lollipop Lollipop oh lalalalaPop... Ja das war eine ganz schöne Arbeit hier für die richtige Lichtung zu sorgen. Aber wie man schön sieht der Urwald hat sich gelichtet die Stäbe können frei atmen und stehen wie eine eins von oben dringt das Licht nach unten gut durch was will man mehr!
Jetzt ist das Schwellen angesagt. 🤡